
Search results for "Safety issues" in Home Design Ideas
 GMI Design Group
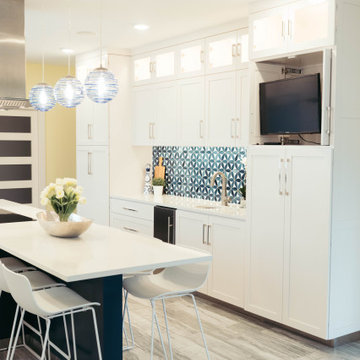
This dark, dreary kitchen was large, but not being used well. The family of 7 had outgrown the limited storage and experienced traffic bottlenecks when in the kitchen together. A bright, cheerful and more functional kitchen was desired, as well as a new pantry space.
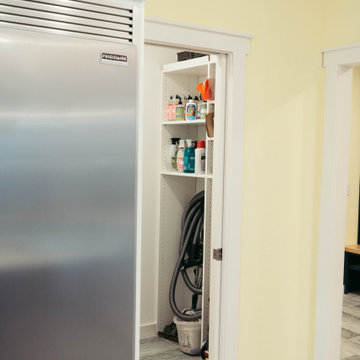
We gutted the kitchen and closed off the landing through the door to the garage to create a new pantry. A frosted glass pocket door eliminates door swing issues. In the pantry, a small access door opens to the garage so groceries can be loaded easily. Grey wood-look tile was laid everywhere.
We replaced the small window and added a 6’x4’ window, instantly adding tons of natural light. A modern motorized sheer roller shade helps control early morning glare. Three free-floating shelves are to the right of the window for favorite décor and collectables.
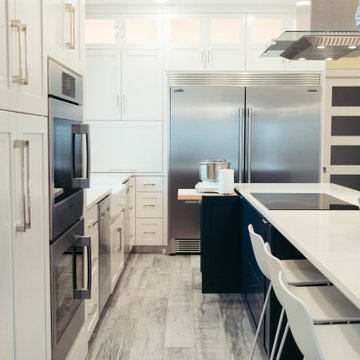
White, ceiling-height cabinets surround the room. The full-overlay doors keep the look seamless. Double dishwashers, double ovens and a double refrigerator are essentials for this busy, large family. An induction cooktop was chosen for energy efficiency, child safety, and reliability in cooking. An appliance garage and a mixer lift house the much-used small appliances.
An ice maker and beverage center were added to the side wall cabinet bank. The microwave and TV are hidden but have easy access.
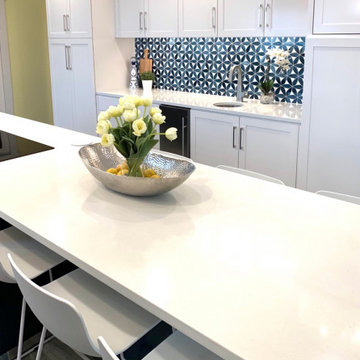
The inspiration for the room was an exclusive glass mosaic tile. The large island is a glossy classic blue. White quartz countertops feature small flecks of silver. Plus, the stainless metal accent was even added to the toe kick!
Upper cabinet, under-cabinet and pendant ambient lighting, all on dimmers, was added and every light (even ceiling lights) is LED for energy efficiency.
White-on-white modern counter stools are easy to clean. Plus, throughout the room, strategically placed USB outlets give tidy charging options.
 ACRE landscape architecture + design studio
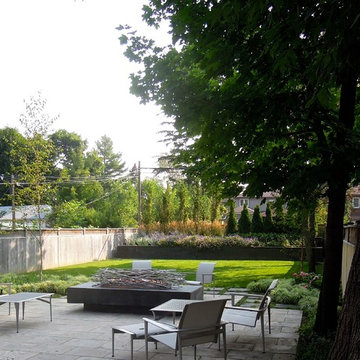
A lovely yard that started as a long bowling alley of lawn. We wanted to create a more human scale in the lounge area without building too many visual barriers. The overall effect is splashes of woodland across a contemporary canvas.
 Cochrane Floors & More
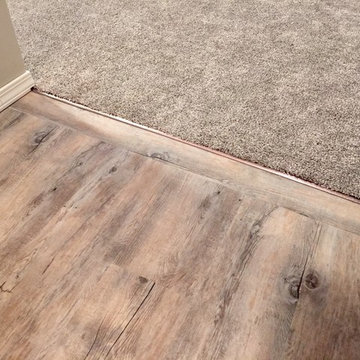
This renovation was completed with the primary goal of removed the carpet in the stairs which was not only difficult to clean but constantly looking worn in this very busy household. Ideally they wanted a durable, low maintenance flooring solution that still added character and coziness. The solution: Luxury vinyl planks! The unique and discreet metal nosings we used respect the clean lines and richness of this amazing plank in a non-commercial way. NOTE: While not all vinyl planks are created equal - the good ones are worth paying a little extra for!
Find the right local pro for your project
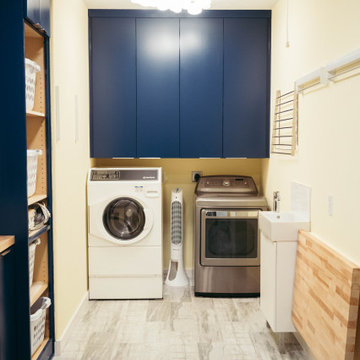 GMI Design Group
This dark, dreary kitchen was large, but not being used well. The family of 7 had outgrown the limited storage and experienced traffic bottlenecks when in the kitchen together. A bright, cheerful and more functional kitchen was desired, as well as a new pantry space.
We gutted the kitchen and closed off the landing through the door to the garage to create a new pantry. A frosted glass pocket door eliminates door swing issues. In the pantry, a small access door opens to the garage so groceries can be loaded easily. Grey wood-look tile was laid everywhere.
We replaced the small window and added a 6’x4’ window, instantly adding tons of natural light. A modern motorized sheer roller shade helps control early morning glare. Three free-floating shelves are to the right of the window for favorite décor and collectables.
White, ceiling-height cabinets surround the room. The full-overlay doors keep the look seamless. Double dishwashers, double ovens and a double refrigerator are essentials for this busy, large family. An induction cooktop was chosen for energy efficiency, child safety, and reliability in cooking. An appliance garage and a mixer lift house the much-used small appliances.
An ice maker and beverage center were added to the side wall cabinet bank. The microwave and TV are hidden but have easy access.
The inspiration for the room was an exclusive glass mosaic tile. The large island is a glossy classic blue. White quartz countertops feature small flecks of silver. Plus, the stainless metal accent was even added to the toe kick!
Upper cabinet, under-cabinet and pendant ambient lighting, all on dimmers, was added and every light (even ceiling lights) is LED for energy efficiency.
White-on-white modern counter stools are easy to clean. Plus, throughout the room, strategically placed USB outlets give tidy charging options.
 GMI Design Group
This dark, dreary kitchen was large, but not being used well. The family of 7 had outgrown the limited storage and experienced traffic bottlenecks when in the kitchen together. A bright, cheerful and more functional kitchen was desired, as well as a new pantry space.
We gutted the kitchen and closed off the landing through the door to the garage to create a new pantry. A frosted glass pocket door eliminates door swing issues. In the pantry, a small access door opens to the garage so groceries can be loaded easily. Grey wood-look tile was laid everywhere.
We replaced the small window and added a 6’x4’ window, instantly adding tons of natural light. A modern motorized sheer roller shade helps control early morning glare. Three free-floating shelves are to the right of the window for favorite décor and collectables.
White, ceiling-height cabinets surround the room. The full-overlay doors keep the look seamless. Double dishwashers, double ovens and a double refrigerator are essentials for this busy, large family. An induction cooktop was chosen for energy efficiency, child safety, and reliability in cooking. An appliance garage and a mixer lift house the much-used small appliances.
An ice maker and beverage center were added to the side wall cabinet bank. The microwave and TV are hidden but have easy access.
The inspiration for the room was an exclusive glass mosaic tile. The large island is a glossy classic blue. White quartz countertops feature small flecks of silver. Plus, the stainless metal accent was even added to the toe kick!
Upper cabinet, under-cabinet and pendant ambient lighting, all on dimmers, was added and every light (even ceiling lights) is LED for energy efficiency.
White-on-white modern counter stools are easy to clean. Plus, throughout the room, strategically placed USB outlets give tidy charging options.
 GMI Design Group
This dark, dreary kitchen was large, but not being used well. The family of 7 had outgrown the limited storage and experienced traffic bottlenecks when in the kitchen together. A bright, cheerful and more functional kitchen was desired, as well as a new pantry space.
We gutted the kitchen and closed off the landing through the door to the garage to create a new pantry. A frosted glass pocket door eliminates door swing issues. In the pantry, a small access door opens to the garage so groceries can be loaded easily. Grey wood-look tile was laid everywhere.
We replaced the small window and added a 6’x4’ window, instantly adding tons of natural light. A modern motorized sheer roller shade helps control early morning glare. Three free-floating shelves are to the right of the window for favorite décor and collectables.
White, ceiling-height cabinets surround the room. The full-overlay doors keep the look seamless. Double dishwashers, double ovens and a double refrigerator are essentials for this busy, large family. An induction cooktop was chosen for energy efficiency, child safety, and reliability in cooking. An appliance garage and a mixer lift house the much-used small appliances.
An ice maker and beverage center were added to the side wall cabinet bank. The microwave and TV are hidden but have easy access.
The inspiration for the room was an exclusive glass mosaic tile. The large island is a glossy classic blue. White quartz countertops feature small flecks of silver. Plus, the stainless metal accent was even added to the toe kick!
Upper cabinet, under-cabinet and pendant ambient lighting, all on dimmers, was added and every light (even ceiling lights) is LED for energy efficiency.
White-on-white modern counter stools are easy to clean. Plus, throughout the room, strategically placed USB outlets give tidy charging options.
 GMI Design Group
This dark, dreary kitchen was large, but not being used well. The family of 7 had outgrown the limited storage and experienced traffic bottlenecks when in the kitchen together. A bright, cheerful and more functional kitchen was desired, as well as a new pantry space.
We gutted the kitchen and closed off the landing through the door to the garage to create a new pantry. A frosted glass pocket door eliminates door swing issues. In the pantry, a small access door opens to the garage so groceries can be loaded easily. Grey wood-look tile was laid everywhere.
We replaced the small window and added a 6’x4’ window, instantly adding tons of natural light. A modern motorized sheer roller shade helps control early morning glare. Three free-floating shelves are to the right of the window for favorite décor and collectables.
White, ceiling-height cabinets surround the room. The full-overlay doors keep the look seamless. Double dishwashers, double ovens and a double refrigerator are essentials for this busy, large family. An induction cooktop was chosen for energy efficiency, child safety, and reliability in cooking. An appliance garage and a mixer lift house the much-used small appliances.
An ice maker and beverage center were added to the side wall cabinet bank. The microwave and TV are hidden but have easy access.
The inspiration for the room was an exclusive glass mosaic tile. The large island is a glossy classic blue. White quartz countertops feature small flecks of silver. Plus, the stainless metal accent was even added to the toe kick!
Upper cabinet, under-cabinet and pendant ambient lighting, all on dimmers, was added and every light (even ceiling lights) is LED for energy efficiency.
White-on-white modern counter stools are easy to clean. Plus, throughout the room, strategically placed USB outlets give tidy charging options.
 SUPERIOR CHIMNEY SERVICES CORPORATION
September 21st is the first day of Fall. I know we don’t want to think about it yet, but it is good to prepare and get the chimney swept early. Why? According to the Farmer’s Almanac, they are predicting a colder and snowier Winter. But you say, “eh, I got a gas fireplace.” Better yet, “I don’t use my fireplace, so why should I sweep it, and clean it early?” Let’s discuss why all types of chimneys and fireplaces need to be swept.
Why Do All Types of Chimney’s and Fireplaces Need to Be Swept?
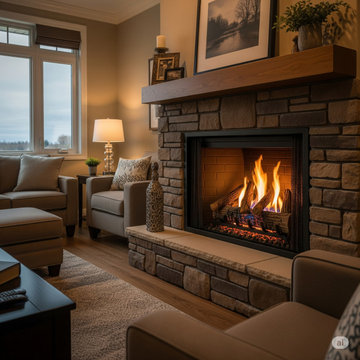
When we think of the fireplace, we picture the real wood burning fireplace with the sounds of crackling wood. With regular use of the wood-burning fireplaces, a byproduct called creosote forms and over time, lines the side of the chimney flue. This needs to be swept at least once per year as creosote is flammable. However, all chimney’s, regardless of whether it burns wood or utilizes gas, needs to be professionally inspected and swept annually.
Many homeowners mistakenly believe that a gas or unused chimney is immune to problems since it doesn't produce a byproduct. However, these chimney systems face their own unique dangers. Gas fireplaces, especially those that are high-efficiency, can lead to the buildup of corrosive deposits. Over time, these deposits can degrade your chimney liner. Getting it inspected by a certified chimney technician will control this issue so it doesn’t turn into a problem.
4 Key Reasons to Prioritize Your Annual Chimney Inspection
The annual chimney inspection is more than just a sweep; it’s a comprehensive health check for your entire chimney system. We call it the 14 Point Inspection. A certified chimney technician will look for:
1. Fire Hazards: Again, for wood-burning chimneys, the removal of creosote is important to prevent a chimney fire. Gas fireplaces release corrosive deposits. If you don’t use the fireplace, you never know what debris may have settled in. If you want to use the fireplace, please be sure to have it professionally inspected and swept before use.
2. Obstructions: There’s a whole world outside of your home, and especially in the Fall, our little friends are searching for a warm place to stay. Your chimney looks pretty good. And, let’s not forget how the wind in the Chicagoland are does a great job of moving debris around that can get up and under the chimney cap or directly into the chimney if you don’t have a cap. These blockages need to be cleared for you and your home’s protection.
3. Structural Damage: A chimney technician will be able to spot cracks, water damage, or deterioration of the chimney and chimney liner that could compromise the system's safety.
4. Ventilation Issues: Ventilation is key for your home to breathe. The certified chimney technician will ensure proper draft and airflow, which is the best way to get rid of toxic gases.
NFPA
Remember, the National Fire Protection Association (NFPA) recommends an annual inspection for all chimney types. This simple, proactive maintenance can save you from costly repairs. Don't wait for a problem to become obvious.
Contact Superior Chimney today at 877-244-6349 to schedule a 14-Point Chimney inspection to ensure your home and family are protected.
 GMI Design Group
This dark, dreary kitchen was large, but not being used well. The family of 7 had outgrown the limited storage and experienced traffic bottlenecks when in the kitchen together. A bright, cheerful and more functional kitchen was desired, as well as a new pantry space.
We gutted the kitchen and closed off the landing through the door to the garage to create a new pantry. A frosted glass pocket door eliminates door swing issues. In the pantry, a small access door opens to the garage so groceries can be loaded easily. Grey wood-look tile was laid everywhere.
We replaced the small window and added a 6’x4’ window, instantly adding tons of natural light. A modern motorized sheer roller shade helps control early morning glare. Three free-floating shelves are to the right of the window for favorite décor and collectables.
White, ceiling-height cabinets surround the room. The full-overlay doors keep the look seamless. Double dishwashers, double ovens and a double refrigerator are essentials for this busy, large family. An induction cooktop was chosen for energy efficiency, child safety, and reliability in cooking. An appliance garage and a mixer lift house the much-used small appliances.
An ice maker and beverage center were added to the side wall cabinet bank. The microwave and TV are hidden but have easy access.
The inspiration for the room was an exclusive glass mosaic tile. The large island is a glossy classic blue. White quartz countertops feature small flecks of silver. Plus, the stainless metal accent was even added to the toe kick!
Upper cabinet, under-cabinet and pendant ambient lighting, all on dimmers, was added and every light (even ceiling lights) is LED for energy efficiency.
White-on-white modern counter stools are easy to clean. Plus, throughout the room, strategically placed USB outlets give tidy charging options.
 NJW Renovations Unlimited
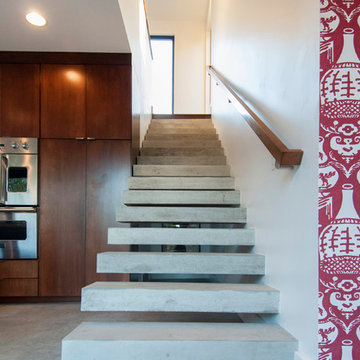
waterfall counter top, 9' tall pantry wall unit, custom cabinets, floating staircase, 7' x 7' commercial store front windows, industrial modern design, cantilever steel run stair treads, concrete slip covered treads
Karli Moore Photography
 Golden View Renovation
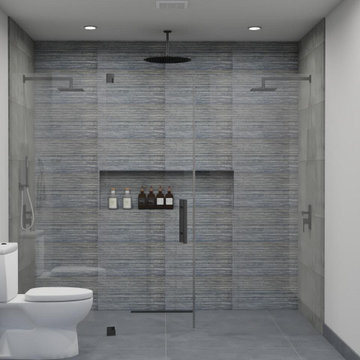
Bathroom - modern gray tile and mosaic tile porcelain tile, gray floor and double-sink bathroom idea in San Francisco with a one-piece toilet, a hinged shower door, flat-panel cabinets, white cabinets, white walls, an integrated sink and a floating vanity
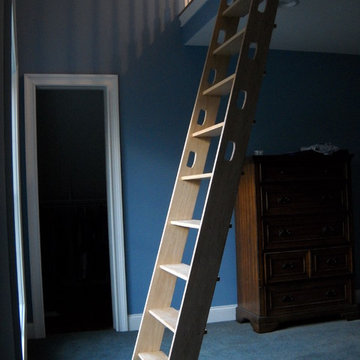
 Acadia Stairs
Example of a mid-sized mountain style loft-style carpeted family room design in New York with no fireplace, no tv and blue walls
 SUPERIOR CHIMNEY SERVICES CORPORATION
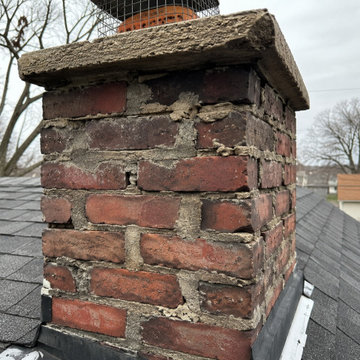
As the temperatures continue to climb, and we finally get a chance to enjoy some warm weather, we start to walk around the neighborhood, or even our own homes, to find that lots of work needs to be done. Whether it be weed picking or changing bulbs in the light fixtures there’s always something that needs to be done. However, there’s one thing that can’t wait for your attention and that’s chimney tuckpointing. Why is it so important? Let’s take a look.
Weather and Tuckpointing, Not a Good Match
You might have guessed that Chicago and Chicagoland’s weather is brutal on masonry. The city and suburbs average around 35 freeze-thaw cycles every single winter. Every time the cycle occurs, it takes a toll on the chimney's mortar joints. When water gets in and temperatures drop, the water freezes & expands as ice with enough force to crack brick and stone. When Spring comes around, what once was a hairline crack, now gets bigger and allows rain to enter into your home.
This is why the yearly chimney inspection is not optional, according to the CSIA (Chimney Safety Institute of America).
A Little Chicago History
Most homes in neighborhoods like Beverly, Oak Park, Evanston and across the North Shore were built between the 1890s and 1950s. The mortar used in that era had a lifespan of roughly 25–30 years under normal conditions. Under Chicago and Chicagoland conditions? It is reduced. Homeowners buying older properties frequently inherit chimneys that haven't been maintained in a very long time.
When the chimney along with the flashing, bricks, chimney cap and chimney crown are not checked and maintained, loss of structural integrity begins. Water working its way through deteriorated joints reaches the interior of the chimney. This is where it can cause damage to the fire liner while it finds its way into the home. In some situations, compromised masonry near the fireplace can create fire safety concerns.
Getting a Chimney Inspection Early Makes All the Difference
The good news is that chimney tuckpointing, diagnosed early, is simply a repair. The bad news is that homeowners who wait too long can turn the issue into a partial rebuild, or a full chimney rebuild. By the time mortar is visibly crumbling from the street, the damage has already progressed deeper into the chimney structure.
A professional inspection every year is the most cost-effective way to keep the chimney and home heathy. It's often the difference between a few hundred dollars and several thousand.
Not All Tuckpointing Is Equal
One thing worth understanding is that proper tuckpointing requires removing the old mortar to a depth of approximately three-quarters of an inch before new mortar can be applied. Anything less and the new mortar won't bond with longevity / correctly. DIY or companies that just smear new mortar over old joints are doing what's sometimes called "skim coating," and it's essentially cosmetic work that won't hold up.
The type of mortar mix matters too. More modern cement mortars are actually harder than historic brick, which causes the brick itself to absorb, stress and crack rather than the mortar joint. A knowledgeable mason from Superior Chimney will match mortar composition to the brick, only something a real expert can get right.
Contact Superior Chimney today to get a chimney inspection which includes inspecting the exterior chimney today at 877-244-6349.
 Frank Pitman Designs
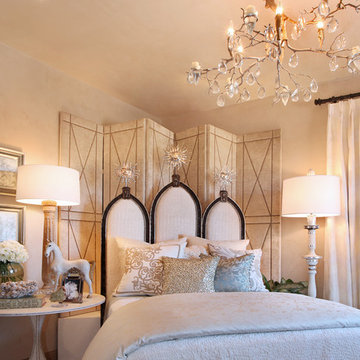
By placing the bed grouping in a corner, this bedroom takes advantage of beautiful views in two directions. The custom headboard is upholstered in chenille fabric with nickel nail head trim, and topped with three nickel soleil sculptures. The chandelier is a lost wax bronze sculpture in antiqued silver leaf. The round table is faux lizard with nickel nail head trim. The tall upholstered screen is fawn silk velvet with antiqued bronze nail head trim. Jeri Koegel Photography
 SERVPRO of Blackwood NJ and Gloucester Township NJ
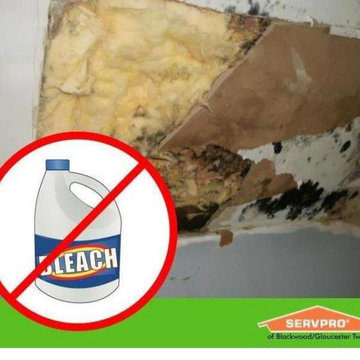
Cleaning Mold with Bleach is Hazardous, Don't use bleach, Mold,
Using chlorine bleach to kill mold is probably one of the worst things you can do.
As a matter of fact, the Occupational Safety and Health Administration (OSHA), stopped recommending the use of bleach for dealing with mold issues. And, the Environmental Protection Agency (EPA) updated their guide as well, removing the suggestion to use bleach to kill mold.
The problem is, it’s true that bleach can kill some mold in some places, some of the time. But, bleach only works to remove mold on hard, impermeable surfaces like bathtub and shower surrounds or tiles. However, on porous surfaces like drywall or hardwood floors, it won’t work to kill mold or keep it from coming back.
Mold spreads its roots deep into porous surfaces.
Simply spraying a bleach solution on the surface won’t kill mold spores at their roots.
Here are some reasons Why you should NOT to Use Bleach to Kill Mold:
1) Bleach is Caustic, with High VOC's and can cause Burns to your Eyes, Nose and Throat and Skin. Your Pets paws, can get burned, and Pets lick their paws.
2) Bleach encourages toxic mold growth on porous surfaces because it provides excess moisture.
3) Bleach is extremely corrosive, and corrodes Metal Fastners, such as Screws and Nails, Water Pipes, Waste and Drain Pipes.
4) Bleach only removes the color from mold.
5) Chlorine bleach is extremely harmful to surfaces.
SERVPRO of Blackwood NJ Gloucester Township NJ, is a Veteran Owned and Operated Small Business, or Veteran Owned Business, (V.O.S.B.), and understands that fires, Mold, floods, Covid 19, or other disasters can strike suddenly and they can cause disruption to your life and home or business.
SERVPRO of Blackwood NJ Gloucester Township NJ, is Completely registered with:
1) The System for Award Management (SAM) for the U.S. Government.
2) The Commercial and Government Entity (CAGE) Code, with the Federal Government.
***CAGE Code 8QK50 and DUNS 023257359
***Government Contractor
We look forward to partnering with Industrial Hygienists, Environmental Consultants, and other business opportunities, to bid on Federal, State, County, City, Industrial, Manufacturing, Commercial, and Residential Projects, throughout the entire United States of America.
YES WE ARE OPEN!!
Jon A. Barrett
Marketing Manager
SERVPRO of Blackwood/Gloucester Twp
Phone: (856) 227-7800
Email: sp.jonb@gmail.com
Website: https://www.SERVPROblackwoodgloucestertownship.com/company-profile
Emergency Services 24/7/365
Federal, State, Industrial, Commercial and Residential Restoration Services
CAGE Code: 8QK50 DUNS# 023257359
*****VETERAN OWNED AND OPERATED
Google MyBusiness:
https://goo.gl/maps/v5wzUXhQ3pDntdbTA

 Free Lancing
Effective residential construction project management is crucial in today’s fast-moving building industry. It means overseeing every step of building a home, from planning to finishing, to ensure projects are completed time, within budget, and with high quality. Unlike commercial projects, residential projects require special attention to meet homeowners' unique needs and wishes, requiring a customized approach from the beginning to the end.
In 2025, the construction sector will use advanced technologies like AI and integrated project delivery (IPD) to streamline processes and improve stakeholder collaboration. However, project managers face significant challenges, including managing risks, maintaining quality control, and ensuring effective communication among team members.
A WIP Report (Work-in-Progress Report) is a key tool that helps track a project's budget, progress, and resource use. It provides clear insights, making managing costs easier, avoiding delays, and making informed decisions.
By adopting best practices and using modern construction management tools, project managers can overcome these challenges and deliver successful residential construction projects that meet client expectations and contribute to a sustainable future.
This article provides a brief overview of residential construction project management, highlights its importance, and touches on the challenges faced by project managers while incorporating the latest trends and technologies in the field.
Types of Residential Construction Management
Here are the different types of Residential Construction Management:
Single-Family Homes: These are standalone houses built for individual families. Managing these projects involves overseeing construction from planning to completion, ensuring that the home meets the owner's preferences and budget.
Multi-Family Housing: This includes apartments, condominiums, and townhouses. Projects of this type require managing multiple units, often with shared facilities, and ensuring compliance with local building codes.
Custom Home Building: This involves constructing homes tailored to specific client needs. Close collaboration with architects and designers is required to ensure the house reflects the owner's personality and preferences.
Home Renovation and Remodeling: These projects focus on updating or expanding existing homes. They often involve working with subcontractors for specialized tasks like electrical or plumbing work.
Components of Residential Construction Project Management
Managing a residential construction project requires carefully coordinating people, materials, and timelines. A well-structured approach ensures efficiency, cost control, and high-quality results.
Roles and Responsibilities
A project manager plays a vital role in residential construction. They oversee every step from planning to completion and ensure the project stays on schedule, within budget, and meets quality standards.
Project Manager’s Role in Home Construction
The project manager is responsible for organizing tasks, managing resources, and solving problems that arise during construction. They coordinate between different teams, track progress, and ensure safety regulations are followed.
Collaboration with Contractors, Architects, and Stakeholders
Successful residential construction requires teamwork. Project managers work closely with architects to bring designs to new heights, coordinate with contractors to manage labor and materials, and keep stakeholders (such as homeowners and investors) informed about project updates.
Client Communication and Expectations Management
Clear communication with clients is essential. The project manager keeps homeowners updated on timelines, changes, and challenges. Setting realistic expectations and providing regular updates, they help avoid misunderstandings and keep the project running smoothly.
Project Scope & Planning
Practical project planning sets the foundation for a successful residential construction project. It ensures clear goals, minimizes risks, and keeps the project on track.
Defining Project Objectives and Deliverables:
Clearly outlining what needs to be done and what the final result should look like is essential. This involves setting specific, measurable goals that align with the homeowner's vision and budget.
Managing Homeowner Expectations and Scope Creep:
Homeowners often have changing needs or ideas. Effective project managers must manage these expectations to prevent "scope creep," which can delay projects and increase costs. This involves open communication and setting clear boundaries.
Ensuring Compliance with Zoning Laws and Permits:
Before construction begins, it's crucial to ensure that all necessary permits are obtained and that the project complies with local zoning laws. This step avoids costly fines and delays, ensuring the project moves forward smoothly.
Budgeting & Cost Control
Proper budgeting is essential for keeping residential construction projects financially viable. Effective cost management prevents overspending and ensures profitability.
Accurate Cost Estimation for Residential Projects
A precise cost estimate considers labor, materials, permits, and unexpected expenses. Using historical data and Sage 300 CRE for financial management improves accuracy and helps set realistic budgets.
Budget Allocation and Tracking
Allocating funds efficiently ensures that each phase of the project receives the necessary resources. Tracking expenses through Construction & Financial Dashboards allows for real-time monitoring and early detection of budget deviations.
Preventing Budget Overruns
Uncontrolled costs can derail a project. Regular financial reviews, automated alerts for overspending, and contingency planning help keep expenses in check and prevent financial strain.
Scheduling & Timeline Management
Timely project completion is crucial in residential construction. Effective scheduling minimizes delays and ensures a smooth workflow.
Creating Detailed Project Schedules
A structured schedule outlines all tasks, deadlines, and dependencies. Breaking down the project into phases, planning, execution, and finishing, helps maintain order and clarity.
Preventing Delays & Meeting Deadlines
Delays can result from labor shortages, weather conditions, or supply chain issues. To avoid problems, it’s good to check for risks ahead of time, add extra time to schedules, and keep everyone on the same page.
Using Gantt Charts and Critical Path Methods
CPM for Construction helps identify critical activities that directly impact project completion, while Gantt charts provide a visual timeline of tasks. Both tools optimize scheduling and improve efficiency.
Residential Construction Project Management Phases
Managing a residential construction project effectively requires a structured approach through various phases. Each phase plays a critical role in ensuring the project's success, from initial planning to completion.
Pre-Construction Phase
The pre-construction phase sets the foundation for a smooth and efficient building process. Proper planning at this stage helps prevent costly changes and delays later.
Site Analysis & Approvals: A thorough site analysis assesses soil conditions, topography, and environmental factors. Feasibility studies evaluate project viability, including costs and regulatory compliance. Obtaining zoning approvals, permits, and other legal clearances is crucial before breaking ground.
Selecting Materials and Procurement Strategies: Choosing the right materials impacts durability, sustainability, and cost efficiency. A well-planned procurement strategy, including bulk purchasing and reliable supplier partnerships, ensures timely delivery and cost savings. Using Sage 300 CRE for procurement management helps streamline material sourcing and financial planning.
Construction Phase
The construction phase transforms plans into reality. Effective coordination and strict quality control ensure a successful build.
Resource Allocation and Workflow Coordination: Efficiently managing labor, equipment, and materials is key to maintaining progress. Using CPM for Construction, project managers can allocate resources strategically, prevent bottlenecks, and optimize workflows for timely completion.
Project Closeout & Handover
The final phase of residential construction project management is crucial for ensuring a smooth transition from construction to occupancy. Proper closeout procedures guarantee quality, client satisfaction, and long-term project success.
Final Inspections and Quality Assurance: Before finishing the project, a final inspection checks that everything meets safety rules and quality standards. Any problems need to be fixed quickly. Using Procore helps make inspections and tracking issues easier, ensuring a high-quality final product.
Client Walkthrough and Support: A final check helps homeowners see the finished work, ask questions, and make sure it meets their expectations. This is also a chance to explain important home features and maintenance tips. Good communication here builds trust and strengthens relationships.
Warranty Management and Feedback: Efficient warranty management ensures clients get quick help for any issues after construction. A clear process for tracking requests and keeping in touch with homeowners boosts satisfaction. Collecting feedback helps improve future projects. Using S-Curve Forecasting tracks performance trends and refines management strategies.
Software for Residential Construction Project Management
The integration of technology in residential construction project management has revolutionized the way projects are planned, executed, and monitored. Digital tools streamline operations, reduce costs, and improve communication, making them essential for modern construction firms.
Importance of Digital Tools
Investing in digital tools is crucial for construction firms as it transforms the industry by enhancing efficiency, accuracy, and collaboration across the entire project lifecycle. They also improve project management by streamlining processes, automating tasks, and facilitating real-time stakeholder communication.
Top Construction Management Software for Residential Projects
Several software solutions are available for managing residential construction projects:
Procore: Known for its comprehensive project management features, including document management and collaboration tools.
Sage 300 CRE: Offers robust accounting and financial management capabilities, ideal for large-scale construction projects.
Buildertrend: Specializes in residential construction, providing tools for project scheduling, budgeting, and client communication.
CoConstruct: Focuses on custom home building and remodeling, offering features for estimating, scheduling, and project management.
WIP Reports: Useful for tracking work-in-progress and managing project finances effectively.
Features Comparison and Best Use Cases:
Procore: Best for large projects requiring extensive collaboration and document management.
Sage 300 CRE: Ideal for firms needing robust financial management.
Buildertrend: Suitable for residential builders focusing on client communication and project scheduling.
CoConstruct: Perfect for custom home builders who need detailed estimating and scheduling tools.
WIP Reports: Useful for firms needing to track project finances closely.
How Software Improves Project Efficiency
Construction management software significantly enhances project efficiency in several ways:
Automating Accounting and Job Costing: Software like Sage 300 CRE automates financial tasks, reducing manual errors and improving budget tracking.
Streamlining Document Management and Communication: Tools like Procore centralize documents and facilitate real-time communication among team members, reducing misunderstandings and delays.
Mobile-Friendly Solutions for Real-Time Tracking: Mobile apps from platforms like Buildertrend allow for on-site access to project data, enabling real-time tracking and decision-making.
These digital tools and software solutions are essential for modern residential construction project management, offering benefits such as improved efficiency, enhanced collaboration, and better financial control.
Challenges in Residential Construction Project Management
Residential construction projects face a variety of challenges that can impact their success. Here are some of the key issues project managers encounter:
Managing Subcontractors and Labor Shortages
One of the biggest challenges in residential construction is managing subcontractors and dealing with labor shortages. Subcontractors often have their own schedules and priorities, which can lead to delays if not coordinated properly. Additionally, labor shortages can slow down projects and increase costs due to the need for overtime or hiring temporary workers.
Budget Overruns and Unexpected Costs
Budget overruns are common in residential construction due to factors like material price fluctuations, unexpected site conditions, or changes in project scope. Effective budget management involves regularly monitoring expenses and having contingency plans for unexpected costs.
Changing Construction and Eco Rules
Construction and Eco Rules are always changing, so project managers need to keep up with the latest regulations. This involves following guidelines for saving energy, protecting the environment, and ensuring safety. Ignoring these rules can lead to fines, delays, or even stopping the project.
Best Practices
To ensure your residential construction projects run smoothly and successfully, follow these essential best practices:
Setting Clear Project Goals and Milestones
Clearly defining what you want to achieve is the first step to success. Set specific, measurable, achievable, relevant, and time-bound (SMART) goals. This helps everyone involved understand what needs to be done and by when. For example, instead of saying "build a house," say "build a house with three bedrooms and two bathrooms within the next nine months."
Stakeholder Collaboration
Good communication is key to keeping everyone on the same page. Regular meetings with contractors, suppliers, and homeowners help prevent misunderstandings and ensure that everyone knows what's happening and what's next. This open dialogue also helps resolve issues quickly, preventing small problems from becoming big delays.
Using Data-Driven Insights for Decision-Making
Making decisions based on facts rather than guesses is crucial. Use data and analytics to understand project progress, identify potential issues early, and make informed decisions. For instance, if data shows that a particular material is consistently causing delays, you can plan ahead to avoid those delays in the future.
Proactive Risk Management Strategies
Things don't always go as planned, so being prepared is essential. Identify potential risks early and have a plan to manage them. This might include having backup suppliers, planning for weather conditions, or setting aside extra funds for unexpected expenses. Being proactive can prevent small issues from turning into major problems.
Conclusion
Effective residential construction project management requires careful planning, clear communication, and the right digital tools. From single-family homes to multi-family housing and custom projects, managing timelines, budgets, and quality is essential for success.
By following best practices, using project management software, and staying ahead of industry trends, project managers can ensure smooth execution and client satisfaction despite challenges like labor shortages, budget overruns, and regulatory compliance; modern technology and strategic planning help mitigate risks.
Construction firms can improve efficiency, enhance collaboration, and maintain financial control by adopting advanced tools like Procore, Sage 300 CRE, and Buildertrend. A well-managed project delivers a quality home and builds trust and long-term success in the industry.
FAQs
What is residential construction project management?
It involves overseeing all aspects of building residential properties, from initial planning and design to construction and completion, ensuring projects are completed on time, within budget, and to the desired quality standards.
How can I prevent budget overruns in my construction project?
Accurate cost estimation, continuous budget tracking, and having contingency plans for unexpected expenses are key strategies to prevent budget overruns.
What are the main stages of a residential construction project?
The primary stages include design, pre-construction, procurement, and construction.
How does construction management software improve project efficiency?
It streamlines processes like scheduling, budgeting, and communication, providing real-time data access and collaboration among stakeholders, which enhances overall project efficiency.
How can I ensure my project complies with local building codes and regulations?
Engage professionals familiar with local laws, obtain all necessary permits before starting, and conduct regular inspections to ensure adherence to building codes and regulations.
 VPWdesigns
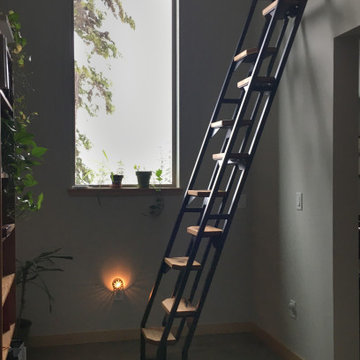
This was a fun build and a delightful family to work and design with. The ladder is aesthetically pleasing and functional for their space, and also much safer than the previous loft access. The custom welded steel frame and alternating step support system combined with light colored, solid alder wood treads provide an open feel for the tight space.
 CRC Builders Inc.
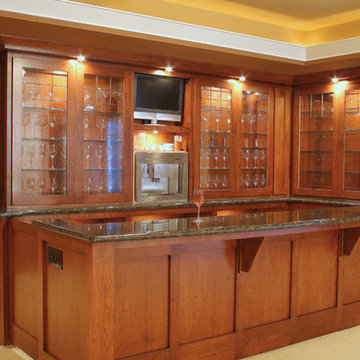
The homeowner wanted something different, out of the ordinary, as an entertainment center and bar combination that would add an unusual dimension to watching TV. It had to be in character with the rest of the residence, tastefully designed and executed to deliver the maximum effect.
A two-piece combination bar and seating, coupled with a fireplace and large screen TV was designed. A system was designed and custom built cabinet consisting of a radius front entertainment center houses a large flat screen TV and enclosed stereo speakers on the top level, and a gas log fireplace below.
A custom built see-through bar sports a matching radius front, plenty of storage, and room for three to eat, drink, and enjoy the warmth of the fireplace without missing any of the action on the TV. For even greater functionality, the TV is also viewable through the large opening in the bar while meals or snacks are prepared from the kitchen. Traffic flow is unique: access and egress between the bar front and TV can happen with ease around both sides of the bar, and the opening in the back of the bar provides for service both from and to the kitchen area. Because of the free and easy movement about the space, adequate lighting, and lack of combustibles at or on the fireplace, safety, as well as an ample use of space, are both achieved. Both pieces are custom fabricated from start to finish, and match each other identically in all respects. Both are constructed of clear cherry finish with a clear satin lacquer. Both enjoy chrome accents strips and custom crafted, glass cabinet doors with matching radii, and both are tastefully lit with accenting puck lights. The design and fabrication for both units shared issues in common as well as individually.
The entertainment center was fabricated in the shop in three units and then assembled onsite. The opening for the flat screen TV had to be carefully considered as it too had a radius and therefore had to be designed so that the TV would fit.
The entire bar system, except the countertop, had to be fabricated onsite due to the structural columns on either side between which the curved lower cabinets would rest. Then the countertop template was prepared, fabricated elsewhere, returned and installed. After the countertop was in place, the cabinetmaker had to wrap the two columns on either side as well as the overhead beam while making sure the joints at the columns and header maintained alignment. A complement of matching radii cabinet doors had to be constructed for both units. Radius glass inserts had to be ordered with precise dimensions to assure a perfect fit to openings with tight tolerances. Any mistake would have been expensive to correct. Because of the abundance of natural light into the space, the finishes had to be dead-on, otherwise every flaw would show. The custom walnut inlays were fabricated out of square stock, which protruded above the radius in each door. A jig matching the radius had to be designed and fabricated, then a router used to trim excess material and then sanded and finished.
Solving the multitude of challenges associated with the project was one of the parts that made the project fun and interesting. The homeowners now can entertain every night.
 CRC Builders Inc.
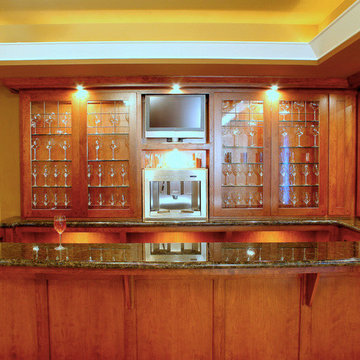
The homeowner wanted something different, out of the ordinary, as an entertainment center and bar combination that would add an unusual dimension to watching TV. It had to be in character with the rest of the residence, tastefully designed and executed to deliver the maximum effect.
A two-piece combination bar and seating, coupled with a fireplace and large screen TV was designed. A system was designed and custom built cabinet consisting of a radius front entertainment center houses a large flat screen TV and enclosed stereo speakers on the top level, and a gas log fireplace below.
A custom built see-through bar sports a matching radius front, plenty of storage, and room for three to eat, drink, and enjoy the warmth of the fireplace without missing any of the action on the TV. For even greater functionality, the TV is also viewable through the large opening in the bar while meals or snacks are prepared from the kitchen. Traffic flow is unique: access and egress between the bar front and TV can happen with ease around both sides of the bar, and the opening in the back of the bar provides for service both from and to the kitchen area. Because of the free and easy movement about the space, adequate lighting, and lack of combustibles at or on the fireplace, safety, as well as an ample use of space, are both achieved. Both pieces are custom fabricated from start to finish, and match each other identically in all respects. Both are constructed of clear cherry finish with a clear satin lacquer. Both enjoy chrome accents strips and custom crafted, glass cabinet doors with matching radii, and both are tastefully lit with accenting puck lights. The design and fabrication for both units shared issues in common as well as individually.
The entertainment center was fabricated in the shop in three units and then assembled onsite. The opening for the flat screen TV had to be carefully considered as it too had a radius and therefore had to be designed so that the TV would fit.
The entire bar system, except the countertop, had to be fabricated onsite due to the structural columns on either side between which the curved lower cabinets would rest. Then the countertop template was prepared, fabricated elsewhere, returned and installed. After the countertop was in place, the cabinetmaker had to wrap the two columns on either side as well as the overhead beam while making sure the joints at the columns and header maintained alignment. A complement of matching radii cabinet doors had to be constructed for both units. Radius glass inserts had to be ordered with precise dimensions to assure a perfect fit to openings with tight tolerances. Any mistake would have been expensive to correct. Because of the abundance of natural light into the space, the finishes had to be dead-on, otherwise every flaw would show. The custom walnut inlays were fabricated out of square stock, which protruded above the radius in each door. A jig matching the radius had to be designed and fabricated, then a router used to trim excess material and then sanded and finished.
Solving the multitude of challenges associated with the project was one of the parts that made the project fun and interesting. The homeowners now can entertain every night.
 CRC Builders Inc.
The homeowner wanted something different, out of the ordinary, as an entertainment center and bar combination that would add an unusual dimension to watching TV. It had to be in character with the rest of the residence, tastefully designed and executed to deliver the maximum effect.
A two-piece combination bar and seating, coupled with a fireplace and large screen TV was designed. A system was designed and custom built cabinet consisting of a radius front entertainment center houses a large flat screen TV and enclosed stereo speakers on the top level, and a gas log fireplace below.
A custom built see-through bar sports a matching radius front, plenty of storage, and room for three to eat, drink, and enjoy the warmth of the fireplace without missing any of the action on the TV. For even greater functionality, the TV is also viewable through the large opening in the bar while meals or snacks are prepared from the kitchen. Traffic flow is unique: access and egress between the bar front and TV can happen with ease around both sides of the bar, and the opening in the back of the bar provides for service both from and to the kitchen area. Because of the free and easy movement about the space, adequate lighting, and lack of combustibles at or on the fireplace, safety, as well as an ample use of space, are both achieved. Both pieces are custom fabricated from start to finish, and match each other identically in all respects. Both are constructed of clear cherry finish with a clear satin lacquer. Both enjoy chrome accents strips and custom crafted, glass cabinet doors with matching radii, and both are tastefully lit with accenting puck lights. The design and fabrication for both units shared issues in common as well as individually.
The entertainment center was fabricated in the shop in three units and then assembled onsite. The opening for the flat screen TV had to be carefully considered as it too had a radius and therefore had to be designed so that the TV would fit.
The entire bar system, except the countertop, had to be fabricated onsite due to the structural columns on either side between which the curved lower cabinets would rest. Then the countertop template was prepared, fabricated elsewhere, returned and installed. After the countertop was in place, the cabinetmaker had to wrap the two columns on either side as well as the overhead beam while making sure the joints at the columns and header maintained alignment. A complement of matching radii cabinet doors had to be constructed for both units. Radius glass inserts had to be ordered with precise dimensions to assure a perfect fit to openings with tight tolerances. Any mistake would have been expensive to correct. Because of the abundance of natural light into the space, the finishes had to be dead-on, otherwise every flaw would show. The custom walnut inlays were fabricated out of square stock, which protruded above the radius in each door. A jig matching the radius had to be designed and fabricated, then a router used to trim excess material and then sanded and finished.
Solving the multitude of challenges associated with the project was one of the parts that made the project fun and interesting. The homeowners now can entertain every night.
16