
Search results for "Security risks" in Home Design Ideas

 ETO Doors
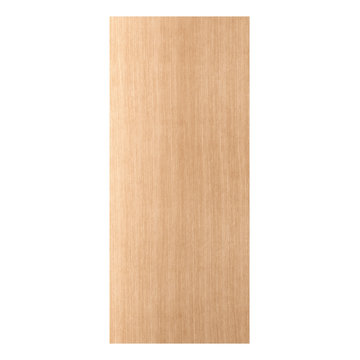
Please note: Doors are unfinished (the pictures may depict a finished door)
Request a Free Corner Sample to See the ETO Quality Difference
Elevate the aesthetic and security of your home or office with our Leon Exterior White Oak Flush Door with Vertical Grain. Crafted with a solid core, this door offers a perfect balance of modern sophistication and exceptional durability, making it ideal for entryways, front doors, back doors, patio doors, garage side doors, and other exterior applications. Designed for both residential and commercial use, this oak door enhances any space with its refined style and long-lasting performance. Whether upgrading your front entry or refreshing a side entrance, this exterior white oak flush door delivers superior quality and design.
The engineered construction of our white oak exterior doors features a solid core with a 3mm thick clear face veneer, ensuring both durability and a premium finish. This solid-core design enhances protection against warping, cracking, and splitting, providing a quieter indoor environment. With an innovative integral panel structure, our white oak doors resist shrinking and eliminate the risk of stile and rail separation, ensuring long-term reliability and beauty.
Free Samples: Request a Free White Oak Exterior Flush Door Corner Sample to See the ETO Quality Difference.
PRO Discounts: Pro discount program trade pricing available for contractors, architects, and designers on all our exterior white oak doors.
Lowest Prices Nationwide: At ETO Doors, we leverage our mass production to manufacture these high-quality exterior white oak doors at the lowest prices in the country, passing significant savings directly to you.
Versatile Usage: Our white oak doors are perfect for residential and commercial settings, including new construction and remodeling projects. Our flush interior doors are installed in places with high traffic volumes such as multifamily homes, office buildings, and hotels.
Customization Available: We understand that every project is unique. Our wood flush doors can be customized to fit your specific size and design requirements, ensuring a perfect fit and look for any application.
Optional Features (at an additional cost)
20-Minute Fire Rating for Wood Doors Available: Exterior flush white oak doors fire rated to withstand fire for 20 minutes, certified by UL or Warnock Hersey.
Exterior Pre-hanging: Our solid core white oak exterior doors can be pre-hung with matching engineered white oak jambs or exterior white primed jambs as pre-hung single doors or pre-hung double doors units.
Impact Hurricane Certification: Our Exterior White Oak doors are available with a Miami Dade hurricane impact wood door approval in both in-swing and out-swing configurations. Our wood Exterior White Oak storm doors certifications are equivalent to a "Miami-Dade NOA" which has the highest hurricane approval standard for wood doors in the country. Each of our flush white oak exterior doors can be assembled with the appropriate components to be Florida Building Code Compliant.


Find the right local pro for your project

 Kyle Hunt & Partners, Incorporated
James Kruger, LandMark Photography
Interior Design: Martha O'Hara Interiors
Architect: Sharratt Design & Company
Inspiration for a large french country open concept and formal dark wood floor and brown floor living room remodel in Minneapolis with beige walls, a standard fireplace and a stone fireplace
Inspiration for a large french country open concept and formal dark wood floor and brown floor living room remodel in Minneapolis with beige walls, a standard fireplace and a stone fireplace

 Bunch Design
Kitchen, bathroom and partial renovation of a residence. Design intent was to create a design complimentary to the existing mid century house while introducing hints and love of Japanese lifestyle.
Photographed by: Bo Sundius


 thea home inc
Tessa Neustadt
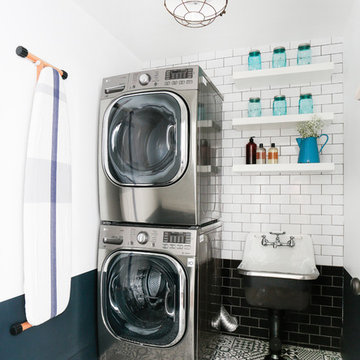
Transitional multicolored floor dedicated laundry room photo in Los Angeles with open cabinets, white cabinets, multicolored walls and a stacked washer/dryer
Transitional multicolored floor dedicated laundry room photo in Los Angeles with open cabinets, white cabinets, multicolored walls and a stacked washer/dryer


 User
UserChiChi Ubiña
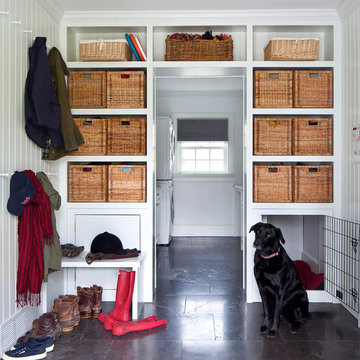
Entryway - mid-sized transitional limestone floor entryway idea in New York with white walls
Entryway - mid-sized transitional limestone floor entryway idea in New York with white walls

 Creekside Homes Inc
Mid-century, modern home built by Creekside Homes, Inc., photos provided by RoseCity 3D Photography.
Mid-sized 1950s white one-story stucco exterior home photo in Portland with a shingle roof
Mid-sized 1950s white one-story stucco exterior home photo in Portland with a shingle roof





 KD Designs Custom Interiors
Home office - transitional built-in desk dark wood floor and brown floor home office idea in Baltimore with white walls

 PARADELO BURGESS DESIGN STUDIO LLC
Design ideas for a large tropical full sun front yard brick formal garden in Miami.
 PBC Design + Build
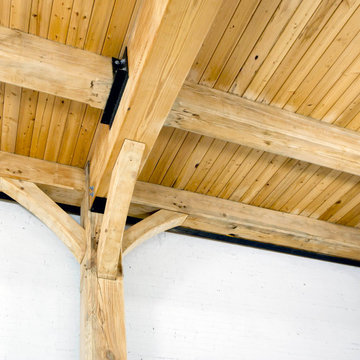
We here at PBC love a great project, especially when it involves one of our favorite local non-profit organizations. Kids Making It is a youth woodworking program that teaches valuable vocational, entrepreneurial and life skills to at-risk, low income, and disadvantaged kids. At KMI they strive to keep local kids in school, out of trouble, and on a path to a successful future. It is an amazing organization that is all heart, and one that we are proud to have been involved with for several years.
When Jimmy Pierce, founder and executive director of KMI, came to PBC with a specific need (more space) and general idea of what he wanted we knew that we had to be a part of it. As with all of our projects, the addition to the current Kids Making It building started as a design-build consultation. We called upon our friend and amazing architect Rob Romero to sit down with us, along with Jimmy and KMI program director, Andy Crowther to discuss the possibilities. The specific focus was on creating a space that KMI could use as they continued to grow their organization. Jimmy and Andy wanted a place where they could train the students in new trades and take the wood-working that they had already learned a step further. They needed open and they needed BIG. That’s where the timber framing came in.
Timber framing is a style of building construction that uses heavy timber frames as opposed to more slender lumber. It is post and beam construction, built like furniture using wood joinery to hold the framing in place. This type of construction has been around for hundreds of years but isn’t used as commonly as it once was due to the high cost of materials and specialized tradespeople that it requires. That’s where Atlantic Barn and Timber Company came in, they heard about the need and answered the call. Very graciously, they offered to erect the timber framing for free. And just like that the materials and equipment arrived, the frames were assembled, stood up, and secured in place…all on that little corner of 7th and Castle Street.
At 2,257 square feet, the first floor will be the home to the new storefront, a large (class)room, and a storage bay for donated materials. The second floor of the addition will measure 1,982 square feet and offer an open space, offices, a full bathroom, conference room, and aforementioned decks overlooking the front and the rear of the building.
PBC Design + Build is beyond proud to be a part of such a wonderful project, and we consider ourselves very fortunate to be able to aid in KMI’s mission.

 Care Free Homes, Inc.
This Middletown, RI home looks great with a new GAF Timberline HD Roofing System in the color Pewter Gray!
A GAF Timberline HD Roofing System is a roofing product that homeowners can rely on even in the roughest weather conditions! As North Americas, #1 selling shingle its durability, performance, and architecturally stylish look is perfect for New England homeowners. This roofing system features a 130 mph wind rating, DuraGrip Adhesive which seals shingles securely reducing the risk of shingle blow-off and StainGuard Protection which protects your roof from unsightly algae. GAF also offers a wide selection of styles, textures, and colors to match every homeowner’s needs. As an award-winning GAF Master Elite Contractor, we provide homeowners with GAF’s factory-registered, 50 Year Non-Prorated, Transferable Roof Warranty which provides both peace of mind and added value to your home.

 Industrial Projects
Creating a comfortable outdoor living space is a priority for many homeowners and DIY enthusiasts. With rising summer temperatures, installing a shade tarp in your backyard offers an affordable and effective solution for sun protection. We’ve developed this detailed, step-by-step guide to help you confidently install a shade tarp that not only shields you from the sun but also adds aesthetic appeal to your outdoor area.
Benefits of Installing a Backyard Shade Tarp
Before diving into the installation process, let’s explore the key benefits of having a backyard shade tarp:
Provides UV Protection: Keeps your family and guests safe from harmful sun exposure.
Reduces Outdoor Temperatures: Creates a cooler, more enjoyable outdoor space.
Protects Outdoor Furniture: Extends the life of patio furniture by reducing sun damage.
Enhances Outdoor Aesthetics: Adds a modern, stylish look to your yard.
Budget-Friendly: More affordable compared to permanent structures like pergolas.
Materials and Tools You’ll Need
To begin your DIY backyard shade project, gather the following materials and tools:
Materials:
Shade tarp (UV-resistant and breathable)
Sturdy posts or existing structures (trees, fences, walls)
Mounting hardware (eye bolts, D-rings, turnbuckles, snap hooks)
Nylon or polyester rope, or stainless-steel wire
Concrete (if installing new posts)
Tools:
Power drill
Measuring tape
Level
Ladder
Wrench or adjustable spanner
Post hole digger (if installing new posts)
Step 1: Plan Your Shade Tarp Layout
The first step in installing your backyard shade tarp is careful planning. Take time to assess your outdoor area and answer these key questions:
Where is the sun’s path throughout the day?
What size and shape of tarp best suits your space?
Will you anchor the tarp to existing structures or install new posts?
What height do you want the tarp to sit at for maximum shade and airflow?
Pro Tip: Use string or garden hoses to visualize the tarp layout on the ground before making permanent decisions.
Step 2: Measure and Mark Anchor Points
Once you’ve determined the tarp’s location and orientation:
Measure the tarp dimensions.
Mark the exact points where each corner of the tarp will be anchored.
Ensure that the anchor points are at least 5–10% longer than the tarp size to allow for tensioning and slight adjustments.
Consider slope angles for water runoff. Aim for at least a 20-degree angle to prevent water pooling on the tarp.
Step 3: Install Support Posts (If Necessary)
If your backyard lacks existing anchor points like trees or fences, you’ll need to install sturdy support posts:
Dig post holes at least 24 inches deep and 8-12 inches wide for stability.
Set posts in concrete, making sure they remain plumb and level.
Allow the concrete to cure for at least 24–48 hours before applying tension from the tarp.
We recommend using pressure-treated wood, galvanized steel poles, or aluminum posts for longevity and strength.
Step 4: Install Mounting Hardware
With your anchor points ready, it’s time to install the necessary hardware:
Attach eye bolts or pad eyes securely into walls, posts, or other fixed structures.
For added flexibility and adjustability, install turnbuckles or tensioners to fine-tune the tarp’s tightness.
Connect snap hooks, D-rings, or carabiners to make assembly and disassembly easier.
Make sure all hardware is rated for outdoor use to prevent rust and corrosion.
Step 5: Attach and Tension the Shade Tarp
Now it’s time for the most satisfying part—mounting the shade tarp:
Begin by attaching one corner of the tarp to an anchor point.
Gradually attach the remaining corners, moving diagonally for even tension.
Adjust each connection point using your turnbuckles, ropes, or cables.
Pull the tarp tight enough to avoid sagging, but not so tight that it risks tearing.
Check that the tarp maintains the desired slope for rainwater runoff and adjust tension as needed.
Step 6: Final Adjustments and Safety Check
Before enjoying your new shaded area:
Inspect all anchor points and hardware for stability.
Test the tarp’s tension and make adjustments for even distribution.
Ensure that no sharp edges or loose connections remain that could damage the tarp or pose a safety hazard.
Confirm that the tarp is secure in windy conditions by giving it a gentle tug.
If you live in an area with frequent high winds, consider removing the tarp during storms to prevent damage.
Step 7: Enjoy Your Shaded Backyard Oasis
Once installed, your backyard shade tarp provides a comfortable and protective space for outdoor gatherings, relaxation, or family activities. You can decorate underneath with outdoor furniture, string lights, or potted plants to create a personalized outdoor retreat.
Maintenance Tips for Long-Lasting Shade Tarp Performance
To extend the life of your shade tarp, follow these maintenance guidelines:
Regularly check for wear and tear, especially around anchor points and seams.
Clean the tarp periodically with mild soap and water to prevent mildew buildup.
Store the tarp indoors during harsh weather seasons if it's not designed for year-round use.
Tighten hardware as needed to maintain proper tension and avoid sagging.
By following these simple care steps, your shade tarp will continue to deliver years of sun protection and outdoor comfort.
Conclusion: Upgrade Your Outdoor Space with a DIY Shade Tarp
Installing a shade tarp in your backyard is a cost-effective and rewarding DIY project. With careful planning, quality materials, and proper installation techniques, you’ll enjoy cool, shaded outdoor living all season long. This step-by-step guide ensures your project goes smoothly from start to finish.
 safe ZOnea
Every year, the same thing happens. The first real snowfall arrives, demand for de-icing materials spikes overnight, and the businesses that waited too long find themselves scrambling for supply at the worst possible moment. Facility managers, property owners, contractors, and municipalities all depend on a steady supply of salt and ice melt to keep their properties safe and operational through winter. The ones who plan ahead sail through. The ones who don't pay more, wait longer, and take on real risk.
Sourcing de-icing materials well is not complicated, but it does require thinking ahead and understanding the options. The choices you make about what to buy, how to buy it, and who to buy it from have a direct effect on your costs, your reliability, and your ability to keep people safe when conditions turn dangerous. This article lays out what matters.
Why Your Choice of Supplier Matters More Than You Think
It is easy to treat de-icing material as a commodity, something you grab whenever you need it without much thought about where it comes from. That works fine until the moment it doesn't, usually in the middle of a storm when everyone needs supply at once and the casual sources have run dry. At that point, the relationships you built before the season become the difference between staying stocked and being stuck.
Reliable supply is the whole game in winter operations. A property that runs out of ice melt during a storm faces safety hazards, liability exposure, and disruption, none of which can wait for a back-ordered shipment. This is why establishing relationships with dependable rock salt suppliers before the season starts is one of the smartest moves a facility manager or contractor can make. It locks in supply, often locks in better pricing, and removes a major source of mid-winter stress.
The lesson here is to treat sourcing as a planning decision rather than a last-minute errand. The businesses that come through winter smoothly are almost always the ones that secured their supply chain early, chose suppliers who could actually deliver when it counted, and never had to gamble on finding material during a shortage. Reliability bought in advance is far cheaper than scarcity paid for in a crisis.
Bagged or Bulk: Matching the Material to the Job
One of the first practical decisions is whether to buy de-icing material in bags or in bulk, and the right answer depends entirely on the operation. Each format has clear advantages, and many operations end up using both for different purposes.
Bagged material offers convenience, control, and easy storage. It is simple to handle, easy to distribute to different locations or crews, straightforward to store without special equipment, and convenient for spot application by hand. It suits smaller properties, businesses without bulk storage, and situations where portion control and tidiness matter. Bulk material, on the other hand, tends to make sense for large operations that go through high volumes, where buying in quantity lowers the per-unit cost and the operation has the equipment and space to store and handle it. The tradeoff is between the convenience and flexibility of bags and the volume economics of bulk.
For many operations, the right approach is a mix: bulk for the high-volume core of the work and bags for flexibility, spot treatment, and locations where bulk handling is impractical. The key is to match the format to how the material will actually be stored, moved, and applied, rather than defaulting to one or the other out of habit. Thinking this through in advance avoids both the waste of over-buying bulk you can't handle and the expense of relying entirely on bags for a large operation.
Rock Salt Is Not Your Only Option
Rock salt, or sodium chloride, is the workhorse of winter de-icing for good reason. It is effective, widely available, and cost-efficient, which makes it the default choice for most operations most of the time. But it has limits, and understanding the alternatives helps you choose the right material for the conditions you actually face.
The most important limitation is temperature. Rock salt becomes less effective as temperatures drop, and in genuinely cold conditions it can struggle to do the job at all. This is where alternatives come in. Calcium chloride, for instance, works at much lower temperatures than rock salt and acts quickly, which makes it valuable when conditions are severe or when fast melting matters. Operations that face hard freezes or need dependable performance in extreme cold often keep calcium chloride for sale on hand for exactly those situations, using it alongside rock salt rather than instead of it.
The practical approach is to understand the conditions your property faces and stock accordingly. For many operations, rock salt handles the bulk of the work while a faster, colder-rated material like calcium chloride covers the extreme days when ordinary salt falls short. Matching the material to the temperature and the urgency of the situation is what separates an operation that stays ahead of winter from one that is constantly reacting to it.
Securing Your Supply Before the Season
Knowing what to buy is only half the equation. The other half is making sure you can actually get it when you need it, which means securing your supply before winter arrives rather than after it has already started. Timing is one of the most underrated factors in winter operations.
The logic is simple. Demand for de-icing materials is highly seasonal and spikes sharply during storms, when everyone needs supply simultaneously. Prices and availability both move against the buyer at exactly those moments. By contrast, planning ahead, estimating your needs and arranging supply before the season, puts you in a far stronger position. Working with established rock salt suppliers ahead of time means your material is accounted for before the rush, often at better pricing and with the confidence that it will be there when the first storm hits.
This kind of planning also lets you think clearly rather than react under pressure. You can estimate your seasonal needs based on your property and past winters, decide on the right mix of materials and formats, and arrange storage in advance. Operations that do this consistently spend less, worry less, and never find themselves making frantic calls during a storm. The effort of planning ahead is modest, and the payoff in reliability and cost savings is substantial.
Storing and Handling What You Buy
Securing supply is not much use if the material degrades before you can use it, which makes proper storage and handling an important and often overlooked part of the equation. De-icing materials are sensitive to moisture, and poor storage can turn a good supply into a clumped, hardened mess that is difficult to apply.
The fundamentals are straightforward. Keep material dry and protected from moisture, since salt and ice melt readily absorb water and can harden if exposed. Store it in a way that suits the format, whether that means a proper bulk storage area or a dry space for stacked bags. Keep it accessible, so crews can get to it quickly when a storm hits and time is short. And handle it with the right equipment for the format and volume, which protects both the material and the people working with it. None of this is complicated, but neglecting it can undermine even a well-planned supply.
Good storage practices protect the investment you made in securing supply early. There is little point in arranging your materials ahead of the season only to have them degrade before use. Treating storage and handling as part of the overall plan, rather than an afterthought, ensures that the material you secured is actually usable when the moment comes. It is the final link in a supply chain built to perform under winter conditions.
Estimating How Much You Actually Need
One question trips up operations of every size: how much de-icing material to buy. Order too little and you risk running short during a storm. Order too much and you tie up money and storage space in material you may not use. Getting the estimate reasonably right is a meaningful part of sourcing well.
Several factors shape the answer. The size and type of the areas you treat, sidewalks, lots, entrances, and drive lanes, set the baseline for how much material each application consumes. The local climate matters too, since colder regions and those with frequent snowfall go through far more material than milder ones. Application frequency depends on how often storms hit and how quickly surfaces need to be cleared, which varies with the kind of property and the expectations of the people who use it. And the type of material plays a role, since different products are applied at different rates.
Past experience is often the best guide. Operations that track what they used in previous winters, adjusted for the size of the property and the severity of the season, can estimate their needs with reasonable confidence. For newer operations without that history, it helps to plan conservatively and to work with a supplier who can replenish stock reliably, so that a low estimate does not turn into a mid-storm shortage.
The goal is not perfect precision but a sound, slightly cautious estimate paired with a dependable supply relationship. That combination lets an operation keep enough material on hand to handle the season without over-committing to volume it cannot store or use. Thinking this through before winter, rather than guessing during it, is one more way that planning ahead pays off when the snow starts to fall.
The Bottom Line
Sourcing de-icing materials well comes down to a few straightforward principles: plan ahead, choose reliable suppliers before the season, match your materials and formats to your actual needs and conditions, and store what you buy properly. The operations that follow these principles move through winter with confidence, while those that improvise pay more and take on needless risk.
Winter is predictable in one respect: it arrives every year, and demand for de-icing material spikes the moment it does. The businesses that prepare for that reality, rather than being surprised by it, are the ones that keep their properties safe, their costs controlled, and their operations running no matter what the season throws at them. A little foresight before the first snowfall pays off through every storm that follows.
 Window Film Chattanooga
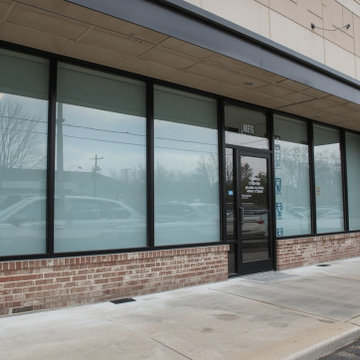
Window Film Chattanooga installed safety and security window film for a retail storefront in Chattanooga, TN. The film holds shattered glass in place during break-in attempts, severe weather, or accidental impact, reducing injury risk and slowing forced entry. The installation is virtually invisible and does not alter the appearance of the storefront. Window Film Chattanooga provides security film solutions for homes, offices, schools, and commercial properties across the greater Chattanooga area.
 Get My Rugs LLC
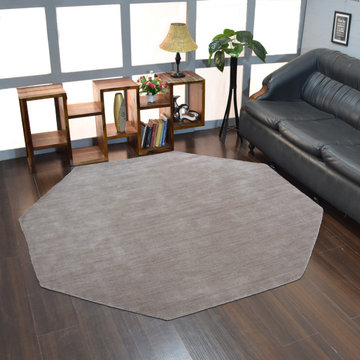
Modern Style your living room or bedroom into an exquisite retreat with the perfect area rug, an essential element that combines both style and practicality. A thoughtfully selected rug not only anchors the space but also infuses it with warmth, texture, and personality. Whether you're enhancing a cozy bedroom or designing a spacious living area, choosing the right rug is crucial to creating a harmonious and inviting environment.
The design of your area rug can profoundly influence the overall ambiance of your room. For a touch of opulence, consider hand-tufted or hand-knotted rugs, which are renowned for their intricate patterns and luxurious textures. These rugs, crafted with meticulous attention to detail, make a sophisticated statement in any setting. If a contemporary aesthetic appeals to you, machine-woven rugs are an excellent choice. They are available in an array of vibrant patterns and hues and are engineered to endure high foot traffic with their durable heat-set fibers. For a versatile and classic option, flat-woven rugs, such as kilims, offer a reversible design that seamlessly integrates with both modern and traditional decor.
When selecting a rug, the choice of material significantly impacts both its look and feel. Shag and flokati rugs are ideal for creating a sumptuous, inviting atmosphere. Their long, soft fibers provide unparalleled comfort underfoot, enhancing the coziness of your living room or bedroom. Hand-loomed rugs deliver unique textures and artisanal craftsmanship, while braided and hand-hooked rugs bring a delightful, handcrafted charm. For ease of maintenance, machine washable rugs are highly practical. They allow for effortless cleaning and help maintain a pristine appearance with minimal effort.
In addition to aesthetics, the functionality of your rug is paramount. Stain-resistant and water-resistant rugs are perfect for managing spills and everyday wear, ensuring your rug remains pristine over time. Non-slip and adhesive backings are crucial for safety, particularly on hardwood floors, preventing any risk of slipping and ensuring the rug stays securely in place. Furthermore, cushioned rugs enhance comfort, making your space not only stylish but also extraordinarily comfortable.
Personalize your space with bespoke or custom rug options. An 8x10 area rug is ideal for covering substantial areas and can be customized to fit specific dimensions or design preferences. Custom features, such as elegant fringe details or organic textures, allow you to craft a rug that reflects your unique style and complements your existing decor.
The selection of the top 15 area rugs available today encompasses a wide range of styles and features to meet diverse needs. From distressed designs that impart character to sleek contemporary patterns that offer a modern touch, there is a rug to suit every taste. Large rugs for living rooms and bedrooms can define and unify the space, while oversized carpets can create a dramatic focal point. Consider the practical aspects of each rug to ensure it not only enhances your decor but also withstands the rigors of daily use.
Ultimately, selecting the ideal area rug involves a delicate balance between aesthetic appeal and functional utility. Whether you opt for a luxurious hand-tufted piece, a resilient machine-woven design, or a versatile flat-woven style, the right rug will elevate your living space into a stylish and comfortable haven. By exploring a variety of options and carefully considering both design and practicality, you can find the perfect rug to transform your room into a beautifully appointed retreat.
1