
Search results for "Short runs" in Home Design Ideas
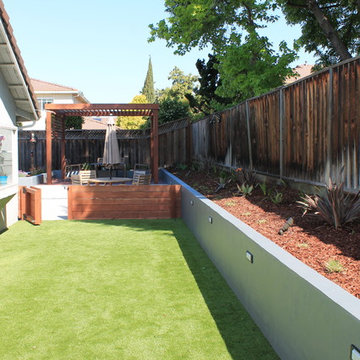

 White Pebble Interiors
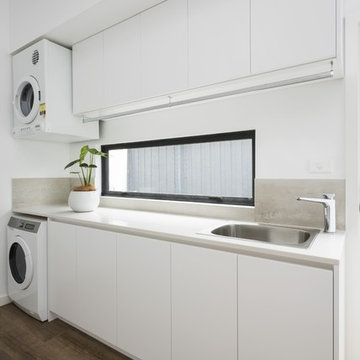
Practical, yet elegant laundry. Winner Best Ecological Sustainable Design in Bayside 2015.As featured in Australian House & Garden October 2016 & The Herald Sun October 8, 2016. Photo credit: Matthew Mallet
 Orren Pickell Building Group
**Project Overview**
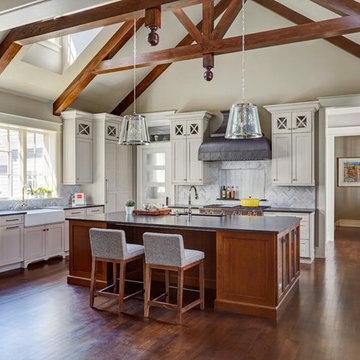
This new construction home built next to a serene lake features a gorgeous, large-scale kitchen that also connects to a bar, home office, breakfast room and great room. The homeowners sought the warmth of traditional styling, updated for today. In addition, they wanted to incorporate unexpected touches that would add personality. Strategic use of furniture details combined with clean lines brings the traditional style forward, making the kitchen feel fresh, new and timeless.
**What Makes This Project Unique?*
Three finishes, including vintage white paint, stained cherry and textured painted gray oak cabinetry, work together beautifully to create a varied, unique space. Above the wall cabinets, glass cabinets with X mullions add interest and decorative storage. Single ovens are tucked in cabinets under a window, and a warming drawer under one perfectly matches the cabinet drawer under the other. Matching furniture-style armoires flank the wall ovens, housing the freezer and a pantry in one and custom designed large scale appliance garage with retractable doors in the other. Other furniture touches can be found on the sink cabinet and range top cabinet that help complete the look. The variety of colors and textures of the stained and painted cabinetry, custom dark finish copper hood, wood ceiling beams, glass cabinets, wood floors and sleek backsplash bring the whole look together.
**Design Challenges*
Even though the space is large, we were challenged by having to work around the two doorways, two windows and many traffic patterns that run through the kitchen. Wall space for large appliances was quickly in short supply. Because we were involved early in the project, we were able to work with the architect to expanded the kitchen footprint in order to make the layout work and get appliance placement just right. We had other architectural elements to work with that we wanted to compliment the kitchen design but also dictated what we could do with the cabinetry. The wall cabinet height was determined based on the beams in the space. The oven wall with furniture armoires was designed around the window with the lake view. The height of the oven cabinets was determined by the window. We were able to use these obstacles and challenges to design creatively and make this kitchen one of a kind.
Photo by MIke Kaskel
Find the right local pro for your project
 Nar Design Group
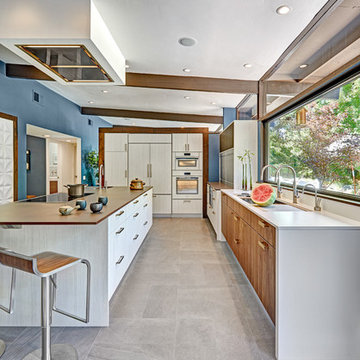
This mid-century modern kitchen was developed with the original architectural elements of its mid-century shell at the heart of its design. Throughout the space, the kitchen’s repetition of alternating dark walnut and light wood uses in the cabinetry and framework reflect the contrast of the dark wooden beams running along the white ceiling. The playful use of two tones intentionally develops unified work zones using all modern day elements and conveniences. For instance, the 5’ galley workstation stands apart with grain-matched walnut cabinetry and stone wrap detail for a furniture-like feeling. The mid-century architecture continued to be an emphasis through design details such as a flush venting system within a drywall structure that conscientiously disappears into the ceiling affording the existing post-and-beams structures and clerestory windows to stand in the forefront.
Along with celebrating the characteristic of the mid-century home the clients wanted to bring the outdoors in. We chose to emphasis the view even more by incorporating a large window centered over the galley kitchen sink. The final result produced a translucent wall that provokes a dialog between the outdoor elements and the natural color tones and materials used throughout the kitchen. While the natural light and views are visible because of the spacious windows, the contemporary kitchens clean geometric lines emphasize the newly introduced natural materials and further integrate the outdoors within the space.
The clients desired to have a designated area for hot drinks such as coffee and tea. To create a station that could house all the small appliances & accessories and was easily accessible we incorporated two aluminum tambours together with integrated power lift doors. One tambour acting as the hot drink station and the other acting as an appliance garage. Overall, this minimalistic kitchen is nothing short of functionality and mid-century character.
Photo Credit: Fred Donham of PhotographerLink
 TKS Design Group
Download our free ebook, Creating the Ideal Kitchen. DOWNLOAD NOW
Lakefront property in the northwest suburbs of Chicago is hard to come by, so when we were hired by this young family with exactly that, we were immediately inspired by not just the unusually large footprint of this 1950’s colonial revival but also the lovely views of the manmade lake it was sited on. The large 5-bedroom home was solidly stuck in the 1980’s, but we saw tons of potential. We started out by updating the existing staircase with a fresh coat of paint and adding new herringbone slate to the entry hall.
The powder room off the entryway also got a refresh - new flooring, new cabinets and fixtures. We ran the new slate right through into this space for some consistency. A fun wallpaper and shiplap trim add a welcoming feel and set the tone for the home.
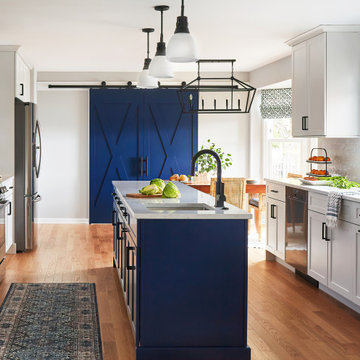
Next, we tackled the kitchen. Located away from the rest of the first floor, the kitchen felt a little isolated, so we immediately began planning for how to better connect it to the rest of the first floor. We landed on removing the wall between the kitchen and dining room and designed a modified galley style space with separate cooking and clean up zones. The cooking zone consists of the refrigerator, prep sink and cooktop, along with a nice long run of prep space at the island. The cleanup side of the kitchen consists of the main sink and dishwasher. Both areas are situated so that the user can view the lake during prep work and cleanup!
One of the home’s main puzzles was how to incorporate the mudroom and area in front of the patio doors at the back of the house. We already had a breakfast table area, so the space by the patio doors was a bit of a no man’s land. We decided to separate the kitchen proper from what became the new mudroom with a large set of barn doors. That way you can quickly hide any mudroom messes but have easy access to the light coming in through the patio doors as well as the outdoor grilling station. We also love the impact the barn doors add to the overall space.
The homeowners’ first words to us were “it’s time to ditch the brown,” so we did! We chose a lovely blue pallet that reflects the home’s location on the lake which is also vibrant yet easy on the eye. Countertops are white quartz, and the natural oak floor works well with the other honey accents. The breakfast table was given a refresh with new chairs, chandelier and window treatments that frame the gorgeous views of the lake out the back.
We coordinated the slate mudroom flooring with that used in the home’s main entrance for a consistent feel. The storage area consists of open and closed storage to allow for some clutter control as needed.
Next on our “to do” list was revamping the dated brown bar area in the neighboring dining room. We eliminated the clutter by adding some closed cabinets and did some easy updates to help the space feel more current. One snag we ran into here was the discovery of a beam above the existing open shelving that had to be modified with a smaller structural beam to allow for our new design to work. This was an unexpected surprise, but in the end we think it was well worth it!
We kept the colors here a bit more muted to blend with the homeowner’s existing furnishings. Open shelving and polished nickel hardware add some simple detail to the new entertainment zone which also looks out onto the lake!
Next we tackled the upstairs starting with the homeowner’s son’s bath. The bath originally had both a tub shower and a separate shower, so we decided to swap out the shower for a new laundry area. This freed up some space downstairs in what used to be the mudroom/laundry room and is much more convenient for daily laundry needs.
We continued the blue palette here with navy cabinetry and the navy tile in the shower. Porcelain floor tile and chrome fixtures keep maintenance to a minimum while matte black mirrors and lighting add some depth the design. A low maintenance runner adds some warmth underfoot and ties the whole space together.
We added a pocket door to the bathroom to minimize interference with the door swings. The left door of the laundry closet is on a 180 degree hinge to allow for easy full access to the machines. Next we tackled the master bath which is an en suite arrangement. The original was typical of the 1980’s with the vanity outside of the bathroom, situated near the master closet. And the brown theme continued here with multiple shades of brown.
Our first move was to segment off the bath and the closet from the master bedroom. We created a short hall from the bedroom to the bathroom with his and hers walk-in closets on the left and right as well as a separate toilet closet outside of the main bathroom for privacy and flexibility.
The original bathroom had a giant soaking tub with steps (dangerous!) as well as a small shower that did not work well for our homeowner who is 6’3”. With other bathtubs in the home, they decided to eliminate the tub and create an oversized shower which takes up the space where the old tub was located. The double vanity is on the opposite wall and a bench is located under the window for morning conversations and a place to set a couple of towels.
The pallet in here is light and airy with a mix of blond wood, creamy porcelain and marble tile, and brass accents. A simple roman shade adds some texture and it’s top-down mechanism allows for light and privacy.
This large whole house remodel gave our homeowners not only the ability to maximize the potential of their home but also created a lovely new frame from which to view their fabulous lake views.
Designed by: Susan Klimala, CKD, CBD
Photography by: Michael Kaskel
For more information on kitchen and bath design ideas go to: www.kitchenstudio-ge.com
 TKS Design Group
Free ebook, Creating the Ideal Kitchen. DOWNLOAD NOW
The Klimala’s and their three kids are no strangers to moving, this being their fifth house in the same town over the 20-year period they have lived there. “It must be the 7-year itch, because every seven years, we seem to find ourselves antsy for a new project or a new environment. I think part of it is being a designer, I see my own taste evolve and I want my environment to reflect that. Having easy access to wonderful tradesmen and a knowledge of the process makes it that much easier”.
This time, Klimala’s fell in love with a somewhat unlikely candidate. The 1950’s ranch turned cape cod was a bit of a mutt, but it’s location 5 minutes from their design studio and backing up to the high school where their kids can roll out of bed and walk to school, coupled with the charm of its location on a private road and lush landscaping made it an appealing choice for them.
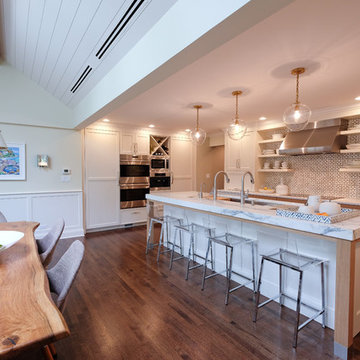
“The bones of the house were really charming. It was typical 1,500 square foot ranch that at some point someone added a second floor to. Its sloped roofline and dormered bedrooms gave it some charm.” With the help of architect Maureen McHugh, Klimala’s gutted and reworked the layout to make the house work for them. An open concept kitchen and dining room allows for more frequent casual family dinners and dinner parties that linger. A dingy 3-season room off the back of the original house was insulated, given a vaulted ceiling with skylights and now opens up to the kitchen. This room now houses an 8’ raw edge white oak dining table and functions as an informal dining room. “One of the challenges with these mid-century homes is the 8’ ceilings. I had to have at least one room that had a higher ceiling so that’s how we did it” states Klimala.
The kitchen features a 10’ island which houses a 5’0” Galley Sink. The Galley features two faucets, and double tiered rail system to which accessories such as cutting boards and stainless steel bowls can be added for ease of cooking. Across from the large sink is an induction cooktop. “My two teen daughters and I enjoy cooking, and the Galley and induction cooktop make it so easy.” A wall of tall cabinets features a full size refrigerator, freezer, double oven and built in coffeemaker. The area on the opposite end of the kitchen features a pantry with mirrored glass doors and a beverage center below.
The rest of the first floor features an entry way, a living room with views to the front yard’s lush landscaping, a family room where the family hangs out to watch TV, a back entry from the garage with a laundry room and mudroom area, one of the home’s four bedrooms and a full bath. There is a double sided fireplace between the family room and living room. The home features pops of color from the living room’s peach grass cloth to purple painted wall in the family room. “I’m definitely a traditionalist at heart but because of the home’s Midcentury roots, I wanted to incorporate some of those elements into the furniture, lighting and accessories which also ended up being really fun. We are not formal people so I wanted a house that my kids would enjoy, have their friends over and feel comfortable.”
The second floor houses the master bedroom suite, two of the kids’ bedrooms and a back room nicknamed “the library” because it has turned into a quiet get away area where the girls can study or take a break from the rest of the family. The area was originally unfinished attic, and because the home was short on closet space, this Jack and Jill area off the girls’ bedrooms houses two large walk-in closets and a small sitting area with a makeup vanity. “The girls really wanted to keep the exposed brick of the fireplace that runs up the through the space, so that’s what we did, and I think they feel like they are in their own little loft space in the city when they are up there” says Klimala.
Designed by: Susan Klimala, CKD, CBD
Photography by: Carlos Vergara
For more information on kitchen and bath design ideas go to: www.kitchenstudio-ge.com
 The Galeana Group
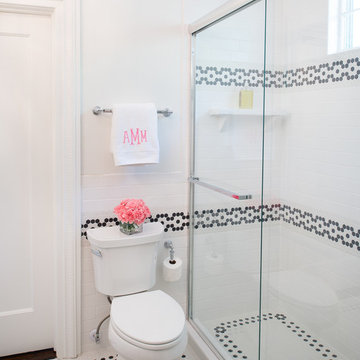
This bathroom is situated between two bedrooms in 1920s mansion in the heart of one of San Antonio, Texas' most important historic districts. The design was created for a teenage girl (hence the subtle touches of pink), but it's historically relevant and classic design makes it appropriate for anyone. The beauty of this project is that the space looks clean and updated, but also looks like it could've been original to the house.
This project was designed and contracted by Galeana Younger. Photo by Mark Menjivar.
Sponsored
Columbus, OH

Hope Restoration & General Contracting
Columbus Design-Build, Kitchen & Bath Remodeling, Historic Renovations
 Charlotte DreamScapes
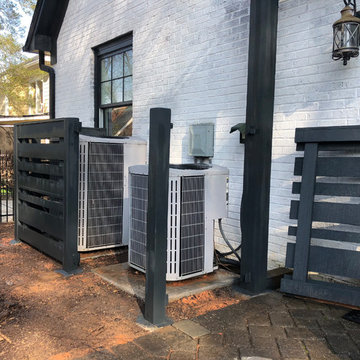
This beautiful, all-cedar privacy fence warmly welcomes visitors and keeps the eyes looking around the yard. The arbor extends over the patio to continue the green-black trim to better frame the white house. The HVAC units have been fenced in with a visual screen that lets airflow through - and the panels are removable for maintenance access. We also replaced the old planter boxes on the front windows.
 Visbeen Architects
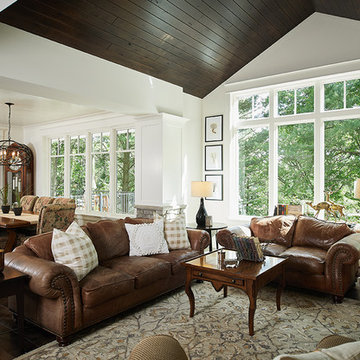
As a cottage, the Ridgecrest was designed to take full advantage of a property rich in natural beauty. Each of the main houses three bedrooms, and all of the entertaining spaces, have large rear facing windows with thick craftsman style casing. A glance at the front motor court reveals a guesthouse above a three-stall garage. Complete with separate entrance, the guesthouse features its own bathroom, kitchen, laundry, living room and bedroom. The columned entry porch of the main house is centered on the floor plan, but is tucked under the left side of the homes large transverse gable. Centered under this gable is a grand staircase connecting the foyer to the lower level corridor. Directly to the rear of the foyer is the living room. With tall windows and a vaulted ceiling. The living rooms stone fireplace has flanking cabinets that anchor an axis that runs through the living and dinning room, ending at the side patio. A large island anchors the open concept kitchen and dining space. On the opposite side of the main level is a private master suite, complete with spacious dressing room and double vanity master bathroom. Buffering the living room from the master bedroom, with a large built-in feature wall, is a private study. Downstairs, rooms are organized off of a linear corridor with one end being terminated by a shared bathroom for the two lower bedrooms and large entertainment spaces.
Photographer: Ashley Avila Photography
Builder: Douglas Sumner Builder, Inc.
Interior Design: Vision Interiors by Visbeen
 Donald Lococo Architects
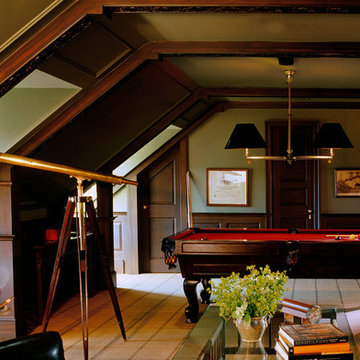
Situated in Kenwood, Maryland just outside of Washington, D.C., this whole-house renovation reinterprets a 1950s split-level into a rustic French country house. Published 3 times, The French country house plans for this renovation inform and guide the remodel. Short double-hung existing windows of various sizes on a 1950s brick front wall (see below) were replaced by straightforward openings along the front facade. By replacing them with a series of similar openings, the end result is a principled, simple elegance inspired by French country style homes. The rustic application of field stone arches and rough stucco are both inviting and enchanting, echoing French country interior design.
Elements of French country home decor complement the home. The traditional French country home design has been widely published, including features in Renovation Style and Maryland Life magazines, among others. One singular continuous walkway runs the entire length of the main front under each of the French doors, and a courtyard created by stucco walls and stone piers create an inner sanctum in the front yard. In the back of the property, added French gates lead to a newly constructed pavilion.
 Environments by Design
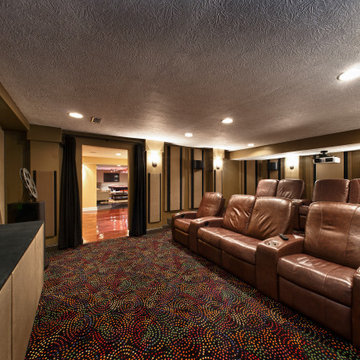
Our clients live in a country club community and were looking to renovate their unfinished basement. The client knew he wanted to include a gym, theater, and gaming center.
We incorporated a Home Automation system for this project, providing for music playback, movie watching, lighting control, and security integration.
Our challenges included a short construction deadline and several structural issues. The original basement had a floor-to-ceiling height of 8’-0” with several columns running down the center of the basement that interfered with the seating area of the theater. Our design/build team installed a second beam adjacent to the original to help distribute the load, enabling the removal of columns.
The theater had a water meter projecting a foot out from the front wall. We retrofitted a piece of A/V acoustically treated furniture to hide the meter and gear.
This homeowner originally planned to include a putting green on his project, until we demonstrated a Visual Sports Golf Simulator. The ceiling height was two feet short of optimal swing height for a simulator. Our client was committed, we excavated the corner of the basement to lower the floor. To accent the space, we installed a custom mural printed on carpet, based upon a photograph from the neighboring fairway of the client’s home. By adding custom high-impact glass walls, partygoers can join in on the fun and watch the action unfold while the sports enthusiasts can view the party or ball game on TV! The Visual Sports system allows guests and family to not only enjoy golf, but also sports such as hockey, baseball, football, soccer, and basketball.
We overcame the structural and visual challenges of the space by using floor-to-glass walls, removal of columns, an interesting mural, and reflective floor surfaces. The client’s expectations were exceeded in every aspect of their project, as evidenced in their video testimonial and the fact that all trades were invited to their catered Open House! The client enjoys his golf simulator so much he had tape on five of his fingers and his wife informed us he has formed two golf leagues! This project transformed an unused basement into a visually stunning space providing the client the ultimate fun get-a-away!

 Light it Up AV & Turf
Project Description
Govee Permanent Outdoor Lights 2 Precision Home Installation
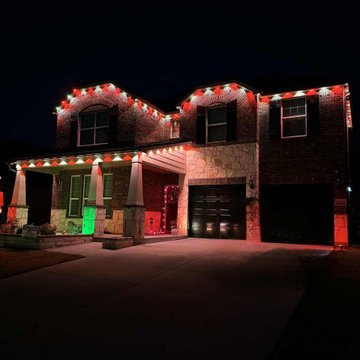
This project features the professional installation of the next-generation Govee Permanent Outdoor Lights 2 system. Known for their upgraded brightness and enhanced color rendering, these lights require a precise, calculated layout—especially since the manufacturer guidelines restrict cutting into the main line, presenting a unique installation challenge.
Key Features of This Installation:
Next-Gen Exterior Illumination: Outfitted with the newly released Govee Permanent Outdoor Lights 2, delivering brilliant architectural down-lighting, incredible holiday presets, and daily accent lighting.
Creative Technical Problem Solving: Because these specialized strands could not be cut without voiding the integrity of the system, we meticulously engineered the run layout. To achieve a perfectly flush finish at the roofline edge, we successfully executed a custom shortening and capping technique on the final strands.
Flawless Eave Integration: The lights were mounted at the optimal distance from the fascia to ensure a perfectly uniform, triangular cone wash down the home's exterior walls, eliminating hot spots and dark gaps.
Smart Ecosystem Control: Fully integrated into the homeowner's smart ecosystem, allowing for voice control, scheduled automation, and endless customization through the native app interface.
Our Specialized Lighting Expertise
Smart lighting systems require more than just hanging a strand—they require precision planning. We specialize in handling high-end retail and commercial systems, providing:
Advanced Layout Mapping: Ensuring your runs look symmetrical and perfectly tailored to your roofline before a single clip is mounted.
Out-of-the-Box Troubleshooting: Finding safe, manufacturer-approved technical workarounds for complex roof lines where standard plug-and-play methods fall short.
Clean Wire Management: Tucking and hiding all jump wires and power supplies for a seamless daytime appearance.

 Albert, Righter & Tittmann Architects, Inc.
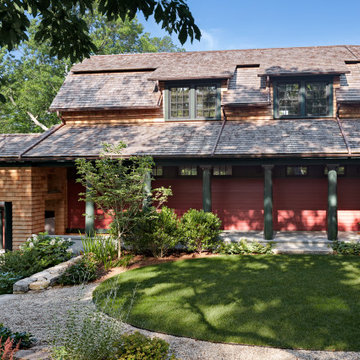
Quarry House, a shingled two story house with dark green trim, is pinned to the solid ledge on the sea coast of Connecticut. The narrow house sits under a spine of a roof, running south to north, with the primary living in a ‘head’, at the north end, where the best views are. The circulation of the site and house follows this massing, through two courts, the lower more public, and the upper more private.
The lower court is defined by the garage building, and by the south face of the house. From this first court, a well-defined portal leads to an arcade, which, flanking the main wing of the house, pulls one along the second and higher court. The L of the main house and the tool shed define the garden court. Both courts withhold the view.
The actual front door is nearly half-way into the house. From there, a short passage brings one to the primary living space where the view unfolds across a syncopated rhythm of windows, first overlooking an intimate tidal inlet and, then, turning west, to the longer view of the Long Island Sound, where a cantilevered deck seems to float over the rock. A clerestory window, hidden in a dormer, brings south light into this room.
A final point: the 3400 square foot house, with its deeply insulated 12” thick walls and roofing, runs on a low energy load. An HRV ensures a constant cycle of fresh air even in heating season.
 Light it Up AV & Turf
Project Description
Govee Permanent Outdoor Lights 2 Precision Home Installation
This project features the professional installation of the next-generation Govee Permanent Outdoor Lights 2 system. Known for their upgraded brightness and enhanced color rendering, these lights require a precise, calculated layout—especially since the manufacturer guidelines restrict cutting into the main line, presenting a unique installation challenge.
Key Features of This Installation:
Next-Gen Exterior Illumination: Outfitted with the newly released Govee Permanent Outdoor Lights 2, delivering brilliant architectural down-lighting, incredible holiday presets, and daily accent lighting.
Creative Technical Problem Solving: Because these specialized strands could not be cut without voiding the integrity of the system, we meticulously engineered the run layout. To achieve a perfectly flush finish at the roofline edge, we successfully executed a custom shortening and capping technique on the final strands.
Flawless Eave Integration: The lights were mounted at the optimal distance from the fascia to ensure a perfectly uniform, triangular cone wash down the home's exterior walls, eliminating hot spots and dark gaps.
Smart Ecosystem Control: Fully integrated into the homeowner's smart ecosystem, allowing for voice control, scheduled automation, and endless customization through the native app interface.
Our Specialized Lighting Expertise
Smart lighting systems require more than just hanging a strand—they require precision planning. We specialize in handling high-end retail and commercial systems, providing:
Advanced Layout Mapping: Ensuring your runs look symmetrical and perfectly tailored to your roofline before a single clip is mounted.
Out-of-the-Box Troubleshooting: Finding safe, manufacturer-approved technical workarounds for complex roof lines where standard plug-and-play methods fall short.
Clean Wire Management: Tucking and hiding all jump wires and power supplies for a seamless daytime appearance.
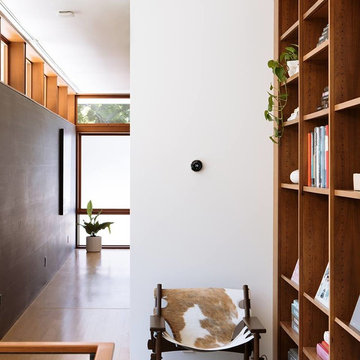
 SMARTSolutions
Make your home a smart home with the Google Nest products. Save money with a Nest Learning Thermostat, keep an eye on your home with a Nest Cam, and control it all from the Google Home Hub.
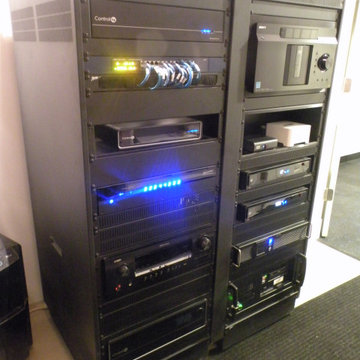 Environments by Design
Our clients live in a country club community and were looking to renovate their unfinished basement. The client knew he wanted to include a gym, theater, and gaming center.
We incorporated a Home Automation system for this project, providing for music playback, movie watching, lighting control, and security integration.
Our challenges included a short construction deadline and several structural issues. The original basement had a floor-to-ceiling height of 8’-0” with several columns running down the center of the basement that interfered with the seating area of the theater. Our design/build team installed a second beam adjacent to the original to help distribute the load, enabling the removal of columns.
The theater had a water meter projecting a foot out from the front wall. We retrofitted a piece of A/V acoustically treated furniture to hide the meter and gear.
This homeowner originally planned to include a putting green on his project, until we demonstrated a Visual Sports Golf Simulator. The ceiling height was two feet short of optimal swing height for a simulator. Our client was committed, we excavated the corner of the basement to lower the floor. To accent the space, we installed a custom mural printed on carpet, based upon a photograph from the neighboring fairway of the client’s home. By adding custom high-impact glass walls, partygoers can join in on the fun and watch the action unfold while the sports enthusiasts can view the party or ball game on TV! The Visual Sports system allows guests and family to not only enjoy golf, but also sports such as hockey, baseball, football, soccer, and basketball.
We overcame the structural and visual challenges of the space by using floor-to-glass walls, removal of columns, an interesting mural, and reflective floor surfaces. The client’s expectations were exceeded in every aspect of their project, as evidenced in their video testimonial and the fact that all trades were invited to their catered Open House! The client enjoys his golf simulator so much he had tape on five of his fingers and his wife informed us he has formed two golf leagues! This project transformed an unused basement into a visually stunning space providing the client the ultimate fun get-a-away!
Sponsored
Columbus, OH
Hope Restoration & General Contracting
Columbus Design-Build, Kitchen & Bath Remodeling, Historic Renovations
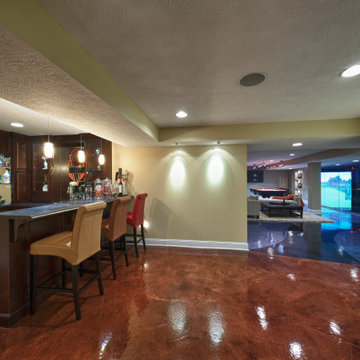 Environments by Design
Our clients live in a country club community and were looking to renovate their unfinished basement. The client knew he wanted to include a gym, theater, and gaming center.
We incorporated a Home Automation system for this project, providing for music playback, movie watching, lighting control, and security integration.
Our challenges included a short construction deadline and several structural issues. The original basement had a floor-to-ceiling height of 8’-0” with several columns running down the center of the basement that interfered with the seating area of the theater. Our design/build team installed a second beam adjacent to the original to help distribute the load, enabling the removal of columns.
The theater had a water meter projecting a foot out from the front wall. We retrofitted a piece of A/V acoustically treated furniture to hide the meter and gear.
This homeowner originally planned to include a putting green on his project, until we demonstrated a Visual Sports Golf Simulator. The ceiling height was two feet short of optimal swing height for a simulator. Our client was committed, we excavated the corner of the basement to lower the floor. To accent the space, we installed a custom mural printed on carpet, based upon a photograph from the neighboring fairway of the client’s home. By adding custom high-impact glass walls, partygoers can join in on the fun and watch the action unfold while the sports enthusiasts can view the party or ball game on TV! The Visual Sports system allows guests and family to not only enjoy golf, but also sports such as hockey, baseball, football, soccer, and basketball.
We overcame the structural and visual challenges of the space by using floor-to-glass walls, removal of columns, an interesting mural, and reflective floor surfaces. The client’s expectations were exceeded in every aspect of their project, as evidenced in their video testimonial and the fact that all trades were invited to their catered Open House! The client enjoys his golf simulator so much he had tape on five of his fingers and his wife informed us he has formed two golf leagues! This project transformed an unused basement into a visually stunning space providing the client the ultimate fun get-a-away!

 safe ZOnea
Staging a home for sale or for a major transition is a strange in-between state. You are still living in the space, but you are also preparing it to impress strangers, support showings, and remain functional until the final move-out day. That tension between “home” and “product” is where storage quietly becomes one of your smartest tools. Used well, storage lets you reduce clutter, protect important items, and create the kind of rooms that photograph beautifully and feel calm when buyers walk through the door.
A staged move is rarely just about shifting boxes from one address to another. It is about managing timing, presentation, and stress at the same time. When storage is built into the plan from day one, the entire process feels less rushed and more strategic. Rooms open up gradually, essentials stay accessible, and you never feel like you are drowning in half-packed chaos. Understanding how to use storage as a staging partner, not just a place to dump excess stuff, is what turns a messy transition into a controlled, professional-looking move.
Why Storage Is the Backbone of Every Staged Move
Visual space is emotional space. When every surface is covered, and every corner is full, buyers feel crowded before they have even evaluated the layout. Storage gives you a way to pull back without making drastic decisions about what to keep or donate. Seasonal décor, bulky furniture, duplicate items, archives, and personal collections can be moved out early, so the home reads cleaner and more open while still feeling lived-in. That balance between warmth and simplicity is exactly what good staging tries to achieve.
In more complex situations, such as live-work properties or home offices, storage becomes even more important. You may need to keep a business running while also presenting a polished environment to viewers. Partnering with local movers in Boston makes it easier to shift equipment, files, and nonessential pieces into storage in phases, so work can continue while the visible areas of the property stay controlled and presentable.
How Staging and Storage Work Together to Control Visual Impact
Staging works best when every object in a room has a clear purpose. A sofa frames a conversation. A table suggests gathering. A lamp softens the mood. Everything else that is not essential to that story competes for attention. Storage supports staging by giving you a clean staging bench off-site, where nonessential items can wait without being constantly shuffled between rooms or piled into overstuffed closets.
The art lies in deciding what stays and what goes. Family photos, extensive collections, excess seating, and rarely used appliances often move into storage first. What remains should be enough to show scale, comfort, and function without revealing the full weight of daily life. Commercial properties go through a similar filtering process. Extra desks, surplus equipment, outdated signage, and inactive files often move out early so the active workspace feels lean, efficient, and future-ready before a relocation supported by commercial movers takes place.
Strategic Timing of Storage before the Actual Move
The worst time to think about storage is when boxes are already stacked in the hallway. In a staged move, storage decisions ideally begin as soon as you know the property will be listed or the space will be transitioned. That might be a month or more before the main moving date. Starting early gives you time to sort, label, and prioritize instead of throwing things together in a panic.
An early storage phase also helps you test how the home feels with less in it. You may discover that removing a few large pieces transforms a cramped room into an open, inviting space. For commercial spaces, early storage lets operations continue with fewer interruptions. Departments can send nonessential items out in waves. When the main relocation comes, much of the excess is already safely stored, and what remains is easier for a commercial movers Boston team to handle with speed and care.
The Emotional Psychology behind Letting Storage Hold Your Belongings
Letting belongings leave the house ahead of you can feel unsettling. There is always a quiet fear that once something is out of sight, it will be forgotten, damaged, or harder to reclaim. That is why some people resist using storage even when they know it would make the staging process easier. Acknowledging that emotion instead of dismissing it helps you plan more honestly and avoids last-minute regret.
The reality is that good storage is not a black hole; it is a temporary pause. When items are packed thoughtfully, labeled clearly, and placed in an environment you trust, they become easier to manage than when they are tucked into random cupboards or stacked in spare rooms. For many people, living with fewer visible possessions during staging actually reduces tension. The home feels lighter and easier to maintain. Businesses notice the same effect when storage removes outdated equipment and clutter from the floor. The workspace looks more focused, and staff can concentrate on current tasks instead of navigating around accumulated history.
Protecting Assets While They Live in Storage
Sending belongings into storage is only a good idea if they come back in the same or better condition. That is where quality control matters. Furniture, textiles, electronics, files, and artwork each have different vulnerabilities. Moisture, temperature swings, dust, and rough handling can all damage them in ways that only become obvious later. Choosing the right type of storage and packing accordingly is central to the genius of using storage as part of a staged move rather than as a desperate overflow container.
Climate-controlled units, padded wrapping, elevated pallets, careful stacking, and clearly marked boxes all reduce risk. The goal is to handle items fewer times, not more. When storage is integrated into the move plan, belongings can travel directly from the home to storage and later from storage to the new address with minimal extra movement. Many owners coordinate those transfers through a well trusted movers in Boston, so the same team that moves items out early also manages their final delivery, preserving continuity and accountability.
How Storage Reduces Risk during Multi-Phase Moves
Few staged moves happen in a single clean step. There are often gaps between listing and selling, between selling and closing, between closing and final move-out. If renovations, inspections, or office reconfigurations are involved, the timeline becomes even more layered. Storage absorbs those gaps, so you are not forced to live among towers of boxes or stack equipment in hallways waiting for the next phase.
By treating storage as a flexible middle ground, you can move things out gradually while still having access when needed. For example, archived files can go first, followed by seasonal décor, then surplus furniture. As each stage ends, fewer items remain to be shifted on the final date. This phased approach reduces the risk of rushed, late-night packing sessions, careless stacking, and damaged items. It also makes it easier for commercial moving crews to work efficiently because they are handling a manageable volume of goods at each phase rather than everything at once.
Using Storage to Maintain Clean Show-Ready Conditions
One of the hardest parts of staging is keeping the property consistently show-ready. Every viewing becomes its own small event. Floors need to be cleared, surfaces wiped, and personal items tucked away. When too many belongings remain in the home, each showing takes a heavy amount of effort. Storage cuts that workload dramatically by taking nonessentials completely off the stage.
With fewer items to move and hide, maintaining a neutral, inviting look becomes much more realistic. You are not scrambling to stuff things into closets or push items under the bed. Instead, the home sits closer to show condition all the time, and the final touches before a viewing are minimal. In commercial environments, using storage helps maintain a professional appearance for clients and staff, even while the space is being prepared for a larger transition. Active tools and furniture stay in play, while inactive pieces quietly support the future from storage.
Storage as a Strategic Tool in Business Relocation Planning
For businesses, storage is more than a convenience; it is part of risk management. Office relocations and staged commercial moves have to juggle lease deadlines, equipment deliveries, IT cutovers, and staffing realities. Trying to shift everything in one move often results in downtime, lost files, and strained teams. Storage turns the move into a series of controlled steps instead of a single disruptive jump.
Unused furniture, archived documents, and non-critical inventory can be moved into storage weeks ahead of the main relocation. As the new space becomes ready, items can move out of storage and directly into position. This reduces double-handling and keeps the old and new locations from filling with half-unpacked material. A business that coordinates these flows with professional commercial movers in Boston usually experiences smoother transitions, because storage is treated as a working part of the operational plan rather than a leftover problem.
The Hidden Cost Benefits of Proper Storage Planning
On paper, storage looks like an extra expense. In reality, poorly managed moves cost far more. When everything is rushed into boxes at the last minute, items are damaged, misplaced, or transported multiple times. Extra labor hours, emergency packing supplies, replacement furniture, and extended timelines quickly outweigh the cost of well-used storage. Staging without storage also tends to keep homes and offices crowded longer, which can hurt impressions and, in the case of a sale, influence offers.
When storage is integrated from the beginning, you minimize waste. You handle items fewer times, you know where things are, and you avoid paying people to shift the same objects repeatedly. Staged homes that look better often sell faster or draw stronger interest, which helps recover investment on the back end. Businesses benefit from less downtime, safer handling of equipment, and predictable work schedules. Those gains are why many clients prefer partnering with a commercial moving company in Boston that understands storage as a cost-control tool, not just a place to park overflow.
Conclusion
The true genius of using storage during a staged home move is that it quietly rewrites the rules of transition. Instead of treating space as something that must absorb every box and belonging until the last possible moment, you treat storage as a flexible extension of the home or office. This shift in thinking opens rooms, clears sightlines, and makes every phase of the move more intentional. Staging becomes easier, maintenance becomes lighter, and the stress of living in a half-moved environment drops noticeably. When storage is chosen carefully, used early, and coordinated with the overall moving plan, it protects both physical assets and emotional energy. Buyers and visitors see a calm, collected space. You experience a less chaotic path from “here” to “there.” Whether you are selling a home, repositioning a business, or managing a complex phased relocation, storage can turn a disruptive event into a managed, almost elegant process.
For people who want that level of control and care during a staged move, Stairhopper movers have built a strong reputation by treating storage, timing, and transport as parts of one connected strategy. Their team is known for listening closely, planning around real-life constraints, and moving both residential and commercial clients through transitions with calm, steady execution. They approach every project as a partnership, aligning storage use, staging needs, and final delivery so that what matters most arrives safely, on schedule, and with as little disruption as possible.
Frequently Asked Questions
Q1. When should I arrange storage for a staged home move?
Ideally, four to six weeks before listing or transition, so clearing, packing, and staging can happen gradually without rushed decisions or last-minute stress.
Q2. Is climate-controlled storage necessary for staged moves?
It is highly recommended for wood furniture, electronics, artwork, and documents, since temperature and humidity swings can quietly damage materials over time.
Q3. How does storage help keep a home show-ready?
By moving nonessential items off-site, daily tidying becomes simpler, and each room can stay closer to a staged condition between viewings or inspections.
Q4. Can storage reduce the length of the final moving day?
Yes. When many items are moved into storage in advance, the final moving day focuses on essentials, which shortens timelines and reduces physical and mental strain.
Q5. Is storage useful for short-term business relocations?
Even in short relocations, storage helps prevent overcrowded offices and allows departments to move in phases without interrupting everyday operations.
Q6. How do I decide what should go into storage first?
Start with rarely used items, seasonal décor, surplus furniture, and archived materials, then work toward pieces that are visually distracting or make rooms feel cramped.
Q7. Will using storage make it harder to find things later?
Not if packing and labeling are done carefully. Clear categories, room-based labels, and simple inventories make stored items easier to locate than when scattered at home.
Q8. Does storage still make sense if my move happens in one day?
Yes, because staging and preparation begin well before that day. Storage keeps the home functional and attractive during the weeks leading up to the final move.
 Light it Up AV & Turf
Project Description
Govee Permanent Outdoor Lights 2 Precision Home Installation
This project features the professional installation of the next-generation Govee Permanent Outdoor Lights 2 system. Known for their upgraded brightness and enhanced color rendering, these lights require a precise, calculated layout—especially since the manufacturer guidelines restrict cutting into the main line, presenting a unique installation challenge.
Key Features of This Installation:
Next-Gen Exterior Illumination: Outfitted with the newly released Govee Permanent Outdoor Lights 2, delivering brilliant architectural down-lighting, incredible holiday presets, and daily accent lighting.
Creative Technical Problem Solving: Because these specialized strands could not be cut without voiding the integrity of the system, we meticulously engineered the run layout. To achieve a perfectly flush finish at the roofline edge, we successfully executed a custom shortening and capping technique on the final strands.
Flawless Eave Integration: The lights were mounted at the optimal distance from the fascia to ensure a perfectly uniform, triangular cone wash down the home's exterior walls, eliminating hot spots and dark gaps.
Smart Ecosystem Control: Fully integrated into the homeowner's smart ecosystem, allowing for voice control, scheduled automation, and endless customization through the native app interface.
Our Specialized Lighting Expertise
Smart lighting systems require more than just hanging a strand—they require precision planning. We specialize in handling high-end retail and commercial systems, providing:
Advanced Layout Mapping: Ensuring your runs look symmetrical and perfectly tailored to your roofline before a single clip is mounted.
Out-of-the-Box Troubleshooting: Finding safe, manufacturer-approved technical workarounds for complex roof lines where standard plug-and-play methods fall short.
Clean Wire Management: Tucking and hiding all jump wires and power supplies for a seamless daytime appearance.
16