
Search results for "Shoulder" in Home Design Ideas

 Dino Carbetta Italian Fine Art Photography
“The mystical reflections of Villa Borghese – Rome”… I stumbled into photography just before graduation at the U of TN while volunteering at a local hospital where I was influenced to attend Brooks Institute. The instructors preached the technical aspects of photography, and upon graduation…we could implement our own artistic vision. As a commercial photographer since graduation, I have had little time to express my artistic vision…until I went to Italy for the first time, where I discovered my true love and passion! I consider myself a “contemplative” photographer, and as such, I have a three-part process to achieve my final presentation for each image: the discovery, how I perceive the image creation, and how I hope others will perceive the image. This artistic pursuit, I imagine, is similar to Michelangelo viewing a piece of marble for the first time. Villa Borghese in Roma is a famous Gardens and Museum begun in the early 17th century, highlighted by a "Temple of Aesculapius” at the garden lake. Surrounding this small lake is a three-foot iron fence, which I now affectionately call “Il lago di dolore”, or Lake Pain! I tried to cross this iron fence with camera in hand and a 20lb bag on my shoulder…needless to say, it did not go well! Despite the intense pain, I continued to take 60 images around the lake, and upon return home, I stubbornly refused to look at them until recently. My disdain for Lake Pain kept me from discovering the true artistic vision I first saw when I began creating these images. I finally gave into the contempt I had for the Lake and began working on several images. Perhaps, the viewer will perceive the great pain it took to finally engender a feeling of solace and peace in the true vision, and find that suffering eventually brought forth eminent beauty. As for this photographer, Il lago di dolore will be a constant reminder that the creation of great art sometimes endures great pain!
 M.T.N Design
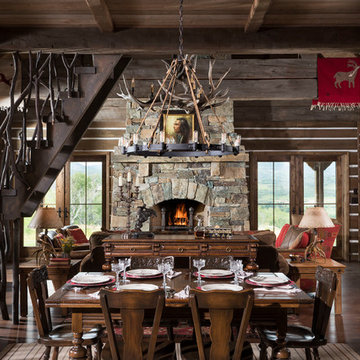
The dining room space flows into the rustic great room.
Architecture by M.T.N Design, the in-house design firm of PrecisionCraft Log & Timber Homes. Photos by Heidi Long.
 Saikley Architects
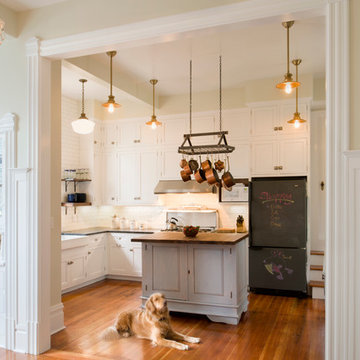
Kitchen, bath and master bedroom remodel on a very modest budget. Cramped, dark spaces with inefficient floor plans were opened up and made much more functional. Many salvaged parts were used in the project for economy and beauty. The Victorian style was respected while also making the spaces contemporary in feeling and use.
https://saikleyarchitects.com/portfolio/victorian-salvage/
Find the right local pro for your project
 Rooted By Design
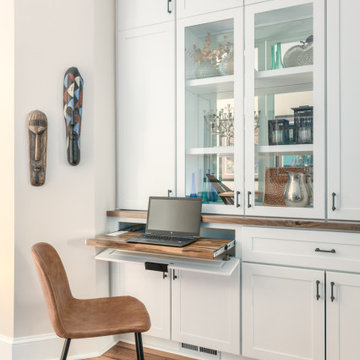
Philadelphia Row Home Renovation focusing on maximizing storage for a young family of 5. We created a "mudroom" in the front of the row home with a large living room space for family time + hosting. We used kid-friendly furnishings with performance fabrics that are durable and easy to clean. Prioritized eco-friendly selections, utilizing locally sourced + American made pieces.


 Custom Surface Solutions
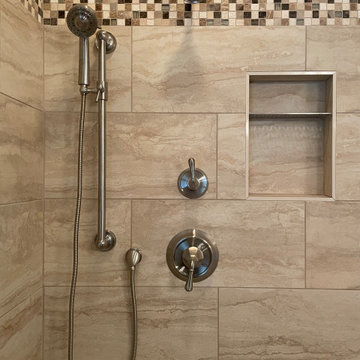
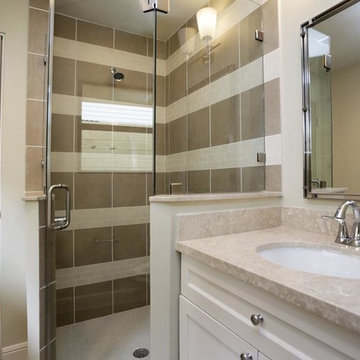
Custom Surface Solutions (www.css-tile.com) - Owner Craig Thompson (512) 966-8296. This project shows a shower / bath and vanity counter remodel. 12" x 24" porcelain tile shower walls and tub deck with Light Beige Schluter Jolly coated aluminum profile edge. 4" custom mosaic accent band on shower walls, tub backsplash and vanity backsplash. Tiled shower niche with Schluter Floral patter Shelf-N and matching . Schluter drain in Brushed Nickel. Dual undermount sink vanity countertop using Silestone Eternal Marfil 3cm quartz. Signature Hardware faucets.
 Jamie House Design
Jamie House Design partnered with P and G Homes to expand and renovate this original Garden Oaks home.
Jamie House works with builders to design cabinetry/molding, select all materials, select exterior colors/ moldings/ window styles and landscaping in the Houston area.
Staging is by The Luxe Designer.
 The Outdoor Kitchen Design Store
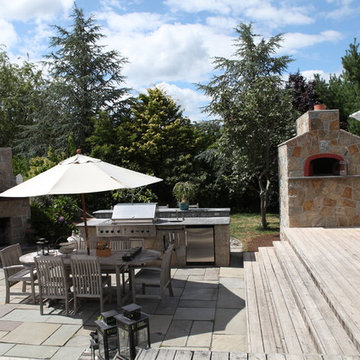
Michael Gotowala founder of THE OUTDOOR KITCHEN DESIGN STORE. Tuscany fire Outdoor Pizza Oven.Outdoor Pizza Ovens are todays hottest trend in Outdoor Living. Outdoor Living should look, feel and taste FABULOUS.
The free standing wood fired Tuscany Fire Outdoor Pizza Oven is perfect for family outings.
The realism is the trend of outdoor dining and preparation that reaches far beyond the grill. The wood fired Outdoor Pizza oven can cook pizza, calzones, baked stuff shells, breads and much more.
Two ways to cook with the Wood Fired Pizza Oven.
One way with the door open and flamed pushed to the side and pizza place on the other. The Pizza is cooked right on the floor of the oven.
Secondly is the old fashioned hearth oven technique of escalating the temperature of the oven and then closing the door with the food placed in the now temperate oven heat.
The Outdoor Pizza oven is a great way to anchor teens home outdoors with family and friends.
Michael Gotowala founder of THE OUTDOOR KITCHEN DESIGN STORE.Outdoor Living should look, feel and taste FABULOUS.
The free standing DI FIORE Outdoor Pizza Oven is perfect for family outings.
The realism is the trend of outdoor dining and preparation that reaches far beyond the grill. The wood fired Outdoor Pizza oven can cook pizza, calzones, baked stuff shells, breads and much more.
Two ways to cook with the Wood Fired Pizza Oven.
One way with the door open and flamed pushed to the side and pizza place on the other. The Pizza is cooked right on the floor of the oven.
Secondly is the old fashioned hearth oven technique of escalating the temperature of the oven and then closing the door with the food placed in the now temperate oven heat.
The Outdoor Pizza oven is a great way to anchor teens home outdoors with family and friends.
For more great Outdoor Pizza Oven ideas and projects go to THE OUTDOOR KITCHEN DESIGN STORE.
www.Outdoorkitchendesigner.com www.OutdoorLivingDesignerCt.com
For more great Outdoor Pizza Oven ideas and projects go to THE OUTDOOR KITCHEN DESIGN STORE.
www.Outdoorkitchendesigner.com
Michael Gotowala founder of THE OUTDOOR KITCHEN DESIGN STORE
 Harmonic Horticulture and Construction
I think that many carpenters today consider nails and screws to be what holds a structure together. As a result, I think that many structures today are held together by little more than nails and screws. I often see knee braces bolted to the side of a post for a pergola when they should be positioned between the post and beam to take the load directly. Fasteners should not be load-bearing! They should be used to pin a piece of lumber into a position that allows it to shoulder the load directly.
Nails and screws are fast. When used appropriately, they can keep costs down by reducing the time it takes to build something. But they are not the answer to everything. Joist hangars do little to stop a deck from pulling away from a house, just as nailing from the side is not a replacement for putting a post directly under a beam.
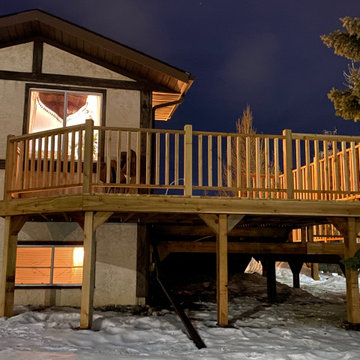
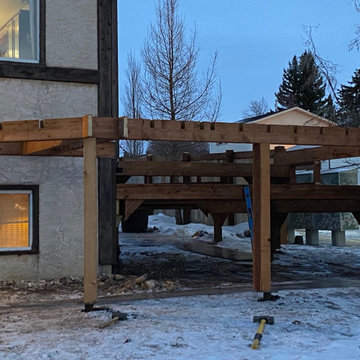
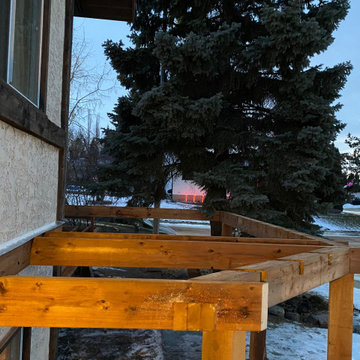
On more than one occasion I've solved a challenging framing problem by employing lap-joints. I've used lap-jointed framing to build curves without having to bend wood, and in the example shown I've used them simply to avoid having to look at an unsightly beam underneath a raised section of deck.
I cut notches half way through my beam where the joists will go, then I cut a corresponding notch into each joist that allows it to fit into the notch in the beam. This allows the joists to cantilever 'through' the beam, which gives me a number of advantages. Using this technique, I can build deck frames tight to the ground without having to rim the structure with joist-hangared beams. I can also use the cantilever to sculpt the edge of the deck into nearly any shape.
As the lumber is locked in from every direction, it is also a far stronger joint than a joist-hangared butt-end, as it resists pulling away, and it is stronger than joist-on-beam because it does not allow for any twisting or 'flopping' of the joists. The beam and joist are locked together, and they each replace the missing pieces of one another, so there is no strength lost in either member.
-Tyler Collins, Operations Manager
 Harmonic Horticulture and Construction
I think that many carpenters today consider nails and screws to be what holds a structure together. As a result, I think that many structures today are held together by little more than nails and screws. I often see knee braces bolted to the side of a post for a pergola when they should be positioned between the post and beam to take the load directly. Fasteners should not be load-bearing! They should be used to pin a piece of lumber into a position that allows it to shoulder the load directly.
Nails and screws are fast. When used appropriately, they can keep costs down by reducing the time it takes to build something. But they are not the answer to everything. Joist hangars do little to stop a deck from pulling away from a house, just as nailing from the side is not a replacement for putting a post directly under a beam.
On more than one occasion I've solved a challenging framing problem by employing lap-joints. I've used lap-jointed framing to build curves without having to bend wood, and in the example shown I've used them simply to avoid having to look at an unsightly beam underneath a raised section of deck.
I cut notches half way through my beam where the joists will go, then I cut a corresponding notch into each joist that allows it to fit into the notch in the beam. This allows the joists to cantilever 'through' the beam, which gives me a number of advantages. Using this technique, I can build deck frames tight to the ground without having to rim the structure with joist-hangared beams. I can also use the cantilever to sculpt the edge of the deck into nearly any shape.
As the lumber is locked in from every direction, it is also a far stronger joint than a joist-hangared butt-end, as it resists pulling away, and it is stronger than joist-on-beam because it does not allow for any twisting or 'flopping' of the joists. The beam and joist are locked together, and they each replace the missing pieces of one another, so there is no strength lost in either member.
-Tyler Collins, Operations Manager
 Harmonic Horticulture and Construction
I think that many carpenters today consider nails and screws to be what holds a structure together. As a result, I think that many structures today are held together by little more than nails and screws. I often see knee braces bolted to the side of a post for a pergola when they should be positioned between the post and beam to take the load directly. Fasteners should not be load-bearing! They should be used to pin a piece of lumber into a position that allows it to shoulder the load directly.
Nails and screws are fast. When used appropriately, they can keep costs down by reducing the time it takes to build something. But they are not the answer to everything. Joist hangars do little to stop a deck from pulling away from a house, just as nailing from the side is not a replacement for putting a post directly under a beam.
On more than one occasion I've solved a challenging framing problem by employing lap-joints. I've used lap-jointed framing to build curves without having to bend wood, and in the example shown I've used them simply to avoid having to look at an unsightly beam underneath a raised section of deck.
I cut notches half way through my beam where the joists will go, then I cut a corresponding notch into each joist that allows it to fit into the notch in the beam. This allows the joists to cantilever 'through' the beam, which gives me a number of advantages. Using this technique, I can build deck frames tight to the ground without having to rim the structure with joist-hangared beams. I can also use the cantilever to sculpt the edge of the deck into nearly any shape.
As the lumber is locked in from every direction, it is also a far stronger joint than a joist-hangared butt-end, as it resists pulling away, and it is stronger than joist-on-beam because it does not allow for any twisting or 'flopping' of the joists. The beam and joist are locked together, and they each replace the missing pieces of one another, so there is no strength lost in either member.
-Tyler Collins, Operations Manager
 Ashley Martin Home
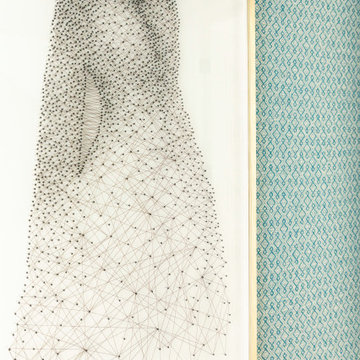
Bedroom - large transitional master light wood floor and brown floor bedroom idea in Orlando with white walls, a standard fireplace and a tile fireplace
 Melinamade - Residential Design + Interiors
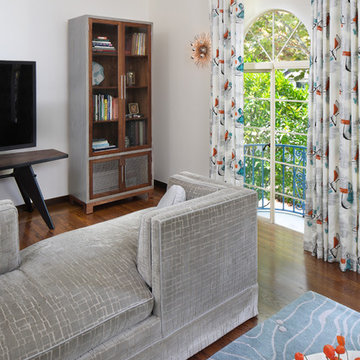
A vintage 1950s Jean Prouve table here along with a custom bone inlay starburst table, hand silk-screened draperies, custom ash/walnut cabinets, and sofas designed by Melina Copass & Preston Sharp. Due to the challenging long and narrow shape of this room, custom designed sofas, especially a Tete-a-Tete style, were needed to create combination seating for around the fireplace and the adjacent TV wall. To know more about this makeover, please read the "Houzz Tour" feature article here: http://www.houzz.com/ideabooks/32975037/list/houzz-tour-midcentury-meets-mediterranean-in-california
Bernard Andre Photography
 Village Home Stores
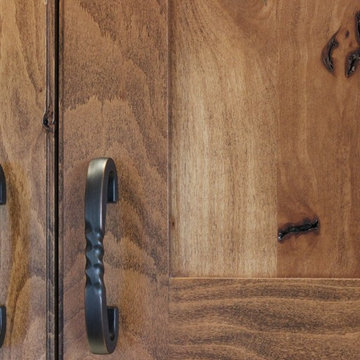
Full-overlay Rustic Beech cabinets in the "Charleston" door style and "Briarwood" finish.
Village Home Stores
Example of a large mountain style kitchen design in Chicago
Example of a large mountain style kitchen design in Chicago


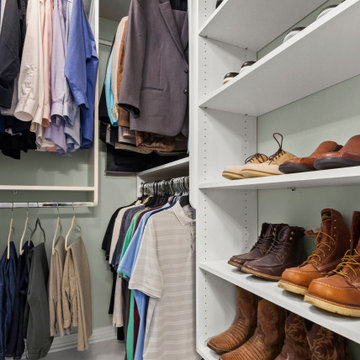
 Inspired Closets Baton Rouge
Do you ever think about DIYing your closet renovation, but you’re just not sure it’ll turn out the way you want?
This is where we found our recent client, Amanda, and her husband, Terry.
DIY Dreamers
The couple was in the middle of renovating their master bath when Amanda went down a Pinterest ‘rabbit hole.’
There in her endless scrolling, she was mesmerized by photos of beautiful master closets…efficient master closets…organized master closets…inspired master closets.
Amanda began thinking…If she and Terry were already redoing their master bath, it only made sense to renovate their ensuite closet at the same time.
They could even DIY it and save a little bit of money, too. Right?
Amanda took measurements, researched closet organization systems online, and prepared to become a closet DIY warrior.
But a little thought was holding her back.
It wasn’t that she didn’t think they could do it themselves.
Could they survive the stress of the renovation process?
What if they ended up hating the result?
What if they ended up hating each other in the process?
That’s when Amanda found us and decided to explore a different option.
A Professional Job – At the Same Price
Our Designer Felicity arrived for a consultation, worked up a complete closet renovation plan, explained our signature stress-free installation process, and gave the couple a price.
The number ended up rivaling the final DIY cost.
Amanda and Terry were sold (and relieved).
The couple’s professional closet renovation & end-to-end installation took place over just 2 days last summer.
They now have custom floor-to-ceiling closet organization – and new weight off of their shoulders that only comes with a clean, organized space.
We later returned to revamp their daughter Savannah’s closet a few weeks later.
Before you DIY your closet revamp, give us a quick call. We’d love to show you what we can do.
Request a free consultation to get started on your dream closet here: https://www.inspiredclosets.com/locations/baton-rouge/contact/
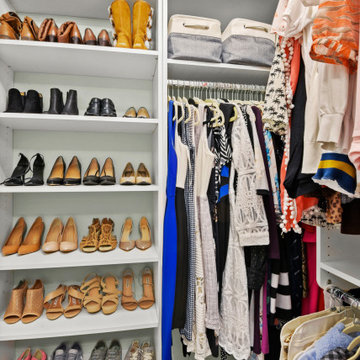 Inspired Closets Baton Rouge
Do you ever think about DIYing your closet renovation, but you’re just not sure it’ll turn out the way you want?
This is where we found our recent client, Amanda, and her husband, Terry.
DIY Dreamers
The couple was in the middle of renovating their master bath when Amanda went down a Pinterest ‘rabbit hole.’
There in her endless scrolling, she was mesmerized by photos of beautiful master closets…efficient master closets…organized master closets…inspired master closets.
Amanda began thinking…If she and Terry were already redoing their master bath, it only made sense to renovate their ensuite closet at the same time.
They could even DIY it and save a little bit of money, too. Right?
Amanda took measurements, researched closet organization systems online, and prepared to become a closet DIY warrior.
But a little thought was holding her back.
It wasn’t that she didn’t think they could do it themselves.
Could they survive the stress of the renovation process?
What if they ended up hating the result?
What if they ended up hating each other in the process?
That’s when Amanda found us and decided to explore a different option.
A Professional Job – At the Same Price
Our Designer Felicity arrived for a consultation, worked up a complete closet renovation plan, explained our signature stress-free installation process, and gave the couple a price.
The number ended up rivaling the final DIY cost.
Amanda and Terry were sold (and relieved).
The couple’s professional closet renovation & end-to-end installation took place over just 2 days last summer.
They now have custom floor-to-ceiling closet organization – and new weight off of their shoulders that only comes with a clean, organized space.
We later returned to revamp their daughter Savannah’s closet a few weeks later.
Before you DIY your closet revamp, give us a quick call. We’d love to show you what we can do.
Request a free consultation to get started on your dream closet here: https://www.inspiredclosets.com/locations/baton-rouge/contact/
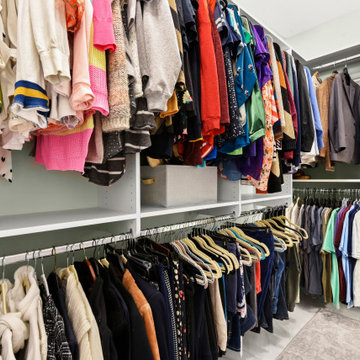 Inspired Closets Baton Rouge
Do you ever think about DIYing your closet renovation, but you’re just not sure it’ll turn out the way you want?
This is where we found our recent client, Amanda, and her husband, Terry.
DIY Dreamers
The couple was in the middle of renovating their master bath when Amanda went down a Pinterest ‘rabbit hole.’
There in her endless scrolling, she was mesmerized by photos of beautiful master closets…efficient master closets…organized master closets…inspired master closets.
Amanda began thinking…If she and Terry were already redoing their master bath, it only made sense to renovate their ensuite closet at the same time.
They could even DIY it and save a little bit of money, too. Right?
Amanda took measurements, researched closet organization systems online, and prepared to become a closet DIY warrior.
But a little thought was holding her back.
It wasn’t that she didn’t think they could do it themselves.
Could they survive the stress of the renovation process?
What if they ended up hating the result?
What if they ended up hating each other in the process?
That’s when Amanda found us and decided to explore a different option.
A Professional Job – At the Same Price
Our Designer Felicity arrived for a consultation, worked up a complete closet renovation plan, explained our signature stress-free installation process, and gave the couple a price.
The number ended up rivaling the final DIY cost.
Amanda and Terry were sold (and relieved).
The couple’s professional closet renovation & end-to-end installation took place over just 2 days last summer.
They now have custom floor-to-ceiling closet organization – and new weight off of their shoulders that only comes with a clean, organized space.
We later returned to revamp their daughter Savannah’s closet a few weeks later.
Before you DIY your closet revamp, give us a quick call. We’d love to show you what we can do.
Request a free consultation to get started on your dream closet here: https://www.inspiredclosets.com/locations/baton-rouge/contact/
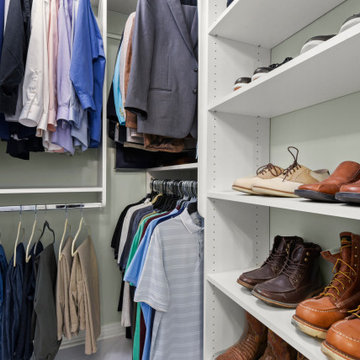 Inspired Closets Baton Rouge
Do you ever think about DIYing your closet renovation, but you’re just not sure it’ll turn out the way you want?
This is where we found our recent client, Amanda, and her husband, Terry.
DIY Dreamers
The couple was in the middle of renovating their master bath when Amanda went down a Pinterest ‘rabbit hole.’
There in her endless scrolling, she was mesmerized by photos of beautiful master closets…efficient master closets…organized master closets…inspired master closets.
Amanda began thinking…If she and Terry were already redoing their master bath, it only made sense to renovate their ensuite closet at the same time.
They could even DIY it and save a little bit of money, too. Right?
Amanda took measurements, researched closet organization systems online, and prepared to become a closet DIY warrior.
But a little thought was holding her back.
It wasn’t that she didn’t think they could do it themselves.
Could they survive the stress of the renovation process?
What if they ended up hating the result?
What if they ended up hating each other in the process?
That’s when Amanda found us and decided to explore a different option.
A Professional Job – At the Same Price
Our Designer Felicity arrived for a consultation, worked up a complete closet renovation plan, explained our signature stress-free installation process, and gave the couple a price.
The number ended up rivaling the final DIY cost.
Amanda and Terry were sold (and relieved).
The couple’s professional closet renovation & end-to-end installation took place over just 2 days last summer.
They now have custom floor-to-ceiling closet organization – and new weight off of their shoulders that only comes with a clean, organized space.
We later returned to revamp their daughter Savannah’s closet a few weeks later.
Before you DIY your closet revamp, give us a quick call. We’d love to show you what we can do.
Request a free consultation to get started on your dream closet here: https://www.inspiredclosets.com/locations/baton-rouge/contact/
 APPEARANCES INTERNATIONAL
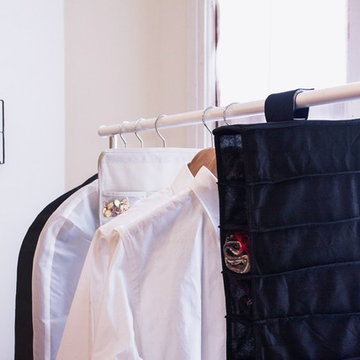
The hangers have a rich natural finish and polished chrome hook, which add warmth and sophistication to any closet décor, all while providing convenient storage and organization. These wide, rounded shoulder, wooden hangers prevent garments from unsightly hanger bumps and help maintain natural shape. They also help to increase hanging space in your closet, by keeping coordinating components stored on a single hanger.
Great for jewelry and many other storage uses, this organizer has 28 soft, clear see-through pockets to easily view and protect jewelry and other small accessory items. Alternatively, you can fill the compartments with sewing or scrap-booking notions as the perfect crafting companion! The provided hook hangs over any standard closet rod or door. With this combination of space-saving shape and accessible convenience, our organizer offers a great storage solution no matter the location.
With 4 large shelves, each supported by an innovative hanging system, this unit is well equipped to store all types of accessories, caps, sweaters, crafts, etc. Made from heavy duty polyester canvas material, this durable fabric breathes and neatly stores all of your items. Quick and easy installation (no tools required), on a standard sized closet rod. This system is the perfect organization solution for your home, dorm room, or office!
These handy storage solutions are just a small example of the many products by StorageManiac and J.S. Hanger. The innovative and sophisticated styling and design of each piece make these a welcome and useful addition to any home. These products allow you to keep everything tidy, neat, and in order, while providing a modern and sleek look. No matter the space, these products are bound to fit any need you may have!
Photo Credit: Lambert McOwusu
33