
Search results for "Simply remove" in Home Design Ideas
 Koko Architecture + Design
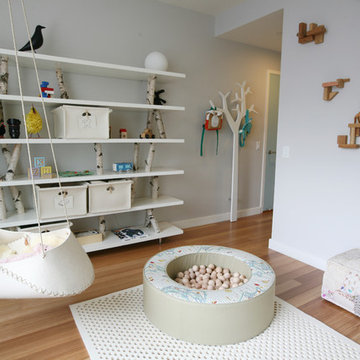
Mid-sized danish gender-neutral light wood floor kids' room photo in New York with gray walls
 Simply Home Decorating
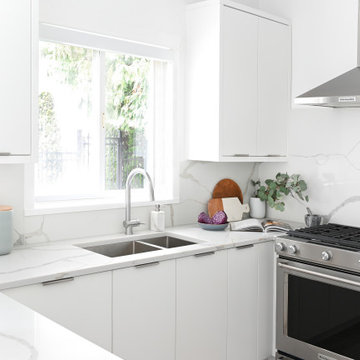
This 1990's home, located in North Vancouver's Lynn Valley neighbourhood, had high ceilings and a great open plan layout but the decor was straight out of the 90's complete with sponge painted walls in dark earth tones. The owners, a young professional couple, enlisted our help to take it from dated and dreary to modern and bright. We started by removing details like chair rails and crown mouldings, that did not suit the modern architectural lines of the home. We replaced the heavily worn wood floors with a new high end, light coloured, wood-look laminate that will withstand the wear and tear from their two energetic golden retrievers. Since the main living space is completely open plan it was important that we work with simple consistent finishes for a clean modern look. The all white kitchen features flat doors with minimal hardware and a solid surface marble-look countertop and backsplash. We modernized all of the lighting and updated the bathrooms and master bedroom as well. The only departure from our clean modern scheme is found in the dressing room where the client was looking for a more dressed up feminine feel but we kept a thread of grey consistent even in this more vivid colour scheme. This transformation, featuring the clients' gorgeous original artwork and new custom designed furnishings is admittedly one of our favourite projects to date!
 CONTENT Architecture
Photo by: Peter Molick Photography
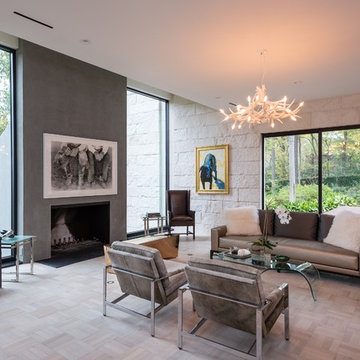
Inspiration for a contemporary formal living room remodel in Houston with a standard fireplace
Inspiration for a contemporary formal living room remodel in Houston with a standard fireplace
Find the right local pro for your project
 Soft Surroundings
Tempaper
Peel and stick. Remove or reposition. That's the beauty of Tempaper Self-Adhesive Wallpaper. In attractive styles and colors - designed by celebrities Cynthia Rowley and Genevieve Gorder, and by nature itself - Tempaper has looks that appeal to everyone.
How to use Tempaper Wallpaper: peel away the backing. Press onto a smooth, primed and painted surface (a satin or semi-gloss finish is best). Simply peel to remove or reposition. Made in USA with lead-free, phthalate-free and VOC-free materials and inks.
Bird Watching Self-Adhesive Wallpaper
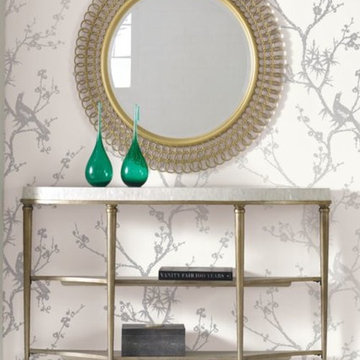
Breathtaking Bird Watching self-adhesive wallpaper was created by fashion designer, Cynthia Rowley. It silhouettes a bird and branch graphic in lustrous metallic on black, white or pink grounds. Simply peel and stick; it can be easily removed and repositioned on any primed and painted wall. A gorgeous, nature-inspired design for a statement-making wall. Black/gold, white/silver, pink/gold.
· Designed by fashion designer Cynthia Rowley
· Sold as one double roll of 27" x 27 ft., a total of 60-3/4 sq. ft.
· Pattern repeats every 27" on the diagonal
· Peel to stick; peel to remove or reposition
· Lead-free, phthalate-free, VOC-free
· Made in USA
· Use the Self-Adhesive Wallpaper Tool (08525) for effortless application

 Tile Doctor Ltd
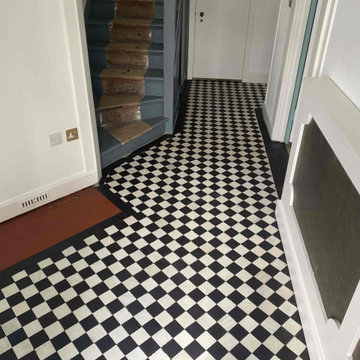
This client from North London had recently bought a property in Highgate N6 and during renovation had discovered an original Victorian tiled floor in the hallway. The floor was laid in a classic black and white diamond pattern but unfortunately a large section was missing and had been filled with concrete. Furthermore, most of the remaining floor had been covered in cement and glue.
I carried out a survey of the floor to determine the main issues and was then able to email over a quote later that day that included rebuilding the missing section of flooring. I suspect the floor had been excavated at some point in the past to install central heating and then rather than have the excavated section restored it was simply back filled and then levelled with a cement screed before finally gluing down a carpet on top.
Once the quote was accepted, I sourced replacement tiles from the Vintage Floor Tile company. Situated in Kent they are a reclamation yard that specialises in supplying original geometric and encaustic tiles including the major historical makers such as Minton and Craven Dunnill.
Armed with replacement tiles I started by removing the concrete that had been used to backfill the missing section and prepare a new surface for tiling with quick drying cement. When ready I was able to carefully build back the original pattern using the replacements. The tiles were secured with tile adhesive and once that had gone off, they were grouted.
The floor was left to set fully overnight and then the next day I was able to return and clean the whole floor using a strong dilution of Tile Doctor Remove and Go. As usual this was left to soak into the tiles for a good ten minutes before being scrubbed into the tiles using a black scrubbing pad. The Tile Doctor Remove and Go did a good job of cleaning the floor and the cleaning solution soon turned black with dirt during the scrubbing. The floor was rinsed with water and the soil extracted with a wet vacuum. After inspecting the floor any areas that needed further work were hand scrubbed and rinsed again until I was happy the floor was clean.
The last part of the cleaning process was to give the tiles an acid wash using Tile Doctor Acid Gel which further cleans the floor by removing old cement residue and grout haze. It also neutralises efflorescent salts in the tiles which are a common issue with floors of this age with no damp proof membrane. After another rinse and extraction, the floor was given a final rinse and then dried as much as possible using the wet vacuum.
I left the floor to dry out for a couple of days before returning to apply a protective sealer. Tile and Stone should be dry before sealing so I use a damp meter first to double check. All was well so to seal the tiles I proceeded to apply the first of what would be three coats of sealer. I used Tile Doctor Colour Grow for this, it works by impregnating the tile occupying the pores and thereby preventing dirt from becoming ingrained there. This product also enhances the black and white colour of the tiles and makes the floor much easier to clean.
Once done the floor was transformed and needless to say my customer was very pleased with the result. For the aftercare of Victorian Tiled floors, I recommend the use of a ph neural tile cleaner such as Tile Doctor Neutral Cleaner; most supermarket tile cleaners are simply too strong for use on sealed floors and can strip off the sealer prematurely.
Andrew Newstead
North London Tile Doctor



 Simply Home Decorating
This 1990's home, located in North Vancouver's Lynn Valley neighbourhood, had high ceilings and a great open plan layout but the decor was straight out of the 90's complete with sponge painted walls in dark earth tones. The owners, a young professional couple, enlisted our help to take it from dated and dreary to modern and bright. We started by removing details like chair rails and crown mouldings, that did not suit the modern architectural lines of the home. We replaced the heavily worn wood floors with a new high end, light coloured, wood-look laminate that will withstand the wear and tear from their two energetic golden retrievers. Since the main living space is completely open plan it was important that we work with simple consistent finishes for a clean modern look. The all white kitchen features flat doors with minimal hardware and a solid surface marble-look countertop and backsplash. We modernized all of the lighting and updated the bathrooms and master bedroom as well. The only departure from our clean modern scheme is found in the dressing room where the client was looking for a more dressed up feminine feel but we kept a thread of grey consistent even in this more vivid colour scheme. This transformation, featuring the clients' gorgeous original artwork and new custom designed furnishings is admittedly one of our favourite projects to date!

 Serenity Design
There are few things we enjoy nearly as much as helping a homeowner create a statement that is so exclusively them that it’s all but impossible for another to duplicate what they’re creating in their home. Sure, there can be common colors and sometimes even common themes, but for as many homeowners as there are, there are as many individual tastes, thoughts, and ideas that can inspire creativity and design. Tapping into where each homeowner is coming from is what is what brings us so much joy and excitement.
Just imagine the excitement we felt when this homeowner asked us to help him with this unusual project! He received this Jack Daniels barrel as a gift from a close friend and wanted to create a new bar in his basement to entertain family and friends. The initial thought was to have the barrel as a stand alone conversation piece, but after some further discussion we suggested using it as a focal point and thus the project was born.
Jack was known to be a man of refinement and to pay him the appropriate respect it only made sense to approach this project with an equal sense of detail in the crafting of this project, if for no other reason, we hold the same values. To match all of this with our homeowner’s fondness of entertaining friends, the warm and relaxing feeling he was looking for and the aesthetics of the room, the use of reclaimed and live-edge wood made for a natural fit.
In fact aside from a few structural 2x4s beneath the surface, the entire project is built from reused, reclaimed, or re-purposed materials. The most obvious example would be the barrel itself. A bit of research revealed that Jack Daniels only uses their barrels one time before replacing them. Rather than simply destroying them or throwing them away, the barrels are made available to the public to use for other purposes. As a side note we appreciate seeing other companies taking this responsible and earth friendly approach to business.
As a part of our own mission to reduce, reuse, and recycle as often as we can, you’ll note the wall paneling is also re-purposed materials. These particular boards we retrieved from an old building that was being removed and rather than allowing all these materials to be bulldozed with the rest of the old structure, we took as much of the old building materials as we could to use elsewhere. For this project we had the old planks and beams them re-sawn into the wall paneling you see here. Look closely at the picture and you’ll see the original nail holes in the boards that made their new home in this project.
We even incorporated the reclaimed paneling into wrapping the column the previously exposed wood beams above bar area. It adds to the overall feel by incorporating the theme into an otherwise ungainly (and obviously necessary!) part of the house structure.
All the boards in the design of the bar itself come from re-purposed, urban Ash logs. These are either aging and at-risk trees that cities need removed. Ash trees can be subject to assorted infections and diseases and it’s an unfortunate truth that once the disease is discovered, the best way to reduce it’s spreading is to remove the trees in the surrounding area. To further our mission, we take these trees before they end up in a shredder and re-purpose as many of them as we can rather than seeing them simply turned to mulch. We believe this to be a much more responsible use of available materials and just as beautiful.
Each board has so much individual character with their natural knots and swirls. We particularly enjoyed the perfectly sized and shaped piece that became the support at the far end of the bar top. It’s as if nature knew we were going to make this project and grew that board to the perfect dimensions just for this purpose!
We also had a small leftover piece that was extra knotty and so full of character that we incorporated it as a small shelf just above the barrel. Just because it’s small doesn’t mean it can’t make a statement…
Of course no bar would be complete without the top itself. We had a few extra large pieces of Ash with live edges on both sides for the owner to choose from that fit the rough dimensions we needed. His decision made, we added just a very subtle hint of blue and green with our proprietary treatment before the final finishing with epoxy to a mirror finish. We added a few recessed lights to help highlight the natural patterns in the bar top and this bar is ready to serve.
This project was satisfying for several reasons. We were thrilled we were able to complete the project entirely out of reclaimed and re-purposed materials. The homeowner’s desire for a rustic feel made it easier to accomplish this and we appreciate that we can partake in projects like this, particularly one so unique.
Custom doesn’t come out of a catalog. At Serenity Design Studio our number one goal is to see your unique vision come to life.
 Tracy Berman Interiors
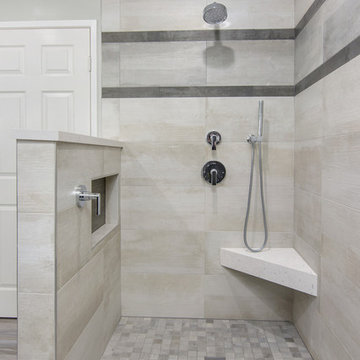
Simplicity, Calming, Contemporary and easy to clean were all adjectives the home owners wanted to see in their new Master Bathroom remodel. A oversized Jacuzzi tub was removed to create a very large walk in shower with a wet and dry zone. Corner benches were added for seating along with a niche for toiletries. The new vanity has plenty of storage capacity. The chrome fixtures coordinate with the mirrors and vanity lights to create a contemporary and relaxing Master Bathroom.
 Cary Bernstein Architect
Cesar Rubio Photography
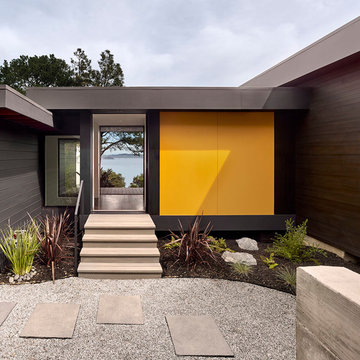
Inspiration for a mid-sized contemporary gray floor front door remodel in San Francisco with gray walls
Inspiration for a mid-sized contemporary gray floor front door remodel in San Francisco with gray walls
 Cari Giannoulias Design
Black and Tan Modern Kitchen
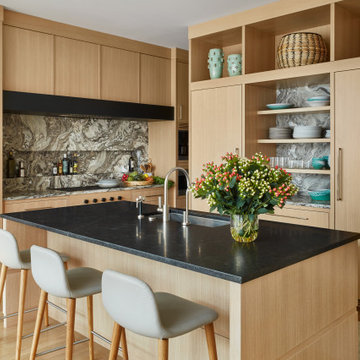
Enclosed kitchen - mid-sized transitional l-shaped light wood floor and beige floor enclosed kitchen idea in Chicago with a drop-in sink, flat-panel cabinets, beige cabinets, marble countertops, black backsplash, marble backsplash, paneled appliances, an island and black countertops
Enclosed kitchen - mid-sized transitional l-shaped light wood floor and beige floor enclosed kitchen idea in Chicago with a drop-in sink, flat-panel cabinets, beige cabinets, marble countertops, black backsplash, marble backsplash, paneled appliances, an island and black countertops
 Alyssa Collins
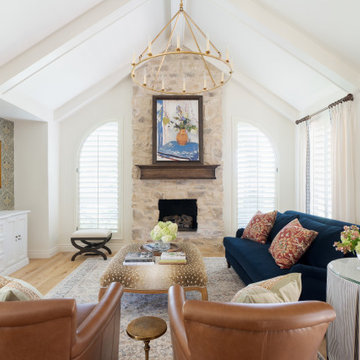
Large elegant open concept light wood floor, exposed beam and wallpaper living room photo in Oklahoma City with white walls, a standard fireplace, a stone fireplace and a wall-mounted tv

 TKS Design Group
Download our free ebook, Creating the Ideal Kitchen. DOWNLOAD NOW
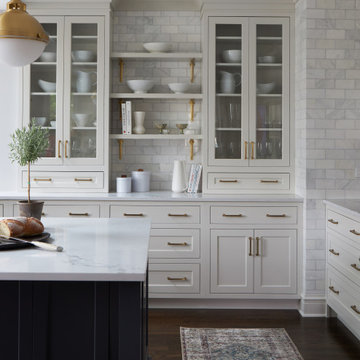
For many, extra time at home during COVID left them wanting more from their homes. Whether you realized the shortcomings of your space or simply wanted to combat boredom, a well-designed and functional home was no longer a want, it became a need. Tina found herself wanting more from her Old Irving Park home and reached out to The Kitchen Studio about adding function to her kitchen to make the most of the available real estate.
At the end of the day, there is nothing better than returning home to a bright and happy space you love. And this kitchen wasn’t that for Tina. Dark and dated, with a palette from the past and features that didn’t make the most of the available square footage, this remodel required vision and a fresh approach to the space. Lead designer, Stephanie Cole’s main design goal was better flow, while adding greater functionality with organized storage, accessible open shelving, and an overall sense of cohesion with the adjoining family room.
The original kitchen featured a large pizza oven, which was rarely used, yet its footprint limited storage space. The nearby pantry had become a catch-all, lacking the organization needed in the home. The initial plan was to keep the pizza oven, but eventually Tina realized she preferred the design possibilities that came from removing this cumbersome feature, with the goal of adding function throughout the upgraded and elevated space. Eliminating the pantry added square footage and length to the kitchen for greater function and more storage. This redesigned space reflects how she lives and uses her home, as well as her love for entertaining.
The kitchen features a classic, clean, and timeless palette. White cabinetry, with brass and bronze finishes, contrasts with rich wood flooring, and lets the large, deep blue island in Woodland’s custom color Harbor – a neutral, yet statement color – draw your eye.
The kitchen was the main priority. In addition to updating and elevating this space, Tina wanted to maximize what her home had to offer. From moving the location of the patio door and eliminating a window to removing an existing closet in the mudroom and the cluttered pantry, the kitchen footprint grew. Once the floorplan was set, it was time to bring cohesion to her home, creating connection between the kitchen and surrounding spaces.
The color palette carries into the mudroom, where we added beautiful new cabinetry, practical bench seating, and accessible hooks, perfect for guests and everyday living. The nearby bar continues the aesthetic, with stunning Carrara marble subway tile, hints of brass and bronze, and a design that further captures the vibe of the kitchen.
Every home has its unique design challenges. But with a fresh perspective and a bit of creativity, there is always a way to give the client exactly what they want [and need]. In this particular kitchen, the existing soffits and high slanted ceilings added a layer of complexity to the lighting layout and upper perimeter cabinets.
While a space needs to look good, it also needs to function well. This meant making the most of the height of the room and accounting for the varied ceiling features, while also giving Tina everything she wanted and more. Pendants and task lighting paired with an abundance of natural light amplify the bright aesthetic. The cabinetry layout and design compliments the soffits with subtle profile details that bring everything together. The tile selections add visual interest, drawing the eye to the focal area above the range. Glass-doored cabinets further customize the space and give the illusion of even more height within the room.
While her family may be grown and out of the house, Tina was focused on adding function without sacrificing a stunning aesthetic and dreamy finishes that make the kitchen the gathering place of any home. It was time to love her kitchen again, and if you’re wondering what she loves most, it’s the niche with glass door cabinetry and open shelving for display paired with the marble mosaic backsplash over the range and complimenting hood. Each of these features is a stunning point of interest within the kitchen – both brag-worthy additions to a perimeter layout that previously felt limited and lacking.
Whether your remodel is the result of special needs in your home or simply the excitement of focusing your energy on creating a fun new aesthetic, we are here for it. We love a good challenge because there is always a way to make a space better – adding function and beauty simultaneously.
 Diane Durocher Interiors
Peter Rymwid Architectural Photography
Co-designed with Peter Salerno
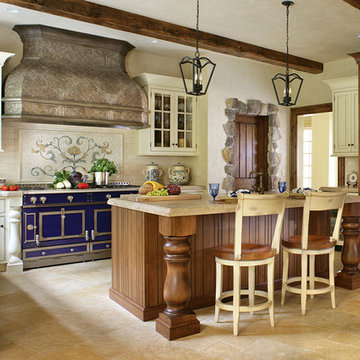
Inspiration for a mediterranean kitchen remodel in New York with raised-panel cabinets, light wood cabinets, beige backsplash, subway tile backsplash, colored appliances and an island
Inspiration for a mediterranean kitchen remodel in New York with raised-panel cabinets, light wood cabinets, beige backsplash, subway tile backsplash, colored appliances and an island
 Donna Gilliam Interiors
Photography by Laura Rockett
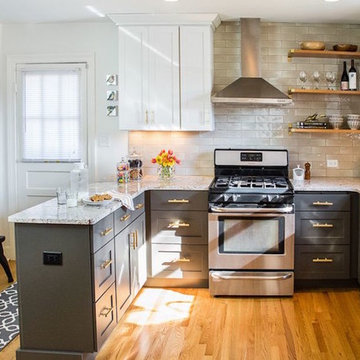
Example of a mid-sized transitional u-shaped medium tone wood floor enclosed kitchen design in Nashville with an undermount sink, shaker cabinets, granite countertops, beige backsplash, subway tile backsplash, stainless steel appliances, a peninsula and black cabinets
Example of a mid-sized transitional u-shaped medium tone wood floor enclosed kitchen design in Nashville with an undermount sink, shaker cabinets, granite countertops, beige backsplash, subway tile backsplash, stainless steel appliances, a peninsula and black cabinets
 Key Residential
Versatile Imaging
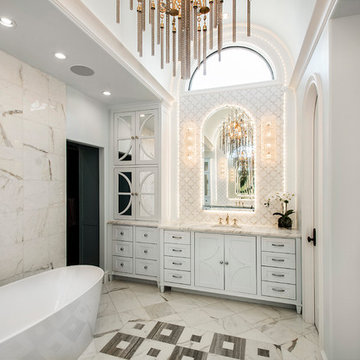
Inspiration for a large timeless master white tile and marble tile marble floor and multicolored floor freestanding bathtub remodel in Dallas with white walls, an undermount sink, white countertops, white cabinets and shaker cabinets
Inspiration for a large timeless master white tile and marble tile marble floor and multicolored floor freestanding bathtub remodel in Dallas with white walls, an undermount sink, white countertops, white cabinets and shaker cabinets


 Carpet Cleaning Pros
Carpet Cleaning Pros
Obtain your totally free Carpet Cleaning Quote Today! Serving all locations in Johannesburg City
Your carpetings experience a lot of damage and need to be skillfully cleansed at least yearly.
We clean much more than simply rugs! We can aid with furniture, mattresses, workplace chairs, deodorising and also a lot more!
Carpet Cleaning Pros is Johannesburg City leading carpet cleaning company. We head out of our means to provide superb customer care and also professional carpet and furniture cleaning services.
We run throughout Johannesburg City so give us a call currently!
Carpet Cleaning Pros
Address: Shop 8, 406 Southern Klipriviersberg Rd, Steeledale, Johannesburg City, 2197
087 250 0268
Website: https://www.carpetcleaningpros.co.za/
Social Media: https://www.facebook.com/Carpet-Cleaning-Pros-105599832051569 https://www.youtube.com/channel/UCb0lO04xmlg0s8X0bWSIAqQ/ https://za.pinterest.com/parpetcleaningpros/
Carpet Cleaning Pros - Carpet Cleaning in Johannesburg City. Carpet Cleaning Pros South Africa - Fast, Affordable, Free Quotes. Quick results, remove stains, restore to new. Serving all areas in South Africa, Durban, Cape Town, Joburg, Pretoria.
The Carpet Cleaning Pros Special Technique
Carpet Cleaning Pros uses our own unique technique for specialist carpet cleaning:
Pre-clean examination. Prior to cleaning your carpets or upholstery, our experts inspect the location for discolorations, tracked-in dust and also locations of problem.
Pre-clean treatment. Based on the pre-clean assessment, your carpet cleaning pro will certainly treat any kind of spots to eliminate stubborn dirt. We likewise deal with woollen carpets with a brownout solution.
Specialist cleaning. This is where the magic takes place. Using our specialized equipment as well as high-tech solutions, we expertly deep clean your carpets or furniture.
Rinsing. Our rinsing stage gets rid of the cleaning service and any kind of continuing to be accumulation.
Deodorizing. We will deal with the location with our special ventilating option if you require your rugs or upholstery deodorised.
Quick-dry. With our special method, your rugs as well as upholstery will be completely dry prior to you understand it!
Carpet Cleaning Johannesburg City
Did you recognize that you should have your carpetings professionally cleansed a minimum of once a year?
Your rugs hold any kind of dust, dirt, germs as well as allergens that people track in, as well as specialist cleaning can remove all this.
Over time, carpets can create an undesirable smell.
We will skillfully clean your carpets promptly and also efficiently, and also they'll be completely dry within a couple of hours!
It's less expensive than you believe so call currently for a totally free quote!
Office Chair and Furniture Cleaning Johannesburg City
Workplace chairs, couches and also other soft furniture can obtain very unclean.
Don't enable your consumers to obtain the incorrect impact of your workplace, as well as get your carpetings and furnishings cleansed on a regular basis.
Our expert cleaning will get rid of dirt, stains as well as irritants for a healthy workplace.
Call us right here for a free quote!
Upholstery Cleaning Johannesburg City
Sofas, curtains, drapes, area rugs, and also furniture with upholstery all require normal, specialist cleaning.
This not just keeps them clean and hygienic, but additionally extends their life-span.
Visit this site for a totally free quote for upholstery cleaning.
Bed as well as Mattress Cleaning Johannesburg City
Your bed and cushion has a great deal of hidden dust that is unclean and can also make you ill.
After a short while, a brand-new mattress will contain dead skin cells, sweat, dander, dirt, dirt and also various other toxic irritants. This can make your allergic reactions flare as well as supply an unclean sleeping place.
The good news is that regular mattress cleaning can prevent this.
Call right here to reserve a specialist mattress cleaning.
Office, Church, Synagogue as well as Mosque Cleaning
Carpet Cleaning Pros uses professional office, mosque, synagogue and also church cleaning.
These buildings all see a lot of traffic through their doors. Rugs can soon get upholstered and unclean chairs as well as benches can become discolored and unhygienic.
We provide economical prices for cleaning workplaces, mosques, churches and also synagogues. We run throughout Johannesburg City and will involve you!
To reserve your professional cleaning, go here.
Ventilating
Carpet Cleaning Pros additionally uses specialist ventilating services.
Deodorising can be very effective in a variety of circumstances:
Pet dog messes. Cat pee is specifically potent-smelling as well as can be tough to get out on your own. Our expert deodorising can remove offensive family pet mess smells.
Water damage. If your carpets have been water damaged, the trapped water in the carpets can end up being moudly and also smelly. Specialist deodorising can clean and then remove the scent.
Old carpets. Rather of ripping them up you may desire to maintain them if your carpets are old however still in excellent adequate condition to continue making use of. A professional clean and deodorising can eliminate moldy smells from old rugs.
Food splashes. Mistakenly spilt food on your carpets? Obtain them deodorised and smelling like new!
Sick spaces. It will be almost difficult to remove the scent on your very own if someone has actually thrown up on your carpets. We will professionally deep clean and afterwards deodorise the location, making it as if it never happened!
Obtain your totally free Carpet Cleaning Quote Today! Based on the pre-clean examination, your carpet cleaning pro will treat any kind of discolorations to remove persistent dust. Utilizing our specialist devices as well as high-tech options, we professionally deep clean your carpetings or furniture.
If your carpets have actually been water harmed, the trapped water in the carpets can end up being moudly and also stinky. A professional clean as well as deodorising can get rid of mildewy smells from old rugs.
 Tile Doctor Ltd
This is a large 17.2 m2 Sandstone Floor installed throughout the living and kitchen areas of a property in the beautiful village of Disley close to Lyme Park which is run by the National Trust. The floor had been installed four years ago and my client was unhappy with the original sealer which hadn’t lasted very long. Without the protection of a sealer dirt had become ingrained in the pores of the stone which was now difficult to clean. Another issue was the rough nature of the Sandstone meant it was impossible to mop as it shreds the mop! As a result, the floor was mainly cleaned with a hoover which was not ideal, especially in a kitchen.
I went over to survey the floor and before quoting I ran a small test clean in the kitchen which took the floor back to its natural pale colour and really showed how dirty the floor had become. Test cleans are great as it helps me to formulate an effective cleaning plan and provide an accurate quote. My client was impressed with the result and so I was booked to come back and deep clean and then reseal the whole floor. Due to its size I estimated the floor would take two days to deep clean and a further day to apply a new sealer, so three days in total.
Working in large sections I started by cleaning the floor and stripping off the old sealer with a strong dilution of Tile Doctor Remove and Go which is a coatings remover that is safe to use on stone. The solution was left to soak into the pores of the Sandstone for ten minutes before being worked in with a 200-grit diamond pad fitted to a rotary floor machine. This action not only removed the old sealer and cleaned the floor but the 200-grit pad being vey coarse removed a lot of the roughness from the surface of the Sandstone so it shouldn’t shred any more mops.
After rinsing the floor with water and removing the slurry with a wet vacuum I set about cleaning the grout with Tile Doctor Pro-Clean worked into the grout line with a stiff brush and assisted with steam from a professional steam cleaner with a grout attachment. Once done the floor was rinsed and extracted again to remove the soil from the grouting. There was also an area near one of the doors where the grout had become loose and needed replacing so I made up a batch of matching grout and filled this in. The floor was then left overnight to dry with assistance from a couple of air movers.
I returned the next day to finish the floor by applying a sealer. First, I double checked the floor was dry with the damp meter. The readings confirmed the air movers had done a good job and that the floor was within the accepted parameters, so I was ready to seal. The sealer I chose was Tile Doctor Seal and Go which being water based doesn’t leave a smell as it dries, it really works well on Sandstone and adds a nice subtle sheen to the stone.
Once finished the floor looked much cleaner, lighter in colour overall more inviting, you could even see the fossils in some of the tiles.
The surface was also smoother so the customer should find cleaning with a mop much easier in future. On that subject its worth pointing out that owners of sealed floors should always use a neutral pH tile cleaner on their floors as most supermarket products are simply too strong and will prematurely strip the sealer off a tile if used repeatedly. Tile Doctor sell a product called Tile Doctor Neutral Cleaner which is ideal for cleaning sealed Sandstone floors like this one.
My client was really happy with the results and sent me a message later saying: “the floor looks amazing!”
Kamila Logonzy
East Cheshire Tile Doctor
15