
Search results for "Slowly sinking" in Home Design Ideas

 Paradise Found Construction
Over the years, the deck of this large executive home had been slowly pulling away from the house. Many of the 2 ft. x 2 ft. masonry support piers had begun to sink and lean in various directions. Unfortunately, the problem wasn’t isolated to just the deck support columns. An inspection of the columns supporting the adjacent Sunroom confirmed that the same structural failures were occurring to all of them.
An excavation of one of the piers and its concrete footer revealed that the Sunroom and half of the Deck columns had been built on soil fill, and were slowly sinking and tilting away from the house. The only permanent solution to keep the Deck and Sunroom from collapsing was to replace the piers and the underlying footers.
The Sunroom and a portion of the Deck were jacked up and supported by wooden cribs until new 2 ft. x 2ft. solid masonry columns could be built to replace the failed ones. In order to create enough bearing support under the footers, galvanized steel helical screws were driven under each column footer to an average depth of 26 feet. Concrete footers were poured on top of the screws, and each footer was tied into the adjacent footer and eventually back into the foundation of the home by a series of stabilizing rebar and concrete cross-tie footers.
Once all 14 of the failed columns were rebuilt, the Sunroom was lowered onto the new support piers. A new deck was built to replace the compromised section, and the rest of the original decking and railings were removed and replaced. After the new wood had been acclimated to weather for several months and allowed to dry out and stabilize, the deck and railings were stained and sealed.
 Paradise Found Construction
Over the years, the deck of this large executive home had been slowly pulling away from the house. Many of the 2 ft. x 2 ft. masonry support piers had begun to sink and lean in various directions. Unfortunately, the problem wasn’t isolated to just the deck support columns. An inspection of the columns supporting the adjacent Sunroom confirmed that the same structural failures were occurring to all of them.
An excavation of one of the piers and its concrete footer revealed that the Sunroom and half of the Deck columns had been built on soil fill, and were slowly sinking and tilting away from the house. The only permanent solution to keep the Deck and Sunroom from collapsing was to replace the piers and the underlying footers.
The Sunroom and a portion of the Deck were jacked up and supported by wooden cribs until new 2 ft. x 2ft. solid masonry columns could be built to replace the failed ones. In order to create enough bearing support under the footers, galvanized steel helical screws were driven under each column footer to an average depth of 26 feet. Concrete footers were poured on top of the screws, and each footer was tied into the adjacent footer and eventually back into the foundation of the home by a series of stabilizing rebar and concrete cross-tie footers.
Once all 14 of the failed columns were rebuilt, the Sunroom was lowered onto the new support piers. A new deck was built to replace the compromised section, and the rest of the original decking and railings were removed and replaced. After the new wood had been acclimated to weather for several months and allowed to dry out and stabilize, the deck and railings were stained and sealed.

 Revealing Redesign
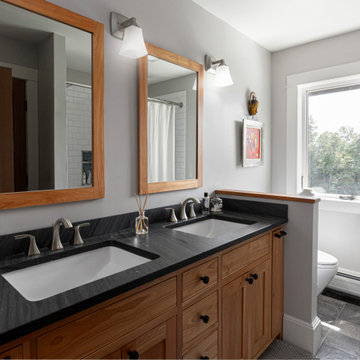
This master bathroom is a part of a whole house renovation we tackled starting in 2016, slowly and intentionally recreating each space in the house so that each room could be an updated, lovely space that FELT LIKE HOME to my clients.
In the master bath, we reconfigured the existing footprint of the bathroom, eliminating the large tub they no longer wanted, and relocating the door to the bedroom to allow space for a double vanity in the layout (a must for this professional couple on busy mornings), and so that a larger shower could be incorporated.
Also included in the design is a built-in window seat with drawers, and a linen closet, providing plenty of additional storage.
The finishing touches combine the classic materials such as marble counters and the color combination of blue and white, paired with modern details, such as the herringbone wood-like tile, to give an eclectic, timeless feel to the room.
Find the right local pro for your project
 Paradise Found Construction
Over the years, the deck of this large executive home had been slowly pulling away from the house. Many of the 2 ft. x 2 ft. masonry support piers had begun to sink and lean in various directions. Unfortunately, the problem wasn’t isolated to just the deck support columns. An inspection of the columns supporting the adjacent Sunroom confirmed that the same structural failures were occurring to all of them.
An excavation of one of the piers and its concrete footer revealed that the Sunroom and half of the Deck columns had been built on soil fill, and were slowly sinking and tilting away from the house. The only permanent solution to keep the Deck and Sunroom from collapsing was to replace the piers and the underlying footers.
The Sunroom and a portion of the Deck were jacked up and supported by wooden cribs until new 2 ft. x 2ft. solid masonry columns could be built to replace the failed ones. In order to create enough bearing support under the footers, galvanized steel helical screws were driven under each column footer to an average depth of 26 feet. Concrete footers were poured on top of the screws, and each footer was tied into the adjacent footer and eventually back into the foundation of the home by a series of stabilizing rebar and concrete cross-tie footers.
Once all 14 of the failed columns were rebuilt, the Sunroom was lowered onto the new support piers. A new deck was built to replace the compromised section, and the rest of the original decking and railings were removed and replaced. After the new wood had been acclimated to weather for several months and allowed to dry out and stabilize, the deck and railings were stained and sealed.
 Revealing Redesign
This master bathroom is a part of a whole house renovation we tackled starting in 2016, slowly and intentionally recreating each space in the house so that each room could be an updated, lovely space that FELT LIKE HOME to my clients.
In the master bath, we reconfigured the existing footprint of the bathroom, eliminating the large tub they no longer wanted, and relocating the door to the bedroom to allow space for a double vanity in the layout (a must for this professional couple on busy mornings), and so that a larger shower could be incorporated.
Also included in the design is a built-in window seat with drawers, and a linen closet, providing plenty of additional storage.
The finishing touches combine the classic materials such as marble counters and the color combination of blue and white, paired with modern details, such as the herringbone wood-like tile, to give an eclectic, timeless feel to the room.
 Revealing Redesign
This master bathroom is a part of a whole house renovation we tackled starting in 2016, slowly and intentionally recreating each space in the house so that each room could be an updated, lovely space that FELT LIKE HOME to my clients.
In the master bath, we reconfigured the existing footprint of the bathroom, eliminating the large tub they no longer wanted, and relocating the door to the bedroom to allow space for a double vanity in the layout (a must for this professional couple on busy mornings), and so that a larger shower could be incorporated.
Also included in the design is a built-in window seat with drawers, and a linen closet, providing plenty of additional storage.
The finishing touches combine the classic materials such as marble counters and the color combination of blue and white, paired with modern details, such as the herringbone wood-like tile, to give an eclectic, timeless feel to the room.
 Revealing Redesign
This master bathroom is a part of a whole house renovation we tackled starting in 2016, slowly and intentionally recreating each space in the house so that each room could be an updated, lovely space that FELT LIKE HOME to my clients.
In the master bath, we reconfigured the existing footprint of the bathroom, eliminating the large tub they no longer wanted, and relocating the door to the bedroom to allow space for a double vanity in the layout (a must for this professional couple on busy mornings), and so that a larger shower could be incorporated.
Also included in the design is a built-in window seat with drawers, and a linen closet, providing plenty of additional storage.
The finishing touches combine the classic materials such as marble counters and the color combination of blue and white, paired with modern details, such as the herringbone wood-like tile, to give an eclectic, timeless feel to the room.

 Paradise Found Construction
Over the years, the deck of this large executive home had been slowly pulling away from the house. Many of the 2 ft. x 2 ft. masonry support piers had begun to sink and lean in various directions. Unfortunately, the problem wasn’t isolated to just the deck support columns. An inspection of the columns supporting the adjacent Sunroom confirmed that the same structural failures were occurring to all of them.
An excavation of one of the piers and its concrete footer revealed that the Sunroom and half of the Deck columns had been built on soil fill, and were slowly sinking and tilting away from the house. The only permanent solution to keep the Deck and Sunroom from collapsing was to replace the piers and the underlying footers.
The Sunroom and a portion of the Deck were jacked up and supported by wooden cribs until new 2 ft. x 2ft. solid masonry columns could be built to replace the failed ones. In order to create enough bearing support under the footers, galvanized steel helical screws were driven under each column footer to an average depth of 26 feet. Concrete footers were poured on top of the screws, and each footer was tied into the adjacent footer and eventually back into the foundation of the home by a series of stabilizing rebar and concrete cross-tie footers.
Once all 14 of the failed columns were rebuilt, the Sunroom was lowered onto the new support piers. A new deck was built to replace the compromised section, and the rest of the original decking and railings were removed and replaced. After the new wood had been acclimated to weather for several months and allowed to dry out and stabilize, the deck and railings were stained and sealed.

 Distinguished Kitchens & Bath
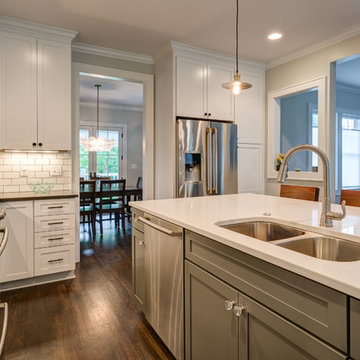
Dura Supreme Custom Cabinetry in a White Painted Shaker Door.
This white kitchen has a contemporary twist with a pop of color for a light and bright feel!
Photographed by: Andrea Patassy

 Advance Design Studio, Ltd.
Jennifer and Dan have lived in their Deer Park Illinois home for 15 years, slowly making minor fixes like painting and decorating; but they had a new plan for their kitchen the entire time. An awkwardly placed garage door, and an island cooktop with a terrible downdraft made a full-scale kitchen remodel an absolute must. Jennifer had many ideas in mind and wanted to work with a company that could provide high-end work, while partnering with a designer that would tailor the kitchen to her ideas.
She was intrigued by the phrase “Common Sense Remodeling” in Advance Design’s feature she discovered while perusing an issue of the community’s Quintessential Barrington Magazine. Doing further research on the company’s website, as she looked through project profiles and read about Advance Design’s “Common Sense Remodeling” philosophy, she promptly scheduled an appointment to see if the people and ideas she read about were truly who they said they were. The more she read, the more she knew that the “Common Sense” approach to remodeling they described was exactly the type of company she was looking for.
The partnership was sealed after an initial consultation with Owner Todd Jurs and Project Designer Michelle Lecinski. They displayed a combination of friendliness, professionalism and respect that was unmatched by any of the other companies Jennifer talked to. She knew that with Advance Design, she would be able to retain the vision that she had in mind with high-quality craftsmanship.
“I reached out to Advance Design because of the ‘Common Sense Remodeling’ tagline,” Jennifer said. “That’s what lingered for me”. “Advance Design was the most respectful- of the house and of my design ideas, and the most professional of the handful of companies that looked at my project”.
Soon after the meeting Jennifer began working with Michelle on the project design. They quickly developed chemistry. Jennifer loved how Michelle researched and located every detail that Jennifer wanted for the kitchen. Between the two of them, every concept and idea was worked through and perfected. “Jennifer had definite ideas about what she wanted the new kitchen to look like, she just didn’t know how to bring it all together. We worked together really well to make her ideas into the practical reality necessary for a well-functioning kitchen, with the look and feel that she had envisioned”, says Michelle.
“Michelle was wonderful in using the CAD system she would show me new drawings every time we changed the layout while working through the design,” Jennifer said. “She was a really wonderful partner in execution, she made sure everything happened quickly and easily.”
The finished design drew out elements of Jennifer’s style and personality. The pair call the look “sophisticated farmhouse” to describe the kitchen renovation to family and friends. The result was a beautifully crafted, authentic-feeling space that satisfied Jennifer’s dreams 15 years in the making. The whole project consisted of a kitchen remodel, mudroom upgrade with powder room, and garage entry relocation. “The projects I personally like the best, are the ones that put the client’s dreams on display,” Project Designer Michelle said. “And this is one of those projects.”
The main focal point of the kitchen is custom zinc and brass ventilation hood with a vintage sheen, which was hand made to order by a small company in Indiana named Vogler Metalworking. “It’s like sculpture, a true work of art”, says Jennifer. Your eye is immediately drawn towards this elegant yet practical hood that eliminated the home’s downdraft problem and added a striking conversation piece at the same time. The carpenters had to use special gloves when transporting and installing it, so they didn’t smudge it with fingerprints. The beautiful hood centers proudly over the stunning black enamel and brass LaCornue Range. “I had a friend who had a LaCornue range and after learning how easy it was to cook perfect meals, I was convinced I wanted to have one”, says Jennifer. This unique, breathtaking combination anchors the entire kitchen and is apparent immediately as you walk into the great room the surrounds the space.
DuraSupreme Crestwood cabinets with a Kendall Panel add function and sophistication. A custom gray paint color paired with a storm blue was developed so that the new kitchen looked like it belonged to the existing space. Unlacquered brass faucets and hardware were important to Jennifer because she wanted the living finishes to age over time. Remarkable brass diamond mesh cabinet door inserts imported from the UK continue to add this one-of-a-kind kitchen renovation; giving it a “you won’t see this everywhere” quality. The use of old railcar flooring for the coffee bar countertop and reclaimed oak for the open shelving gives an authenticity to the space uncommon in kitchens today.
Jennifer and Michelle fell in love with the Limestone Grey Stone while they were investigating unique island countertop ideas. They liked the fact that the limestone as a living finish will age and change over time. Calcutta Miel Quartz countertops made for an excellent pairing around the perimeter, as it’s durable and perfect for cooking preparations. A textured white subway tile backsplash that runs to the ceiling keeps your eye moving towards the open shelving, and to the main focal point of the stunning range hood combination.
“The kitchen functions beautifully, and it’s gorgeous,” beams Jennifer as she gestures with both hands while smiling ear to ear. “The most important thing was I wanted a kitchen that had a wonderful flow, cooked beautiful meals and was a great gathering place for family and friends, and this space does that perfectly! Beauty wise, it turned out exactly how I had envisioned. I felt the function part was the hardest part, and that was nailed”!
Relocating the garage entry to the new mudroom was a huge priority and has finally separated the family’s arriving home functions from their kitchen. Now coats and shoes and bags have their own area for dropping once members arrive home. Matching gray DuraSupreme cabinetry helped create gorgeous, purposeful lockers for the family. A reclaimed vintage sink and custom wall paper were added to the tiny powder room to beautify the once previously only functional space. Advance Design was even able to create a custom space for their dog to sleep while the family is away.
“It was unbelievable that a project of this size was completed in such a short time, and I think that’s because of the large amount of planning and preparation that went into it,” Jennifer marveled, “When we started, we were ready, and everything was prepared”.
When it came to execution, Project Manager Justin Davis and his crew were quick, accessible, and organized. Projects like this kitchen are typically completed in as little as 8-10 weeks. Jennifer’s kitchen however despite the relocation of some challenging HVAC in a soffit and moving of an exterior door was completed remarkably fast in part because the team was working with an existing tile floor that ran throughout the first floor that the client really loved.
“You get to know these people really well because they’re living in your house while you’re living in your house. They were so fast and really good, it didn’t take as long as even planned” reported Jennifer. “I would text Justin and he always responded almost immediately. I got to know all the guys who were working in our house and they were all wonderful people”.
Details in a customized kitchen like this one require skill and care from the people who install it. “All the guys on the job were skilled at what the did. I wanted small details like little feet to look like furniture, that is where their carpentry skill came in to make these all perfect”, said Jennifer. “The tile guys were wonderful. They even let me determine how I wanted the texture with the grout to appear for a salt and pepper look; now that is a very skilled trade person making it custom”.
In Jennifer’s interview, she continued to reference Advance Design’s “Common Sense Remodeling”, so I took a minute to ask her exactly what that phrase meant to her and how it played out in her experience with her project and the Advance Design team. Here is what she said: “I was intrigued about Common Sense Remodeling and in my head that there would be clear costs and prices, great communication between the design team, the execution team and me”, said Jennifer. They did deliver on that, it was so clear about the cost breakdown, what I could expect from everyone who came to my house, and everything that we had ordered. That to me is the Common Sense”!
It’s great to see a client take literally our assertion that a well-planned remodeling project is simply “Common Sense”! She anticipated each step of the way would be clear, concise, and predictable, all the while protecting the outcome due to the careful upfront planning. “Advance Design delivered on their ‘Common Sense Remodeling’ promise,” Jennifer said. “From the design team, to the execution team - everything was straight forward like I imagined. The project turned out exactly how I envisioned, I enjoyed this process and absolutely would recommend Advance Design Studio to anyone.”
 Revealing Redesign
This master bathroom is a part of a whole house renovation we tackled starting in 2016, slowly and intentionally recreating each space in the house so that each room could be an updated, lovely space that FELT LIKE HOME to my clients.
In the master bath, we reconfigured the existing footprint of the bathroom, eliminating the large tub they no longer wanted, and relocating the door to the bedroom to allow space for a double vanity in the layout (a must for this professional couple on busy mornings), and so that a larger shower could be incorporated.
Also included in the design is a built-in window seat with drawers, and a linen closet, providing plenty of additional storage.
The finishing touches combine the classic materials such as marble counters and the color combination of blue and white, paired with modern details, such as the herringbone wood-like tile, to give an eclectic, timeless feel to the room.
 Newschool Builders LLC
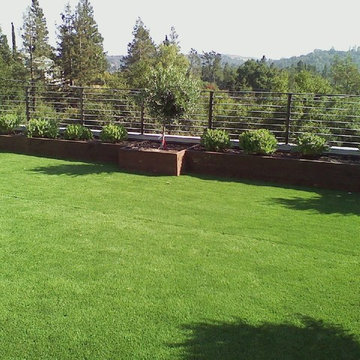
The cobblers kids have no shoes rang true as this builder worked on his own home for many years. Originally a 1980’s split level, this project slowly transformed from a once outdated and run down building into a beautiful contemporary home. Mixing natural wood and stone created a classic, yet contemporary feel throughout the interior and exterior.
A full gut down to the studs allowed the structure to be up fitted with new mechanicals, electrical, insulation, windows and doors. We moved the kitchen to the south side, removed the attic and built full length dormers and a stair tower allowing epic views of cables hump. The interior is built out with custom builtins, cabinets and furniture. The exterior was laid out in a way that makes entertaining a dream. Landscaping and hardscaping tied this whole project together. It feels good to finish building out your own home from a dream all the way through to reality.

 Jackson Design & Remodeling
Uniquely Bold in Ocean Beach, CA | Photo Credit: Jackson Design and Remodeling
Example of a trendy 3/4 gray tile, orange tile, red tile, white tile and yellow tile gray floor alcove shower design in San Diego with flat-panel cabinets, medium tone wood cabinets, white walls, a vessel sink and a hinged shower door
Example of a trendy 3/4 gray tile, orange tile, red tile, white tile and yellow tile gray floor alcove shower design in San Diego with flat-panel cabinets, medium tone wood cabinets, white walls, a vessel sink and a hinged shower door
Sponsored
Columbus, OH

Hope Restoration & General Contracting
Columbus Design-Build, Kitchen & Bath Remodeling, Historic Renovations


 Emilia Decor
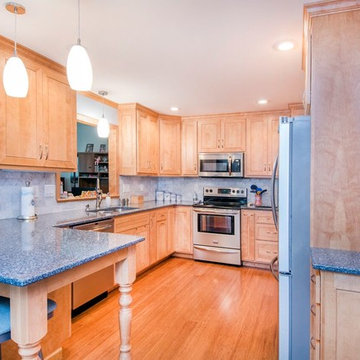
Transitional u-shaped light wood floor kitchen photo in Portland with shaker cabinets, blue cabinets, quartzite countertops, porcelain backsplash and a peninsula
 Advance Design Studio, Ltd.
Jennifer and Dan have lived in their Deer Park Illinois home for 15 years, slowly making minor fixes like painting and decorating; but they had a new plan for their kitchen the entire time. An awkwardly placed garage door, and an island cooktop with a terrible downdraft made a full-scale kitchen remodel an absolute must. Jennifer had many ideas in mind and wanted to work with a company that could provide high-end work, while partnering with a designer that would tailor the kitchen to her ideas.
She was intrigued by the phrase “Common Sense Remodeling” in Advance Design’s feature she discovered while perusing an issue of the community’s Quintessential Barrington Magazine. Doing further research on the company’s website, as she looked through project profiles and read about Advance Design’s “Common Sense Remodeling” philosophy, she promptly scheduled an appointment to see if the people and ideas she read about were truly who they said they were. The more she read, the more she knew that the “Common Sense” approach to remodeling they described was exactly the type of company she was looking for.
The partnership was sealed after an initial consultation with Owner Todd Jurs and Project Designer Michelle Lecinski. They displayed a combination of friendliness, professionalism and respect that was unmatched by any of the other companies Jennifer talked to. She knew that with Advance Design, she would be able to retain the vision that she had in mind with high-quality craftsmanship.
“I reached out to Advance Design because of the ‘Common Sense Remodeling’ tagline,” Jennifer said. “That’s what lingered for me”. “Advance Design was the most respectful- of the house and of my design ideas, and the most professional of the handful of companies that looked at my project”.
Soon after the meeting Jennifer began working with Michelle on the project design. They quickly developed chemistry. Jennifer loved how Michelle researched and located every detail that Jennifer wanted for the kitchen. Between the two of them, every concept and idea was worked through and perfected. “Jennifer had definite ideas about what she wanted the new kitchen to look like, she just didn’t know how to bring it all together. We worked together really well to make her ideas into the practical reality necessary for a well-functioning kitchen, with the look and feel that she had envisioned”, says Michelle.
“Michelle was wonderful in using the CAD system she would show me new drawings every time we changed the layout while working through the design,” Jennifer said. “She was a really wonderful partner in execution, she made sure everything happened quickly and easily.”
The finished design drew out elements of Jennifer’s style and personality. The pair call the look “sophisticated farmhouse” to describe the kitchen renovation to family and friends. The result was a beautifully crafted, authentic-feeling space that satisfied Jennifer’s dreams 15 years in the making. The whole project consisted of a kitchen remodel, mudroom upgrade with powder room, and garage entry relocation. “The projects I personally like the best, are the ones that put the client’s dreams on display,” Project Designer Michelle said. “And this is one of those projects.”
The main focal point of the kitchen is custom zinc and brass ventilation hood with a vintage sheen, which was hand made to order by a small company in Indiana named Vogler Metalworking. “It’s like sculpture, a true work of art”, says Jennifer. Your eye is immediately drawn towards this elegant yet practical hood that eliminated the home’s downdraft problem and added a striking conversation piece at the same time. The carpenters had to use special gloves when transporting and installing it, so they didn’t smudge it with fingerprints. The beautiful hood centers proudly over the stunning black enamel and brass LaCornue Range. “I had a friend who had a LaCornue range and after learning how easy it was to cook perfect meals, I was convinced I wanted to have one”, says Jennifer. This unique, breathtaking combination anchors the entire kitchen and is apparent immediately as you walk into the great room the surrounds the space.
DuraSupreme Crestwood cabinets with a Kendall Panel add function and sophistication. A custom gray paint color paired with a storm blue was developed so that the new kitchen looked like it belonged to the existing space. Unlacquered brass faucets and hardware were important to Jennifer because she wanted the living finishes to age over time. Remarkable brass diamond mesh cabinet door inserts imported from the UK continue to add this one-of-a-kind kitchen renovation; giving it a “you won’t see this everywhere” quality. The use of old railcar flooring for the coffee bar countertop and reclaimed oak for the open shelving gives an authenticity to the space uncommon in kitchens today.
Jennifer and Michelle fell in love with the Limestone Grey Stone while they were investigating unique island countertop ideas. They liked the fact that the limestone as a living finish will age and change over time. Calcutta Miel Quartz countertops made for an excellent pairing around the perimeter, as it’s durable and perfect for cooking preparations. A textured white subway tile backsplash that runs to the ceiling keeps your eye moving towards the open shelving, and to the main focal point of the stunning range hood combination.
“The kitchen functions beautifully, and it’s gorgeous,” beams Jennifer as she gestures with both hands while smiling ear to ear. “The most important thing was I wanted a kitchen that had a wonderful flow, cooked beautiful meals and was a great gathering place for family and friends, and this space does that perfectly! Beauty wise, it turned out exactly how I had envisioned. I felt the function part was the hardest part, and that was nailed”!
Relocating the garage entry to the new mudroom was a huge priority and has finally separated the family’s arriving home functions from their kitchen. Now coats and shoes and bags have their own area for dropping once members arrive home. Matching gray DuraSupreme cabinetry helped create gorgeous, purposeful lockers for the family. A reclaimed vintage sink and custom wall paper were added to the tiny powder room to beautify the once previously only functional space. Advance Design was even able to create a custom space for their dog to sleep while the family is away.
“It was unbelievable that a project of this size was completed in such a short time, and I think that’s because of the large amount of planning and preparation that went into it,” Jennifer marveled, “When we started, we were ready, and everything was prepared”.
When it came to execution, Project Manager Justin Davis and his crew were quick, accessible, and organized. Projects like this kitchen are typically completed in as little as 8-10 weeks. Jennifer’s kitchen however despite the relocation of some challenging HVAC in a soffit and moving of an exterior door was completed remarkably fast in part because the team was working with an existing tile floor that ran throughout the first floor that the client really loved.
“You get to know these people really well because they’re living in your house while you’re living in your house. They were so fast and really good, it didn’t take as long as even planned” reported Jennifer. “I would text Justin and he always responded almost immediately. I got to know all the guys who were working in our house and they were all wonderful people”.
Details in a customized kitchen like this one require skill and care from the people who install it. “All the guys on the job were skilled at what the did. I wanted small details like little feet to look like furniture, that is where their carpentry skill came in to make these all perfect”, said Jennifer. “The tile guys were wonderful. They even let me determine how I wanted the texture with the grout to appear for a salt and pepper look; now that is a very skilled trade person making it custom”.
In Jennifer’s interview, she continued to reference Advance Design’s “Common Sense Remodeling”, so I took a minute to ask her exactly what that phrase meant to her and how it played out in her experience with her project and the Advance Design team. Here is what she said: “I was intrigued about Common Sense Remodeling and in my head that there would be clear costs and prices, great communication between the design team, the execution team and me”, said Jennifer. They did deliver on that, it was so clear about the cost breakdown, what I could expect from everyone who came to my house, and everything that we had ordered. That to me is the Common Sense”!
It’s great to see a client take literally our assertion that a well-planned remodeling project is simply “Common Sense”! She anticipated each step of the way would be clear, concise, and predictable, all the while protecting the outcome due to the careful upfront planning. “Advance Design delivered on their ‘Common Sense Remodeling’ promise,” Jennifer said. “From the design team, to the execution team - everything was straight forward like I imagined. The project turned out exactly how I envisioned, I enjoyed this process and absolutely would recommend Advance Design Studio to anyone.”



 INSPIRED KITCHEN DESIGN
Perhaps the most impressive aspect of this IKEA wetbar is that they cut the butcher block countertops themselves.
She explains: “We started the journey thinking we will get a countertop from IKEA. However, we found out that IKEA doesn’t have a real butcher block and we had to have a specific type of sink for the real butcher block to work.”
Therefore, the couple had to adjust some of their layout plans, including having to reconsider the sink and still find butcher block for their countertops, which they eventually purchased from Home Depot.
To fully understand how to cut the countertops, Nastia’s husband watched YouTube videos and purchased some new tools to do the cutting as well.
“Since we bought an unfinished one, my husband also had to learn how to sand and oil our new butcher block. We used mineral oil on it, per instructions. Oiling it first every day, then once a week, then once a month. It was intimidating at first, to cut the hole for the sink. But, once we started and moved slowly it became less stressful,” she points out.
According to Nastia, the key to a successful IKEA project is simple: Don’t give up.
“The small hiccups we ran into were a bit too much, but it was on top of dealing with a flood. I really insisted on the blue cabinet doors and it was totally worth it, it made a huge difference,” she says.
She concludes: “Overall, I love the custom doors recommended by the designer (I would never have heard about Semihandmade otherwise). And I love the combination of Deep Blue with golden pulls. It creates a certain elegance in the entire space.”

 Vintage Cellars & Saunas
This project is more than meets the eye! In a gorgeous neighborhood in Del Mar, San Diego, California, This unique small custom wine cellar truly acts as a showstopper. Originally within this house, the door which now faces outward used to be around the corner in a small hallway, virtually eliminating any visibility into this contemporary walk in custom wine cellar. Upon seeing the location of this space within the house, Gene Walder and the knowledgeable team at Vintage Cellars knew that to really take advantage of the room provided, (which is actually below the stairs), they needed to get rid of the original door and add a brand new one facing the main living space.
Just a small feat in a series of unique custom features within this cellar!
Here at Vintage Cellars, before any design takes shape, it is vital to understand what the clients wants and needs are based on their growing collection of wine. With a good idea of bottle sizes, shapes (some pinot noir bottles, for example have a wider bottom than a typical cabernet sauvignon bottle) and unique features desired, the team of wine cellar designers and wine cellar builders at Vintage Cellars are able to create a very special and desirable wine cellar for each client.
The owners of this beautiful home collaborated heavily with the Vintage Cellars team in the design process of this rustic custom wine cellar - something that we aim to do with every project. The homeowners wanted to showcase some of their favorite Magnum sized bottles in a high reveal horizontal display row, directly on top of another area highlighting the best 750 ml's in their collection.
This small custom wine room fills most of the left wall with single deep, individual bottle storage. Directly below this wine racking is room for wine case / wine bin storage. Centered within this wall is a nice space for opening and decanting wines with a gorgeous dark stone countertop and room for hanging wine glasses above.
The opposite wall is filled floor to ceiling with label revealing horizontal display rows. Again, this type of feature is very desirable in recent years. Homeowners want to be able to showcase the best bottles they own within their custom wine cellars in the most stunning and beautiful ways possible. Additionally, this feature is commonly replicated with metal bars for a more contemporary and modern look and feel.
Within Beach Cities such as Del Mar, La Jolla, Cardiff, Coronado, Rancho Santa Fe, Encinitas, Solana Beach, Newport Beach and Orange County alike, small walk wine cellars are all the rage. Custom Wine Closet s and Under the Stairs Custom Wine Room s are quickly becoming a commonplace feature within modern luxury homes.
Funny enough, because San Diego has become such a hub and mecca for craft beer breweries, luxury homes within communities such as La Jolla, Del Mar, Encinitas, Coronado, Cardiff, Rancho Santa Fe, Solana Beach, Carlsbad, La Costa and Torrey Pines have taken notice and began including space for unique beer storage within their custom wine cellars as well.
This right side wall horizontal display racking does just that. If you look closely, those intricately labeled bottles are craft brews kept at a chill and refreshing 55 Degrees- just waiting to be opened and enjoyed immediately.
Just when you thought the custom wine cellar tour was over, another unique feature catches your eye. You see the back stone wall? Press ever so gently in the top left corner two thirds of the way up and - Voila! - a secret door appears and slowly reveals more room under the stairway for case storage and the like.
The homeowner also decided to add interesting lighting to this cellar. The Custom wine room can turn any color of the rainbow - allowing you to focus on all lights or just one a time, creating that perfect mood lighting for the holidays, springtime, or summer.
This entire custom wine cellar and all wine racking were done in raw black walnut.
Vintage Cellars has built gorgeous custom wine cellars and wine storage rooms across the United States and World for over 25 years. We are your go-to business for anything wine cellar and wine storage related! Whether you're interested in a wine closet, wine racking, custom wine racks, a custom wine cellar door, or a cooling system for your existing space, Vintage Cellars has you covered!
We carry all kinds of wine cellar cooling and refrigeration systems, incuding: Breezaire, CellarCool, WhisperKool, Wine Guardian, CellarPro and Commercial systems.
We also carry many types of Wine Refrigerators, Wine Cabinets, and wine racking types, including La Cache, Marvel, N'Finity, Transtherm, Vinotheque, Vintage Series, Credenza, Walk in wine rooms, Climadiff, Riedel, Fontenay, and VintageView.
Vintage Cellars also does work in many styles, including Contemporary and Modern, Rustic, Farmhouse, Traditional, Craftsman, Industrial, Mediterranean, Mid-Century, Industrial and Eclectic.
Some locations we cover often include: San Diego, Rancho Santa Fe, Corona Del Mar, Del Mar, La Jolla, Newport Beach, Newport Coast, Huntington Beach, Del Mar, Solana Beach, Carlsbad, Orange County, Beverly Hills, Malibu, Pacific Palisades, Santa Monica, Bel Air, Los Angeles, Encinitas, Cardiff, Coronado, Manhattan Beach, Palos Verdes, San Marino, Ladera Heights, Santa Monica, Brentwood, Westwood, Hancock Park, Laguna Beach, Crystal Cove, Laguna Niguel, Torrey Pines, Thousand Oaks, Coto De Caza, Coronado Island, San Francisco, Danville, Walnut Creek, Marin, Tiburon, Hillsborough, Berkeley, Oakland, Napa, Sonoma, Agoura Hills, Hollywood Hills, Laurel Canyon, Sausalito, Mill Valley, San Rafael, Piedmont, Paso Robles, Carmel, Pebble Beach
Contact Vintage Cellars today with any of your Wine Cellar needs!
(800) 876-8789
Vintage Cellars
904 Rancheros Drive
San Marcos, California 92069
(800) 876-8789
 Advance Design Studio, Ltd.
Jennifer and Dan have lived in their Deer Park Illinois home for 15 years, slowly making minor fixes like painting and decorating; but they had a new plan for their kitchen the entire time. An awkwardly placed garage door, and an island cooktop with a terrible downdraft made a full-scale kitchen remodel an absolute must. Jennifer had many ideas in mind and wanted to work with a company that could provide high-end work, while partnering with a designer that would tailor the kitchen to her ideas.
She was intrigued by the phrase “Common Sense Remodeling” in Advance Design’s feature she discovered while perusing an issue of the community’s Quintessential Barrington Magazine. Doing further research on the company’s website, as she looked through project profiles and read about Advance Design’s “Common Sense Remodeling” philosophy, she promptly scheduled an appointment to see if the people and ideas she read about were truly who they said they were. The more she read, the more she knew that the “Common Sense” approach to remodeling they described was exactly the type of company she was looking for.
The partnership was sealed after an initial consultation with Owner Todd Jurs and Project Designer Michelle Lecinski. They displayed a combination of friendliness, professionalism and respect that was unmatched by any of the other companies Jennifer talked to. She knew that with Advance Design, she would be able to retain the vision that she had in mind with high-quality craftsmanship.
“I reached out to Advance Design because of the ‘Common Sense Remodeling’ tagline,” Jennifer said. “That’s what lingered for me”. “Advance Design was the most respectful- of the house and of my design ideas, and the most professional of the handful of companies that looked at my project”.
Soon after the meeting Jennifer began working with Michelle on the project design. They quickly developed chemistry. Jennifer loved how Michelle researched and located every detail that Jennifer wanted for the kitchen. Between the two of them, every concept and idea was worked through and perfected. “Jennifer had definite ideas about what she wanted the new kitchen to look like, she just didn’t know how to bring it all together. We worked together really well to make her ideas into the practical reality necessary for a well-functioning kitchen, with the look and feel that she had envisioned”, says Michelle.
“Michelle was wonderful in using the CAD system she would show me new drawings every time we changed the layout while working through the design,” Jennifer said. “She was a really wonderful partner in execution, she made sure everything happened quickly and easily.”
The finished design drew out elements of Jennifer’s style and personality. The pair call the look “sophisticated farmhouse” to describe the kitchen renovation to family and friends. The result was a beautifully crafted, authentic-feeling space that satisfied Jennifer’s dreams 15 years in the making. The whole project consisted of a kitchen remodel, mudroom upgrade with powder room, and garage entry relocation. “The projects I personally like the best, are the ones that put the client’s dreams on display,” Project Designer Michelle said. “And this is one of those projects.”
The main focal point of the kitchen is custom zinc and brass ventilation hood with a vintage sheen, which was hand made to order by a small company in Indiana named Vogler Metalworking. “It’s like sculpture, a true work of art”, says Jennifer. Your eye is immediately drawn towards this elegant yet practical hood that eliminated the home’s downdraft problem and added a striking conversation piece at the same time. The carpenters had to use special gloves when transporting and installing it, so they didn’t smudge it with fingerprints. The beautiful hood centers proudly over the stunning black enamel and brass LaCornue Range. “I had a friend who had a LaCornue range and after learning how easy it was to cook perfect meals, I was convinced I wanted to have one”, says Jennifer. This unique, breathtaking combination anchors the entire kitchen and is apparent immediately as you walk into the great room the surrounds the space.
DuraSupreme Crestwood cabinets with a Kendall Panel add function and sophistication. A custom gray paint color paired with a storm blue was developed so that the new kitchen looked like it belonged to the existing space. Unlacquered brass faucets and hardware were important to Jennifer because she wanted the living finishes to age over time. Remarkable brass diamond mesh cabinet door inserts imported from the UK continue to add this one-of-a-kind kitchen renovation; giving it a “you won’t see this everywhere” quality. The use of old railcar flooring for the coffee bar countertop and reclaimed oak for the open shelving gives an authenticity to the space uncommon in kitchens today.
Jennifer and Michelle fell in love with the Limestone Grey Stone while they were investigating unique island countertop ideas. They liked the fact that the limestone as a living finish will age and change over time. Calcutta Miel Quartz countertops made for an excellent pairing around the perimeter, as it’s durable and perfect for cooking preparations. A textured white subway tile backsplash that runs to the ceiling keeps your eye moving towards the open shelving, and to the main focal point of the stunning range hood combination.
“The kitchen functions beautifully, and it’s gorgeous,” beams Jennifer as she gestures with both hands while smiling ear to ear. “The most important thing was I wanted a kitchen that had a wonderful flow, cooked beautiful meals and was a great gathering place for family and friends, and this space does that perfectly! Beauty wise, it turned out exactly how I had envisioned. I felt the function part was the hardest part, and that was nailed”!
Relocating the garage entry to the new mudroom was a huge priority and has finally separated the family’s arriving home functions from their kitchen. Now coats and shoes and bags have their own area for dropping once members arrive home. Matching gray DuraSupreme cabinetry helped create gorgeous, purposeful lockers for the family. A reclaimed vintage sink and custom wall paper were added to the tiny powder room to beautify the once previously only functional space. Advance Design was even able to create a custom space for their dog to sleep while the family is away.
“It was unbelievable that a project of this size was completed in such a short time, and I think that’s because of the large amount of planning and preparation that went into it,” Jennifer marveled, “When we started, we were ready, and everything was prepared”.
When it came to execution, Project Manager Justin Davis and his crew were quick, accessible, and organized. Projects like this kitchen are typically completed in as little as 8-10 weeks. Jennifer’s kitchen however despite the relocation of some challenging HVAC in a soffit and moving of an exterior door was completed remarkably fast in part because the team was working with an existing tile floor that ran throughout the first floor that the client really loved.
“You get to know these people really well because they’re living in your house while you’re living in your house. They were so fast and really good, it didn’t take as long as even planned” reported Jennifer. “I would text Justin and he always responded almost immediately. I got to know all the guys who were working in our house and they were all wonderful people”.
Details in a customized kitchen like this one require skill and care from the people who install it. “All the guys on the job were skilled at what the did. I wanted small details like little feet to look like furniture, that is where their carpentry skill came in to make these all perfect”, said Jennifer. “The tile guys were wonderful. They even let me determine how I wanted the texture with the grout to appear for a salt and pepper look; now that is a very skilled trade person making it custom”.
In Jennifer’s interview, she continued to reference Advance Design’s “Common Sense Remodeling”, so I took a minute to ask her exactly what that phrase meant to her and how it played out in her experience with her project and the Advance Design team. Here is what she said: “I was intrigued about Common Sense Remodeling and in my head that there would be clear costs and prices, great communication between the design team, the execution team and me”, said Jennifer. They did deliver on that, it was so clear about the cost breakdown, what I could expect from everyone who came to my house, and everything that we had ordered. That to me is the Common Sense”!
It’s great to see a client take literally our assertion that a well-planned remodeling project is simply “Common Sense”! She anticipated each step of the way would be clear, concise, and predictable, all the while protecting the outcome due to the careful upfront planning. “Advance Design delivered on their ‘Common Sense Remodeling’ promise,” Jennifer said. “From the design team, to the execution team - everything was straight forward like I imagined. The project turned out exactly how I envisioned, I enjoyed this process and absolutely would recommend Advance Design Studio to anyone.”
4