
Search results for "Specific process" in Home Design Ideas
 Windy City Painters
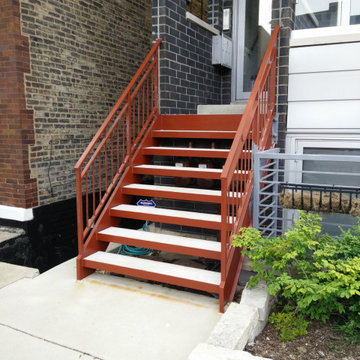
Does your iron fence look like Chicago winters have been winning the battle for years? That slow orange spread across pickets and rails is not just an eyesore - it is active corrosion undermining the structural integrity of metalwork that frames some of Chicago's most architecturally significant residential properties. Windy City Painters addresses iron fence rust at the source, using professional-grade rust conversion chemistry and direct-to-metal coatings engineered for the specific abuse Chicago's climate delivers.
PROJECT OVERVIEW
This project involved a heavily rusted ornamental iron fence on a Chicago North Side residential property. Rust had progressed beyond surface oxidation into moderate pitting on lower rails, a pattern Windy City Painters sees frequently on properties within blocks of treated roadways where salt drift accelerates corrosion. The scope included mechanical descaling, chemical rust conversion, DTM priming, and a durable gloss topcoat matched to the original fence color.
MATERIALS AND PRODUCTS
Ospho Rust Converter: A phosphoric acid-based treatment that chemically reacts with iron oxide, converting it to iron phosphate - a stable, paintable compound. Corroseal Water-Based Rust Converter is an alternative for situations requiring lower VOC handling. Rust-Oleum Professional DTM Primer and Sherwin-Williams DTM Acrylic Coating serve as the primary coating system, formulated for direct metal adhesion with built-in rust inhibitors. For structurally compromised sections, welding is coordinated before any chemical or coating work begins.
THE PROCESS
Step 1 - Mechanical Preparation: Wire wheel grinding on an angle grinder removes loose rust scale, mill scale, and flaking paint. For advanced pitting, Windy City Painters deploys a needle gun descaler, which impacts the metal surface thousands of times per minute to drive scale from deep cavities. This step determines whether the fence can be coated or needs welding first.
Step 2 - Chemical Rust Conversion: Ospho or Corroseal is brushed onto all remaining rust surface. These products do not simply seal rust - they react with it. The conversion process takes 24 hours to fully cure before topcoating. Skipping this step is the single most common reason iron fence paint jobs fail prematurely.
Step 3 - DTM Priming: Sherwin-Williams DTM or Rust-Oleum DTM primer is applied by brush to ensure full penetration around decorative elements, picket tips, and weld joints. Spray application is used on open sections for even film build. DTM formulations bond directly to prepared metal without a separate shop primer.
Step 4 - Finish Coating: A DTM topcoat in gloss or semi-gloss provides the final weather barrier. Gloss is preferred for iron fencing because the harder surface sheds water more effectively and resists dirt adhesion between maintenance cycles. Windy City Painters applies two finish coats for maximum film thickness.
CHICAGO-SPECIFIC CHALLENGES
Chicago's freeze-thaw cycle is the primary enemy of iron fence coatings. Water infiltrates micro-cracks in paint film, freezes, expands, and delaminate coating from beneath. Properties on the North Side and Near West Side also contend with lake-effect humidity that keeps metal surfaces damp for extended periods, slowing cure times and promoting under-film corrosion if preparation is inadequate. Greystones and Victorian brownstones typically feature ornate cast iron or wrought iron fencing with complex geometries that trap moisture and demand hand-brush application to fully coat recesses.
WHAT TO EXPECT LONG-TERM
A properly prepared and coated iron fence in Chicago should hold 5-8 years before requiring recoating. Annual inspection of weld joints, picket tips, and base rails closest to grade will identify early rust return. Addressing small spots with touch-up converter and primer extends service life significantly between full recoats.
PRO TIPS
Tip 1: Never pressure wash a rusted iron fence immediately before painting. Water drives moisture into pits and delays the surface drying needed for chemical converter adhesion. Allow 48 hours of dry weather before prep begins.
Tip 2: Picket tips and rail ends are the first failure points. These end-grain equivalent areas on metal concentrate corrosion. Ask your painter to apply an extra brush coat to every tip and terminus.
Tip 3: Black is the traditional and most durable color choice for iron fencing. Dark pigments absorb UV rather than reflecting it, reducing thermal cycling stress on the paint film at color change boundaries.
FAQ
Q: What does iron fence painting cost in Chicago?
A: Most residential iron fence painting in Chicago ranges from $400 to $1,200 depending on linear footage, rust severity, prep method required, and whether structural welding is needed before Windy City Painters can coat the surface.
Q: How do I know if my fence needs a welder before painting?
A: If you can press a screwdriver through a rail or picket, the metal wall has failed. Windy City Painters inspects all fencing before quoting and identifies weld-required sections so repairs happen before any coating investment.
Q: Is Ospho or Corroseal better for my fence?
A: Both convert rust effectively. Ospho is solvent-based and fast-acting, preferred for heavy rust. Corroseal is water-based with lower odor, preferred in enclosed or residential settings where off-gassing is a concern. Windy City Painters selects based on site conditions.
Q: Can iron fence painting be done in winter in Chicago?
A: Application requires temperatures above 50 degrees Fahrenheit for DTM coatings to cure properly. Most iron fence painting in Chicago runs April through October, with scheduling flexibility based on extended warm stretches.
Q: How do I maintain my fence between professional recoats?
A: Inspect annually in spring. Sand any rust spots to bare metal with 80-grit paper, apply Ospho, let cure 24 hours, then spot-prime with DTM primer and touch up with finish coat. Windy City Painters offers maintenance inspections.
Q: Do you paint courtyard building fences and coach house gates?
A: Yes. Multi-unit courtyard buildings and coach houses are common in the North Side neighborhoods Windy City Painters serves. We coordinate with property managers and HOAs for larger perimeter fence projects.
Q: How long after painting can I touch the fence?
A: DTM coatings are typically dry to touch in 2-4 hours and hard dry in 24 hours. Full cure for maximum hardness takes 7 days. Windy City Painters advises against pressure washing or heavy contact during that cure window.
Visit windypainters.com to request your free iron fence assessment and project quote.
 Windy City Painters
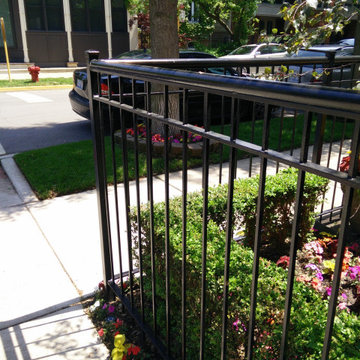
Ever notice how your iron fence looks worse every spring after Chicago winters? That steady seasonal decline is not inevitable - it is a preparation and coating problem that Windy City Painters solves with systematic metal restoration.
PROJECT OVERVIEW
Iron fence painting in Chicago requires more than a fresh coat of paint. Chicago's freeze-thaw cycles, road salt exposure, and high seasonal humidity create conditions that destroy inadequately prepared metal coatings within a year or two. Windy City Painters approaches every iron fence project as a corrosion control job first and a painting job second. The result is a finish that holds up through multiple Chicago winters without peeling, bubbling, or allowing rust to spread beneath the surface.
MAterials AND PRODUCTS
Windy City Painters selects products specifically rated for ferrous metal in high-corrosion environments. For rust conversion, we use Ospho phosphoric acid treatment or Corroseal water-based rust converter, both of which chemically transform active rust into a stable iron phosphate compound. For priming and finish coats, Rust-Oleum DTM and Sherwin-Williams DTM rust-inhibitive direct-to-metal coatings provide excellent adhesion, flexibility, and moisture resistance. These products are formulated to expand and contract with metal through temperature swings without cracking.
THE PROCESS
Step 1 - Mechanical Surface Preparation: Wire wheel grinding and needle gun descaling remove all loose rust, failing paint, and mill scale. This step is non-negotiable. No rust-inhibitive coating performs correctly over contaminated or loosely adhered substrate. Windy City Painters treats this phase as the foundation of the entire project.
Step 2 - Rust Conversion Treatment: Ospho or Corroseal is applied to any remaining rust after mechanical prep. These products do not simply cover rust - they react with iron oxide to create iron phosphate, a chemically stable surface that accepts primer without ongoing corrosion underneath. Contact time and full surface saturation are critical.
Step 3 - Rust-Inhibitive Priming: Rust-Oleum DTM or Sherwin-Williams DTM rust-inhibitive primer is applied by brush to ensure full penetration into ornamental details, crevices, and rail joints where moisture collects. Spray application alone misses critical contact points on older Chicago ironwork.
Step 4 - Finish Coat Application: Two finish coats of Rust-Oleum DTM or Sherwin-Williams DTM topcoat deliver color saturation, UV stability, and a hard film that resists chipping from foot traffic, landscaping equipment, and seasonal debris impact common to Chicago urban properties.
CHICAGO-SPECIFIC CHALLENGES
Chicago iron fences face a combination of stressors that accelerates failure compared to milder climates. Road salt spray migrates well beyond the street surface and deposits chlorides on fence metal throughout winter. Freeze-thaw cycles - sometimes occurring multiple times in a single week - expand and contract metal enough to crack coatings that lack flexibility. Older ornamental iron on greystones, Victorian brownstones, two-flats, and courtyard buildings often has decades of paint buildup that must be addressed before any restoration coating will perform correctly.
WHAT TO EXPECT LONG-TERM
A properly prepared and coated iron fence painted by Windy City Painters typically performs five to seven years before requiring recoating in Chicago conditions. Annual spring inspection for salt residue, minor touch-up of any chips within the first season, and a light rinse to remove winter road chemicals all extend coating life. Structural rust that has compromised rail integrity should be addressed by a welder before painting - Windy City Painters identifies these conditions during initial assessment.
PRO TIPS
Tip 1: Never paint over rust without a conversion treatment first. Paint applied over active rust creates a sealed environment where corrosion accelerates invisibly until the coating fails completely.
Tip 2: Budget for welded repairs on iron fences older than twenty-five years. Ornamental iron on Chicago historic properties often has pitting or section loss that painting alone cannot address structurally.
Tip 3: Time your iron fence painting project for late spring or early fall when temperatures stay consistently above fifty degrees overnight. DTM coatings need adequate cure time before the first freeze to achieve full hardness.
Call Windy City Painters to schedule your iron fence assessment at windypainters.com.
FAQ
Q: What is the cost of iron fence painting in Chicago?
A: Iron fence painting cost in Chicago varies by linear footage, rust severity, and ornamental complexity. Windy City Painters provides free on-site estimates so you receive an accurate number before any commitment is made.
Q: Do you need to remove all old paint before repainting an iron fence?
A: Not always. Windy City Painters assesses existing coating adhesion. Sound paint in good condition can remain. Peeling, bubbling, or paint over active rust must be removed for the new coating to perform correctly.
Q: Can structural rust on an iron fence be repaired without replacing the fence?
A: Depends on severity. Surface and moderate rust responds well to conversion treatment and DTM coatings. If rust has caused section loss or structural weakness, Windy City Painters recommends a welder address those areas before painting.
Q: How long does iron fence painting take?
A: Most residential iron fence projects take one to three days including prep, rust conversion, priming, and two finish coats. Windy City Painters sequences cure time between coats to ensure full adhesion at every stage.
Q: What is the best paint for iron fences in Chicago?
A: Rust-Oleum DTM and Sherwin-Williams DTM rust-inhibitive coatings are among the best options for Chicago iron fences due to their flexibility, moisture resistance, and ability to handle freeze-thaw temperature swings without cracking.
Q: Is it worth painting an old iron fence or should I replace it?
A: Painting is almost always more cost-effective than replacement for structurally sound iron. Windy City Painters assesses every fence honestly and only recommends replacement when restoration would not deliver a durable result.
Q: How do I find a reliable iron fence painting contractor near me in Chicago?
A: Look for contractors who specify rust conversion products by name, explain their mechanical prep process, and provide references from similar Chicago properties. Windy City Painters documents every step and warranties our work.

 Angelo's Marble & Granite Inc.
Inspiration for a timeless u-shaped kitchen remodel in Philadelphia with a farmhouse sink and granite countertops
Find the right local pro for your project
 Powell Construction
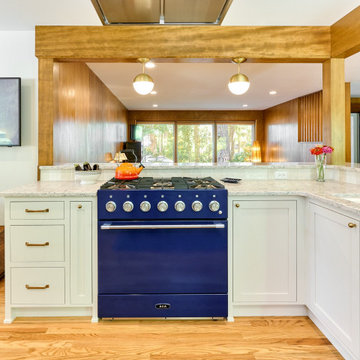
This 1960’s home underwent a striking transformation--remodeling the kitchen, hall bathroom and laundry room. These homeowners dreamed of an open floor plan that would unite the kitchen and adjacent living areas. To accomplish this, we removed an imposing chimney that separated the kitchen from the living room. Additionally, we eliminated a weight-bearing wall that was between the kitchen and dining room. What a change! The spaces that formerly felt dark and confined are now bright and connected, comfortably accommodating larger gatherings.
When considering the specifics of design, we wanted to stay true to the home’s mid-century roots, while updating it with today’s style elements. Embracing the mid-century aspects, we played off some of the existing features of the home by mirroring them in the spaces we redesigned. To introduce today’s style, we thoughtfully incorporated the finishes and touches that would aptly reflect that component. The resulting design is beautifully juxtaposed by the homeowners’ treasured antique furniture pieces.
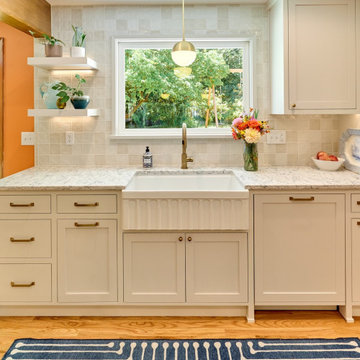
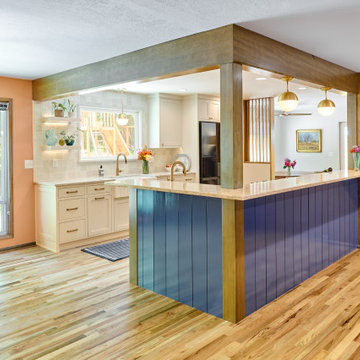
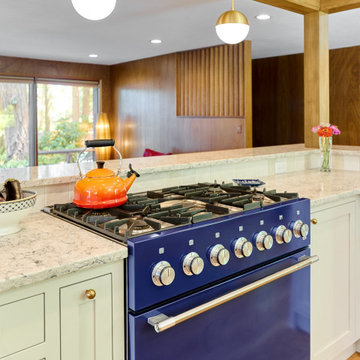
In the kitchen, we enhanced the open and airy feel by choosing a light greige color for the inset cabinetry paired with a tonal light-colored, blue-veined quartz for the countertops. These tones are perfectly complemented by the gold finishes of the cabinet hardware, faucets, and mid-century modern pendants. To maximize the storage potential of this kitchen, we customized the cabinetry with a convenient utensil organizer and a blind corner “cloud” pullout. A full height zellige-style tile backsplash with custom floating shelves makes for an impressive statement wall. With family get togethers in mind, we added an additional bar/prep sink and a spacious breakfast nook with a good deal of bench storage. A vertically-slatted wood half-wall separates the kitchen and breakfast nook, replicating the original mid-century wall detail at the entry.
Between the living room and kitchen, we designed a semi-open bar-height peninsula, accenting the bar front with a vertical shiplap kickplate in a bold blue. Carrying this color statement through the kitchen, the homeowner selected a “Navy Steel” Samsung Bespoke refrigerator and an AGA Mercury range, in “Blueberry.” These colors are also echoed in the multi-tonal quartz.
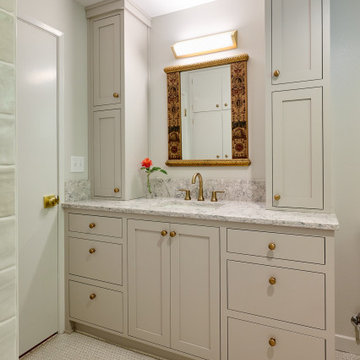
In the hall bathroom, we were aiming for the bright ambiance we’d achieved in the living areas. The penny round tile flooring and full height zellige-look tile combine for a classy, elevated look. In keeping with the kitchen, we installed similar gold fixtures and inset cabinetry and the same beautiful quartz countertop. The vanity towers provide these happy homeowners with additional room to store all their necessities.
Through the design process, we were able to gain square footage in the laundry room which allowed for the extra cabinet space the homeowners were looking for. Of course, a remodel is never complete without conveniences for the pets. The kitty’s litter box is neatly tucked in the cabinet behind a custom cat-cutout--a cute and tidy idea!
Kitchen Selections: Cabinet color-Farrow & Ball Ammonite No. 274; Countertops-Silestone Pietra; Cabinet hardware-Top Knobs Barrington collection in Honey Bronze; Pendants-Rejuvenation Palo Alto; Faucets- Delta Trinsic in Champagne Bronze; Tile-Tilebar Portmore 4x4 in White; Island bar shiplap color-Farrow and Ball Wine Dark No. 308
Bathroom Selections: Floor tile-Cepac Classic Rounds in Cloud; Tile-Tilebar Portmore 4x4 in White; Cabinet color-Farrow & Ball Purbeck Stone No. 275; Countertop-Silestone Pietra; Faucet-Delta Trinsic in Champagne Bronze
 Almesedoors
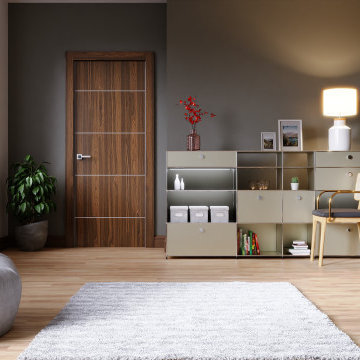
THE DOOR NAME ORIGIN - "ALLUMINIO ELIVIA VERTICAL WOOD GRAIN 4HS"
Of all the interior door models in the Elivia collection, this one is perhaps the most unapologetically elegant. Why? Hmm … That which is self-evident can be the most difficult to explain.
Is it because it is built using the latest breakthroughs in interior door making technology? Look at the finish: the process of applying it utilizes something called “stretching” by professionals, which is to say that instead of simply slapping the finish on top of the interior door’s surface, our company fuses (for lack of a better word) the materials (on molecular level, no less), the result being that the finished product is more warp-resistant, scratch-resistant, and fade-proof than any interior door put together in the past. This is especially important in climates known for their high humidity levels. Yes, but this has more to do with engineering than aesthetics, right?
Okay, so, is this interior door super-elegant because it features all the wonderful state-of-the-art hardware, specifically, the 3D adjustable, self-lubricating concealed hinges (made in Italy, by the way – a country which is, arguably, the birthplace of elegance as a concept)? Self-lubricating means your interior door will never creak. 3D-adjustable means that the installation is quick and precise (far more so than what you’d expect from ordinary hinges). Concealed means, of course, that the pin will not be visible from either side of the interior door when it’s closed. Actually, there is no pin. Neat, isn’t it? Would that be it?
Perhaps. Elegance in interior doors is a tricky concept. It combines (well, at least in the case of this particular interior door model it does) the “wow!” effect with the long-term agreeability. How so, you might ask. Well. It gets your favorable attention the first time you set eyes on it (the “wow” part); after which, you’ll never get tired of looking at it. For as long as you own it, it’ll always be easy on the eyes.
That must be it.
Maybe. Maybe not. There’s more.
This interior door is almost certainly Italian in spirit. Italian culture is rooted in Greco-Roman (Italian designers are very proud of that fact). Look at the vertical latitudinal orientation (which is to say the direction) of the wood grain. Pointing upward means creating additional visual space, pushing the ceiling higher (because your ceilings can never be too high). This is a time-proven architectural trick which ancient Greeks, with their characteristic tongue-in-cheek humor, referred to as “optical correction.” (By the way, if you’d sooner increase, the visual horizontal space of your room, you should look into this interior door’s sister – with the appropriate direction of the wood grain).
And then there’s the 4HS part, which stands for four horizontal stripes – resembling the four strings on the violin: the ultimate elegant musical instrument if there ever was one.
In its present form, the violin appeared in early Sixteenth Century in (guess …) northern Italy. Of course. To be fair, it quickly gained popularity throughout Europe, and the rest of the world soon after.
It’s elegance (the appearance as well as the sound) agreed with both street musicians and the nobility. The French king Charles IX ordered an Italian master to construct twenty-four violins for him in the year 1560.
Was the violin the source of inspiration for our designers?
Let’s move on to the finish.
 Powell Construction
This 1960’s home underwent a striking transformation--remodeling the kitchen, hall bathroom and laundry room. These homeowners dreamed of an open floor plan that would unite the kitchen and adjacent living areas. To accomplish this, we removed an imposing chimney that separated the kitchen from the living room. Additionally, we eliminated a weight-bearing wall that was between the kitchen and dining room. What a change! The spaces that formerly felt dark and confined are now bright and connected, comfortably accommodating larger gatherings.
When considering the specifics of design, we wanted to stay true to the home’s mid-century roots, while updating it with today’s style elements. Embracing the mid-century aspects, we played off some of the existing features of the home by mirroring them in the spaces we redesigned. To introduce today’s style, we thoughtfully incorporated the finishes and touches that would aptly reflect that component. The resulting design is beautifully juxtaposed by the homeowners’ treasured antique furniture pieces.
In the kitchen, we enhanced the open and airy feel by choosing a light greige color for the inset cabinetry paired with a tonal light-colored, blue-veined quartz for the countertops. These tones are perfectly complemented by the gold finishes of the cabinet hardware, faucets, and mid-century modern pendants. To maximize the storage potential of this kitchen, we customized the cabinetry with a convenient utensil organizer and a blind corner “cloud” pullout. A full height zellige-style tile backsplash with custom floating shelves makes for an impressive statement wall. With family get togethers in mind, we added an additional bar/prep sink and a spacious breakfast nook with a good deal of bench storage. A vertically-slatted wood half-wall separates the kitchen and breakfast nook, replicating the original mid-century wall detail at the entry.
Between the living room and kitchen, we designed a semi-open bar-height peninsula, accenting the bar front with a vertical shiplap kickplate in a bold blue. Carrying this color statement through the kitchen, the homeowner selected a “Navy Steel” Samsung Bespoke refrigerator and an AGA Mercury range, in “Blueberry.” These colors are also echoed in the multi-tonal quartz.
In the hall bathroom, we were aiming for the bright ambiance we’d achieved in the living areas. The penny round tile flooring and full height zellige-look tile combine for a classy, elevated look. In keeping with the kitchen, we installed similar gold fixtures and inset cabinetry and the same beautiful quartz countertop. The vanity towers provide these happy homeowners with additional room to store all their necessities.
Through the design process, we were able to gain square footage in the laundry room which allowed for the extra cabinet space the homeowners were looking for. Of course, a remodel is never complete without conveniences for the pets. The kitty’s litter box is neatly tucked in the cabinet behind a custom cat-cutout--a cute and tidy idea!
Kitchen Selections: Cabinet color-Farrow & Ball Ammonite No. 274; Countertops-Silestone Pietra; Cabinet hardware-Top Knobs Barrington collection in Honey Bronze; Pendants-Rejuvenation Palo Alto; Faucets- Delta Trinsic in Champagne Bronze; Tile-Tilebar Portmore 4x4 in White; Island bar shiplap color-Farrow and Ball Wine Dark No. 308
Bathroom Selections: Floor tile-Cepac Classic Rounds in Cloud; Tile-Tilebar Portmore 4x4 in White; Cabinet color-Farrow & Ball Purbeck Stone No. 275; Countertop-Silestone Pietra; Faucet-Delta Trinsic in Champagne Bronze
 Powell Construction
This 1960’s home underwent a striking transformation--remodeling the kitchen, hall bathroom and laundry room. These homeowners dreamed of an open floor plan that would unite the kitchen and adjacent living areas. To accomplish this, we removed an imposing chimney that separated the kitchen from the living room. Additionally, we eliminated a weight-bearing wall that was between the kitchen and dining room. What a change! The spaces that formerly felt dark and confined are now bright and connected, comfortably accommodating larger gatherings.
When considering the specifics of design, we wanted to stay true to the home’s mid-century roots, while updating it with today’s style elements. Embracing the mid-century aspects, we played off some of the existing features of the home by mirroring them in the spaces we redesigned. To introduce today’s style, we thoughtfully incorporated the finishes and touches that would aptly reflect that component. The resulting design is beautifully juxtaposed by the homeowners’ treasured antique furniture pieces.
In the kitchen, we enhanced the open and airy feel by choosing a light greige color for the inset cabinetry paired with a tonal light-colored, blue-veined quartz for the countertops. These tones are perfectly complemented by the gold finishes of the cabinet hardware, faucets, and mid-century modern pendants. To maximize the storage potential of this kitchen, we customized the cabinetry with a convenient utensil organizer and a blind corner “cloud” pullout. A full height zellige-style tile backsplash with custom floating shelves makes for an impressive statement wall. With family get togethers in mind, we added an additional bar/prep sink and a spacious breakfast nook with a good deal of bench storage. A vertically-slatted wood half-wall separates the kitchen and breakfast nook, replicating the original mid-century wall detail at the entry.
Between the living room and kitchen, we designed a semi-open bar-height peninsula, accenting the bar front with a vertical shiplap kickplate in a bold blue. Carrying this color statement through the kitchen, the homeowner selected a “Navy Steel” Samsung Bespoke refrigerator and an AGA Mercury range, in “Blueberry.” These colors are also echoed in the multi-tonal quartz.
In the hall bathroom, we were aiming for the bright ambiance we’d achieved in the living areas. The penny round tile flooring and full height zellige-look tile combine for a classy, elevated look. In keeping with the kitchen, we installed similar gold fixtures and inset cabinetry and the same beautiful quartz countertop. The vanity towers provide these happy homeowners with additional room to store all their necessities.
Through the design process, we were able to gain square footage in the laundry room which allowed for the extra cabinet space the homeowners were looking for. Of course, a remodel is never complete without conveniences for the pets. The kitty’s litter box is neatly tucked in the cabinet behind a custom cat-cutout--a cute and tidy idea!
Kitchen Selections: Cabinet color-Farrow & Ball Ammonite No. 274; Countertops-Silestone Pietra; Cabinet hardware-Top Knobs Barrington collection in Honey Bronze; Pendants-Rejuvenation Palo Alto; Faucets- Delta Trinsic in Champagne Bronze; Tile-Tilebar Portmore 4x4 in White; Island bar shiplap color-Farrow and Ball Wine Dark No. 308
Bathroom Selections: Floor tile-Cepac Classic Rounds in Cloud; Tile-Tilebar Portmore 4x4 in White; Cabinet color-Farrow & Ball Purbeck Stone No. 275; Countertop-Silestone Pietra; Faucet-Delta Trinsic in Champagne Bronze
 Powell Construction
This 1960’s home underwent a striking transformation--remodeling the kitchen, hall bathroom and laundry room. These homeowners dreamed of an open floor plan that would unite the kitchen and adjacent living areas. To accomplish this, we removed an imposing chimney that separated the kitchen from the living room. Additionally, we eliminated a weight-bearing wall that was between the kitchen and dining room. What a change! The spaces that formerly felt dark and confined are now bright and connected, comfortably accommodating larger gatherings.
When considering the specifics of design, we wanted to stay true to the home’s mid-century roots, while updating it with today’s style elements. Embracing the mid-century aspects, we played off some of the existing features of the home by mirroring them in the spaces we redesigned. To introduce today’s style, we thoughtfully incorporated the finishes and touches that would aptly reflect that component. The resulting design is beautifully juxtaposed by the homeowners’ treasured antique furniture pieces.
In the kitchen, we enhanced the open and airy feel by choosing a light greige color for the inset cabinetry paired with a tonal light-colored, blue-veined quartz for the countertops. These tones are perfectly complemented by the gold finishes of the cabinet hardware, faucets, and mid-century modern pendants. To maximize the storage potential of this kitchen, we customized the cabinetry with a convenient utensil organizer and a blind corner “cloud” pullout. A full height zellige-style tile backsplash with custom floating shelves makes for an impressive statement wall. With family get togethers in mind, we added an additional bar/prep sink and a spacious breakfast nook with a good deal of bench storage. A vertically-slatted wood half-wall separates the kitchen and breakfast nook, replicating the original mid-century wall detail at the entry.
Between the living room and kitchen, we designed a semi-open bar-height peninsula, accenting the bar front with a vertical shiplap kickplate in a bold blue. Carrying this color statement through the kitchen, the homeowner selected a “Navy Steel” Samsung Bespoke refrigerator and an AGA Mercury range, in “Blueberry.” These colors are also echoed in the multi-tonal quartz.
In the hall bathroom, we were aiming for the bright ambiance we’d achieved in the living areas. The penny round tile flooring and full height zellige-look tile combine for a classy, elevated look. In keeping with the kitchen, we installed similar gold fixtures and inset cabinetry and the same beautiful quartz countertop. The vanity towers provide these happy homeowners with additional room to store all their necessities.
Through the design process, we were able to gain square footage in the laundry room which allowed for the extra cabinet space the homeowners were looking for. Of course, a remodel is never complete without conveniences for the pets. The kitty’s litter box is neatly tucked in the cabinet behind a custom cat-cutout--a cute and tidy idea!
Kitchen Selections: Cabinet color-Farrow & Ball Ammonite No. 274; Countertops-Silestone Pietra; Cabinet hardware-Top Knobs Barrington collection in Honey Bronze; Pendants-Rejuvenation Palo Alto; Faucets- Delta Trinsic in Champagne Bronze; Tile-Tilebar Portmore 4x4 in White; Island bar shiplap color-Farrow and Ball Wine Dark No. 308
Bathroom Selections: Floor tile-Cepac Classic Rounds in Cloud; Tile-Tilebar Portmore 4x4 in White; Cabinet color-Farrow & Ball Purbeck Stone No. 275; Countertop-Silestone Pietra; Faucet-Delta Trinsic in Champagne Bronze

 Vintage Cellars & Saunas
This gorgeous custom wine cellar acts as a dramatic entrypiece as you walk into this beautiful home in San Juan Capistrano, Orange County, California. San Juan Capistrano is a lovely community located slightly inland, tucked within Orange County near cities like Newport Beach, Lake Forest, Huntington Beach, Costa Mesa, Dana Point, Laguna Niguel, Laguna Hills, and Irvine.
This fantastically designed wine cellar, courtesy of the master wine cellar builders at Vintage Cellars, is a unique representation of fun and bespoke features that can be incorporated into a traditional redwood, yet modern and bright wine cellar like this. The wine room draws you in from across the house, with its warm redwood tones and interesting wrought iron and glass door. Wine Cellar doors are often overlooked, but proper knowledge of door materials, glass specifications, threshold placement and hanging procedures are key to creating that perfect airtight room. Additionally, based on the location of your room within your home, the amount of glass in your wine cellar, and your location in the world, levels of cooling capacity need to be seriously considered.
Glass is a naturally poor insulator. Because there has been a very heavy push for "wine cellar art," "wine cellars as art," and wine cellars as a main design component within high end homes, glass wine cellars are often incorporated in high trafficked areas or spaces where each homeowner can show off their prized wines to friends in an almost showcase like display.
When you first enter this large custom wine cellar in Orange County, Southern California, standing out first immediately on your left is a unique work station with a scanner, label-maker, and table top - perfect for inventorying the 3,500 bottles that this rustic wine cellar holds. The e-Sommelier system integrated allows this homeowner to catalog each and every wine within his collection, first letting the program know he owns it, how many bottles, which vintages, and with the click of a button - custom wine labels each with a bar code. Accompanied with the bar code scanner, the e-sommelier system has become a great companion for wine cellars and wine collectors alike, allowing a somewhat seamless and straightforward process in inventorying wines.
Directly past the wine inventory station is a vertical row of large format bottle coved trays, displaying some of the owner's favorite wines in the most coveted vintages.
This large walk in custom wine cellar in all heart redwood wine racking fills most of its capacity utilizing double deep, individual bottle storage. At waist height spanning the entire circumference of the wine room is a high reveal display row, highlighted with LED lighting and more single deep storage behind.
The back wall, in addition to the high reveal display row and double deep individual bottle storage, incorporates a rectangular wine work center with glass rack above - perfect for decanting, storing uniquely shaped bottles, and opening your favorite bottles with friends. Directly below this countertop are two drawers. A unique feature throughout this wooden traditional large walk in wine cellar in San Juan Capistrano, Orange County, California is the incorporation of wine barrel into the room's corner walls, work stations, countertops, and center custom table.
This custom wine cellar near Newport Beach, Dana Point, Laguna Beach, Laguna Hills, Coto De Caza, Laguna Niguel, Huntington Beach, and other gorgeous beach communities in Orange County, also incorporates wine case storage throughout the bottom, and a small area above the wine inventory system for split bottles.
Vintage Cellars, as well as the homeowner, are very happy with the way this beautiful project turned out, and we would love the opportunity to help you with you wine cellar projects!
Please contact us today to speak with one of our wine cellar specialists and begin building your wine cellar dreams today!
 Tile Doctor Ltd
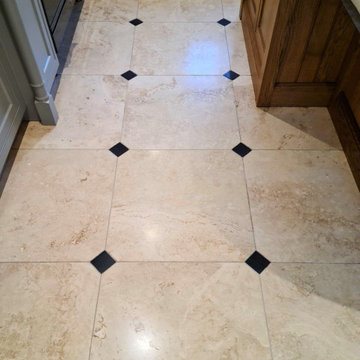
The pictures show a large Limestone floor laid through much of the ground floor of a property situated on the outskirts of York seventeen years prior.
The owners had three dogs that slept in their own doggy room. The floor in this room was in the worst condition of the five rooms as it had been subject to significant wear and tear. The Limestone tiles looked dull with ingrained dirt and the grout was stained and patchy.
The original tiler had laid the floor well, but he had applied a satin topical sealer to the stone most of which had worn off over the years. A floor like this would need a little maintenance and the sealer reapplying from time to time to maintain it.
I completed a test clean for the client to show them what could be achieved which came out well. Happy with the result they accepted my quote for the restoration work, and we booked in a suitable time to complete the work.
The area was quite large, so I separated the job into rooms and started by protecting the skirtings and woodwork from splashing etc. I decided to do a chemical clean first to remove what was left of the old sealer but more importantly to give the grout a thorough clean which was making the floor look scruffy.
For this I opted to apply a strong dilution of Tile Doctor Pro-Clean which was left to dwell for a short while and then worked in with a mechanical rotary cleaner. It gets to work on the ingrained dirt and sealer. It should also help to get rid of the doggy smells. This process turns the cleaning solution black and is then extracted using a wet vacuum keeping the mess to a minimum. I paid particular attention to the grout which was deeply discoloured and found that some areas required going over a couple of times to get them clean. I was only just getting started on the cleaning but immediately the floor was looking so much better.
I then deep cleaned the Limestone with a set of diamond burnishing pads, working in sequence from the 400 grit through to 1500 grit. A small amount of water was used to aid the lubrication and after each pad have been over the entire area few times the solution is rinsed off with more water and extracted with the wet vacuum.
The floor came back to almost new and as the client wanted a satin finish, I ended by applying a 3000-grit pad to add a deeper polish to the Limestone. The floor was then left overnight to dry.
The last step of polishing with the 3000-grit pad already leaves the floor quite dry however I always like to check before sealing so just to be sure I took some reading with a damp meter. The readings were fine, so I started applying the first of two coats of Tile Doctor Ultra Seal to finish the floor. This is an impregnating sealer (as opposed to the previous topical sealer) that soaks into the stone protecting it from within but without affecting its appearance. This product was chosen in consultation with the client who was specific about how they wanted to floor to look.
The floor now looked superb. Both the client and l were very pleased with the finished floor and so where the dogs! For aftercare I recommended Tile Doctor Stone Soap which is designed for cleaning polished stone floors like these, it’s a gentle stone cleaner that helps maintain the patina and ideal for this type of floor.
Nigel Stoker
North West Yorkshire Tile Doctor
 Powell Construction
This 1960’s home underwent a striking transformation--remodeling the kitchen, hall bathroom and laundry room. These homeowners dreamed of an open floor plan that would unite the kitchen and adjacent living areas. To accomplish this, we removed an imposing chimney that separated the kitchen from the living room. Additionally, we eliminated a weight-bearing wall that was between the kitchen and dining room. What a change! The spaces that formerly felt dark and confined are now bright and connected, comfortably accommodating larger gatherings.
When considering the specifics of design, we wanted to stay true to the home’s mid-century roots, while updating it with today’s style elements. Embracing the mid-century aspects, we played off some of the existing features of the home by mirroring them in the spaces we redesigned. To introduce today’s style, we thoughtfully incorporated the finishes and touches that would aptly reflect that component. The resulting design is beautifully juxtaposed by the homeowners’ treasured antique furniture pieces.
In the kitchen, we enhanced the open and airy feel by choosing a light greige color for the inset cabinetry paired with a tonal light-colored, blue-veined quartz for the countertops. These tones are perfectly complemented by the gold finishes of the cabinet hardware, faucets, and mid-century modern pendants. To maximize the storage potential of this kitchen, we customized the cabinetry with a convenient utensil organizer and a blind corner “cloud” pullout. A full height zellige-style tile backsplash with custom floating shelves makes for an impressive statement wall. With family get togethers in mind, we added an additional bar/prep sink and a spacious breakfast nook with a good deal of bench storage. A vertically-slatted wood half-wall separates the kitchen and breakfast nook, replicating the original mid-century wall detail at the entry.
Between the living room and kitchen, we designed a semi-open bar-height peninsula, accenting the bar front with a vertical shiplap kickplate in a bold blue. Carrying this color statement through the kitchen, the homeowner selected a “Navy Steel” Samsung Bespoke refrigerator and an AGA Mercury range, in “Blueberry.” These colors are also echoed in the multi-tonal quartz.
In the hall bathroom, we were aiming for the bright ambiance we’d achieved in the living areas. The penny round tile flooring and full height zellige-look tile combine for a classy, elevated look. In keeping with the kitchen, we installed similar gold fixtures and inset cabinetry and the same beautiful quartz countertop. The vanity towers provide these happy homeowners with additional room to store all their necessities.
Through the design process, we were able to gain square footage in the laundry room which allowed for the extra cabinet space the homeowners were looking for. Of course, a remodel is never complete without conveniences for the pets. The kitty’s litter box is neatly tucked in the cabinet behind a custom cat-cutout--a cute and tidy idea!
Kitchen Selections: Cabinet color-Farrow & Ball Ammonite No. 274; Countertops-Silestone Pietra; Cabinet hardware-Top Knobs Barrington collection in Honey Bronze; Pendants-Rejuvenation Palo Alto; Faucets- Delta Trinsic in Champagne Bronze; Tile-Tilebar Portmore 4x4 in White; Island bar shiplap color-Farrow and Ball Wine Dark No. 308
Bathroom Selections: Floor tile-Cepac Classic Rounds in Cloud; Tile-Tilebar Portmore 4x4 in White; Cabinet color-Farrow & Ball Purbeck Stone No. 275; Countertop-Silestone Pietra; Faucet-Delta Trinsic in Champagne Bronze
 Vintage Cellars & Saunas
This beautiful custom wine cellar / wine wall / wine room in San Juan Capistrano, Orange County, California is truly a jaw dropper. Vintage Cellars, wine cellar builders out of san diego, california, were able to design and build this masterpiece as a major centerpoint of this dining room and kitchen.
A custom wine cellar designed and built by vintage wine cellars out of San Diego, California - this custom wine wall has tons of unique and noteworthy features throughout. The bottom of the cellar begins with multiple areas for wine case storage and other bulk storage options. The great thing about this space is that it was designed for multi-use capability, leaving ample room to store multiple layers deep of single bottle storage as well.
Directly above the case storage lie multiple layers of easy pull out shelving on smooth rolling tracks, seamlessly allowing for drawer sliding with no risk of bottle movement or abrupt stops. These are fantastic features to have, especially in the case of having flights of wines from your favorite wineries. A collection of 2010 through 2016 Larkmeade Cabernet Sauvignon bottles from Napa have never looked so good.
In the center, a small countertop and opening are used for a practical space to open and decant wines. Glass shelving features and acrylic wine racking dividers make for a fun, transparent, and sleek looking centerpiece.
On either side of this wine wall feature / kitchen wine cellar are long rows of high reveal display of wine bottles, carefully designed and engineered to lay down properly so that the cork will stay wet and wines are aged perfectly and gracefully over time. These display rows act as fantastic "show off" sections - perfectly highlighting each bottle's respective label and giving you the ability to really display your gems.
More sections sit above these displays, turning the bottles inward and facing them cork out. In this certain circumstance and with this specific client's collection, these sections really popped with color and intrigue with many cases of the same wines being placed into the racking. Intense hues of Red and Yellow POP, keeping this wine cellar interesting and a pleasure to look at no matter what section you're exploring.
Horizontal stainless steel metal rods are Integrated into the custom cabinetry horizontally and angled across each multiple sections, again offering another unique and different design feature, now with wine bottle labels facing outward and completely visible. This look in custom wine wall / custom wine cellar / custom wine room / custom wine display / custom wine storage solutions is a great way to integrate modern nuances into your cellar. Accents of metal into an otherwise "traditional" wooden wine cellar can actually add a unique change of pace and give an entire new breath of life to an existing wine storage space.
700 bottle capacity, with room for magnum storage above.
Vintage Cellars enjoys working directly with NOE Design Co. and MAIDEN Steel companies when integrating a major glass door feature. The quality of work is second to none, unparalleled, and we are able to ensure that our clients are left with an absolutely stunning, but more importantly, 100% perfectly sealed and specified door and stainless steel framing system.
With so many different kinds of wine racks / wine racking / wine cellar designs and styles, you can really go in any and every direction in the discovery and design phase of a custom wine cellar project. The Custom wine cellar builder custom wine cellar builders team at Vintage Cellars make the entire process exciting, informative, and smooth from start to finish.
Vintage Cellars has built gorgeous custom wine cellars and wine storage rooms across the United States and World for over 25 years. We are your go-to business for anything wine cellar and wine storage related! Whether you're interested in a wine closet, wine racking, custom wine racks, a custom wine cellar door, or a cooling system for your existing space, Vintage Cellars has you covered!
We carry all kinds of wine cellar cooling and refrigeration systems, incuding: Breezaire, CellarCool, WhisperKool, Wine Guardian, CellarPro and Commercial systems.
We also carry many types of Wine Refrigerators, Wine Cabinets, and wine racking types, including La Cache, Marvel, N'Finity, Transtherm, Vinotheque, Vintage Series, Credenza, Walk in wine rooms, Climadiff, Riedel, Fontenay, and VintageView.
Vintage Cellars also does work in many styles, including Contemporary and Modern, Rustic, Farmhouse, Traditional, Craftsman, Industrial, Mediterranean, Mid-Century, Industrial and Eclectic.
Some locations we cover often include: Agora Hills, Alameda, Albany, Alhambra, Aliso Viejo, Altadena, Anaheim, Angwin, Arcadia, Aromas, Arroyo Grande, Atascadero, Atherton, Avila Beach, Balboa Terrace, Bel Air, Belmont, Belvedere, Benton, Berkeley, Bermuda Dunes, Beverly Hills, Big Sur, Bolinas, Boyle Heights, Bradbury, Bradley, Brea, Brentwood, Bridgeport, Brisbane, Buellton, Buena Park, Burbank, Burlingame, Calabasas, Calistoga, Cambria, Canoga Park, Cardiff, Carlsbad, Carmel, Carmel By The Sea, Carmel Valley, Carnelian Bay, Carpinteria, Casmalia, Castroville, Cathedral City, Cayucos, Chatsworth, Chualar, City of LA, City of SF, Coachella, Coleville, Colma, Corona Del Mar, Coronado, Coronado Island, Corte Madera, Costa Mesa, Coto De Caza, Creston, Crystal Cove, Cupertino, Cypress, Danville, Deer Park, Del Mar, Diablo, Duarte, Eagle Rock, East Palo Alto, East Pasadena, Echo Park, El Granada, El Monte, Emeryville, Encinitas, Encino, Fairfax, Foster City, Fountain Valley, Fremont, Fullerton, Garden Grove, Glendale, Golden Gate Park, Goleta, Gonzales, Granada Hills, Granite Bay, Greenbrae, Greenfield, Grover Beach, Guadalupe, Half Moon Bay, Hancock Park, Harmony, Hidden Hills, Hillsborough, Hollywood, Hollywood Hills, Huntington Beach, Indian Wells, Indio, Industry, Inner Richmond, Inverness, Irvine, Jolon, June Lake, Kentfield, King City, La Canada Flintridge, La Habra, La Honda, La Jolla, La Palma, La Quinta, Ladera Heights, Laguna Beach, Laguna Hills, Laguna Niguel, Laguna Woods, Lake Balboa, Lake Forest, Lake Tahoe, Lake View Terrace, Larkspur, Laurel Canyon, Lee Vining, Lockwood, Lompoc, Long Beach, Los Alamitos, Los Alamos, Los Altos, Los Altos Hills, Los Angeles, Los Gatos, Los Olivos, Los Osos, Malibu, Mammoth Lakes, Manhattan Beach, Marin, Marina, Marshall, Mayflower Village, Menlo Park, Mill Valley, Millbrae, Mission Hills, Mission Viejo, Mono, Monrovia, Montara, Montebello, Monterey, Monterey Park, Morro Bay, Moss Beach, Moss Landing, Mountain View, Napa, New Cuyama, Newark, Newport Beach, Newport Coast, Nicasio, Nipomo, North Hills, Northridge, Novato, Oakland, Oakville, Ocean Beach, Oceano, Orange, Orange County, Pacific Grove, Pacific Palisades, Pacoima, Palm Desert, Palm Springs, Palo Alto, Palos Verdes, Panorama City, Pasadena, Paso Robles, Pebble Beach, Pescadero, Piedmont, Pismo Beach, Placentia, Point Reyes Station, Pope Valley, Portola Valley, Presidio, Presidio Heights, Rancho Mirage, Rancho Santa Fe, Rancho Santa Margarita, Redondo Beach, Redwood City, Reseda, Rosemead, Russian Cliff, Rutherford, Saint Helena, Salinas, San Anselmo, San Ardo, San Bruno, San Carlos, San Clemente, San Diego, San Fernando, San Francisco, San Gabriel, San Gregorio, San Jose, San Juan Capistrano, San Leandro, San Lorenzo, San Lucas, San Luis Obispo, San Marino, San Mateo, San Miguel, San Rafael, San Simeon, Santa Ana, Santa Barbara, Santa Clara, Santa Clarita, Santa Margarita, Santa Maria, Santa Monica, Santa Ynez, Saratoga, Sausalito, Sea Cliff, Seal Beach, Seaside, Shadow Hills, Shandon, Sherman Oaks, Sierra Madre, Silver Lake, Solana Beach, Soledad, Solvang, Sonoma, South El Monte, South Pasadena, South San Gabriel, Spreckels, Squaw Valley, St Helena, Stanford, Stanton, Stinson Beach, Stough Park, Studio City, Summerland, Sun Valley, Sunland, Sunnyvale, Sylmar, Tahoe City, Tahoe Vista, Tarzana, Temple City, Templeton, Thousand Oaks, Thousand Palms, Tiburon, Toluca Lake, Topanga, Topaz, Torrey Pines, Tujanga, Tustin, Union City, Valencia, Verdugo Mountains, Vernon, Villa Park, Walnut, Walnut Creek, West Puente Valley, Westminster, Westwood, Whittier, Woodside, Yorba Linda, Yountville
San Diego Wine Cellars, Rancho Santa Fe Wine Cellars, Beverly Hills Wine Cellars, Bel Air Wine Cellars, Orange County Wine Cellars, Newport Beach Wine Cellars, San Francisco Wine Cellars, Napa Wine Cellars, Sonoma Wine Cellars, Los Angeles Wine Cellars, Santa Barbara Wine Cellars, Palm Desert Wine Cellars, La Jolla Wine Cellars, Del Mar Wine Cellars, Coronado Wine Cellars, Pacific Palisades Wine Cellars, Malibu Wine Cellars, Santa Monica Wine Cellars, Brentwood Wine Cellars, Laguna Wine Cellars, Crystal Cove Wine Cellars, Hollywood Wine Cellars, Bay Area Wine Cellars, South Bay Wine Cellars, LA Wine Cellars, SD Wine Cellars, OC Wine Cellars, SF Wine Cellars, Huntington Beach Wine Cellars, Carlsbad Wine Cellars, Palos Verdes Wine Cellars, Paso Robles Wine Cellars, Encinitas Wine Cellars, Manhattan Beach Wine Cellars, Marin Wine Cellars, Tiburon Wine Cellars, Coto De Caza Wine Cellars, Thousand Oaks Wine Cellars, Cardiff Wine Cellars, RSF Wine Cellars, San Marino Wine Cellars, Ladera Heights Wine Cellars, Westwood Wine Cellars, Hillsborough Wine Cellars, Luxury Wine Cellars, Custom Wine Cellars, High End Wine Cellars, Estate Wine Cellars, Modern Wine Cellars, Contemporary Wine Cellars, Rustic Wine Cellars, Traditional Wine Cellars
Contact Vintage Cellars today with any of your Wine Cellar needs!
(800) 876-8789
Vintage Cellars
904 Rancheros Drive
San Marcos, California 92069
(800) 876-8789
 Vintage Cellars & Saunas
This gorgeous custom wine cellar acts as a dramatic entrypiece as you walk into this beautiful home in San Juan Capistrano, Orange County, California. San Juan Capistrano is a lovely community located slightly inland, tucked within Orange County near cities like Newport Beach, Lake Forest, Huntington Beach, Costa Mesa, Dana Point, Laguna Niguel, Laguna Hills, and Irvine.
This fantastically designed wine cellar, courtesy of the master wine cellar builders at Vintage Cellars, is a unique representation of fun and bespoke features that can be incorporated into a traditional redwood, yet modern and bright wine cellar like this. The wine room draws you in from across the house, with its warm redwood tones and interesting wrought iron and glass door. Wine Cellar doors are often overlooked, but proper knowledge of door materials, glass specifications, threshold placement and hanging procedures are key to creating that perfect airtight room. Additionally, based on the location of your room within your home, the amount of glass in your wine cellar, and your location in the world, levels of cooling capacity need to be seriously considered.
Glass is a naturally poor insulator. Because there has been a very heavy push for "wine cellar art," "wine cellars as art," and wine cellars as a main design component within high end homes, glass wine cellars are often incorporated in high trafficked areas or spaces where each homeowner can show off their prized wines to friends in an almost showcase like display.
When you first enter this large custom wine cellar in Orange County, Southern California, standing out first immediately on your left is a unique work station with a scanner, label-maker, and table top - perfect for inventorying the 3,500 bottles that this rustic wine cellar holds. The e-Sommelier system integrated allows this homeowner to catalog each and every wine within his collection, first letting the program know he owns it, how many bottles, which vintages, and with the click of a button - custom wine labels each with a bar code. Accompanied with the bar code scanner, the e-sommelier system has become a great companion for wine cellars and wine collectors alike, allowing a somewhat seamless and straightforward process in inventorying wines.
Directly past the wine inventory station is a vertical row of large format bottle coved trays, displaying some of the owner's favorite wines in the most coveted vintages.
This large walk in custom wine cellar in all heart redwood wine racking fills most of its capacity utilizing double deep, individual bottle storage. At waist height spanning the entire circumference of the wine room is a high reveal display row, highlighted with LED lighting and more single deep storage behind.
The back wall, in addition to the high reveal display row and double deep individual bottle storage, incorporates a rectangular wine work center with glass rack above - perfect for decanting, storing uniquely shaped bottles, and opening your favorite bottles with friends. Directly below this countertop are two drawers. A unique feature throughout this wooden traditional large walk in wine cellar in San Juan Capistrano, Orange County, California is the incorporation of wine barrel into the room's corner walls, work stations, countertops, and center custom table.
This custom wine cellar near Newport Beach, Dana Point, Laguna Beach, Laguna Hills, Coto De Caza, Laguna Niguel, Huntington Beach, and other gorgeous beach communities in Orange County, also incorporates wine case storage throughout the bottom, and a small area above the wine inventory system for split bottles.
Vintage Cellars, as well as the homeowner, are very happy with the way this beautiful project turned out, and we would love the opportunity to help you with you wine cellar projects!
Please contact us today to speak with one of our wine cellar specialists and begin building your wine cellar dreams today!

 Advance Design Studio, Ltd.
Mike and Michelle of Lake Barrington knew they needed extra space. Their home was becoming too crowded for their family with blossoming teenagers, so a basement renovation offered the perfect solution for more space for the kids and more room to entertain for the adults.
“Our project consisted of expanding our laundry room, putting in a first floor wet bar so we had adult space upstairs, while also renovating our basement for a family-friendly and teen-functional area as well,” Michelle says.
They found Advance Design Studio through a neighbor who gave a glowing recommendation, giving Michelle and Mike the confidence they needed to move forward with a major home renovation. They felt like they knew Advance Design before they even worked together. When they met with the owner Todd Jurs and designer Nicole Ryan, Mike and Michelle knew they were getting a trustworthy, dependable team that could create the project they had been dreaming about for 7 years.
Having virtually no natural light to work with, one of the biggest design challenges was creating a basement that did not feel dark and depressing. The Advance team got to work creating architectural archways and custom detailed dry-stack stone columns artfully designed into the space, adding a dramatic element that made the space feel less like a basement or more like a relaxing family room. Color 3D renderings were created to portray what the space would look like so Mike and Michelle could visualize the space in advance.
Detailed trim and crown moldings grace the built in buffet and wet bar making for an amazingly functional space that lacks nothing in style and visual interest. Cherry wood cabinetry by Dura Supreme is featured in the space with a “Cocoa Brown” finish and includes beautiful mirrored glass doors embellished with unique elliptical mullion details. A built-in microwave, dishwasher and mini fridge add practicality to the ample entertainment mecca. An under mounted sink finishes the space joined with a intricate mosaic tile backsplash and “Ventisca Polished” quartz countertops.
The basement is absolutely perfect for hosting friends and family with expertly designed key areas such as a game space for the kids, a movie area for the family, an ample workout room with luxurious full bath, and even built in wine storage. The family absolutely loves the new basement living space, and has already enjoyed numerous family movie nights and sleep-overs with friends.
While custom cabinets made by Dura Supreme were used to create unique spaces that lived up to Mike and Michelle’s expectations., heated flooring under the 16”x16” “Mongolian Spring” tile was installed giving all tiled areas of the basement a much cozier feel, eliminating that cold hard surface most of us hate in our basements!
The new basement must-have requirement list included a new bath space, which was incorporated adjacent to the work out room. The sleek shower door and cabinets in the new bathroom make guests and family feel like they are in an elegant hotel. The new guest bath features 4”x36” “Silver Screen” honed marble tile in a brick pattern on the shower walls and 2”x2” “Chenille” limestone tile in a hexagon mosaic pattern on the shower floor.
“I came in with very specific requirements for our three project areas,” Michelle says. “There was not one time that I felt like I was asking for something that was not going to turn out how I anticipated.”
Tying in multiple rooms during a renovation if you have can do it makes a lot of sense and saves money in the long run. A fully functional laundry room as well was a must on this family’s wish list. Michelle wanted to add space to the existing cramped and awkward laundry room, and Mike wanted to make sure they could still park a car in the garage. Reconfiguring interior walls required borrowing unused space cleverly from the garage in order to enlarge the laundry room space.
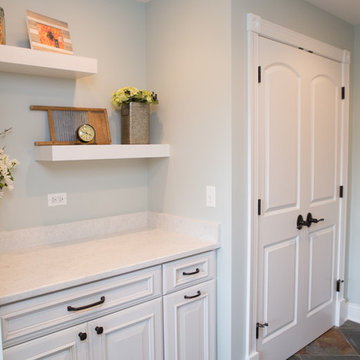
Drawers under the stairs added beautiful hidden storage created almost magically out of dead space. White painted Dura Supreme cabinets bring additional light into the small space; while the 16”x16” cleft slate tile flooring provides excellent contrast and the naturally earthy feel Michelle wanted. Quartz countertops with a 3”x12” “Debut Dew” subway tile backsplash add elegance to the now upliftingly bright laundry room.
The extra space makes doing laundry much more pleasurable and the added storage is a great for all those little things like winter hats and gloves, umbrellas and the like. “The Advance Design project team was phenomenal to work with,” Michelle says. “They came in, shared the plans with us and walked us through the expectations. We always knew what was coming next.”
Converting an existing closet space, the wet bar upstairs was challenging because they wanted a functional area that didn’t look or feel like cabinets just sticking out of a closet. So the Advance team transformed this ordinary closet space into a stunning wet bar that architecturally appears as if it’s always been there. Traditional, elegant hand carved custom molding matching the adjacent fireplace ties the new entertainment bar area in nicely with the existing family room and kitchen area.
Featuring a built in wine refrigerator, Dura Supreme cabinetry in deep cherry wood elegantly displays wine bottles and etched glass mullion doors that fill with soft light in the evening hours. Cambria “Windermere” quartz countertops with a sophisticated hammered copper sink and a glimmering backsplash round out the stunning wet bar. Hosting parties and family functions has become much more enjoyable now that they have a dedicated beverage serving area large enough to include hors devours.
All three projects were designed and constructed together at the same time, making for a cohesive project that was administered smoothly and easily both for the design team and for the family. Disruption to the home was minimal as each phase was completed in each project conclusively, and design and meeting time for the homeowner was efficient and organized making for an enjoyable process.
“Advance Design was great to work with,” Michelle says. “I would highly recommend them to anyone considering a home improvement project. They took the time at the beginning to understand our needs, our budget, and our vision for our home. The field team was great, attentive, on time, cleaned up each day and made the overall experience very positive. We couldn't be happier with the finished product.”
With the help of our talented, award winning design team you can create the basement, laundry room, or any other home renovation that you have been dreaming of. With our “Common Sense Remodeling” approach, the process of renovating you home has never been easier. Contact us today at 847-836-2600 or schedule an appointment to talk with us about that kitchen remodeling project.
Joe Nowak

 Spire North
Tucked away in the backwoods of Torch Lake, this home marries “rustic” with the sleek elegance of modern. The combination of wood, stone and metal textures embrace the charm of a classic farmhouse. Although this is not your average farmhouse. The home is outfitted with a high performing system that seamlessly works with the design and architecture.
The tall ceilings and windows allow ample natural light into the main room. Spire Integrated Systems installed Lutron QS Wireless motorized shades paired with Hartmann & Forbes windowcovers to offer privacy and block harsh light. The custom 18′ windowcover’s woven natural fabric complements the organic esthetics of the room. The shades are artfully concealed in the millwork when not in use.
Spire installed B&W in-ceiling speakers and Sonance invisible in-wall speakers to deliver ambient music that emanates throughout the space with no visual footprint. Spire also installed a Sonance Landscape Audio System so the homeowner can enjoy music outside.
Each system is easily controlled using Savant. Spire personalized the settings to the homeowner’s preference making controlling the home efficient and convenient.
 Advance Design Studio, Ltd.
Mike and Michelle of Lake Barrington knew they needed extra space. Their home was becoming too crowded for their family with blossoming teenagers, so a basement renovation offered the perfect solution for more space for the kids and more room to entertain for the adults.
“Our project consisted of expanding our laundry room, putting in a first floor wet bar so we had adult space upstairs, while also renovating our basement for a family-friendly and teen-functional area as well,” Michelle says.
They found Advance Design Studio through a neighbor who gave a glowing recommendation, giving Michelle and Mike the confidence they needed to move forward with a major home renovation. They felt like they knew Advance Design before they even worked together. When they met with the owner Todd Jurs and designer Nicole Ryan, Mike and Michelle knew they were getting a trustworthy, dependable team that could create the project they had been dreaming about for 7 years.
Having virtually no natural light to work with, one of the biggest design challenges was creating a basement that did not feel dark and depressing. The Advance team got to work creating architectural archways and custom detailed dry-stack stone columns artfully designed into the space, adding a dramatic element that made the space feel less like a basement or more like a relaxing family room. Color 3D renderings were created to portray what the space would look like so Mike and Michelle could visualize the space in advance.
Detailed trim and crown moldings grace the built in buffet and wet bar making for an amazingly functional space that lacks nothing in style and visual interest. Cherry wood cabinetry by Dura Supreme is featured in the space with a “Cocoa Brown” finish and includes beautiful mirrored glass doors embellished with unique elliptical mullion details. A built-in microwave, dishwasher and mini fridge add practicality to the ample entertainment mecca. An under mounted sink finishes the space joined with a intricate mosaic tile backsplash and “Ventisca Polished” quartz countertops.
The basement is absolutely perfect for hosting friends and family with expertly designed key areas such as a game space for the kids, a movie area for the family, an ample workout room with luxurious full bath, and even built in wine storage. The family absolutely loves the new basement living space, and has already enjoyed numerous family movie nights and sleep-overs with friends.
While custom cabinets made by Dura Supreme were used to create unique spaces that lived up to Mike and Michelle’s expectations., heated flooring under the 16”x16” “Mongolian Spring” tile was installed giving all tiled areas of the basement a much cozier feel, eliminating that cold hard surface most of us hate in our basements!
The new basement must-have requirement list included a new bath space, which was incorporated adjacent to the work out room. The sleek shower door and cabinets in the new bathroom make guests and family feel like they are in an elegant hotel. The new guest bath features 4”x36” “Silver Screen” honed marble tile in a brick pattern on the shower walls and 2”x2” “Chenille” limestone tile in a hexagon mosaic pattern on the shower floor.
“I came in with very specific requirements for our three project areas,” Michelle says. “There was not one time that I felt like I was asking for something that was not going to turn out how I anticipated.”
Tying in multiple rooms during a renovation if you have can do it makes a lot of sense and saves money in the long run. A fully functional laundry room as well was a must on this family’s wish list. Michelle wanted to add space to the existing cramped and awkward laundry room, and Mike wanted to make sure they could still park a car in the garage. Reconfiguring interior walls required borrowing unused space cleverly from the garage in order to enlarge the laundry room space.
Drawers under the stairs added beautiful hidden storage created almost magically out of dead space. White painted Dura Supreme cabinets bring additional light into the small space; while the 16”x16” cleft slate tile flooring provides excellent contrast and the naturally earthy feel Michelle wanted. Quartz countertops with a 3”x12” “Debut Dew” subway tile backsplash add elegance to the now upliftingly bright laundry room.
The extra space makes doing laundry much more pleasurable and the added storage is a great for all those little things like winter hats and gloves, umbrellas and the like. “The Advance Design project team was phenomenal to work with,” Michelle says. “They came in, shared the plans with us and walked us through the expectations. We always knew what was coming next.”
Converting an existing closet space, the wet bar upstairs was challenging because they wanted a functional area that didn’t look or feel like cabinets just sticking out of a closet. So the Advance team transformed this ordinary closet space into a stunning wet bar that architecturally appears as if it’s always been there. Traditional, elegant hand carved custom molding matching the adjacent fireplace ties the new entertainment bar area in nicely with the existing family room and kitchen area.
Featuring a built in wine refrigerator, Dura Supreme cabinetry in deep cherry wood elegantly displays wine bottles and etched glass mullion doors that fill with soft light in the evening hours. Cambria “Windermere” quartz countertops with a sophisticated hammered copper sink and a glimmering backsplash round out the stunning wet bar. Hosting parties and family functions has become much more enjoyable now that they have a dedicated beverage serving area large enough to include hors devours.
All three projects were designed and constructed together at the same time, making for a cohesive project that was administered smoothly and easily both for the design team and for the family. Disruption to the home was minimal as each phase was completed in each project conclusively, and design and meeting time for the homeowner was efficient and organized making for an enjoyable process.
“Advance Design was great to work with,” Michelle says. “I would highly recommend them to anyone considering a home improvement project. They took the time at the beginning to understand our needs, our budget, and our vision for our home. The field team was great, attentive, on time, cleaned up each day and made the overall experience very positive. We couldn't be happier with the finished product.”
With the help of our talented, award winning design team you can create the basement, laundry room, or any other home renovation that you have been dreaming of. With our “Common Sense Remodeling” approach, the process of renovating you home has never been easier. Contact us today at 847-836-2600 or schedule an appointment to talk with us about that kitchen remodeling project.
Joe Nowak
 China Marmoglass Co.,Limited
Home > Products
Crystallized Glass,Crystallized stone 6
Crystallized Glass,Crystallized stone,Crystallized glass panel
Marmoglass,Nanoglass,Marmoglass Composite Collectively referred to as Crystallized Glass
Crystallized Glass Application:
1). Interior & external wall cladding
2). Flooring Tile, Stair, Column cladding
3). Basin, Countertop, Table, Bar
4). bath, Kitchen, any tops, round pillar and furniture decoration etc .
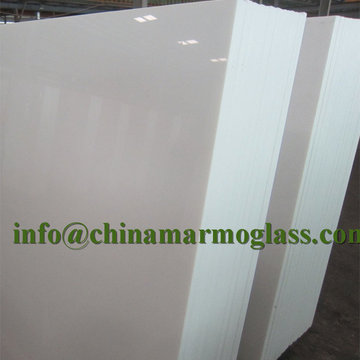
Crystal white is a kind of artificial stone . It is made of glass ,which should be burned in the oven for two days under the more than 1000C temperature . It is much different from natural stone from all sides.
1. Natural and soft texture,
2. Varied colors such white, beige, carrara white
3. Good weather resisting property and durability
4. Zero percent of water absorption , not be polluted easily
5. Green environmental building material
6. High-intensity, light weight
7. Bending formation, economical, time saving
8. scratch resistant ,withstand high-heat .
More details about it :
1. There are more than 10 colors of crystallized glass panel products available: Pure white, yellow, silver yellow, silver grey, grey in white, grey spot white, USA grey spot white, yellow in white….
2. Panel thickness: 10-30MM
3. Normal specifications (mm):
1800*3000*18 1200*2400*18 600*600*18 1200*1200*18
1600*2400*18 1800*3000*30 800*800*18 1000*1000*18
Thin tiles:
305*305*12mm, 450*450*12mm
457*457*12mm, 400*400*12mm
600*600*12mm 1200*2400*12mm
4. Material: crystal quartz sand
5. Packaging: Fumigated wooden crates, Bundles,foam
6. Brand name: China Marmoglass / Nanoglass
7. Place of origin: Xiamen, Fujian ,China
8. Model NO.: GS001, SN002, NANO2009, NNAO2011
9. Supply ability: 20000M2/MONTH, 30TON/DAY
10. Delivery time: generally within 10 days, after the order confirmed and the deposit received
11. Arc panel specifications (mm):
Thickness: 18-30mm
Diameter : 30cm-120cm
1.What is crystallized glass stone(Marmoglass SN002 )?
The micro crystal stone is an innovative product designed as a substitute for the rare natural white marble. It is superior to the natural white marble in terms of characteristics, where the micro crystal stone possesses extreme density making it anti-breakage, giving it zero water absorption qualities, and making it resistant to acidic and alkaline substances. at the pace that mankind is consuming the natural resources in today’s world, the micro crystal stone is the ultimate solution, the superior alternative for the external and internal applications. It is certainly a revolutionary product and the finest construction material of the 21st century.
2.Why choose crystallized glass stone(Marmoglass SN002)?
The micro-crystal stone, also known as the micro-crystal glass, Marmoglass, is a new type of high-level decoration material. It is derived from natural inorganic material through a high temperature process, and it possesses excellent characteristics including the followings:
1. High Performance
The micro-crystal stone has even texture and high density, which makes it crush resistant, anti-bending and high resistant resulting its performance being higher than natural stone. It can be used for long period with minimal damage.
2. Acid-proof alkalinity and anti-corrosion
Not only does the micro-crystal stone posses special micro-crystal characteristics, it also has special glass features such as a fine texture, shiny surface and light reflection effect.
3. Fine Texture
We have the flexibility to manufacture any colors as per customer requirements while also making up the defect of color differences, which exists in natural stone. While the product is widely used for interior and interior decoration of star-level hotels, subways, local landmark buildings, airports, and office building etc, it is more suitable for high-level home decoration.
4. Pollution-resistance and easy maintenance
The micro-crystal is a kind of inorganic crystalline material with stable chemical characteristics. Its acid proof alkalinity and anti-corrosion nature are superior to nature stone, specifically its anti-weather characteristics whereby it is unaffected by the wind or sunlight.
5.A wide application range
The water absorption rare of micro-crystal is quite low, close to zero. Several types of dirty pulps and dyed solution have difficulty in penetrating it. Any dirt on the surface is easily cleaned and it is convenient to mankind.
6. Heat-bend reformation
With the heating method, the micro-crystal can be made into various arched profiles and arched slabs. the process is simple and it allows us to save time, cost, material and resources.
7. No radioactive elements
In the process of manufacturing the micro-crystal stone, we have integrated the elimination of all the harmful radioactive elements that are found in natural stone from its components. It is therefore the safest and most environmentally friendly building material in our modern world.
Crystallized glass can be processed into slab, tile, countertop, column and vanity top, wash basin and etc. It is applicable for flooring, interior and exterior wall cladding, stairs and table. Contributed to the character of no color difference, so it is widely used for top grade hotel, business building shopping mall and such great construction.
Physical Parameter
Density
2.70 g/cm
Water Absorption
0.01%
Compressive Strength
126 Mpa
Radioactive
Class A (Suitable for indoor and outdoor)
Size
Slabs
2400/2600/2800/3000 x 1800/1600/1400/1500mm
Cut-to-size Tiles
30 / 40 / 50 / 60 / 80 / 100cm X 30 /40/50 /60/80 /100cm
12"x12", 24"X12", 24"x24" or customized size
Thickness
1.2cm,1.8cm (3/4'), 2.0cm, 2.5cm, 3.0cm,
Finishing
Polished, honed
Usage
Flooring, Walls, Stairs / Steps, Counter tops, Vanity, Paving / Curbstone, Pillar, Column, Border, Skirting, Window Sills
Quality Control
Thickness Tolerance
+- 1mm;
Polishing Grade
above 100 degree
Crack / Spot
EU / US Standard: zero
QC Standard
AQL2.5/4.0 ITS
Certificate
CE, ISO, GB/T19001-2008
Advantage
1. Own factory with stable supply;
2. Factory direct with good price and prompt delivery;
3. Good Management System for good quality;
4. Value-added service.
large glass white artificial stone of Packing
Inner Packing
Cover with foam and plastic film, corner paper board protection
Individual Carton
Individual carton packing with trademark is available upon request
Outer Packing
Plastic tapes in 6 sides, further strengthened with iron sheet in the corner
Shipping Mark
OEM
Port of Loading
Xiamen Port of China
Delivery Lead Time
Normally 10-15 days for one 20’ GP, faster delivery is available upon confirmation
Trade Term
FOB, CFR, CIF, etc.
Loading Info.
Thickness
Qty per pallet
Pallets per 20ft container
QTY per 20ft container
Square Meter per 20ft container
Weight per 20ft container
Big slab size
3000*1200mm
12mm
25pcs
7
175pcs
600-900 m2
21000kgs
3000*1400mm
15mm
20pcs
7
175pcs
500-700 m2
21000kgs
3000*1600mm
20mm
15pcs
7
105pcs
350-500 m2
21000kgs
3200*1600mm
30mm
10pcs
7
70pcs
250-358 m2
21000kgs
Installation Recommendations
Wall Cladding
1.Wall should be leveled and cleaned,
2.Fix the panel on the wall with wire and expansion screw tightly,
3.Fill the space between the panel and the wall with cement mortar of ratio 1:3,
4.Clean the extra mortar and dirt on the surface.
Floor Installation
1.Mark out the baseline of gound level,
2.Mix the mortar with ratio of 1 cement to 4 sand to have semi-day mortar,
3.Lay the mixed mortar in level with a layer of 3-4cm thickness,place the tile over the mortar and adjust the height properly to be leveled,
4.Remove the tile after level adjustment.Put a thin layer of cement powder on the mortar and add water on it to become wet,
5.Put the tile on top and gently knock with rubber hammer until it sealed with the mortar properly. Make sure the tile is leveled and has the same space between each other. Those tiles which are not leveled with others should be removed and repeat the leveling procedure in step 4.Genetally,the space between two tiles should be 2mm for water evaporation and normal expansion.
Daily maintenance of Micro Crystal Stone
1.The laying area of micro crystal stone can only be opened for use or stacking any item on top after at least 24 hours of filling the gap,
2.The ground must be covered with plywood or carpet for protection in case of doing other decoration work after the installation of micro crystal stone floor,
3.In areas like exit and entrance, the surface of micro crystal stone floor should be covered by carpet or plywood to protect it from the damage of abrasion of sand or other hard material.
4.Do not use general floor wax on micro crystal stone,General floor wax is an oil-based wax which is easily stuck to dust.
5.Please use rubber wheels for shopping cart and trolley on micro crystal stone floor, for the hard wheel may scratch and damage the surface,
6.Regular care and maintenance is the key for long lasting of micro crystal stone’s high glossy and reflection.
Important Notice
1.Make sure the ground of laying area is dry and clean before laying mortar. The ratio 1:3(volume ratio) must be strictly followed and no extra water added during the installation progress
2.In the choice of using white cement as the filling material, the strength and quality of the cement must be checked properly.
3.It is not recommended to store micro crystal stone outdoor for long time. It should be covered with rock wool in winter and moved into indoor 2 hours in advance before installation. It also needs to be covered with waterproof cloth when installing during the rainy days outdoor,
4.When using micro crystal stone as ground floor,2mm wild gap must be left between the joints for the benefit of the water vaporization and physical expansion. In the case of large-scale installation, it is recommended to leave an 8mm expansion joint,
5.It is recommended that the area of micro crystal stone to remain-not used-for at least 24 hours and kept 2-3 days before passing or storing items on top.
Marmoglass Polished Edge, Shining !
China Marmoglass SN002 Slabs Packing and Ready for ship
We not only make Slabs, we also can make:
- Project Tiles
- Countertop
- Tabletop
- Vanitytop
- Column
Tags: Marmoglass, Crystallized glass panel, nano crystallized glass panel, pore marmoglass, pore crystallized glass panel, Artificial Stone, Hole-Free Micro Crystal Stone, Pure white stone, Crystallized glass tile, Crystal glass tile, pure white artificial white marble, Marmo Glass, Glass Marble, White Marble, Marmoglass, nano marmoglass, no pore marmoglass, non-pore crystallized glass panel, glass marble, white marble, crystal white marble, white stone, white marble tile, Micro-crystal stone, Crystallized glass, Crystallized White Stone, Crystallized White Stone, Micro-crystallized composite tile, Hole-Free Micro Crystal Stone, Micro-crystallized composite tile, White Marble Tiles, pure white marble
China Marmoglass SN002 Strong Packing Crates
China Marmoglass SN002 and Nanoglass NANO3 Container Loading
Welcome to our product page of China Marmoglass, in which you can find detailed information of Marmoglass. China Marmoglass Co.,Limited offer Crystallized White Marmoglass is good in quality and competitive in price. China Marmoglass Co.,Limited is the manufacturer and supplier of Marmoglass,White Crystallized Glass Panel,Nanoglass. Crystallized Glass Stone,Crystallized Glass Panel,Crystallized Glass Stone Tile,Crystallized Glass Stone Countertop,Marmoglass also known as Nanoglass and White Crystallized Glass,Marmoglass, Crystallized Glasss is the popular materials for interior and exterior applications, including kitchen countertops, bathroom vanities, commercial foyer wall claddings, etc. China Marmoglass Co.,Limited is the Manufacturer and export Crystallized Glass and Crystallized Glass products. Crystallized Glass can be used Interior & external wall cladding, Flooring Tile, Stair, Column cladding, Basin, Countertop, Table, Bar, bath, Kitchen, any tops, round pillar and furniture decoration etc. Super White Nanoglass Slab, You Can Buy Various High Quality Super White Nanoglass Slab Products from Super White Nanoglass Slab Suppliers and Super White Nanoglass Slab Manufacturers at Chinamarmoglass.comcomposite tile, White Marble Tiles, pure white marble
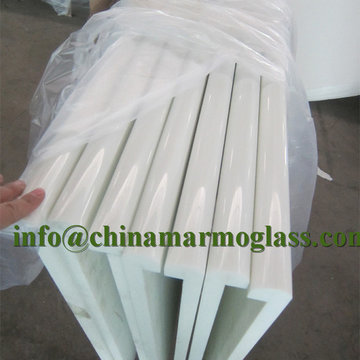 China Marmoglass Co.,Limited
Home > Products
Crystallized Glass,Crystallized stone 6
Crystallized Glass,Crystallized stone,Crystallized glass panel
Marmoglass,Nanoglass,Marmoglass Composite Collectively referred to as Crystallized Glass
Crystallized Glass Application:
1). Interior & external wall cladding
2). Flooring Tile, Stair, Column cladding
3). Basin, Countertop, Table, Bar
4). bath, Kitchen, any tops, round pillar and furniture decoration etc .
Crystal white is a kind of artificial stone . It is made of glass ,which should be burned in the oven for two days under the more than 1000C temperature . It is much different from natural stone from all sides.
1. Natural and soft texture,
2. Varied colors such white, beige, carrara white
3. Good weather resisting property and durability
4. Zero percent of water absorption , not be polluted easily
5. Green environmental building material
6. High-intensity, light weight
7. Bending formation, economical, time saving
8. scratch resistant ,withstand high-heat .
More details about it :
1. There are more than 10 colors of crystallized glass panel products available: Pure white, yellow, silver yellow, silver grey, grey in white, grey spot white, USA grey spot white, yellow in white….
2. Panel thickness: 10-30MM
3. Normal specifications (mm):
1800*3000*18 1200*2400*18 600*600*18 1200*1200*18
1600*2400*18 1800*3000*30 800*800*18 1000*1000*18
Thin tiles:
305*305*12mm, 450*450*12mm
457*457*12mm, 400*400*12mm
600*600*12mm 1200*2400*12mm
4. Material: crystal quartz sand
5. Packaging: Fumigated wooden crates, Bundles,foam
6. Brand name: China Marmoglass / Nanoglass
7. Place of origin: Xiamen, Fujian ,China
8. Model NO.: GS001, SN002, NANO2009, NNAO2011
9. Supply ability: 20000M2/MONTH, 30TON/DAY
10. Delivery time: generally within 10 days, after the order confirmed and the deposit received
11. Arc panel specifications (mm):
Thickness: 18-30mm
Diameter : 30cm-120cm
1.What is crystallized glass stone(Marmoglass SN002 )?
The micro crystal stone is an innovative product designed as a substitute for the rare natural white marble. It is superior to the natural white marble in terms of characteristics, where the micro crystal stone possesses extreme density making it anti-breakage, giving it zero water absorption qualities, and making it resistant to acidic and alkaline substances. at the pace that mankind is consuming the natural resources in today’s world, the micro crystal stone is the ultimate solution, the superior alternative for the external and internal applications. It is certainly a revolutionary product and the finest construction material of the 21st century.
2.Why choose crystallized glass stone(Marmoglass SN002)?
The micro-crystal stone, also known as the micro-crystal glass, Marmoglass, is a new type of high-level decoration material. It is derived from natural inorganic material through a high temperature process, and it possesses excellent characteristics including the followings:
1. High Performance
The micro-crystal stone has even texture and high density, which makes it crush resistant, anti-bending and high resistant resulting its performance being higher than natural stone. It can be used for long period with minimal damage.
2. Acid-proof alkalinity and anti-corrosion
Not only does the micro-crystal stone posses special micro-crystal characteristics, it also has special glass features such as a fine texture, shiny surface and light reflection effect.
3. Fine Texture
We have the flexibility to manufacture any colors as per customer requirements while also making up the defect of color differences, which exists in natural stone. While the product is widely used for interior and interior decoration of star-level hotels, subways, local landmark buildings, airports, and office building etc, it is more suitable for high-level home decoration.
4. Pollution-resistance and easy maintenance
The micro-crystal is a kind of inorganic crystalline material with stable chemical characteristics. Its acid proof alkalinity and anti-corrosion nature are superior to nature stone, specifically its anti-weather characteristics whereby it is unaffected by the wind or sunlight.
5.A wide application range
The water absorption rare of micro-crystal is quite low, close to zero. Several types of dirty pulps and dyed solution have difficulty in penetrating it. Any dirt on the surface is easily cleaned and it is convenient to mankind.
6. Heat-bend reformation
With the heating method, the micro-crystal can be made into various arched profiles and arched slabs. the process is simple and it allows us to save time, cost, material and resources.
7. No radioactive elements
In the process of manufacturing the micro-crystal stone, we have integrated the elimination of all the harmful radioactive elements that are found in natural stone from its components. It is therefore the safest and most environmentally friendly building material in our modern world.
Crystallized glass can be processed into slab, tile, countertop, column and vanity top, wash basin and etc. It is applicable for flooring, interior and exterior wall cladding, stairs and table. Contributed to the character of no color difference, so it is widely used for top grade hotel, business building shopping mall and such great construction.
Physical Parameter
Density
2.70 g/cm
Water Absorption
0.01%
Compressive Strength
126 Mpa
Radioactive
Class A (Suitable for indoor and outdoor)
Size
Slabs
2400/2600/2800/3000 x 1800/1600/1400/1500mm
Cut-to-size Tiles
30 / 40 / 50 / 60 / 80 / 100cm X 30 /40/50 /60/80 /100cm
12"x12", 24"X12", 24"x24" or customized size
Thickness
1.2cm,1.8cm (3/4'), 2.0cm, 2.5cm, 3.0cm,
Finishing
Polished, honed
Usage
Flooring, Walls, Stairs / Steps, Counter tops, Vanity, Paving / Curbstone, Pillar, Column, Border, Skirting, Window Sills
Quality Control
Thickness Tolerance
+- 1mm;
Polishing Grade
above 100 degree
Crack / Spot
EU / US Standard: zero
QC Standard
AQL2.5/4.0 ITS
Certificate
CE, ISO, GB/T19001-2008
Advantage
1. Own factory with stable supply;
2. Factory direct with good price and prompt delivery;
3. Good Management System for good quality;
4. Value-added service.
large glass white artificial stone of Packing
Inner Packing
Cover with foam and plastic film, corner paper board protection
Individual Carton
Individual carton packing with trademark is available upon request
Outer Packing
Plastic tapes in 6 sides, further strengthened with iron sheet in the corner
Shipping Mark
OEM
Port of Loading
Xiamen Port of China
Delivery Lead Time
Normally 10-15 days for one 20’ GP, faster delivery is available upon confirmation
Trade Term
FOB, CFR, CIF, etc.
Loading Info.
Thickness
Qty per pallet
Pallets per 20ft container
QTY per 20ft container
Square Meter per 20ft container
Weight per 20ft container
Big slab size
3000*1200mm
12mm
25pcs
7
175pcs
600-900 m2
21000kgs
3000*1400mm
15mm
20pcs
7
175pcs
500-700 m2
21000kgs
3000*1600mm
20mm
15pcs
7
105pcs
350-500 m2
21000kgs
3200*1600mm
30mm
10pcs
7
70pcs
250-358 m2
21000kgs
Installation Recommendations
Wall Cladding
1.Wall should be leveled and cleaned,
2.Fix the panel on the wall with wire and expansion screw tightly,
3.Fill the space between the panel and the wall with cement mortar of ratio 1:3,
4.Clean the extra mortar and dirt on the surface.
Floor Installation
1.Mark out the baseline of gound level,
2.Mix the mortar with ratio of 1 cement to 4 sand to have semi-day mortar,
3.Lay the mixed mortar in level with a layer of 3-4cm thickness,place the tile over the mortar and adjust the height properly to be leveled,
4.Remove the tile after level adjustment.Put a thin layer of cement powder on the mortar and add water on it to become wet,
5.Put the tile on top and gently knock with rubber hammer until it sealed with the mortar properly. Make sure the tile is leveled and has the same space between each other. Those tiles which are not leveled with others should be removed and repeat the leveling procedure in step 4.Genetally,the space between two tiles should be 2mm for water evaporation and normal expansion.
Daily maintenance of Micro Crystal Stone
1.The laying area of micro crystal stone can only be opened for use or stacking any item on top after at least 24 hours of filling the gap,
2.The ground must be covered with plywood or carpet for protection in case of doing other decoration work after the installation of micro crystal stone floor,
3.In areas like exit and entrance, the surface of micro crystal stone floor should be covered by carpet or plywood to protect it from the damage of abrasion of sand or other hard material.
4.Do not use general floor wax on micro crystal stone,General floor wax is an oil-based wax which is easily stuck to dust.
5.Please use rubber wheels for shopping cart and trolley on micro crystal stone floor, for the hard wheel may scratch and damage the surface,
6.Regular care and maintenance is the key for long lasting of micro crystal stone’s high glossy and reflection.
Important Notice
1.Make sure the ground of laying area is dry and clean before laying mortar. The ratio 1:3(volume ratio) must be strictly followed and no extra water added during the installation progress
2.In the choice of using white cement as the filling material, the strength and quality of the cement must be checked properly.
3.It is not recommended to store micro crystal stone outdoor for long time. It should be covered with rock wool in winter and moved into indoor 2 hours in advance before installation. It also needs to be covered with waterproof cloth when installing during the rainy days outdoor,
4.When using micro crystal stone as ground floor,2mm wild gap must be left between the joints for the benefit of the water vaporization and physical expansion. In the case of large-scale installation, it is recommended to leave an 8mm expansion joint,
5.It is recommended that the area of micro crystal stone to remain-not used-for at least 24 hours and kept 2-3 days before passing or storing items on top.
Marmoglass Polished Edge, Shining !
China Marmoglass SN002 Slabs Packing and Ready for ship
We not only make Slabs, we also can make:
- Project Tiles
- Countertop
- Tabletop
- Vanitytop
- Column
Tags: Marmoglass, Crystallized glass panel, nano crystallized glass panel, pore marmoglass, pore crystallized glass panel, Artificial Stone, Hole-Free Micro Crystal Stone, Pure white stone, Crystallized glass tile, Crystal glass tile, pure white artificial white marble, Marmo Glass, Glass Marble, White Marble, Marmoglass, nano marmoglass, no pore marmoglass, non-pore crystallized glass panel, glass marble, white marble, crystal white marble, white stone, white marble tile, Micro-crystal stone, Crystallized glass, Crystallized White Stone, Crystallized White Stone, Micro-crystallized composite tile, Hole-Free Micro Crystal Stone, Micro-crystallized composite tile, White Marble Tiles, pure white marble
China Marmoglass SN002 Strong Packing Crates
China Marmoglass SN002 and Nanoglass NANO3 Container Loading
Welcome to our product page of China Marmoglass, in which you can find detailed information of Marmoglass. China Marmoglass Co.,Limited offer Crystallized White Marmoglass is good in quality and competitive in price. China Marmoglass Co.,Limited is the manufacturer and supplier of Marmoglass,White Crystallized Glass Panel,Nanoglass. Crystallized Glass Stone,Crystallized Glass Panel,Crystallized Glass Stone Tile,Crystallized Glass Stone Countertop,Marmoglass also known as Nanoglass and White Crystallized Glass,Marmoglass, Crystallized Glasss is the popular materials for interior and exterior applications, including kitchen countertops, bathroom vanities, commercial foyer wall claddings, etc. China Marmoglass Co.,Limited is the Manufacturer and export Crystallized Glass and Crystallized Glass products. Crystallized Glass can be used Interior & external wall cladding, Flooring Tile, Stair, Column cladding, Basin, Countertop, Table, Bar, bath, Kitchen, any tops, round pillar and furniture decoration etc. Super White Nanoglass Slab, You Can Buy Various High Quality Super White Nanoglass Slab Products from Super White Nanoglass Slab Suppliers and Super White Nanoglass Slab Manufacturers at Chinamarmoglass.com
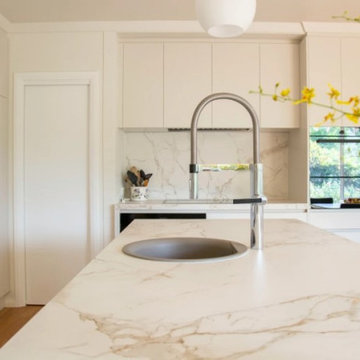
 safe ZOnea
Ask a kitchen designer in Chicago which countertop question comes up most and you will hear the same answer: white or off-white quartz, and which shade. Homeowners walk into showrooms with a photo saved on their phone, usually a bright, veined slab from a magazine spread, and leave an hour later realizing there are a dozen versions of that same look. The confusion is not about taste. It is about the fact that "white quartz" covers a huge range of patterns, undertones, and price points, and nobody explains the differences before the sale.
Older bungalows and newer builds alike are getting stripped of their dated laminate and butcher block in favor of quartz, and the reasons are practical rather than trendy. Quartz does not need sealing, resists the kind of staining that granite can suffer over decades, and holds up to the freeze-thaw humidity swings that Chicago basements and kitchens go through every year. Once a homeowner commits to quartz, though, the real decision starts: which white, and does the pattern justify the difference in cost.
This piece walks through three specific slabs that keep showing up in Chicago renovation projects, why designers reach for them in different rooms, and what actually separates a flat white surface from one with real depth. None of this requires a design background to follow. It is mostly about paying attention to how a slab behaves under kitchen lighting, how busy the vending gets, and how it photographs versus how it looks in person.
Why White Quartz Took Over Chicago Kitchens
Ten years ago, granite dominated Chicago kitchen remodels almost by default. It was durable, it looked expensive, and every fabricator in the metro area carried a wide range of colors. Quartz has since taken over that position, and the shift happened faster than most contractors expected. Engineered stone gave homeowners a more predictable surface, since natural granite varies slab to slab while quartz is manufactured to a consistent pattern batch after batch.
The other driver is light. Chicago winters are long and gray, and a lot of kitchens, especially in older two-flats and courtyard buildings, do not get much direct sun. A dark granite countertop in a dim kitchen can make the whole room feel smaller. White and light-toned quartz reflects what little natural light comes through the windows, and it makes a galley kitchen or a north-facing space feel noticeably brighter without touching the cabinetry or the layout.
There is also a resale argument that local real estate agents bring up constantly. White quartz photographs well for listings, reads as updated and low-maintenance to buyers touring in person, and does not compete visually with whatever cabinet color the next owner might prefer. It is a safer bet than a bold veined marble look or a colored quartz that might feel dated in five years.
Arctic White and the Cost Question
Among the flatter, more uniform whites, arctic white quartz price comes up constantly in budget conversations because the slab sits at a more approachable point than the heavily veined Italian-marble-inspired patterns. It reads as clean and bright without the busy movement that some homeowners find overwhelming in a small kitchen. Fabricators in the Chicago area tend to keep it in stock precisely because demand stays steady across both new construction and remodel projects.
Part of what keeps this slab affordable relative to its heavily patterned cousins comes down to manufacturing complexity. A quartz surface with minimal veining and a consistent white base is simpler to produce at scale than one that mimics the irregular, high-contrast movement of natural Calacatta marble. That production difference shows up directly in what a homeowner pays per square foot, and it is worth asking a fabricator to walk through that pricing before assuming every white quartz costs the same.
Homeowners planning a full kitchen, including an island, backsplash, and perimeter counters, often use a flatter white like this specifically because it lets other elements carry the visual interest. A patterned tile backsplash or a bold cabinet color reads more clearly against a calm countertop than against one already fighting for attention with heavy veining. Designers frequently pair simpler whites with statement lighting fixtures for exactly this reason.
What Makes Calacatta Patterns Different
Calacatta refers to a family of marble originally quarried in Italy, known for a bright white background broken up by bold, often gold-toned veining that moves in thick, dramatic streaks rather than thin gray lines. Natural Calacatta marble is soft, porous, and expensive to maintain, which is exactly why quartz manufacturers spent years developing engineered versions that replicate the look without the upkeep headaches.
The challenge with any Calacatta-style quartz is getting the veining to look organic instead of printed. Early generations of engineered stone struggled with repetitive patterns that gave away the fact the slab was manufactured rather than cut from actual marble. Modern digital printing and layering techniques have closed that gap considerably, and the better Calacatta-inspired quartz lines now vary the veining across each slab batch so two counters in the same kitchen do not look identical.
Chicago designers gravitate toward Calacatta patterns for kitchens that function as the visual centerpiece of an open floor plan, which describes a large share of the gut renovations happening in neighborhoods like Lincoln Park, Roscoe Village, and the North Shore suburbs. When the kitchen island is visible from the living room and dining area, a dramatic veined surface becomes part of the home's overall design language rather than a purely functional work surface.
Calacatta Arno Under Kitchen Lighting
One of the more popular options in this category, calacatta arno quartz, balances a warm white base with soft gray and gold veining that avoids looking too stark under the cooler LED lighting common in newer Chicago builds. Homeowners touring showrooms sometimes make the mistake of judging a slab entirely under warm incandescent lighting, then get surprised when the same surface looks slightly different once installed under their kitchen's actual fixtures.
What separates this particular pattern from flatter competitors is how the veining clusters rather than spreading evenly across the slab. That clustering mimics the way real quarried marble forms, with denser mineral deposits in some sections and cleaner stretches in others. Fabricators cutting a large island slab from a single piece will often orient the pattern intentionally so the busiest veining lands somewhere visually interesting rather than getting cut off at an edge.
Because the background reads warmer than a stark white, this pattern tends to pair well with brass or matte gold hardware, a combination that has been showing up repeatedly in Chicago kitchen remodels over the past few renovation seasons. Cabinet painters report a similar trend, with more clients requesting warm white or greige cabinet colors specifically because they complement this kind of veined quartz better than a cooler, blue-toned white would.
Silestone's Version of the Calacatta Look
Manufacturers compete directly in this Calacatta-inspired category, and silestone eternal calacatta gold represents one brand's specific take on the pattern, distinguished by richer gold veining set against a brighter white base than some competing slabs in the same family. Silestone has built a reputation around anti-bacterial surface treatments in addition to the standard quartz durability, a detail some homeowners specifically ask about for kitchens used heavily by families with young children.
The veining in this particular slab tends to run in longer, more continuous lines compared to the clustered pattern found in some other Calacatta-style options, which gives large island surfaces a sense of visual flow from one end to the other. Fabricators working with bigger islands, the kind increasingly common in open-concept Chicago remodels, often favor patterns like this because there is less need to worry about seams interrupting a busy, disconnected pattern.
Price positioning for this slab tends to sit toward the upper end of the engineered quartz category, reflecting both the brand's manufacturing process and the complexity of replicating that continuous gold veining consistently across production batches. Homeowners weighing this option against other Calacatta-style quartz should ask their fabricator directly about batch availability, since premium patterns sometimes have longer lead times than standard stock colors.
Living With Quartz Day to Day
Beyond how a slab looks in a showroom or a listing photo, the daily experience of owning quartz countertops matters more once the renovation dust settles. Quartz resists scratching far better than laminate and holds up to the acidic spills, hot pans, and general abuse of an active kitchen without the sealing maintenance that natural stone requires every year or two. That low-maintenance reputation is a large part of why quartz overtook granite in the first place.
Heat resistance is a detail that gets less attention than it should. While quartz handles moderate heat well, manufacturers generally recommend using a trivet or pad for very hot pots straight off the stove, since sudden temperature shock can occasionally cause stress marks in the resin binder that holds the engineered stone together. This is a minor precaution rather than a major limitation, but it is worth mentioning to anyone assuming quartz is entirely indestructible.
Cleaning routines stay simple across almost every pattern in this category. A damp cloth and mild soap handle daily messes, and the nonporous surface means wine, coffee, and tomato-based sauces do not soak in the way they can with unsealed granite or marble. Homeowners moving from an older stone counter often mention how much less they worry about everyday spills once quartz is installed, which is a quality-of-life change that rarely makes it into the initial design conversation.
Choosing Between the Three
There is no single correct answer among these three slabs, and that is exactly why they keep coming up together in the same design conversations across Chicago renovation projects. A flatter white with minimal veining suits kitchens where other elements need to carry the visual interest, while a bolder Calacatta-inspired pattern makes sense when the countertop itself is meant to be the centerpiece of an open floor plan.
Budget matters too, and it is worth having a direct conversation with a fabricator about where each option lands before falling in love with a specific slab in a showroom. Lighting, cabinet color, and how the kitchen connects to the rest of the home all play into which pattern will actually look right once installation is finished rather than just in a photo.
Whatever direction a homeowner leans, seeing a full slab in person under actual kitchen lighting remains the single most useful step before signing off. Photos only go so far once the countertop is sitting in the room it will live in for years.

 Anne Hauck Art Deco
The main dining area is surrounded by venetian plaster. One wall houses an Art Deco rosewood sideboard with original brass hardware. A modern bronze statue rests on top surrounded by Jean Dunand bird panels. An Art Deco chinese rug houses the Macassar dining table with the suede leather matching chairs. A rare bauhaus silver tea sets rests on the dining table. The room is lighted by an antique Petitot Deco chandelier in brass and glass.
53