
Search results for "Start unique" in Home Design Ideas
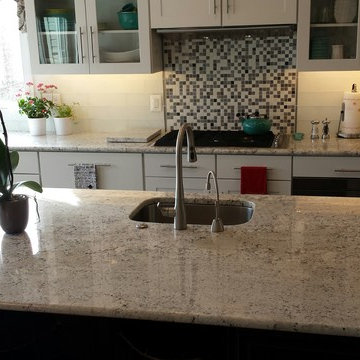
 Stone Action
This kitchen was fabricated by The Beveled Edge! Check out their work: https://bevelededge.net
This kitchen's countertops is White Ice granite with a polished finish..
Search "blue fire" granite, see more granite of this family or other stone options: http://www.stoneaction.com
Learn more about granite to see if it’s right for you:
Granite countertops can last a lifetime. It contains no harmful chemicals and do not emit harmful radiation or gasses. Granite is heat resistant and is one of the most heat-resistant countertops on the market. You can place a hot pan out of the oven directly onto the countertop surface. Experts do recommend the use of a trivet when using appliances that emit heat for long periods of time, such as crockpots. Since the material is so dense, there is a small possibility heating one area of the top and not the entire thing, could cause the countertop to crack.
Granite is scratch resistant. You can cut on it, but it will dull your knives! Granite scores a seven on Moh’s hardness scale.
Granite countertops are considered to be a low maintenance countertop surface. The likelihood of needing to be repaired or resurfaced is low. Granite is a porous material. Most fabricators will apply a sealer to granite countertops before they are installed which will protect them from absorbing liquids too quickly. Many sealers last more than 10 years before needing to be reapplied. When they do need to be reapplied, it is something that most homeowners can do on their own as the process is similar to cleaning. Darker granites are very dense and sometimes don’t even require a sealer.
When it comes to pricing, there are a lot of variables such as edge profile, total square footage, backsplash, etc. Don’t be fooled by the stereotype that all granite is expensive. Lower-range granites will cost less than high-range laminate. Though granite countertops are not considered “low range” in pricing, there are a lot of affordable options.
If you are looking for something truly unique, consider an exotic granite. Some quarries are not easily accessible and/or only able to be quarried for short periods of time throughout the year. If these circumstances exist in a quarry with gorgeous stone, the price will be driven upward.
You won’t find a lot of solid patterns or bright colors, but both do exist. Also, watch for a large range of color and pattern within the same color of stone. It’s always a good idea to view the exact slab(s) that will be fabricated for your kitchen to make sure they are what you expected to see from the sample. Another factor is that many exotic types of granite have huge flowing waves, and a small sample will not be an accurate representation of the whole slab.
Granite countertops are very resistant to chemicals. Acids and bases will not harm the material.
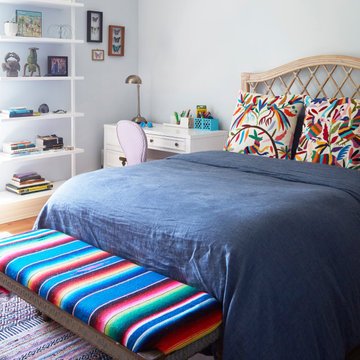
 KitchenLab Interiors
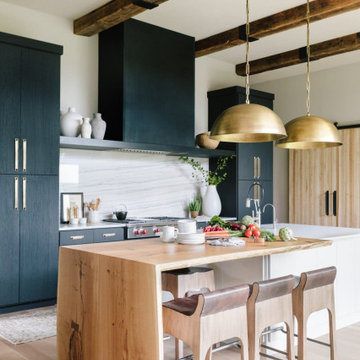
KitchenLab Interiors’ first, entirely new construction project in collaboration with GTH architects who designed the residence. KLI was responsible for all interior finishes, fixtures, furnishings, and design including the stairs, casework, interior doors, moldings and millwork. KLI also worked with the client on selecting the roof, exterior stucco and paint colors, stone, windows, and doors. The homeowners had purchased the existing home on a lakefront lot of the Valley Lo community in Glenview, thinking that it would be a gut renovation, but when they discovered a host of issues including mold, they decided to tear it down and start from scratch. The minute you look out the living room windows, you feel as though you're on a lakeside vacation in Wisconsin or Michigan. We wanted to help the homeowners achieve this feeling throughout the house - merging the causal vibe of a vacation home with the elegance desired for a primary residence. This project is unique and personal in many ways - Rebekah and the homeowner, Lorie, had grown up together in a small suburb of Columbus, Ohio. Lorie had been Rebekah's babysitter and was like an older sister growing up. They were both heavily influenced by the style of the late 70's and early 80's boho/hippy meets disco and 80's glam, and both credit their moms for an early interest in anything related to art, design, and style. One of the biggest challenges of doing a new construction project is that it takes so much longer to plan and execute and by the time tile and lighting is installed, you might be bored by the selections of feel like you've seen them everywhere already. “I really tried to pull myself, our team and the client away from the echo-chamber of Pinterest and Instagram. We fell in love with counter stools 3 years ago that I couldn't bring myself to pull the trigger on, thank god, because then they started showing up literally everywhere", Rebekah recalls. Lots of one of a kind vintage rugs and furnishings make the home feel less brand-spanking new. The best projects come from a team slightly outside their comfort zone. One of the funniest things Lorie says to Rebekah, "I gave you everything you wanted", which is pretty hilarious coming from a client to a designer.

Find the right local pro for your project
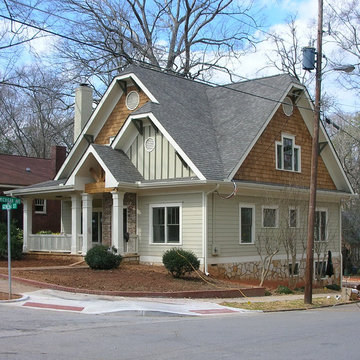
 Rossoto Art LLC
After Remodel.
Design and Photos by William Rossoto of Rossoto Art LLC
Inspiration for a mid-sized craftsman green one-story mixed siding exterior home remodel in Other with a clipped gable roof
Inspiration for a mid-sized craftsman green one-story mixed siding exterior home remodel in Other with a clipped gable roof
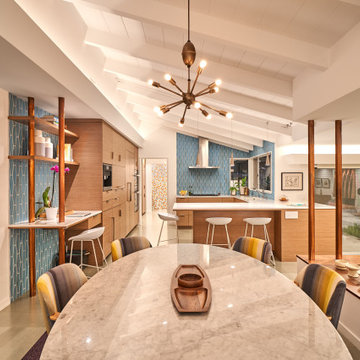
 Sklar Studios
Where to start...so many things to look at in this composition of a space. The flow from a more formal living/ music room into this kitchen/ dining/ family room is just one of many statement spaces. Walls were opened up, ceilings raised, technology concealed, details restored, vintage finds reimagined (pendant light and dining chairs)...the balance of old to new is seamless.

 TOC design & construction inc.
DESIGNED BY TOC design
CONSTRUCTION BY TOC design & Construction inc.
PHOTOS BY : Tania Scardellato
I was fortunate to have a young family approach me in desperate need to renovate there only 3 piece bathroom. This space was In dire need of a remodel, with old brown wall to wall tiles and a dated bulky yellow brown single sink vanity.
Storage was a must, lighting a necessity, and proper accessibility to the shower bath area.
We had a tight budget to respect, but a full gut of this bathroom was required. And a good thing too, once we started doing the demolition we noticed that mildew and rotting floors and walls had accumulated throughout the years. Doing it right the first time is no joke when dealing with water and electrical issues.
We discarded all reminisce of old and built from scratch, new walls, new plumbing, new electrical ,new insulation and a new window, a new fan that actually exhausted outside ( I say this laughing as you would be amazed at how many fans are installed but don’t exhaust outside, and you the client would never know unless you go inside the attic space.
Once all the hard stuff was done, the rest is just a matter of smart design. If you have a small bathroom here are some tips to guide you.
10 tips for making a small bathroom feel larger
Is your tiny bathroom cramping your functionality and style, leaving you longing for the enormous bathrooms gracing the pages of design magazines? Even if your bathroom is a fraction of the size, all it takes is some design savvy to make the most of the space you have. Consider these 10 smart tips that will help your bathroom look, feel and function like those larger contenders.
1-Get creative with corners
Space is at a premium in small bathrooms, so it's important to maximize every inch. Corners, for example, provide extra space for shelving, storage units and even hooks. Get creative and install unique design solutions that are not only functional, but also eye-catching. If you love the airiness of floating cabinets, add baskets or decorative boxes under for extra storage. If you are installing floating cabinets insure that they are installed securely to studs or plywood at wall.
2- Let solid colors shine
Busy patterns have a shrinking effect and make small bathrooms seem even smaller. Conversely, light natural hues make a space feel more open. If you're itching to get creative with design, experiment with textures but keep overpowering patterns to a minimum. Tone on tone is the best to achieve this.
3 - Maximize your bathtub
A bathtub takes up a significant portion of the room, but modern, compact options with curved basins, can make the tub feel larger when in use, all while conserving space.
4 - Select a smaller faucet
A faucet is jewelry for the bathroom. And just as accessories can overpower an outfit, a big bulky faucet isn't flattering in a small bath. Single-handle designs conserve counter space, while a wall-mount installation frees it up all together and can create quite the wow-factor, if the budget can accommodate the required changes to plumbing behind the wall.
5 - Make vanity storage simple
If you're in a storage war with your small bathroom, you're not alone in the battle. Toiletries and personal supplies without a place to call home only add clutter and chaos. Store smart with a space-saving vanity, the dual sink vanity shown here, looks quite simple, but in reality it has 4 sets of full extension drawers, and the vanity tower adds extra storage without overpowering the use of space.
6 - Show off the shower
Shower curtains may be pretty, but they interrupt the visual flow of a bathing space and make it feel significantly smaller. In bathrooms with small footprints, opt for a clear glass sliding shower door that doesn't require the clearance of one with a hinged design. Or as shown in this design and for fraction less expensive a half hinged panel installed on a fixed tempered glass panel. If you're embarking on a big remodel, create the illusion of more space by using same tile in the shower that's used throughout; instead of seeing them as two separate zones, the eye will read them as one.
7 - Discover the treasure of hidden storage
Work with a contractor, and you just might find some serious storage potential hidden behind your walls. Whether it's utilizing space between the studs for shallow shelving or a creating a small linen closet by annexing space from an adjacent room, even small additions can make a big difference.
8 - Focal Point
Tile is a beautiful, durable addition to any bathroom. For dainty spaces, consider installing tile at a diagonal to accentuate the focal point or as in this bathroom I used an oversized textured pattern to bring depth to the space at the window wall.
9 - Choose the right lights
Strategically install light to reflect and brighten a small bathroom to make it appear larger. Recessed lighting is an affordable solution for tiny rooms, offering ample light while taking up little space. Wall sconces alongside a mirror also reflect off the walls and make a room feel bright and airy. I always recommend going with LED lighting at 2800 to 3000K.
10 – Accessorize
This is your time to shine in your decorating skills, have fun with your towels, you can change the color scheme daily just by adding pops of color in your accessories, make sure to get items that serve a dual purpose, like baskets, boxes they can always be used as hampers, storing of towels and even a nice display for your guest.
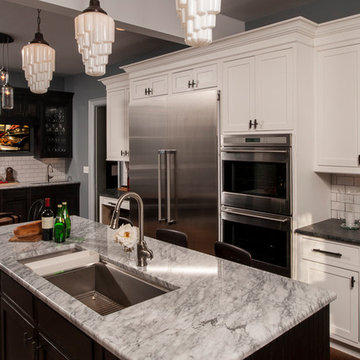
 Artisan Kitchens and Baths
Photographer: Steven Paul Whitsitt
ALLENTOWN CHARMER - Designed by George Siwy of Artisan Kitchens and Baths
This unique home located in the historical Allentown area of Buffalo, was purchased by two busy professionals who had a dream to bring back this historical mansion to its original glory and add a modernized kitchen to its design. The owners with their passion for Architecture and their love of cooking and entertaining hired George Siwy of Artisan Kitchens & Baths at Appliance Associates to make this dream a reality.
The project started with the removal of a load bearing wall that structurally supported two stories above. The project called for a structural engineer to design the right size beam that can be supported by two columns that were built flush into the walls to give the space a more open feel.
George Suggested in bringing in the homes architectural elements by choosing materials and details that were historic to the era of the home. Such details consist of the inset cabinet doors and its recessed panel and molding details, which relate to the quarter sawn oak stair case existing and wainscoting panel details found throughout the first floor of the home. The perimeter cabinetry in the kitchen consist of a maple wood species with a reversed raised panel door style painted white. The island and bar cabinetry consist of a wood species quarter sawn oak stained in an onyx color to relate to a historic cast iron stove inserted into a fireplace which is all original to the home. The imperfect glass seen on either side of the mullion glass windows, which are original to the home, is repeated within the design of the hutch and bar areas with a “seeded glass” material.
The natural countertop materials chosen for this project were seen in the early 20th century era homes, such as Carrera marble which was used in the island and bar areas as well as the Soapstone material used for the perimeter cabinetry.
The well thought out design has made the homeowners dreams a reality, with a kitchen that relates well to its existing architectural elements and brought up to date with modern conveniences of today.
Designer: George Siwy
Special Features: Glass hutch cabinetry with wainscoting, large bar area with beverage center and prep sink, expanded island with seating for four.
Cabinetry: Medallion Gold / Door Style: Bayside
Countertop: Soapstone and Carrera Marble
Kohler: Stages Sink
Elkay: Avado Bar Sink
Wolf: Range top, Wall Oven, and Microwave Drawers
Thermador: Refrigerator / Freezer

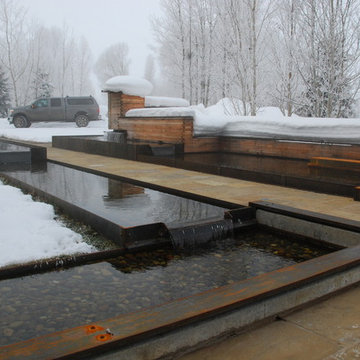
 Brandner Design
We took an existing water garden on this property and turned it into something quite extraordinary....
The first few images show what we started with and the huge transformation.
The water garden is fully functional in the Winter months, which makes this water garden truly unique.
 KitchenLab Interiors
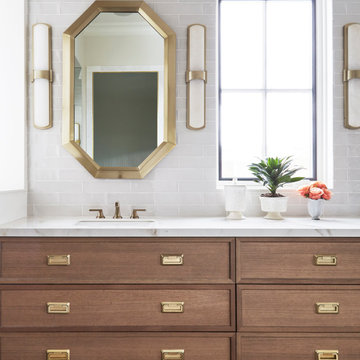
KitchenLab Interiors’ first, entirely new construction project in collaboration with GTH architects who designed the residence. KLI was responsible for all interior finishes, fixtures, furnishings, and design including the stairs, casework, interior doors, moldings and millwork. KLI also worked with the client on selecting the roof, exterior stucco and paint colors, stone, windows, and doors. The homeowners had purchased the existing home on a lakefront lot of the Valley Lo community in Glenview, thinking that it would be a gut renovation, but when they discovered a host of issues including mold, they decided to tear it down and start from scratch. The minute you look out the living room windows, you feel as though you're on a lakeside vacation in Wisconsin or Michigan. We wanted to help the homeowners achieve this feeling throughout the house - merging the causal vibe of a vacation home with the elegance desired for a primary residence. This project is unique and personal in many ways - Rebekah and the homeowner, Lorie, had grown up together in a small suburb of Columbus, Ohio. Lorie had been Rebekah's babysitter and was like an older sister growing up. They were both heavily influenced by the style of the late 70's and early 80's boho/hippy meets disco and 80's glam, and both credit their moms for an early interest in anything related to art, design, and style. One of the biggest challenges of doing a new construction project is that it takes so much longer to plan and execute and by the time tile and lighting is installed, you might be bored by the selections of feel like you've seen them everywhere already. “I really tried to pull myself, our team and the client away from the echo-chamber of Pinterest and Instagram. We fell in love with counter stools 3 years ago that I couldn't bring myself to pull the trigger on, thank god, because then they started showing up literally everywhere", Rebekah recalls. Lots of one of a kind vintage rugs and furnishings make the home feel less brand-spanking new. The best projects come from a team slightly outside their comfort zone. One of the funniest things Lorie says to Rebekah, "I gave you everything you wanted", which is pretty hilarious coming from a client to a designer.
 Modern Loft
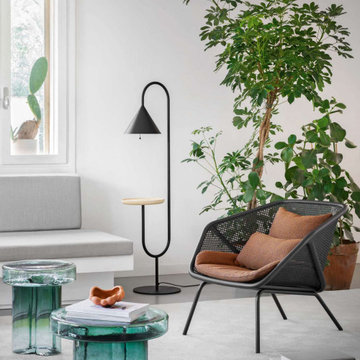
Only a handful of artisans on the island of Murano have the technical knowledge and expertise required to produce something like this. This is why an all glass coffee table such as this one is extremely short in supply.
The making of each Miniforms Soda table starts with one unique piece of Murano blown glass. It is placed in a Murano furnace where each table is blown, drawn-out and shaped by three master glass-makers. They are equipped with a complex system of burners to keep the same temperature throughout the mold, which is essential to creating a hammered feeling to the texture. The result is a single volume of glass with three large petals forming the stem.
The rippling texture of the Soda table showcases class and ethereal beauty, and the uniqueness of the glass provides extraordinary effects of light and shadow. The glass coffee table is available in amber and petrol green.
The Soda table by Yiannis Ghikas expresses the excellence in creativity, technology and research.
Made in Italy

 Elizabeth Aldrich
10 Ideas for Turning Your Garage into a Modern Industrial Neighborhood Bar
By Elizabeth Aldrich
Host happy hours and cocktail parties worthy of a full page spread – in your own garage.
Leave the brick exposed, the concrete floors as is, and the wood unfinished and it costs more? The sophisticated older brother of the shabby-chic trend, urban industrial style, is taking over. Real estate agents are able to tack on a few extra grand to a flat if they can include “exposed brick” in their advertisements, and designer chefs and master mixologists are moving into warehouses and industrial districts in urban areas across the nation. A friend recently invited me to dinner at Portland, Oregon’s newest, hippest charcuterie spot, and when we pulled up to the building it was in a warehouse where I used to go to underground raves in high school.
These industrial style spaces that were once seen as unfinished or lacking in coziness are now seriously coveted. Their rawness is considered authentic, their grit a mark of character. But if you’re a homeowner, there’s a good chance you already have one of them built right into your house: your garage.
I like to preach about how much people underutilize their garage spaces, piling them full of storage bins they never touch. Whether you turn it into a workspace or a playroom, there’s a lot of value in a creatively-used garage space. For the overly ambitious, the design lover, or the hostess with the mostess, here’s one idea that blows the rest out of the water.
Turn your garage into a multi-purpose, urban industrial wonderland for work and play.
Originally outfitted for factories and warehouses, the industrial style facilitates productivity. Now that it’s also being appreciated as a great aesthetic for bars and restaurants, these rooms can serve both form and function, doubling as work and entertaining spaces. This is great for people who have always dreamed of having that extra basement space for hosting friends, complete with a wet bar and a billiards table, but lack the square footage. Just keep in mind that your friends might love it so much, they’ll start ditching their favorite happy hour spot and showing up at your doorstep instead.
Here are ten ideas forbuilding the perfect workshop by day and cocktail bar by night in your garage.
1. Clean out the space. Get rid of everything you don’t need. Part of the beauty of industrial style designs is their simplicity and abundance of open space. Excessive clutter can make people feel boxed in, and that’s not conducive to productivity or to social activity. Out of sight, out of mind. Build shelving up high for storing must-keep belongings, much like a warehouse.
For bonus points, store your belongings in wooden crates for aesthetic consistency. Or consider stacking them on a pallet, wrapping them in excessive amounts of plastic wrap, and loading them onto the next cross-country freighter. You won’t miss them.
2. Install storage for frequently used objects. The brilliant thing about the urban industrial look is that your tools, tool boxes, and tool storage cabinets already fit right in. Metal storage cabinets and file cabinets are perfect additions to the space. While grey is certainly the color pallet for this style, 50 shades might be a few too many. Mix it up by spray painting one of your cabinetsto add a pop of color. Make a small pegboard to hold up your tools and hang larger items such as bicycles and recreational equipment by pegs. If you have a lot of storage bins that you have to keep, look upward instead of storing them on the floor. Insert a tracking system onto your garage ceiling and slide the bins into place.
For extra credit, get an old locker to use as a coat closet when guests come over.
3. Heat the space.Since you’re not turning the garage into a full-time living space, such as a spare bedroom, you really don’t need to go through the work and additional cost of installing full-blown heating and insulation systems. If you don’t need to use the space when the temperature drops, or if you live in a consistently temperate climate, you might not need to do anything. But if you do want to be able to host people through the winter, a simple garage heater will suffice. Here are some good options for installing garage heating.
Take it one step further, and get a couple patio heaters to help with the next step.
4. Turn your driveway into a patio space. Even the best restaurants and cocktail bars are nothing in the summertime without a solid patio space. Leave the garage door open on warmer nights and invite your guests to go outdoors. Place some stylish folding chairs and a patio table out for comfort. Place a few potted plants here and there to make the space feel more inviting.
For a really lively patio scene, put a portable fire pit out on the driveway or front lawn and surround it with workbenches from your garage.
5. Build your bar. Pick a corner in your garage for the bar, and get started. You can build a bar pretty cheaply and easily with reclaimed pallets, and get some industrial-style barstools. Behind the bar, you’ll have both your tools and your liquor, and there’s no need to build expensive cabinetry. If you’re serving quality, why cover it up? Build shelving or open cubicles to house your liquor. Put out metal buckets filled with ice to chill beers.Be sure to serve up cocktails worthy of the space. The Hemingway Daiquiri served straight up is a unique way to dress down, or industrialize, a traditionally frou-frou cocktail.
To go the extra mile, build a bar with laid brick.Install an extra fridge in the garage so you can avoid having to trek into the kitchen to refill chilled drinks, and you can store dips, vegetables, and other hors d'oeuvres right at your fingertips.
6. Bring on the games. To really turn your hosting space into a fun time, be sure to offer ample play options. For the low on space, a dart board will suffice, whereas if you’ve got a five-car garage and can’t manage to fill the space, put in a couple billiard tables. Ping pong tables are ideal for most because they’re great fun and can easily be folded up and stored.
If you want to keep your guests playing until the wee hours of the morning, get an old pinball machine, a vintage arcade game, or a small Skee-Ball alley.
7. The heart of your space.Build along worktable that doubles as a table for your guests right in the center of your garage. It should be tall enough to be used while standing, although you can place a few barstools along with it. Having a table space for drinks but limited seating will encourage guests to walk around and mingle. Build it out of wood and make sure to maintain a natural finish.
Don’t be afraid to rough up the work table by day. The dings and marks created while you build will only lend authenticity to the piece.
8. Install lighting. Remember, the urban industrial style is all about function and showcasing materials in their raw form. There’s no need to buy expensive floor lamps or install a fancy lighting system. The most popular lighting in these types of spaces is exposed bulb lighting. Just open up the wiring on your current lighting system and drop down some bulbs.
For additional lighting, string up exposed bulb patio lights and place some vintage metal desk lamps on the tables and bar area.
9. Brand your space. Use the designs for the stuff you build by day as wall art. Blow up sketches, blueprints, schematics, and architectural drawings to hang up for decoration. Choose one wall that could use a splash of color, perhaps the wall behind your bar, and get a friend to paint a mural, or whip out the spray paint for a real urban feel.
Splurge a little and get a custom neon sign made of your last name or the word “bar” to hang behind the bar.
10. The garage door. For the finishing touch, and to really wow your guests, get a brand new modern, industrial style garage door installed. Look for the window-paneled types that restaurants use, like this contemporary aluminum and glass beauty. You can leave it half open when you want to utilize your driveway-patio space.
On nights when you have to close it all the way, the glass panels let your guests still look out onto the stars, making it feel like a patio space even when it’s too cold for one.
Once your garage bar is up and running, put on your denim suit and get ready to call yourself the Joneses. No one will be able to keep up with you.
 Cure Design Group
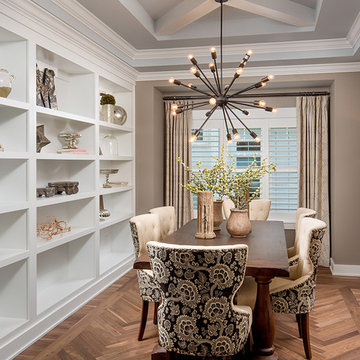
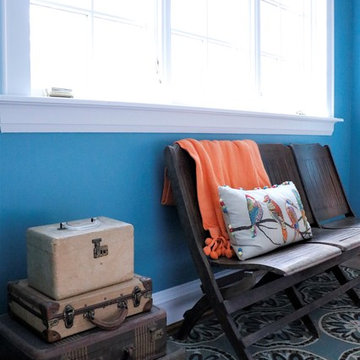
This designer client relationship is one based on friendship. Senior Designer Cori Dyer and client have an indescribable partnership and unmentioned understanding when it comes to decorating this home. A vintage charmer with a modern flair, filled with collectables and uncommon goods that make this space a unique and spectacular.
Cori Dyer:
I first met Sally when our boys became friends at Chaminade in 2007.
Since then, we have stayed close and become great friends.
Several years back she asked for my help giving her ideas on ways to spruce things up a bit and work with her on a major remodel.
A little intimidating as Sally has a beautiful home and is an avid collector of vintage finds.... way before the trend of blending old and new was popular.
She has an eye for unique ways to use vintage pieces and incorporating those into some of the most interesting and compelling displays. What has made this design relationship work is simply one of respect. I know when to give her that push outside of her comfort zone and incorporate her collections with selections that work with what she has, but that offer a new spin on putting it all together.
From that initial "spruce up" has come a makeover in her Living Room and currently one completed in her Family Room.
Although there are signs of my design throughout her home, the detail and selection of the collections and vintage finds are all Sally!!
I truly think that is how Design should be. Blending old and new, and a Designer listening to what makes the client happy.
Client: It was fun to be in style for a year or two, but it’s back to being the quirky lady. I started collecting in my teens and enjoy the hunt for new finds of all types. Cori helped me to enjoy my collections in a new and modern way! As always I had too many things. With her designer eye she taught me to blend the old and the new and to use different materials. The best part was going shopping with one of my best friends, who just happens to be a designer!! She is definitely the ying to my much needed yang.
 User
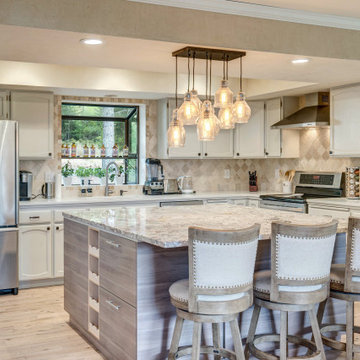
UserIn the heart of Cottingham Street, a journey began—an endeavor to transform a tired, outdated kitchen into a space of modern charm and functional elegance. It all started with a dream, perhaps born over Sunday breakfast conversations or inspired by glossy magazine spreads. You imagined more than just a room; you envisioned a hub, a place where culinary creativity and family gatherings intertwine seamlessly.
First came the consultations, where ideas danced between you and skilled designers, each conversation weaving threads of imagination and practicality. With blueprints in hand and dreams in mind, you ventured into the world of permits and regulations, navigating the bureaucratic maze to ensure your vision could take shape within the constraints of the law.
Demolition day arrived with a symphony of hammers and saws, marking the end of an era and the dawn of a new one. Out went the old, worn cabinets and outdated appliances, making space for the promise of something fresh and exciting. Dust danced in the sunlight filtering through the windows, a metaphor for the transformation unfolding before your eyes.
Amidst the rubble, craftsmen toiled, laying the groundwork for your culinary sanctuary. Pipes were rerouted, wires reconfigured, and walls reshaped, each task bringing you closer to the realization of your dream. It was a dance of precision and expertise, a symphony of progress conducted by skilled hands.
And then, like magic, the pieces began to fall into place. Cabinets rose from the floor like sentinels of style, countertops gleamed with the promise of countless meals shared, and appliances hummed with the anticipation of culinary adventures yet to come. Light flooded the space, casting shadows of possibility across every surface.
With a fresh coat of paint and a flourish of finishing touches, your kitchen emerged from its cocoon of renovation, transformed into a space that felt uniquely yours. It was more than just a room; it was a reflection of your personality, your taste, and your vision for the future.
As the final inspections were conducted and the last details attended to, you stood in the doorway of your new kitchen, a smile spreading across your face. Here, in this space of beauty and functionality, memories would be made, meals shared, and laughter echoed off the walls. It was a journey from start to finish, a testament to the power of vision and the magic of transformation. And it all began on Cottingham Street.

 Tracy Berman Interiors
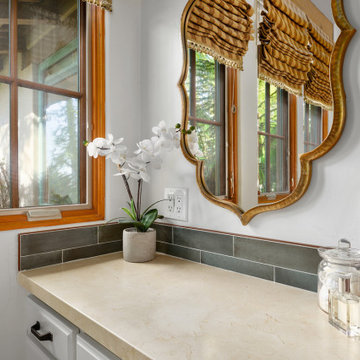
In our master bathroom, we wanted to refresh the design without changing the cabinetry or layout. Every piece of tile in this beautiful Santa Barbara-style home is intentional and unique. Starting with a unique floral tile that runs across the bathroom wall into the shower, where it meets our featured green subway tile laid in a herringbone pattern. The heated bathroom floor is a mix and match of different colored hexagons that pull colors from the shower wall and the floral design.
The newly chosen hardware is umbrio, a bronze finish with prominent copper highlights, and our plumbing fixtures are venetian bronze to match. The mirrors were reused and painted black to go with our backsplash. And last but not least a beautiful copper bathtub to bring it all together.
 Landmark Performance Homes
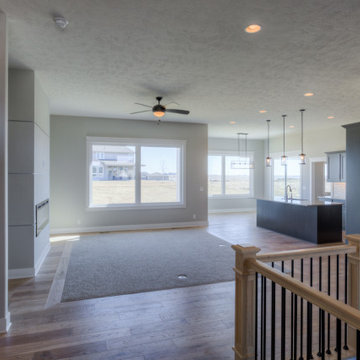
Introducing Landmark's innovative new Fieldstone Plan! With unlimited, flexible options for your lifestyle this plan boasts soaring ceilings in the great room adjacent a large kitchen. Unique plan offers a flex or bedroom off the back of the home for best views! Make this plan uniquely yours today – let us know what look or idea you want to select! This plan starts at $350K with lot included. Call to find out more! 402.672.5550 #buildalandmark #newcosntruction #ranch #floorplan #omahabuilder
 TVL Creative Ltd.
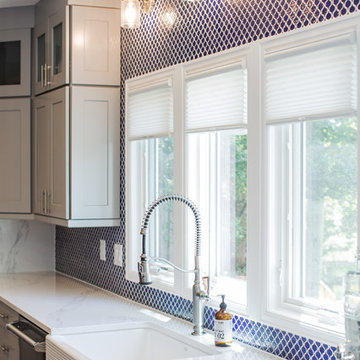
This project is an incredible transformation and the perfect example of successful style mixing! This client, and now a good friend of TVL (as they all become), is a wonderfully eclectic and adventurous one with immense interest in texture play, pops of color, and unique applications. Our scope in this home included a full kitchen renovation, main level powder room renovation, and a master bathroom overhaul. Taking just over a year to complete from the first design phases to final photos, this project was so insanely fun and packs an amazing amount of fun details and lively surprises. The original kitchen was large and fairly functional. However, the cabinetry was dated, the lighting was inefficient and frankly ugly, and the space was lacking personality in general. Our client desired maximized storage and a more personalized aesthetic. The existing cabinets were short and left the nice height of the space under-utilized. We integrated new gray shaker cabinets from Waypoint Living Spaces and ran them to the ceiling to really exaggerate the height of the space and to maximize usable storage as much as possible. The upper cabinets are glass and lit from within, offering display space or functional storage as the client needs. The central feature of this space is the large cobalt blue range from Viking as well as the custom made reclaimed wood range hood floating above. The backsplash along this entire wall is vertical slab of marble look quartz from Pental Surfaces. This matches the expanse of the same countertop that wraps the room. Flanking the range, we installed cobalt blue lantern penny tile from Merola Tile for a playful texture that adds visual interest and class to the entire room. We upgraded the lighting in the ceiling, under the cabinets, and within cabinets--we also installed accent sconces over each window on the sink wall to create cozy and functional illumination. The deep, textured front Whitehaven apron sink is a dramatic nod to the farmhouse aesthetic from KOHLER, and it's paired with the bold and industrial inspired Tournant faucet, also from Kohler. We finalized this space with other gorgeous appliances, a super sexy dining table and chair set from Room & Board, the Paxton dining light from Pottery Barn and a small bar area and pantry on the far end of the space. In the small powder room on the main level, we converted a drab builder-grade space into a super cute, rustic-inspired washroom. We utilized the Bonner vanity from Signature Hardware and paired this with the cute Ashfield faucet from Pfister. The most unique statements in this room include the water-drop light over the vanity from Shades Of Light, the copper-look porcelain floor tile from Pental Surfaces and the gorgeous Cashmere colored Tresham toilet from Kohler. Up in the master bathroom, elegance abounds. Using the same footprint, we upgraded everything in this space to reflect the client's desire for a more bright, patterned and pretty space. Starting at the entry, we installed a custom reclaimed plank barn door with bold large format hardware from Rustica Hardware. In the bathroom, the custom slate blue vanity from Tharp Cabinet Company is an eye catching statement piece. This is paired with gorgeous hardware from Amerock, vessel sinks from Kohler, and Purist faucets also from Kohler. We replaced the old built-in bathtub with a new freestanding soaker from Signature Hardware. The floor tile is a bold, graphic porcelain tile with a classic color scheme. The shower was upgraded with new tile and fixtures throughout: new clear glass, gorgeous distressed subway tile from the Castle line from TileBar, and a sophisticated shower panel from Vigo. We finalized the space with a small crystal chandelier and soft gray paint. This project is a stunning conversion and we are so thrilled that our client can enjoy these personalized spaces for years to come.
 MovableSpaces Inc.
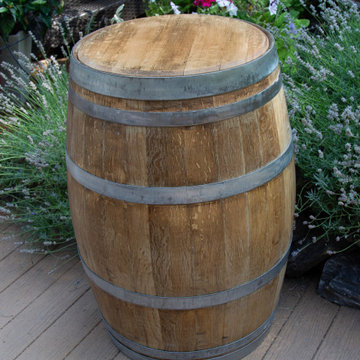
AUTOMATED WINE BARREL BAR
Make a statement with our Automated Hidden Wine Bar!
Imagine showcasing your premium wine with a one of a kind Automated Wine Barrel Bar! With a touch of a button, a hidden bar inside of a reclaimed Okanagan Wine Barrel lifts in front of your eyes...
Movable Spaces, located in the beautiful Okanagan Valley, manufactures state-of-the-art lift systems for modern concealment solutions and custom unique products such as our X2-LK Lift Desk kit and our Automated Wine Barrel Bar.
Our Automated Wine Barrel Bar is the first and only of its kind. Each of our hand selected barrels tells a story. The Okanagan Valley is BC's premier grape growing region, boasting 185 licensed wineries. Rich in tradition and character, the Okanagan Valley wineries consistently rank among the world's best at international wine competitions, with a range of varietals from sun-ripened reds to fresh, crisp whites.
Each barrel selected is meticulously reconditioned (inside and out) to ensure a long-lasting piece of quality furniture with no mold, mildew or residue (no fruit flies here!), then reinforced for strength and stained before the hidden bar and system is installed. The oak staves of the barrels feature beautiful grains and unique markings which we protect in our finishing process to keep their authenticity.
Our Lift Systems are second to none, featuring advanced technology with sub-silent operation, smooth motion with soft start/stop, multiple control options (Bluetooth enabled) and anti-collision detection. Have piece of mind that your Wine Barrel Bar will last for years to come, backed by a 5 year lift system replacement warranty and lifetime phone support for any questions or problems.
Options available for stain color and also for mobile options. Don't have access to a power outlet? No problem! Make your Wine Barrel Bar mobile by adding our high-performance Sony Lithium-ion battery which will provide 200 lifts per charge.
Elevate your wine cellar to new heights!
 Everything Home
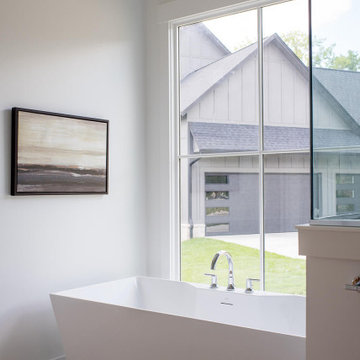
With a focus on lived-in comfort and light, airy spaces, this new construction is designed to feel like home before the moving vans arrive. Everything Home consulted on the floor plan and exterior style of this luxury home with the builders at Old Town Design Group. When construction neared completion, Everything Home returned to specify hard finishes and color schemes throughout and stage the decor and accessories. Start to finish, Everything Home designs dream homes.
---
Project completed by Wendy Langston's Everything Home interior design firm, which serves Carmel, Zionsville, Fishers, Westfield, Noblesville, and Indianapolis.
For more about Everything Home, see here: https://everythinghomedesigns.com/
To learn more about this project, see here:
https://everythinghomedesigns.com/portfolio/scandinavian-luxury-home/
 TVL Creative Ltd.
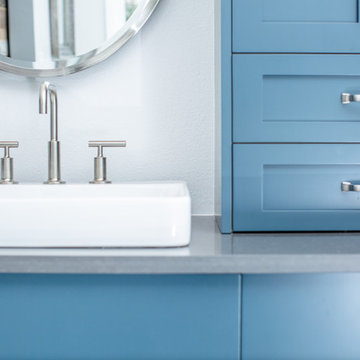
This project is an incredible transformation and the perfect example of successful style mixing! This client, and now a good friend of TVL (as they all become), is a wonderfully eclectic and adventurous one with immense interest in texture play, pops of color, and unique applications. Our scope in this home included a full kitchen renovation, main level powder room renovation, and a master bathroom overhaul. Taking just over a year to complete from the first design phases to final photos, this project was so insanely fun and packs an amazing amount of fun details and lively surprises. The original kitchen was large and fairly functional. However, the cabinetry was dated, the lighting was inefficient and frankly ugly, and the space was lacking personality in general. Our client desired maximized storage and a more personalized aesthetic. The existing cabinets were short and left the nice height of the space under-utilized. We integrated new gray shaker cabinets from Waypoint Living Spaces and ran them to the ceiling to really exaggerate the height of the space and to maximize usable storage as much as possible. The upper cabinets are glass and lit from within, offering display space or functional storage as the client needs. The central feature of this space is the large cobalt blue range from Viking as well as the custom made reclaimed wood range hood floating above. The backsplash along this entire wall is vertical slab of marble look quartz from Pental Surfaces. This matches the expanse of the same countertop that wraps the room. Flanking the range, we installed cobalt blue lantern penny tile from Merola Tile for a playful texture that adds visual interest and class to the entire room. We upgraded the lighting in the ceiling, under the cabinets, and within cabinets--we also installed accent sconces over each window on the sink wall to create cozy and functional illumination. The deep, textured front Whitehaven apron sink is a dramatic nod to the farmhouse aesthetic from KOHLER, and it's paired with the bold and industrial inspired Tournant faucet, also from Kohler. We finalized this space with other gorgeous appliances, a super sexy dining table and chair set from Room & Board, the Paxton dining light from Pottery Barn and a small bar area and pantry on the far end of the space. In the small powder room on the main level, we converted a drab builder-grade space into a super cute, rustic-inspired washroom. We utilized the Bonner vanity from Signature Hardware and paired this with the cute Ashfield faucet from Pfister. The most unique statements in this room include the water-drop light over the vanity from Shades Of Light, the copper-look porcelain floor tile from Pental Surfaces and the gorgeous Cashmere colored Tresham toilet from Kohler. Up in the master bathroom, elegance abounds. Using the same footprint, we upgraded everything in this space to reflect the client's desire for a more bright, patterned and pretty space. Starting at the entry, we installed a custom reclaimed plank barn door with bold large format hardware from Rustica Hardware. In the bathroom, the custom slate blue vanity from Tharp Cabinet Company is an eye catching statement piece. This is paired with gorgeous hardware from Amerock, vessel sinks from Kohler, and Purist faucets also from Kohler. We replaced the old built-in bathtub with a new freestanding soaker from Signature Hardware. The floor tile is a bold, graphic porcelain tile with a classic color scheme. The shower was upgraded with new tile and fixtures throughout: new clear glass, gorgeous distressed subway tile from the Castle line from TileBar, and a sophisticated shower panel from Vigo. We finalized the space with a small crystal chandelier and soft gray paint. This project is a stunning conversion and we are so thrilled that our client can enjoy these personalized spaces for years to come. Special thanks to the amazing Ian Burks of Burks Wurks Construction for bringing this to life!
 Everything Home
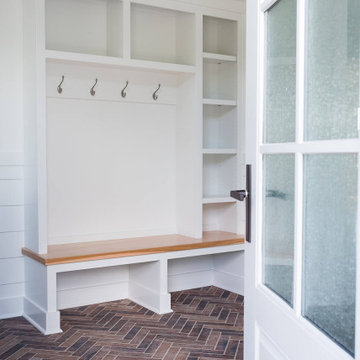
With a focus on lived-in comfort and light, airy spaces, this new construction is designed to feel like home before the moving vans arrive. Everything Home consulted on the floor plan and exterior style of this luxury home with the builders at Old Town Design Group. When construction neared completion, Everything Home returned to specify hard finishes and color schemes throughout and stage the decor and accessories. Start to finish, Everything Home designs dream homes.
---
Project completed by Wendy Langston's Everything Home interior design firm, which serves Carmel, Zionsville, Fishers, Westfield, Noblesville, and Indianapolis.
For more about Everything Home, see here: https://everythinghomedesigns.com/
To learn more about this project, see here:
https://everythinghomedesigns.com/portfolio/scandinavian-luxury-home/
77