
Search results for "Starting" in Home Design Ideas
 Kari P
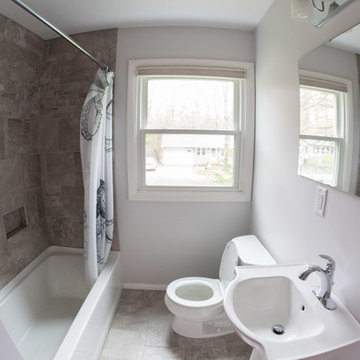
When I bought my house in May 2014, there was one thing I really didn’t like about it – the 1950s bathroom complete with pink tile and mismatched gaudy fixtures was absolutely hideous. I knew redoing the bathroom would be a big, expensive project, so I vowed to just live with it while I fixed up parts of the house that were easier to update, such as putting a fresh coat of paint on the walls and updating the curtains (which I still haven’t done, by the way). Well my first winter in the new house turned out to be a bad one, and in February 2015, I noticed water stains on the walls and ceiling of the second bedroom that only got worse and worse each day. The water damage quickly spread to other rooms, and when contractors came to the house to access and fix the damage, they discovered moisture behind the pink tiled walls of my bathroom. And so started the bathroom remodel.
Start to finish, this project took close to six months, due to going back and forth with insurance and difficulty finding a contractor I liked. I lived without a shower for at least four of those months, showering at the gym where I worked or in a pop-up tent in my backyard once it was warm enough out. My friend Eric and I demoed the bathroom and for the remodel, I picked out all of the design components and had a local contractor, Fred Haas do the work. I kept the original layout – as my bathroom was small to begin with and it was both impractical and expensive to start moving things around – but just about everything else about the bathroom is new, except for maybe the window and door. New tub, sink, and toilet, new tile floor and shower surround, new walls and ceiling, fresh paint, new fixtures and mirror, updated lighting, and a better ventilation system were all added.
Tub – Sterling Vikrell
Toilet – Kohler Wellworth® two-piece round-front dual-flush toilet
Sink – Kohler Veer™ 21" pedestal bathroom sink
Fixtures – Kohler Alteo® line
Tile floor and shower surround – American Olean Laurel Heights ceramic tile in Summit Gray
Lighting – I don't remember... will have to see if I can find it
Ventilation system – NuTone
Mirror – Ikea
Paint – Behr
Shower Curtain – eBay
Here are photos of my project from start to finish. As you can see, I probably still need a thing or two (a toilet paper holder, mini storage shelf, and some art wouldn’t hurt, nor would replacing the door or painting it white), but overall I’m really happy with how my new bathroom came out. I LOVE it, which is the exact opposite of how I felt about the original bathroom.
Photos © Kari Post
 TaylorPro Design and Remodeling, Inc.
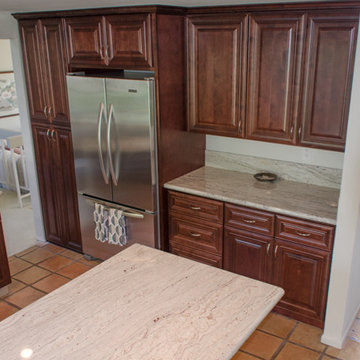
"Kerry was invited to our house to bid on our kitchen remodel in August 2012. We were impressed with his courtesy and professionalism from the start. His estimates were prompt and changes to the scope of work were ready the next day. After we went on vacation for a month, we started work in October. The scope of work included: he removed the counter tops, sink, plumbing, all base and wall cabinets, appliances, french doors and backsplashes. He replaced all switches and outlets, and stops on the water supply. He repaired some damaged drywall. Kerry helped us with our cabinet and granite countertop selection and oversaw their installation within the existing footprint. He installed a stainless undermount sink, garbage disposal, faucet, drain plumbing, and airgap. Our experience with Kerry and his crew was positive from start to finish. Everyone was courteous, prompt, and professional. The work was completed in a timely manner and right on the original estimate. Most importantly, the kitchen is absolutely beautiful. Everytime someone comes over they just say "wow, what a great kitchen!" We highly recommend TaylorPro for anyone looking for an excellent, quality kitchen remodel.
~John & Ann S, Clients
Kitchen remodeling inspirations come from a variety of sources including cultural backgrounds, idealistic ideas, up and coming trends, and personal needs. This kitchen remodel was inspired by a faulty microwave. So the start of the journey was not as elegant as the final destination, but it makes for a great story. Oh, and the final destination included 3 bath remodels too! LOL
Photo By: Kerry W. Taylor
 Kari P
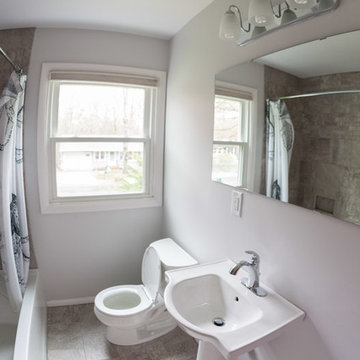
When I bought my house in May 2014, there was one thing I really didn’t like about it – the 1950s bathroom complete with pink tile and mismatched gaudy fixtures was absolutely hideous. I knew redoing the bathroom would be a big, expensive project, so I vowed to just live with it while I fixed up parts of the house that were easier to update, such as putting a fresh coat of paint on the walls and updating the curtains (which I still haven’t done, by the way). Well my first winter in the new house turned out to be a bad one, and in February 2015, I noticed water stains on the walls and ceiling of the second bedroom that only got worse and worse each day. The water damage quickly spread to other rooms, and when contractors came to the house to access and fix the damage, they discovered moisture behind the pink tiled walls of my bathroom. And so started the bathroom remodel.
Start to finish, this project took close to six months, due to going back and forth with insurance and difficulty finding a contractor I liked. I lived without a shower for at least four of those months, showering at the gym where I worked or in a pop-up tent in my backyard once it was warm enough out. My friend Eric and I demoed the bathroom and for the remodel, I picked out all of the design components and had a local contractor, Fred Haas do the work. I kept the original layout – as my bathroom was small to begin with and it was both impractical and expensive to start moving things around – but just about everything else about the bathroom is new, except for maybe the window and door. New tub, sink, and toilet, new tile floor and shower surround, new walls and ceiling, fresh paint, new fixtures and mirror, updated lighting, and a better ventilation system were all added.
Tub – Sterling Vikrell
Toilet – Kohler Wellworth® two-piece round-front dual-flush toilet
Sink – Kohler Veer™ 21" pedestal bathroom sink
Fixtures – Kohler Alteo® line
Tile floor and shower surround – American Olean Laurel Heights ceramic tile in Summit Gray
Lighting – I don't remember... will have to see if I can find it
Ventilation system – NuTone
Mirror – Ikea
Paint – Behr
Shower Curtain – eBay
Here are photos of my project from start to finish. As you can see, I probably still need a thing or two (a toilet paper holder, mini storage shelf, and some art wouldn’t hurt, nor would replacing the door or painting it white), but overall I’m really happy with how my new bathroom came out. I LOVE it, which is the exact opposite of how I felt about the original bathroom.
Photos © Kari Post
Find the right local pro for your project

 TaylorPro Design and Remodeling, Inc.
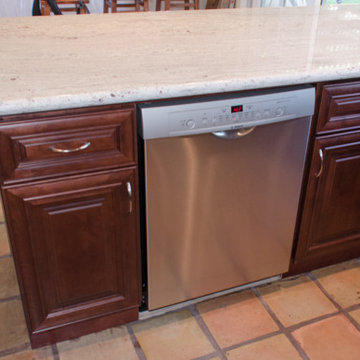
"Kerry was invited to our house to bid on our kitchen remodel in August 2012. We were impressed with his courtesy and professionalism from the start. His estimates were prompt and changes to the scope of work were ready the next day. After we went on vacation for a month, we started work in October. The scope of work included: he removed the counter tops, sink, plumbing, all base and wall cabinets, appliances, french doors and backsplashes. He replaced all switches and outlets, and stops on the water supply. He repaired some damaged drywall. Kerry helped us with our cabinet and granite countertop selection and oversaw their installation within the existing footprint. He installed a stainless undermount sink, garbage disposal, faucet, drain plumbing, and airgap. Our experience with Kerry and his crew was positive from start to finish. Everyone was courteous, prompt, and professional. The work was completed in a timely manner and right on the original estimate. Most importantly, the kitchen is absolutely beautiful. Everytime someone comes over they just say "wow, what a great kitchen!" We highly recommend TaylorPro for anyone looking for an excellent, quality kitchen remodel.
~John & Ann S, Clients
Kitchen remodeling inspirations come from a variety of sources including cultural backgrounds, idealistic ideas, up and coming trends, and personal needs. This kitchen remodel was inspired by a faulty microwave. So the start of the journey was not as elegant as the final destination, but it makes for a great story. Oh, and the final destination included 3 bath remodels too! LOL
Photo By: Kerry W. Taylor
 Closet Factory
REPOST! #clientstory @jehlisahrae⠀
"THIS IS WHAT CLOSET DREAMS ARE MADE OF!! ????⠀⠀
⠀⠀
When Mario and I were in the middle of the home building process, I started looking at custom closet options. I pinned all of the things on Pinterest and started researching different companies. ⠀⠀
⠀⠀
Once we moved in, I started doing some research and because of how big and weirdly shaped our closet is, I had a hard time finding a design I liked and knew exactly what I wanted and refused to settle. I had several zoom consults where I designed a closet but it wasn’t what I wanted.⠀
⠀⠀
When I started working with closet_factory_allentown, I fell in love with the design immediately and it only took a few tweaks before I was asking to schedule! The functionality of this space is amazing whereas before, I did not have any more space and couldn’t even use some of my closet because I could not reach it. Everything is adjustable so if we decide to move things around, we totally can! I even have extra room for more clothes now (shhh don’t tell my husband). ⠀
⠀⠀
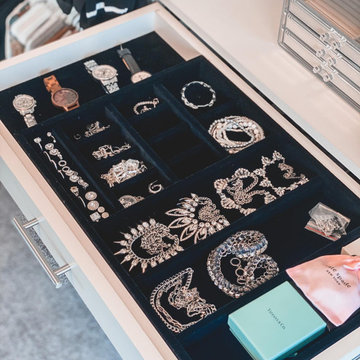
It’s been a week and it doesn’t get old walking into this space everyday. Swipe to see the transformation from the previous space and to see my gorgeous jewelry drawer! ⠀⠀
⠀⠀
If you are considering a closet project, pantry project or something if that sort, I HIGHLY recommend closet_factory_allentown. If you’re not local though, no worries.. closet_factory has other locations too! ⠀⠀
⠀⠀
Oh and head to my stories to check out my closet tour!"
 Prime Design and Build
Designing with Intent: Creating Homes That Tell a Story
Have you ever stepped into a home and felt an instant connection, as if the space itself welcomed you? That’s the power of designing with intent—a thoughtful approach that blends beauty with purpose, ensuring every detail has meaning.
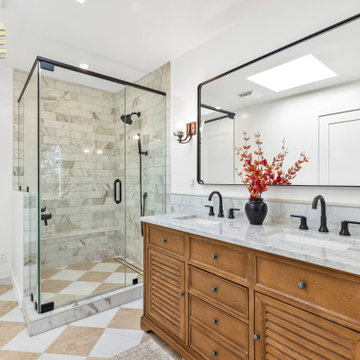
We recently worked on a remarkable 1937 home in Palomar Park, California. The project involved reimagining the second floor to create a master bedroom with a walk in closet and master bathroom while preserving the home’s traditional charm. For the homeowners, this house held decades of memories, and our goal was to honor its legacy while creating a space ready for the next chapter.
The Challenge: Balancing Tradition and Modernity
The homeowners wanted their remodeled space to feel fresh and functional without losing its historic character. This meant every decision, from the layout to the materials, had to strike the perfect balance.
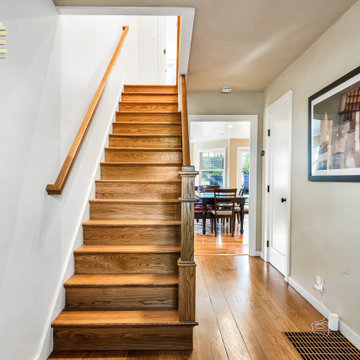
We rebuilt the upstairs including reconstruction of the existing bathroom to make an impressive master bathroom and dressing room, and refinished the hardwood floors to preserve the details that tied back to the home’s 1937 roots. By incorporating traditional elements like marble floors and walls in the bathroom , aged wood vanities and new crown molding for the whole upstairs, we ensured the updated design felt authentic and timeless.
3 Tips for Designing with Intent
Whether you’re working with a historic home or starting a new build, designing with intent can elevate your project. Here are three practical tips to help you create a space that’s as meaningful as it is beautiful:
1. Embrace the Home’s Character
Every home has unique features that tell a story. Whether it’s an original fireplace, old wood floors, or a quirky architectural detail, look for ways to celebrate and integrate these elements into your design.
2. Let Function Drive the Design
No matter how stunning a space looks, it needs to work for your lifestyle. Think about how you use each area and design accordingly. A thoughtful layout, smart storage solutions, and durable materials can transform a home from simply beautiful to truly livable.
In this project, reconfiguring the upstairs wasn’t just about aesthetics—it was about creating a layout that served the family’s everyday needs.
3. Personalize Your Space
The best designs reflect the people who live in them. Incorporate personal touches, such as family heirlooms, meaningful colors, or custom features, to make the space truly yours.
For this home, the homeowners were involved in selecting fixtures and materials that resonated with their style, ensuring the final design felt deeply personal.
Why Intentional Design Matters
Designing with intent transforms a house into a home. It’s about more than just aesthetics—it’s about creating a space that feels deeply connected to your story and needs.
At Prime Design and Build, we believe every project should start with understanding your vision. We work closely with our clients to ensure the design reflects their personality, values, and lifestyle.
Let’s Bring Your Vision to Life
If you’ve been dreaming of a home that feels like a true reflection of you, let’s make it happen. Whether it’s updating a historic property or starting fresh, we’re here to guide you through the process with expertise and care.
As I said in our Palomar Park video, “When we come over to your house, we will get to know you so that we can make your home feel like home too.”
Ready to start your journey? Reach out today for a consultation, and let’s design with intent.
 Prime Design and Build
Designing with Intent: Creating Homes That Tell a Story
Have you ever stepped into a home and felt an instant connection, as if the space itself welcomed you? That’s the power of designing with intent—a thoughtful approach that blends beauty with purpose, ensuring every detail has meaning.
We recently worked on a remarkable 1937 home in Palomar Park, California. The project involved reimagining the second floor to create a master bedroom with a walk in closet and master bathroom while preserving the home’s traditional charm. For the homeowners, this house held decades of memories, and our goal was to honor its legacy while creating a space ready for the next chapter.
The Challenge: Balancing Tradition and Modernity
The homeowners wanted their remodeled space to feel fresh and functional without losing its historic character. This meant every decision, from the layout to the materials, had to strike the perfect balance.
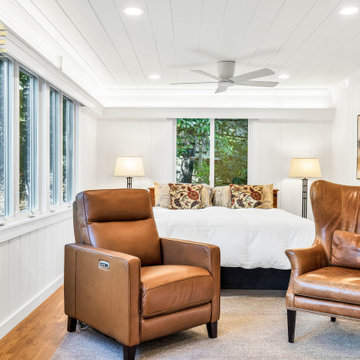
We rebuilt the upstairs including reconstruction of the existing bathroom to make an impressive master bathroom and dressing room, and refinished the hardwood floors to preserve the details that tied back to the home’s 1937 roots. By incorporating traditional elements like marble floors and walls in the bathroom , aged wood vanities and new crown molding for the whole upstairs, we ensured the updated design felt authentic and timeless.
3 Tips for Designing with Intent
Whether you’re working with a historic home or starting a new build, designing with intent can elevate your project. Here are three practical tips to help you create a space that’s as meaningful as it is beautiful:
1. Embrace the Home’s Character
Every home has unique features that tell a story. Whether it’s an original fireplace, old wood floors, or a quirky architectural detail, look for ways to celebrate and integrate these elements into your design.
2. Let Function Drive the Design
No matter how stunning a space looks, it needs to work for your lifestyle. Think about how you use each area and design accordingly. A thoughtful layout, smart storage solutions, and durable materials can transform a home from simply beautiful to truly livable.
In this project, reconfiguring the upstairs wasn’t just about aesthetics—it was about creating a layout that served the family’s everyday needs.
3. Personalize Your Space
The best designs reflect the people who live in them. Incorporate personal touches, such as family heirlooms, meaningful colors, or custom features, to make the space truly yours.
For this home, the homeowners were involved in selecting fixtures and materials that resonated with their style, ensuring the final design felt deeply personal.
Why Intentional Design Matters
Designing with intent transforms a house into a home. It’s about more than just aesthetics—it’s about creating a space that feels deeply connected to your story and needs.
At Prime Design and Build, we believe every project should start with understanding your vision. We work closely with our clients to ensure the design reflects their personality, values, and lifestyle.
Let’s Bring Your Vision to Life
If you’ve been dreaming of a home that feels like a true reflection of you, let’s make it happen. Whether it’s updating a historic property or starting fresh, we’re here to guide you through the process with expertise and care.
As I said in our Palomar Park video, “When we come over to your house, we will get to know you so that we can make your home feel like home too.”
Ready to start your journey? Reach out today for a consultation, and let’s design with intent.

 Prime Design and Build
Designing with Intent: Creating Homes That Tell a Story
Have you ever stepped into a home and felt an instant connection, as if the space itself welcomed you? That’s the power of designing with intent—a thoughtful approach that blends beauty with purpose, ensuring every detail has meaning.
We recently worked on a remarkable 1937 home in Palomar Park, California. The project involved reimagining the second floor to create a master bedroom with a walk in closet and master bathroom while preserving the home’s traditional charm. For the homeowners, this house held decades of memories, and our goal was to honor its legacy while creating a space ready for the next chapter.
The Challenge: Balancing Tradition and Modernity
The homeowners wanted their remodeled space to feel fresh and functional without losing its historic character. This meant every decision, from the layout to the materials, had to strike the perfect balance.
We rebuilt the upstairs including reconstruction of the existing bathroom to make an impressive master bathroom and dressing room, and refinished the hardwood floors to preserve the details that tied back to the home’s 1937 roots. By incorporating traditional elements like marble floors and walls in the bathroom , aged wood vanities and new crown molding for the whole upstairs, we ensured the updated design felt authentic and timeless.
3 Tips for Designing with Intent
Whether you’re working with a historic home or starting a new build, designing with intent can elevate your project. Here are three practical tips to help you create a space that’s as meaningful as it is beautiful:
1. Embrace the Home’s Character
Every home has unique features that tell a story. Whether it’s an original fireplace, old wood floors, or a quirky architectural detail, look for ways to celebrate and integrate these elements into your design.
2. Let Function Drive the Design
No matter how stunning a space looks, it needs to work for your lifestyle. Think about how you use each area and design accordingly. A thoughtful layout, smart storage solutions, and durable materials can transform a home from simply beautiful to truly livable.
In this project, reconfiguring the upstairs wasn’t just about aesthetics—it was about creating a layout that served the family’s everyday needs.
3. Personalize Your Space
The best designs reflect the people who live in them. Incorporate personal touches, such as family heirlooms, meaningful colors, or custom features, to make the space truly yours.
For this home, the homeowners were involved in selecting fixtures and materials that resonated with their style, ensuring the final design felt deeply personal.
Why Intentional Design Matters
Designing with intent transforms a house into a home. It’s about more than just aesthetics—it’s about creating a space that feels deeply connected to your story and needs.
At Prime Design and Build, we believe every project should start with understanding your vision. We work closely with our clients to ensure the design reflects their personality, values, and lifestyle.
Let’s Bring Your Vision to Life
If you’ve been dreaming of a home that feels like a true reflection of you, let’s make it happen. Whether it’s updating a historic property or starting fresh, we’re here to guide you through the process with expertise and care.
As I said in our Palomar Park video, “When we come over to your house, we will get to know you so that we can make your home feel like home too.”
Ready to start your journey? Reach out today for a consultation, and let’s design with intent.

 Betsy Bassett Interiors
This Maine residence reimagines the traditional coastal cottage, expanding its vernacular across more than 8,000 square feet of thoughtfully designed living space. Every room captures dramatic views of the rugged coastline, complemented by carefully curated fabrics and textures that echo the natural landscape. The grand foyer flows seamlessly into a formal living room and an intimate reading nook. At the heart of the home, a chef's kitchen opens to a custom walk-in pantry and a striking walnut bar. The first floor is completed by an elegant dining room and a four-seasons family room that blurs the boundary between interior and exterior. The primary suite features a custom fireplace crafted from locally sourced stone, while the primary bathroom frames unobstructed ocean vistas. The second floor also includes two guest bedrooms, a luxurious laundry room, and dedicated spaces for both homeowners—an art studio and a sophisticated lounge. The lower level reveals an unexpected delight: a two-lane bowling alley enhanced by custom-designed wallpaper, adding a playful counterpoint to the home's refined coastal elegance.
 Richard Leggin Architects
Anice Hoachlander/Hoachlander-Davis Photography
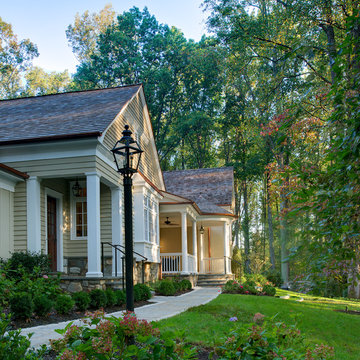
Entryway - traditional entryway idea in DC Metro
Entryway - traditional entryway idea in DC Metro


 Lore Patterson
The Edible Garden
Photo: Lore Patterson
This is an example of a mid-sized traditional backyard landscaping in Seattle for fall.
This is an example of a mid-sized traditional backyard landscaping in Seattle for fall.

 Bushnell Gardens & Landscape
Hen and Chicks 'Carmen', Sempervivum, Photo Credit: Bushnell Gardens Nursery, Granite Bay, CA
Photo of a mid-sized eclectic drought-tolerant and partial sun backyard landscaping in Sacramento for summer.
Photo of a mid-sized eclectic drought-tolerant and partial sun backyard landscaping in Sacramento for summer.
 Fresh Start Contracting
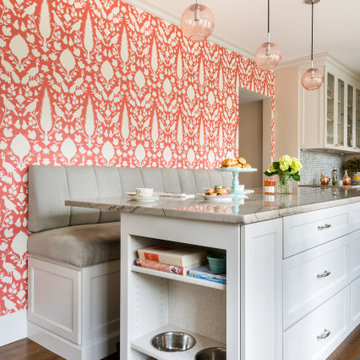
Eat-in kitchen - mid-sized transitional l-shaped medium tone wood floor and brown floor eat-in kitchen idea in Boston with a farmhouse sink, flat-panel cabinets, white cabinets, granite countertops, multicolored backsplash, mosaic tile backsplash, stainless steel appliances, an island and gray countertops


55