
Search results for "Successful cleanup" in Home Design Ideas
 Jennifer Gardner Design
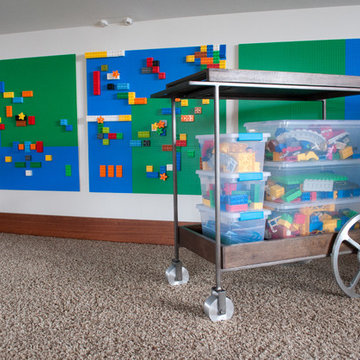
The goal for this light filled finished attic was to create a play space where two young boys could nurture and develop their creative and imaginative selves. A neutral tone was selected for the walls as a foundation for the bright pops of color added in furnishings, area rug and accessories throughout the room. We took advantage of the room’s interesting angles and created a custom chalk board that followed the lines of the ceiling. Magnetic circles from Land of Nod add a playful pop of color and perfect spot for magnetic wall play. A ‘Space Room’ behind the bike print fabric curtain is a favorite hideaway with a glow in the dark star filled ceiling and a custom litebrite wall. Custom Lego baseplate removable wall boards were designed and built to create a Flexible Lego Wall. The family was interested in the concept of a Lego wall but wanted to keep the space flexible for the future. The boards (designed by Jennifer Gardner Design) can be moved to the floor for Lego play and then easily hung back on the wall with a cleat system to display their 3-dimensional Lego creations! This room was great fun to design and we hope it will provide creative and imaginative play inspiration in the years to come!
Designed by: Jennifer Gardner Design
Photography by: Marcella Winspear
 Hardware Resources
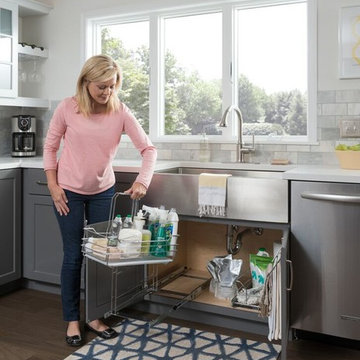
Organizing your cleaning supplies doesn’t have to be a chore. Easy to pullout and remove so you can take it from room to room. Can be mounted left-or right handed and easily installs with just four screws.

Find the right local pro for your project
 Windy City Painters
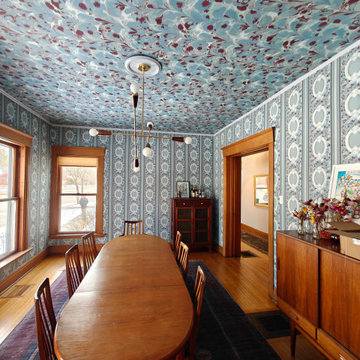
Professional wallpaper installation Chicago dining room showcases expert craftsmanship in this stunning transformation that perfectly complements the home's architectural character.
## Project Overview
This comprehensive wallpaper installation project involved both walls and ceiling application in a formal dining room within a vintage Chicago greystone. The intricate pattern required precise alignment and professional techniques to achieve seamless results that honor the home's historic charm while adding contemporary elegance.
## Materials and Products
We utilized premium wallpaper adhesive specifically formulated for Chicago's climate variations, along with professional-grade smoothing tools and precision cutting equipment. High-quality primer ensured optimal surface preparation for lasting adhesion across both vertical and horizontal applications.
## Installation Process
First, comprehensive surface preparation included removing existing materials and repairing any imperfections. Second, application of specialized primer designed for wallpaper adhesion. Third, precise measurement and cutting with careful attention to pattern alignment. Finally, professional installation with meticulous corner work and ceiling transitions.
## Chicago-Specific Challenges
Chicago homes present unique wallpaper installation challenges including settling foundations that affect wall surfaces, humidity fluctuations impacting adhesive performance, and older plaster surfaces requiring specialized preparation techniques. Additionally, vintage buildings often have irregular walls demanding expert adjustment skills.
## Results and Quality
The completed wallpaper installation creates a sophisticated dining environment that seamlessly integrates with the home's architectural character. Perfect pattern matching across walls and ceiling demonstrates the precision possible with professional installation techniques.
## Professional Tips
Before starting wallpaper installation, always test adhesion in inconspicuous areas first. Maintain consistent room temperature throughout the process. Choose quality materials designed for Chicago's climate. Plan pattern layout carefully to minimize waste and ensure optimal visual flow.
See more work and request free estimate at windypainters.com - Windy City Painters delivers exceptional results.
Q: How long does wallpaper installation take?
A: Professional wallpaper installation typically requires 1-2 days depending on room size, pattern complexity, and surface preparation needs.
Q: Can you install wallpaper on textured walls?
A: Yes, textured wall wallpaper installation requires proper surface preparation and specialized techniques for optimal adhesion results.
Q: Do you remove old wallpaper first?
A: Complete old wallpaper removal is essential before new wallpaper installation to ensure proper adhesion and smooth finish.
Q: What about ceiling wallpaper installation?
A: Ceiling wallpaper installation requires specialized equipment and techniques - Windy City Painters handles this expertly and safely.
Q: How do you ensure pattern matching?
A: Professional wallpaper installation includes precise measuring, cutting, and alignment techniques for seamless pattern matching throughout the space.
Q: Can wallpaper installation work in humid areas?
A: Proper wallpaper installation with quality adhesives designed for humidity variations ensures lasting results in Chicago's climate.
Q: What surfaces accept wallpaper installation?
A: Most properly prepared surfaces including drywall, plaster, and previously painted walls can accept professional wallpaper installation successfully.
Q: Do you handle corner installations?
A: Corner wallpaper installation requires specialized techniques for inside and outside corners - we ensure perfect alignment.
Q: What's included in the service?
A: Complete wallpaper installation service includes surface preparation, removal if needed, professional application, cleanup, and quality guarantee.
Q: How do you prepare surfaces?
A: Surface preparation for wallpaper installation includes cleaning, repairing imperfections, priming, and ensuring optimal conditions for adhesion.
 Driftwood Builders Roofing
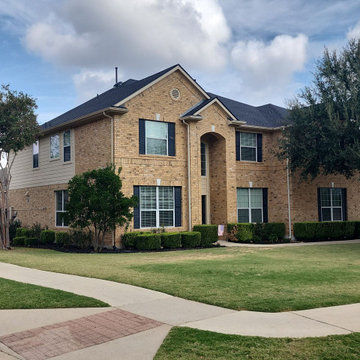
Another successful full roof replacement completed in Circle C Ranch! ?
Our team removed the aging roofing system and installed a brand-new, high-performance roof built to withstand Austin’s intense heat, hail, and storm conditions. This project included upgraded underlayment, improved ventilation, new flashing components, and premium architectural shingles designed for long-term durability and curb appeal.
From the initial inspection through final cleanup, we focused on quality workmanship, clear communication, and protecting the homeowner’s property every step of the way.
If your roof in Circle C is showing signs of age, storm damage, leaks, or missing shingles, now is a great time to schedule a professional inspection before the next storm season arrives.
? Circle C Ranch | Austin, TX
? Full Roof Replacement
✅ Premium Materials
✅ Storm-Ready Installation
✅ Clean & Professional Workmanship
 Tile Doctor Ltd
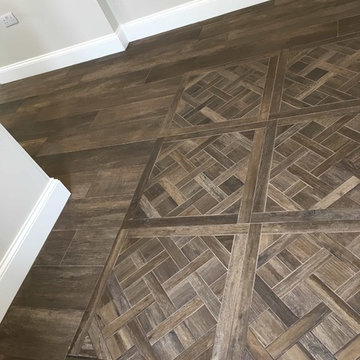
Grout haze or grout smears as it is often called can be a huge problem when laying tiles. Grout haze is basically grout that has been left to dry on the surface of the tile after installation. It’s a common problem which is exacerbated by the use of quick drying products. Take for example this interesting Wood Effect Ceramic Tile installation at a house in Guildford following installation by a builder.
I was a bit slow in following up on the initial enquiry as we had been very busy so by the time, I got in touch I was told they had employed someone else to carry out the work. I apologised for my late response and said to call me if he needed help in the future. Three days later I got a call so we arranged a visit so that I could carry out a test and quote a price.
As it turns out the builder had returned and failed to remove the grout haze and so had a rival firm that seemed more interested in selling unnecessary sealer than fixing the problem. I was astonished to see what a state the builder had left his floor. Grout was all over the floor with footprints walked across thresholds and more. I could understand it if there was some grout was missed after installation but not to this level!
I carried out a successful test and confirmed to the customer that there was absolutely no need to rip and replace his £2k floor. We agreed a date to resolve the problem and to say he was relieved was an understatement!
The builders had used Mapei grout which contains polymers. Polymers offer better flexibility and adhesion, however in order to remove the grout haze we would first need to break down the polymers in the grout first and this is why the rival firm failed.
With that in mind, my first action was to apply Tile Doctor Remove and Go to the floor and leave it to dwell for five to ten minutes. I then worked it into the tile using a scrubbing pad fitted to a rotary machine.
After washing the soil away with warm water and extracting with a wet vacuum I applied Tile Doctor Grout Clean-up to treat the grout. Grout Clean-up is an acid-based product that breaks down the grout so it can be rinsed away and extracted as before. Afterwards I rinsed the floor with warm water and extracted again to remove any trace of product and neutralise the floor. After removing as much moisture as possible with the wet vacuum I speed dried the tiles with a blower.
Ceramic tiles won’t accept a sealer so once the floor had dried the job was finished and it took less than a day.
The customer was over the moon with the difference. While his floor was in such a state, he has been unable to bring in new furniture as the serious possibility of removing the tiles was hanging over him.
Relieved that the problem was now resolved he kindly left the following review:
“I had a floor that had just been laid with very heavy grout haze. I had already had advice from two other professional floor cleaners who had advised me that the floor was irreparable and would need to be pulled up. As soon as I spoke with Rupert, it was clear he was extremely knowledgeable. He asked questions none of the other companies had. By understanding the specific nature of the problem, he was able to solve it by first removing the grout polymers and then applying an acid wash. The floor came up brilliantly. Rupert was the only person I spoke to that could fix this, everyone else told me I needed to replace my floor! Superbly knowledgeable, professional and did an excellent job. Don’t bother speaking to anyone else, just call Rupert! “
Rupert Mcleod
West Surrey Tile Doctor
 Tile Doctor Ltd
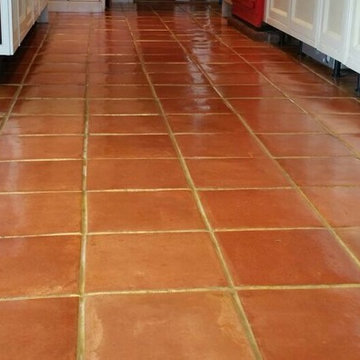
Here’s an interesting job I completed recently in the town of Lymington which is a lovely costal town within the New Forest and on the west side of the Solent. This Terracotta tiled floor was installed in the kitchen and was suffering from an efflorescence issue due to an ongoing leak which resulted in the salts in the water becoming deposited on the surface of the tiles as the water evaporated leaving a white bloom on the surface.
This process is more commonly known as efflorescence and is particularly common in old properties which have no damp proof membrane under the floor and white staining by the cupboards is especially visible in the below photograph.
My client was eager to have the problem fixed, and so enlisted Tile Doctor to get the job done.
To remove the efflorescence, the Terracotta tiled floor was acid washed using a mild dilution of Tile Doctor Grout Clean-Up which is primarily sold to remove grout smears but is equally effective at removing mineral deposits such as the white salts left behind by efflorescence.
The solution was scrubbed into the tiles using a stiff scrubbing brush and was successful at removing the white staining. Naturally it’s not advised to leave acid too long on any surface so the floor was treated in sections and then rinsed off with water and the residue removed using a wet-vacuum.
Following this, the floor was power-scrubbed in combination with a diluted solution of Tile Doctor Pro-Clean. Pro-Clean is a versatile cleaner that also contains stripping properties, allowing it to break down and remove old sealers, it also does a nice job getting the grout clean.
With the efflorescence treated and the floor now clean I was now happy with the condition of the tiles and give them a final rinse under pressure to ensure the floor was neutralised and any trace of products removed.
The Terracotta tiled floor was then left to dry overnight and I came back to seal the floor the next day. To seal the tiles I used three coats of Tile Doctor Seal & Go Extra, which provides a robust surface seal, and is recommended for internal floors with the damp issues.
Hopefully this quick report has offered some useful advice on how to treat efflorescence which is quite a common problem; naturally if you have further questions Tile Doctor does offer a free advice service so do get in touch.
Charles Okwechime
Hampshire Tile Doctor
 Tile Doctor Ltd
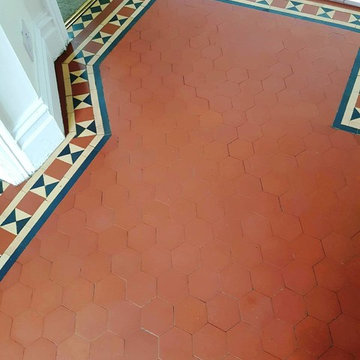
From The 1860s Victorian tiled floors started to appear in public buildings and by the 1890s they had become an essential feature in the most ordinary Victorian terraced houses. Although these floors fell out of fashion during the 1960s and ’70s, when many of them were covered over, they are now being rediscovered by their present owners and this is exactly what happened to my customer in the village of Littleover.
The customer had attempted to clean the floor by themselves but they couldn’t archive the result wanted, fortunately they discovered the Derbyshire Tile Doctor and after their call I went over and did a test for cleaning to make sure I can archive the needed results. They were happy with what they saw, so they booked me in to complete the work.
For cleaning the hallway I used a strong dilution of Tile Doctors Pro Clean which is strong multi-purpose high-alkaline cleaner. I left the Pro Clean to dwell for 10 minutes and then worked it in the tiles by using a strong black scrubbing pad fitted to my rotary machine. After scrubbing I rinsed the floor several times with clean water to remove any trace of cleaning product from the floor.
After successfully cleaning the hall I moved on to the porch which still had some old topical sealer on less walked areas. On these areas I had to use Tile Doctors own very effective stripper Remove and Go. Remove and Go has a long dwell time to remove any given sealer or wax so I left it to soak in for fifteen minutes followed by scrubbing it in with black pad fitted to rotary machine. The next step was to wash off the residue with water which was then removed using a wet vacuum.
Following this the tiles were given a rinse with Tile Doctor Grout Clean-up which is an acid based product that can remove grout smears and mineral deposits. Last step before sealing was to give the floor a thorough wash down with clean water to remove any cleaning product left on the tiles and then I left the floor to dry overnight.
Next day when I returned I used my damp tester to make sure that the floor is completely dry. Luckily for me floor was all dry and I started sealing. For sealing I used Tile Doctors Colour Grow Sealer which is colour enhancing breathable sealer. I applied 2 coats of the sealer and after every coat I polished off the excess with clean cotton cloths.
The result was really good and my customer was very happy with the work and said that now the floor looks transformed.
Tony Olmet
Derbyshire Tile Doctor
 Thermador Home Appliances
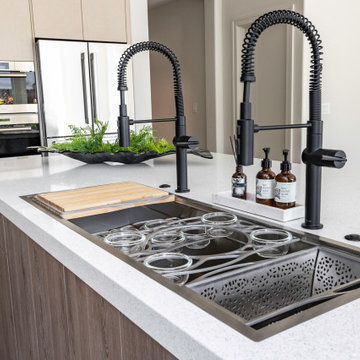
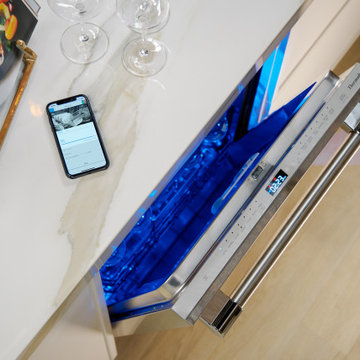
The Easiest Post-Party Cleanup - Revel in the glow of a successful gathering with friends, you deserve it. Rather than spending time hand washing glassware and loading multiple washes, simply load all entertainment ware—even champagne flutes—and unwind. With the Thermador Connected Experience, enjoy personalized control over the appliance via the Home Connect™ app.

1