Search results for "Sufferers" in Home Design Ideas
Muffy Kibbey, Photographer
Carlen and Company, General Contractor
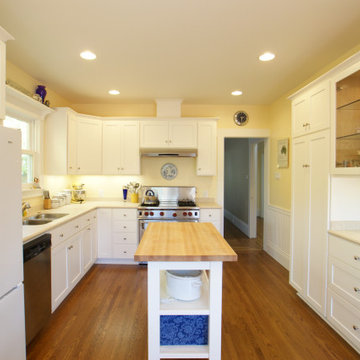
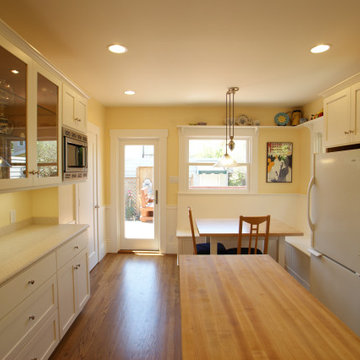
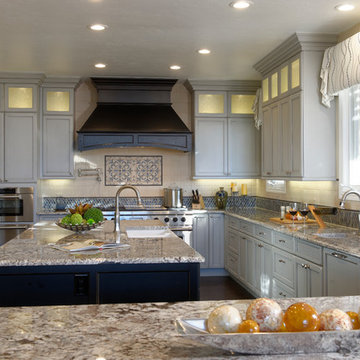
Kitchen/dining room combo - modern medium tone wood floor kitchen/dining room combo idea in San Francisco

© Robert Granoff Photography
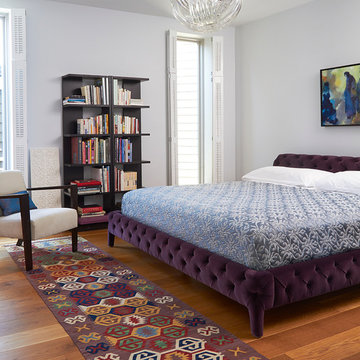
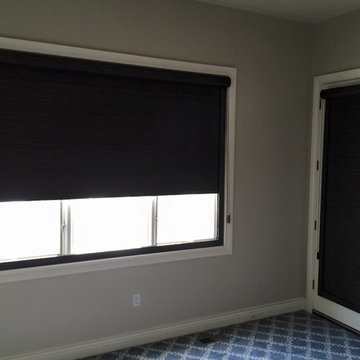
Bedroom - contemporary bedroom idea in New York with white walls

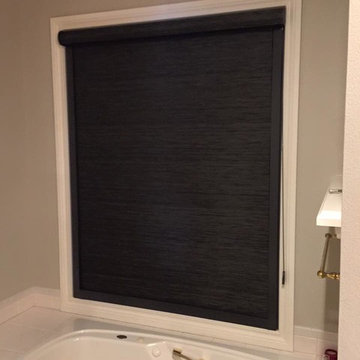
white was before, customer is military veteran, suffered chronic pain and migraines, we took the time to use color and explore the opportunities to reduce the issues. closed still plenty of natural light, ensuring a location that would be beneficial to the entire family.
Find the right local pro for your project

The island of Malta and particularly a visit to an invitingly gracious home in central Valletta, was the inspiration for this new collection, handmade for us in Morocco. The armada of colour and striking pattern is unparalleled for marrying different elements in your home which have built up over time.

The original Fir & Larch flooring suffered significant water damage during the buildings 5-yr vacancy. The propane tank ran empty, so the hot water heater burst, and there was 4" of water on this floor when the caretaker discovered the issue. Amazingly, once dried, the floor suffered almost no cupping, and was salvageable. We elected to lightly sand the floors and keep the patina and story. The patina in the flooring is incredible.

The breakfast area adjoins the clean and open cooking and prep area with easy access to all cooking equipment. The floors are Marmoleum, and provide a sustainable and easy to clean surface.
Photography by Ocular Proof.

white was before, customer is military veteran, suffered chronic pain and migraines, we took the time to use color and explore the opportunities to reduce the issues. closed still plenty of natural light, ensuring a location that would be beneficial to the entire family.

design: Studio TOOP, 2013
location: Rotterdam, NL
status: built in 2014, Weldam Groenprojecten
photo: Hans Clauzing, 2014
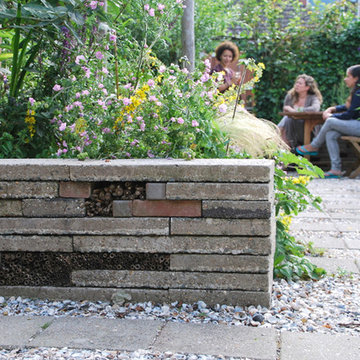
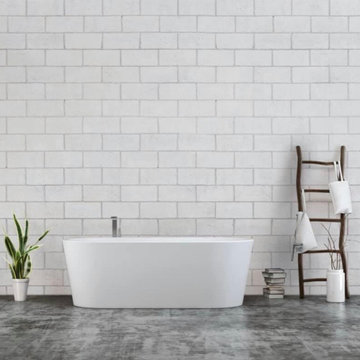
Our good friend Gerda is an avid photographer with a special interest in nature photography and butterflies. She also suffers from a lung disease that sometimes leaves her less mobile and able to head out to pursue this passion. A garden to take pictures in, even when you're not up to heading further out into the world. That was the main goal of this garden. With limited means and the use of affordable materials we created a wheel chair friendly garden that offers ample space for both human and wild life.
design: Studio TOOP, 2013
location: Rotterdam, NL
status: built in 2014, Weldam Groenprojecten
photo: Hans Clauzing, 2014
Our good friend Gerda is an avid photographer with a special interest in nature photography and butterflies. She also suffers from a lung disease that sometimes leaves her less mobile and able to head out to pursue this passion. A garden to take pictures in, even when you're not up to heading further out into the world. That was the main goal of this garden. With limited means and the use of affordable materials we created a wheel chair friendly garden that offers ample space for both human and wild life.

design: Studio TOOP, 2013
location: Rotterdam, NL
status: built in 2014, Weldam Groenprojecten
photo: Hans Clauzing, 2014
Our good friend Gerda is an avid photographer with a special interest in nature photography and butterflies. She also suffers from a lung disease that sometimes leaves her less mobile and able to head out to pursue this passion. A garden to take pictures in, even when you're not up to heading further out into the world. That was the main goal of this garden. With limited means and the use of affordable materials we created a wheel chair friendly garden that offers ample space for both human and wild life.

This renovation was completed with the primary goal of removed the carpet in the stairs which was not only difficult to clean but constantly looking worn in this very busy household. Ideally they wanted a durable, low maintenance flooring solution that still added character and coziness. The solution: Luxury vinyl planks! The unique and discreet metal nosings we used respect the clean lines and richness of this amazing plank in a non-commercial way. NOTE: While not all vinyl planks are created equal - the good ones are worth paying a little extra for!

This fantastic Travertine tiled kitchen floor was in a bad way. Not only had it not been treated to a proper clean and seal in a long while, but it has also suffered from natural pitting, leaving lots of little holes that damaged the overall appearance of the floor. Travertine is very aesthetic, but suffers from the drawback of being quite soft compared to other types of stone (typically it sits between 3-4 on the Moh’s scale of mineral hardness).
The customer, who lives in the town of Sleaford a small Lincolnshire market town, was keen to have the situation remedied through a complete restoration. This would need to include small repairs, along with a deep clean and a fresh seal.
My first job was to deep clean the whole area, which I did using a solution of Tile Doctor Pro Clean and clean water. Pro Clean is a strong alkaline product which has a long history of producing reliable results of a wide range of natural stone floors, including Travertine, Granite, Limestone, and Slate. I applied the solution to both the tiles and the grout lines, and proceeded to scrub it in using a scrubbing pad fitted to a rotary floor machine.
This left the floor fresh and clean, but I would also need to restore the polish to the Travertine to really take its appearance to the next level. To do this I used the process known as burnishing, which essentially involves the consecutive application of different gritted pads to achieve a high quality polish on tiles. Our burnishing system, which consists of four pads, achieves fantastic results on high-end polished stone like Limestone, Marble and, of course, Travertine. I started by applying the Coarse grit burnishing pad, before gradually working my way through to the Medium, Fine, and finally Very Fine pads to achieve a brilliant shine and light reflection finish.
To round off the first day of the restoration, I used a flexible matching filler to fill up any pitted holes present on the surface of the tiles. Following this, I installed a turbo dryer to make sure the floor would dry fully overnight, and be ready to seal the following day.
The next day I returned to the property and proceeded to seal the Travertine tiles using several costs of Tile Doctor Colour Grow sealer to protect the tiles and also really enhance the natural colours in the stone. As an impregnating sealer, Colour Grow penetrates into the stone and fills its pores to safeguard it against ingrained dirt and stains from within.
As you can see from the photographs, the combination of a deep clean, high quality polish and fresh seal really transformed the appearance of the floor from dull and lifeless to a really asset to the kitchen. The customer was absolutely delighted with the results, leaving the following feedback: “Very good job – delighted! Thank you Phil!”
Phil Barrs
Lincolnshire Tile Doctor

This customer, who lives in East Byfleet had been experiencing difficulties in keeping her fantastic Travertine tiled kitchen floor in good condition. Over the years it had suffered from a heavy build up of dirt and oily stains, not to mentioned a number of cracks and small holes. Needless to say, the customer was keen to restore the Travertine tiles to their former glory.
To begin the restoration, I applied Tile Doctor Remove and Go across the entirety of the large tiled area. This heavy duty remover breaks down any old sealers and other coatings, leaving the area ready to cleaned or, in this case, burnished.
Burnishing is a method for cleaning and polishing certain types of high-end stone, including Travertine, Marble, and Limestone. Our burnishing system involves the application of four diamond encrusted pads of varying grits. Firstly, I applied the Coarse grit pad, which helps to break down any dirt and stains on the surface of the tiles. Then, I worked my way through the Medium, Fine, and Very Fine pads, using a little water as lubricant, to gradually refine the polish on the Travertine. It was then rinsed and left to dry.
To round off the first day of work, I filled any cracks and holes using our two-part resin system which greatly improved the look of the tile.
The following day I returned to the property to seal the tiles checking first that the floor had dried. All was well so I proceeded to seal the floor using our colour intensifying impregnating sealer Tile Doctor Colour Grow. Once that was dry, I added the finishing touches by buffing the floor with a soft white buffing pad. As you can see from the photographs, the combination of a fresh seal and polish worked wonders.
We did such a good job with the floor that the customer asked if we could also improve the appearance of their natural stone fireplace which was suffering from bad rust and oil stains however I do a separate write up on that.
Wayne White
West Surrey Tile Doctor

Detailed below is the restoration of a Victorian tiled hallway floor that we started back in June in Preston. Although we started in June there was so much damage to the subfloor and the tiles it took some time to complete, additionally, the client did not like the colour samples of the replacement tiles we had brought along and so decided to source their own which took some time.
Three months later with replacement tiles now sourced we were given the go ahead to start the restoration. The first day’s focus was cleaning the original floor using very coarse 100-grit and 200-grit Diamond pads fitted to a rotary buffer machine and applied to the floor using a strong dilution of Tile Doctor Remove and Go to add extra cleaning power. Tile edges were given special attention using a flex machine fitted with small diamond grit pads.
The floor was rinsed with water to remove the soil generated and this was followed up with an acid rinse using a 1:3 dilution of Tile Doctor Grout Clean Up. This last step in the cleaning process is especially recommend for old floors like this which don’t have a damp proof membrane and can suffer from efflorescence issues.
The next stage focused on repairing the floor and started by carefully knocking out all the broken and chipped tiles. We had previously estimated over 30 tiles needed replacing and so the client had bought two boxes, meaning I had plenty of spares to work with.
Before tiling however, the subfloor had suffered over the years and needed attention first. To deal with this the damaged areas were raked out, cleaned up and then back filled with rapid setting self-levelling screed from Mapie adhesives. Once the sub-base was fixed then we put the new tiles back in, they were not an exact match, about 5mm too short and lighter in tone, but the colour was pretty close.
Tiling an old Victorian floor like this can be a bit like dominoes as you move one out of place 2 decent ones come loose and then they also need refixing. Some of the tiles had hair line cracks in them and once they were loose, they just cracked in half. As such the 20 spare tiles that I thought were spare came into good use and I actually ended up using all of them. I could have done with a few more so it was decided to reset the last four broken tiles and grout them in. Luckily for me the client was very understanding about the nature of tile restoration and had accepted that there would be some imperfections and they were not expecting a new floor.
The Tiles were fixed down using Ultralite Rapid Flex (another product from Mapie) and then grouted using the same adhesive (not a grout, as they did not have grout back in the day, just cement and screed).
The floor was left this to cure overnight, and we came back the next day to finish the clean using a 200-grit diamond pad fitted to a buffing machine and lubricated with water, then one last acid rinse to get the tiles as clean as possible and remove any lingering grout haze. This last clean helps to blend the new tiles in with the original.
Before applying a protective sealer, the floor was left to dry for a couple of days, the tiles need to be thoroughly dry before sealing or you can end up with a patchy appearance.
For this floor with no damp proof membrane, it was important to use a fully breathable sealer that will allow moisture to rise through the tile and evaporate at the surface, so Tile Doctor Colour Grow was chosen. This is a good choice for old floors like this as its fully breathable, head wearing, and it contains a colour enhancer that improves the overall appearance of the tile.
Three coats of Tile Doctor Colour Grow which is a fully breathable, colour enhancing sealer hat works by soaking into the pores of the tile protecting it from within. It has a matt finish, and it works really well with all clay tiles and is ideal for these types of floors.
You can probably spot the lighter coloured tiles in the after photos on this page, however it’s a very subtle difference and I think they have blended in quite well with the original. Certainly, my client was very pleased with the newly restored floor, its completely transformed from when we first visited the client, and the floor has now gained character and history. For aftercare we recommend Tile Doctor Neutral Cleaner, its an effective pH neutral product that is compatible with the new sealer.
Russell Taylor
Lancashire Tile Doctor

Client: Private
Architect: Cousins & Cousins Architects
Contractor: Romark Projects Ltd
Photography: Jack Hobhouse
Inspiration for a small contemporary built-in desk light wood floor and beige floor home office library remodel in London with white walls

Here’s a really interesting commercial job for you, which I recently completed in the town of Hinckley, Leicestershire. I was asked to take a look at a Victorian Geometric and Encaustic tiled floor in the historic Queen’s Head pub.
This floor is over a century old and although in good condition for its age had suffered significant wear over the years, along with some cracked tiles and slight inherent moisture issues. What the pub landlord requested was a restorative clean to alleviate the aesthetically damaging effect of the wear, and to enhance the natural colours of the stone. I was also asked to seal the floor following the clean to achieve a semi-gloss finish.
The first step in the cleaning process was to mix a strong solution of one part Tile Doctor Pro-Clean to four parts clean water. Pro-Clean is a high alkaline cleaner which also contains stripping properties, allowing it to break down old sealer and tackle heavy soil build-up. The solution was applied to the floor and left to dwell for 15 minutes, giving it times to seep into the stone, get underneath the dirt and lift it to the surface.
I addressed several paint spots and areas suffering from glue contamination by using Tile Doctor Remove & Go, which is specially formulated to break down paint and adhesives on unpolished natural stone floors, amongst others. The entire floor was then scrubbed using a special floor cleaning pad, and the resulting slurry was vacuumed away using a wet-vac machine.
The final issue to deal with was the inherent efflorescence staining. This was treated using Tile Doctor Grout Clean-Up, an acid-based product which removes not just efflorescence but also grout haze, mineral deposits, and rust stains. The solution here was one part Grout Clean-Up diluted with four parts water.
After completing the clean, I thoroughly rinsed the floor with clean water to remove any trace of cleaning product and dried the floor as much as possible with a wet vacuum, then before leaving for the day i installed a couple of air movers to assist with drying overnight.
Upon my return the following day, I checked the floor for any excess moisture before sealing it with our topical, semi-gloss finish sealer, known as Seal & Go Extra which due to its formula is ideal for external or old internal floors where there is unlikely to be damp from membrane.
This unique product provides excellent protection, and allows the tiles to breath where floors are suffering from inherent moisture issues. It is suitable for both internal and external use, on Victorian floor tiles, Sandstone, Flagstones, Terracotta, and rough Slate.
As you can see from the photo, I was able to fulfil my client’s request to a high standard, bringing the pub’s old yet characterful Victorian tiled floor back to life again.
Kay Sylvester
Leicestershire Tile Doctor
9