
Search results for "Suspicion" in Home Design Ideas

 Miller Interior Design, LLC
With a wry smile and a penchant for artisanal quality, she asked, "Can you mix Egyptian Art Deco, Funky Modern, and Western Lodge styles in my historic 1910 Prairie Style home?"
Yes, ma'am. Yes I can.
...I'll freely admit, and so will Nancy, the pair of vintage couches we redressed flanking the fireplace are simply hilarious. I call them "Mae West Had A Twin Sister". ;P
photography by Steve Voelker

 Fisher Custom Homes
Velvety, deep-colored furniture and candle-shaped light fixtures haning from heavy rustic wood beams adds to the castle feel of this Mediterranean-style home.
 Goldenline Remodeling
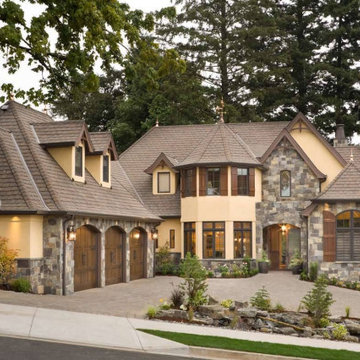
The roof are elements of the upper part of the structure, but they have characteristic differences. The roof can be called a supporting structure, which includes a rafter system, lathing, vapor barrier, waterproofing, insulation, roofing material, gables.
Remember that roofing is complicated, with variables required for both success and longevity. Even though you will be able to identify some roofing problems, contact a professional to verify your suspicions. Goldenline Remodeling can help you determine your roofing requirements. When it comes to proper roofing in SURBITON, our professionals can help address the specific needs and variables of each job. Contact is and you can learn more about roofing services from Goldenline Remodeling.
Find the right local pro for your project
 Goldenline Remodeling
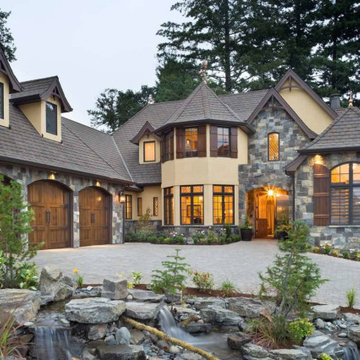
The roof are elements of the upper part of the structure, but they have characteristic differences. The roof can be called a supporting structure, which includes a rafter system, lathing, vapor barrier, waterproofing, insulation, roofing material, gables.
Remember that roofing is complicated, with variables required for both success and longevity. Even though you will be able to identify some roofing problems, contact a professional to verify your suspicions. Goldenline Remodeling can help you determine your roofing requirements. When it comes to proper roofing in SURBITON, our professionals can help address the specific needs and variables of each job. Contact is and you can learn more about roofing services from Goldenline Remodeling.

 The New Amity Workshop, LLC
I took pause a couple of weeks ago to head out with my children to the edges of our meadow. We had a special task at hand that day, to collect milkweed seeds for my Aunt and Uncle’s cabin in the Catskills. It’s a place I’ve been visiting for decades and a place my children now visit. We simply refer to it as “The Cabin”.
That afternoon we gathered milkweed pods and settled into the simple joy of watching the ethereal seeds travel on a puff of air. Seasons ago, my children began to make “wishes” on the seeds, inspired by their lightness and grace as they journeyed high into the clouds. In this spirit, we conjure our wishes each fall in hopes that they will take root and thrive next spring after our winter of inwardness has passed. I have the suspicion that many unclaimed wishes made their way into our basket that afternoon and are eagerly awaiting their new place at The Cabin.


 Nar Design Group
This fun classic kitchen in Gold River features Columbia frameless cabinets in Sandy Hook grey. A green glass backsplash in a random matte and polished pattern complements the cabinets which are faced with both painted wood and frosted glass. The Silestone countertops in the Lyra finish have an ogee bullnose edge. The floors are finished in a rich brown porcelain tile of varying sizes that are made to resemble distressed wood.
Photo Credit: Nar Fine Carpentry, Inc

 Zelaya Properties LLC
We used: Custom cherry cabinetry in Arts & Crafts Shaker style by Kabinart in Boulder and Espresso stains. Liberty Hardware Venetian bronze 1-1/2" cabinet knobs. KitchenAid Architect II Series 22 CF counter-depth French door refrigerator. KitchenAid Architect Series II 27" convection single wall oven. KitchenAid 36" 6-burner dual fuel freestanding commercial-style range. KitchenAid Architect II Series 24" dishwasher. Sharp Insight Pro Series 24" built-in microwave drawer (Model #KB6524PS). Crystorama Solaris 12" wide pendant lights in English bronze. Granite countertops in Brown Fantasy. 3"x6" polished marble backsplash.
Paint colors:
Walls: Glidden Silver Cloud 30YY 63/024
Ceilings/Trims/Doors: Glidden Swan White GLC23
Robert B. Narod Photography

 Moss Yaw Design studio
Engineered cedar siding creates beautiful gray-blue tones at the exterior of the home, while adding a textural element to activate the simple exterior design.

 Hankins & Associates, Inc. - Kitchens and Baths
Bucks County farmhouse features raised panel, beaded inset cabinetry with a paint and glaze finish. Wolf rangetop compliments the stylish hearth which features pullout spices left and right. Dinnerware display right of the Sub-Zero is both attractive and functional. Peninsula offers seating for two and features an undermount cast iron second sink. Photo by Jerry Hankins

 Jakob Morse Flooring Installation
The color of the floor has a great blend between the richness of the brown and the coolness of the gray. The tile is next!
Example of a small country kids' yellow tile and ceramic tile vinyl floor drop-in bathtub design with recessed-panel cabinets, brown cabinets, a two-piece toilet, gray walls, a drop-in sink and laminate countertops
Example of a small country kids' yellow tile and ceramic tile vinyl floor drop-in bathtub design with recessed-panel cabinets, brown cabinets, a two-piece toilet, gray walls, a drop-in sink and laminate countertops
 Tile Doctor Ltd
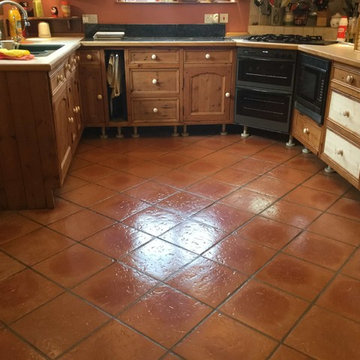
This Terracotta tiled floor was installed in the kitchen of a cottage in the small village of Maidford near Towcester. The tiles were not looking their best and the owner of the property realised it was time to do something about it and contacted Tile Doctor to have the floor stripped and resealed. Stripping and Sealing tile and stone floors is our bread and butter so I was more than happy to pop round and survey the floor which was approximately 9m2.
The grout had darkened with dirt and the previous tile sealer was failing so dirt was now getting ingrained in the Terracotta making it difficult to clean in places and leading to a patchy appearance. We discussed the work involved, my quote was accepted, and a date agreed for me to return and complete the work which would take two days, one to clean and one to seal.
After tidying up the Kitchen and removing the kickboards from underneath the kitchen units I set about working on cleaning and stripping the Terracotta floor of old sealers. To start I tested a small area with a strong dilution of Tile Doctor Wax Away. Wax was quite often used on Terracotta so I figured this product would be a good place to start. My suspicions were proved correct, and I found this to be the best product for removing the many layers of sealant on the floor. Wax Away is a new alkaline product by Tile Doctor and ideal for cleaning clay-based tiles such as Terracotta.
With my sights set on the rest of the floor Wax Away was scrubbed into the tile using a 17” rotary floor scrubbing machine and a black scrubbing pad running on a slow speed which helps to reduce splashing. This activity soon brought the dirt off the floor and the soiled cleaning solution was removed using a wet vacuum and the floor was rinsed down with clean water. The cleaning process was repeated a couple of times until I was happy with the floor, a stiff hand brush was then used along the grout lines with a dilution of Tile Doctor Pro-Clean to clean up the grout.
After rinsing and extracting the floor again the floor was inspected, and I noticed there were a few stubborn paint splashes on the tiles. I managed to remove these and these by spot treating the affected area with Tile Doctor Remove and Go and a steamer to lift the stain out of the clay tile. Once happy the floor was clean it was given a thorough rinse to neutralise it and remove any trace of cleaning products and then left it to dry.
I allowed the floor to dry for several days before returning to seal the Terracotta using numerous coats of Tile Doctor Seal and Go which is an ideal sealer for Terracotta and provides durable stain protection together with a low sheen finish. Terracotta is by its nature very porous and so it’s not unknown for it to take up to nine coats of sealer, which can take some time to apply as like paint you have to wait until it’s dry before it will take the next coat.
The customer was so impressed by the results I achieved in their kitchen they decided to go ahead and book me in to carry out this process throughout the whole of the ground floor which included lounge, study and hallway.
Phil Vissian
Northamptonshire Tile Doctor

 GS Construction
Example of a small classic 3/4 white tile and stone tile mosaic tile floor alcove shower design in Chicago with an undermount sink, recessed-panel cabinets, black cabinets, quartzite countertops, a two-piece toilet and gray walls
 contact7524
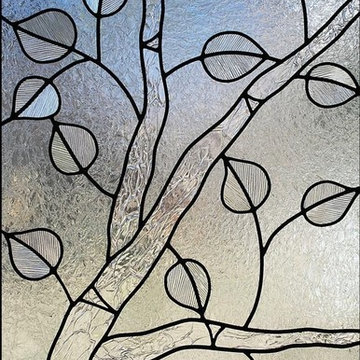
This stained glass window was created as part of our signature Aspen Stained Glass line. These windows look beautiful in cottage style or contemporary homes and are a great way for outdoor enthusiasts to celebrate their love of nature. The textured appearance of the glass provides the homeowners with a high level of privacy and comfort.


 Stonelace Designs
Originally, the exterior of the Napa ranch residence was a standard knocked down stucco finish. We covered over the entire exterior of the house with a natural plaster product that has been made in Italy for centuries, known as Rialto or Vero. This product is a combination of slaked lime mixed with 60% reconstituted crushed marble dust. Quarried from the legendary Carrara marble mines. The finish itself is a vertically combed striated texture embedded into the plaster. While it cures, a transparent group of patinas are applied to the stone-like plaster substance to create a look of an aged villa.


 Cypress Design Co.
Example of a large classic l-shaped ceramic tile eat-in kitchen design in Providence with an island, raised-panel cabinets, medium tone wood cabinets, granite countertops, beige backsplash, ceramic backsplash, stainless steel appliances, an undermount sink and green walls

 MEC
MECPEACOCK FANTASY - Custom Designed Peacock Wall Mural in brilliant colors. Notice how it has just the right amount of color | Have a custom mosaic idea? We can help, with our brilliant Italian-trained mosaicists and easy-to-install tiled masterpieces. Worldwide shipping available on the complete range of quality handcrafted marble & glass mosaic products. For inquires and more info, contact us: http://mecartworks.com

 Heritage Construction Companies, LLC.
Example of a huge trendy metal floating open staircase design in Minneapolis
2