
Search results for "Timely manner" in Home Design Ideas
 Renovisions
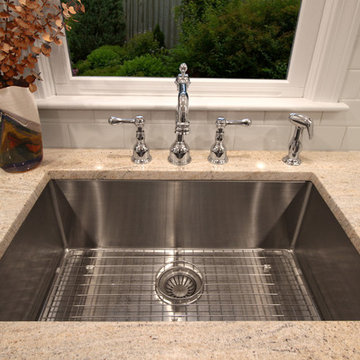
The owners of this outdated 1960’s kitchen were ready for a change and sought out Renovisions after seeing one of their eye-catching ads in South Shore Living Magazine. It was time to start fresh with a cleaner and brighter look with more functional storage. The professionals at Renovisions worked as a team to accommodate their wishes while being mindful of their existing traditional styled furnishings.
Keeping a similar layout, the old cabinets, flooring, countertops, door, window and appliances were removed as well as the wall between the kitchen and dining room to accommodate additional cabinets while creating an L for more useful countertop space. Replacing the worn stained wooden door and double hung window with a new prairie-style window and breezeway door in white finish was the first order of business. By replacing the tired vinyl floor with new oak wood floors the space became warm & inviting. The beautiful new white painted shaker-style cabinets look fabulous with the natural ivory-tan blend granite countertops and sleek stainless steel appliances. Simple, yet elegant white subway tiles provide a serene and open feel to the space. Creating a small niche area behind the slide-in range was also at the top of our clients list to accommodate the spices they use daily, turning an ordinary look to extraordinary.
Pesto change-o, as if by magic Renovisions transformed this dated tight-fit kitchen into a warm and inviting better functioning space that is definitely pleasing to the eyes of these homeowners who are thrilled with the end result and grateful for the high quality work along with the professional manner in which their project was completed.
“Thanks to you, Ed, Mike, and Liz for all your hard work. The kitchen is beautiful and I love the backsplash! The whole room looks beautiful, I'm so glad that we went with the white subway tiles in the end. They're light and clean and really pretty. Thanks for everything, Cathy. Your team has done a wonderful job! We appreciate all your help and hard work.”
- Bea R. (Hanson)
 Renovisions
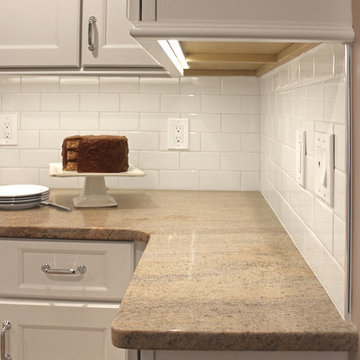
The owners of this outdated 1960’s kitchen were ready for a change and sought out Renovisions after seeing one of their eye-catching ads in South Shore Living Magazine. It was time to start fresh with a cleaner and brighter look with more functional storage. The professionals at Renovisions worked as a team to accommodate their wishes while being mindful of their existing traditional styled furnishings.
Keeping a similar layout, the old cabinets, flooring, countertops, door, window and appliances were removed as well as the wall between the kitchen and dining room to accommodate additional cabinets while creating an L for more useful countertop space. Replacing the worn stained wooden door and double hung window with a new prairie-style window and breezeway door in white finish was the first order of business. By replacing the tired vinyl floor with new oak wood floors the space became warm & inviting. The beautiful new white painted shaker-style cabinets look fabulous with the natural ivory-tan blend granite countertops and sleek stainless steel appliances. Simple, yet elegant white subway tiles provide a serene and open feel to the space. Creating a small niche area behind the slide-in range was also at the top of our clients list to accommodate the spices they use daily, turning an ordinary look to extraordinary.
Pesto change-o, as if by magic Renovisions transformed this dated tight-fit kitchen into a warm and inviting better functioning space that is definitely pleasing to the eyes of these homeowners who are thrilled with the end result and grateful for the high quality work along with the professional manner in which their project was completed.
“Thanks to you, Ed, Mike, and Liz for all your hard work. The kitchen is beautiful and I love the backsplash! The whole room looks beautiful, I'm so glad that we went with the white subway tiles in the end. They're light and clean and really pretty. Thanks for everything, Cathy. Your team has done a wonderful job! We appreciate all your help and hard work.”
- Bea R. (Hanson)
 Renovisions
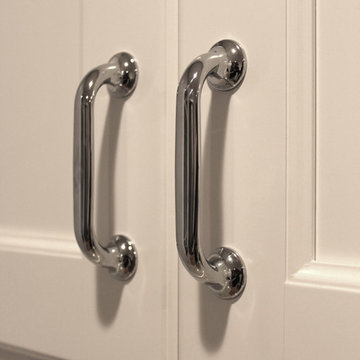
The owners of this outdated 1960’s kitchen were ready for a change and sought out Renovisions after seeing one of their eye-catching ads in South Shore Living Magazine. It was time to start fresh with a cleaner and brighter look with more functional storage. The professionals at Renovisions worked as a team to accommodate their wishes while being mindful of their existing traditional styled furnishings.
Keeping a similar layout, the old cabinets, flooring, countertops, door, window and appliances were removed as well as the wall between the kitchen and dining room to accommodate additional cabinets while creating an L for more useful countertop space. Replacing the worn stained wooden door and double hung window with a new prairie-style window and breezeway door in white finish was the first order of business. By replacing the tired vinyl floor with new oak wood floors the space became warm & inviting. The beautiful new white painted shaker-style cabinets look fabulous with the natural ivory-tan blend granite countertops and sleek stainless steel appliances. Simple, yet elegant white subway tiles provide a serene and open feel to the space. Creating a small niche area behind the slide-in range was also at the top of our clients list to accommodate the spices they use daily, turning an ordinary look to extraordinary.
Pesto change-o, as if by magic Renovisions transformed this dated tight-fit kitchen into a warm and inviting better functioning space that is definitely pleasing to the eyes of these homeowners who are thrilled with the end result and grateful for the high quality work along with the professional manner in which their project was completed.
“Thanks to you, Ed, Mike, and Liz for all your hard work. The kitchen is beautiful and I love the backsplash! The whole room looks beautiful, I'm so glad that we went with the white subway tiles in the end. They're light and clean and really pretty. Thanks for everything, Cathy. Your team has done a wonderful job! We appreciate all your help and hard work.”
- Bea R. (Hanson)
Find the right local pro for your project

 Five Star Tree Care
There are a few reasons why it is critical that your trees have a regular schedule for pruning and maintenance. Pruning helps trees to maintain a tree’s health as well as form it to a pleasing aesthetic shape. Furthermore, pests and diseases are also controlled by regular pruning and care. When pruning is properly performed, your trees will be healthy and attractive all year long. Five Star Tree Services has put together a list of seven things you should keep in mind regarding your tree pruning.
Tree Inspection
Before any tree pruning job, the tree should be properly inspected. This will allow you or our tree care service team to determine which branches should be cut. It will also allow any diseases or pests to be identified and dealt with.
Remove Dead, Weak & Crossed Branches
Dead and weak branches are a hazard to your property and those who happen to walk or lounge under the tree. They also suck vital nutrients away from healthy branches and the tree trunk. Removing them will prevent accidents and allow your tree to thrive. Crossed branches can also cause problems later down the line. They affect the airflow to the crown and can also prevent sunlight from passing through the tree.
Pay Attention to Spacing
It’s important to pay attention to branch spacing when pruning your tree. Lateral branches should be spaced evenly, especially when pruning trees that have yet to mature.
Follow the Basic Pruning Rules
It’s important that the 1/4th and 1/3rd rules of pruning are followed. This means that you should never cut more than a third of the total height of the tree. This length is measured from the bottom up. You should also only cut 1/4th or less of a tree’s crown when you prune at any one time.
Get Your Tools Ready
The tools you use to prune should be ready well before you make the first cut. You should start your project equipped with a pole pruner, pruning saws, hedge shears, loppers, and pruning shears. They also need to be properly sharpened before you start your pruning project. Each of these tools will allow you to reach different parts of the tree and prune them in a safe manner. If your tools are dull, they can damage the tree or even cause accidents when you attempt to cut.
Prune on Schedule
There are schedules for pruning that should be followed according to the type of tree you are caring for. Summer blooming trees should be pruned in early spring while evergreens and hedges should be taken care of in the early part of summer. Fruit-bearing trees should be pruned late in winter ahead of the frost. If there is damage to your tree, it doesn’t matter what time of year it may be, correct the problem as soon as possible.
Avoid Protecting Post-Pruning
Pruning leaves behind wounds, but they will heal. Though they may be unsightly for a while, the marks will heal and return back to its natural beauty. Don’t paint the pruning wounds to protect the tree, it actually has no effect on decay prevention. Painting may even trigger diseases or encourage pests to take up residence.
How We Can Help
Tree pruning is a complication job, but with our tips, you can do it right. It is always a good idea to leave the job to the professionals here at Five Star Tree Services instead. Our Toronto tree care experts have the tools, experience, and skills to get the job done right the first time. Get in touch with us at (416) 990-3355 today for more information.
 Tile Doctor Ltd
This was a substantial engagement at a luxury rental apartment in Brighton rejuvenating the Limestone tiles in two bathrooms and a hallway taking six days of hard work. In addition, I would be working around two decorators, making for even more testing work conditions.
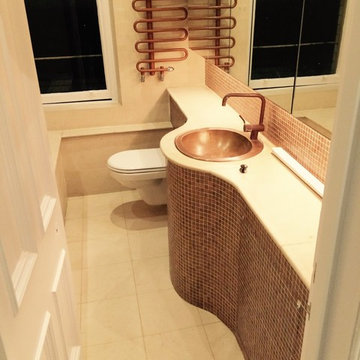
I first set to work on the smallest bathroom, which featured limestone tiles from floor to ceiling, as well as a large bath, copper sink and a tiled surround. Limestone is a very popular choice for interior and exterior decoration, but the tiles in this bathroom were in need of some care to get them looking their best again. My initial task was to strip away any previous sealer by hand; this was done using a mixture of warm water and Tile Doctor Pro-Clean which, along with Limestone, is also suitable for use on other types of natural stone, such as Granite, Slate and Travertine. Pro-Clean serves both as an effective stripper and cleaner, meaning that once the sealer had been stripped away, the tiles also received a thorough clean. Once I had cleaned the tiles, I sucked up any excess water and residue using a Wet-Dry Vac machine.
Since the tiles would have to be left to dry for a couple of days, I offered to restore the copper sink for the customer, even though this was not actually part of my job description. After conducting some research into copper cleaning, I opted to use a combination of lemon juice, vinegar and salt. The research paid off as, once I began to apply the solution to the sink, the bright orange and brown colours of the copper quickly rose to the surface. Within the space of an hour, I had transformed what initially appeared to be a ruined sink into a lovely, shimmering copper feature for the bathroom. Both the decorators and I were truly amazed at the results – but all credit goes to Google!
The larger of the two bathrooms was a much stiffer test for the Tile Doctor products. It had not been left in great condition, as the shower area had clearly not been sealed correctly, and the tiles had been left in such a manner that soap scum from shampoos, soaps and shower gels had built up on the window sill. In fact, the damage was significant enough that I had to explain to the customer before starting the work that whilst I could greatly improve the appearance of the tiles, I would not be able to restore them to new. This is because many shampoo and body wash products are acidic and can cause permanent damage to stone work especially when left to dwell for a long time.
My choice of product was Tile Doctor Mould Away, a formula which, over time, seeps deeply into the pores of the stone, effectively lifting away the muck. In cases of particularly stubborn areas, it is necessary to apply another covering of Mould Away and leave it for an extended period of time. This is exactly what I did over the next few days, leaving the product overnight to work its magic. The change was certainly drastic, if not perfect.
As both bathrooms required extended periods of drying, I spent two days working on the hallway, which had been partially covered with a plastic sealing for the previous six months due to building work. Needless to say, the hallway was in need of a good clean. I set about cleaning the hallway with a solution of warm water and Tile Doctor Pro-Clean, before once again using a Wet-Dry Vac machine to remove any excess water to prepare the floor for sealing at a later point. It is very important to remove any residue of cleaning solution before sealing, as this may impact the performance of the sealer. Following this, I left the hallway to dry for two days, providing the builders with strict instructions to cover it with blankets for protection while they were working.
While the floor was drying, I sealed the bathrooms – both now fully dried – with Tile Doctor Colour Grow Sealer, a solvent-based sealer that was highly effective at enhancing the colour of the brown tiles around the sinks. The product will also provide durable surface protection. I spent the final of the six days sealing the hallway floor with Tile Doctor Seal & Go, which provides both a stain-resistant surface seal and a durable, low-sheen finish. This was an ideal choice of product, as the customer requested a hard-wearing, yet shiny finish.
The hard work really paid off, as both the customer and the decorators were very impressed with the final results in the two bathrooms and the hallway. I was extremely pleased that I was able to complete this big job to the highest possible standards.

 Tamara Heather Interior Design, LLC
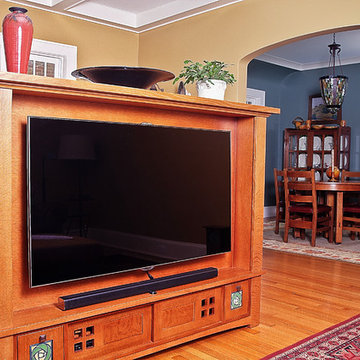
Tamara Heather Interior Design solved the challenge of where to put the televison in this 1920's home, by designing a custom Arts and Crafts style TV/media cabinet that acts as a room divider and defines the entry. Additional updates included a new coffered ceiling, lighting and new paint colors throughout the home.
Stephen Wilfong Photography

 Everything Home
A custom fireplace is the visual focus of this craftsman style home's living room while the U-shaped kitchen and elegant bedroom showcase gorgeous pendant lights.
Project completed by Wendy Langston's Everything Home interior design firm, which serves Carmel, Zionsville, Fishers, Westfield, Noblesville, and Indianapolis.
For more about Everything Home, click here: https://everythinghomedesigns.com/
 Albert, Righter & Tittmann Architects, Inc.
Modern Farmhouse is a contemporary take on a tradition building type, the Connecticut farmhouse. Our clients were interested in a house that fit in with the landscape while providing plenty of daylight with views to the surrounding property. The design uses simple gables arranged in a picturesque manner. It balances clean modern lines, traditional forms, and rustic textures. The new house is bright and light while also feeling personal and unique.
There was interest early on to compress the construction time and to design a building that would not take a lot of energy to run. To achieve these goals, the design of the main house used modular construction and a high performance envelope. To articulate the surfaces of the spaces, the owner assembled a group of designers and artisans. Natural textures and tones were layered over the volumes to give a sense of place and time. The modular units of the house are produced by Huntington Homes in East Montpelier, Vermont.
In addition to the main house, there is a pool house that sits symmetrically on the main axis of a long swimming pool. A glass enclosed living room fits between two concrete volumes that house a bathroom and storage spaces. An outdoor shower faces south, with an oculus that lets light in when the door is closed. The simple forms of the pool house sit below a green roof, which protects the glassy room from the summer sun and integrates the building into the hilly landscape.

 Westlake Royal Building Products
Premium siding from Celect® Cellular Composite Siding by Royal® is made from recyclable, state-of-the-art cellular materials. Which means it faithfully reproduces the deep grain texture and solid heft of real wood. And every style is equally unaffected by mold, mildew, weather and the effects of time.
 Pamela Dailey Design
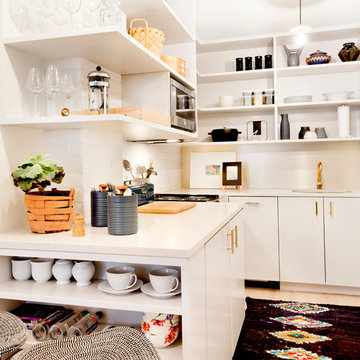
This 400 s.f. studio apartment in NYC’s Greenwich Village serves as a pied-a-terre
for clients whose primary residence is on the West Coast.
Although the clients do not reside here full-time, this tiny space accommodates
all the creature comforts of home.
The kitchenette combines custom cool grey lacquered cabinets with brass fittings,
white beveled subway tile, and a warm brushed brass backsplash; an antique
Boucherouite runner and textural woven stools that pull up to the kitchen’s
coffee counter punctuate the clean palette with warmth and the human scale.
The under-counter freezer and refrigerator, along with the 18” dishwasher, are all
panelled to match the cabinets, and open shelving to the ceiling maximizes the
feeling of the space’s volume.
The entry closet doubles as home for a combination washer/dryer unit.
The custom bathroom vanity, with open brass legs sitting against floor-to-ceiling
marble subway tile, boasts a honed gray marble countertop, with an undermount
sink offset to maximize precious counter space and highlight a pendant light. A
tall narrow cabinet combines closed and open storage, and a recessed mirrored
medicine cabinet conceals additional necessaries.
The stand-up shower is kept minimal, with simple white beveled subway tile and
frameless glass doors, and is large enough to host a teak and stainless bench for
comfort; black sink and bath fittings ground the otherwise light palette.
What had been a generic studio apartment became a rich landscape for living.

 Hilary Walker
Photo: Hilary Rose Walker © 2013 Houzz
Example of a transitional dining room design in Dallas
Example of a transitional dining room design in Dallas
Mid-sized elegant men's carpeted reach-in closet photo in Other with flat-panel cabinets and medium tone wood cabinets
 LITTRELL Architecture + Design
Kat Alves
Inspiration for a mediterranean home design remodel in Sacramento
Inspiration for a mediterranean home design remodel in Sacramento
 Top Tread Stairways
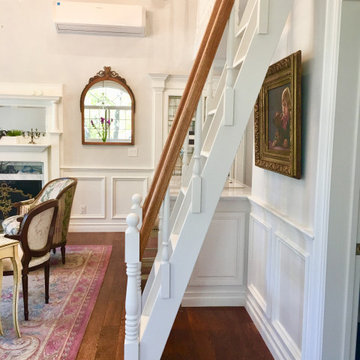
Space-saving Stairs have been used widely in Europe for many years and now have become quite popular in the US with the rise of the Tiny House movement. A further boost has been given to the Space-saving staircase with many of the major building codes in the US allowing them.
Here's the stair we designed and built for a client who wanted a super-slim, non-intrusive way to access their loft. It's built at the code maximum pitch of 70 degrees and has a 102" overall rise. The build code defines an alternating-tread stair as "A device that has a series of steps between 50 and 70 degrees from level... in an alternating manner so that the user does not have both feet on the same level at the same time." So just think with me; That's how we normally climb stairs isn't it? When we climb a conventional stair, we use half of the step at a time. So the idea of an alternating-tread stair is to save a huge amount of floor space by placing the treads in the position where we would normally place our foot as we climb the staircase. This is a brilliant solution for accessing an upper level when space in tight. Please contact Clyde if you want any type of custom stairs. 520-895-2060 or 916-991-9700
 Stellar Gray Fine Homes
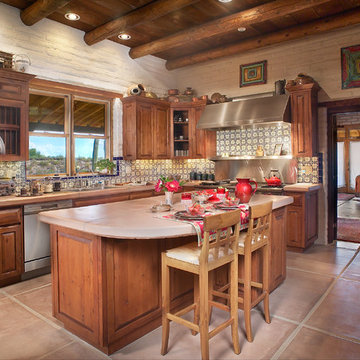
Integral Colored Concrete Counter top, Mexican Talavera Tile,
Thomas Veneklasen Photography
Mid-sized southwest l-shaped concrete floor and beige floor eat-in kitchen photo in Phoenix with a double-bowl sink, raised-panel cabinets, concrete countertops, ceramic backsplash, stainless steel appliances, medium tone wood cabinets, multicolored backsplash and an island
Mid-sized southwest l-shaped concrete floor and beige floor eat-in kitchen photo in Phoenix with a double-bowl sink, raised-panel cabinets, concrete countertops, ceramic backsplash, stainless steel appliances, medium tone wood cabinets, multicolored backsplash and an island
 Jared Frank Studio
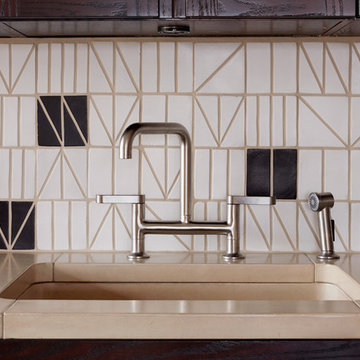
A concrete sink basin is seamlessly integrated into the concrete counters. The tile grout perfect matches the concrete stain.
Inspiration for a small mid-century modern single-wall dark wood floor eat-in kitchen remodel in New York with an integrated sink, glass-front cabinets, dark wood cabinets, concrete countertops, white backsplash, ceramic backsplash, stainless steel appliances, no island and beige countertops
Inspiration for a small mid-century modern single-wall dark wood floor eat-in kitchen remodel in New York with an integrated sink, glass-front cabinets, dark wood cabinets, concrete countertops, white backsplash, ceramic backsplash, stainless steel appliances, no island and beige countertops
 Villa Decor
Ashley Avila
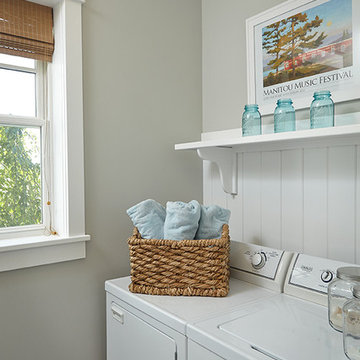
Beach style galley dedicated laundry room photo in Grand Rapids with gray walls and a side-by-side washer/dryer
Beach style galley dedicated laundry room photo in Grand Rapids with gray walls and a side-by-side washer/dryer
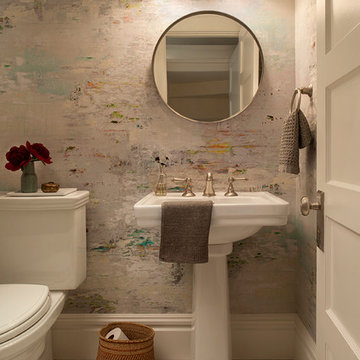
 Regan Baker Design Inc.
For this San Francisco family of five, RBD was hired to make the space unique and functional for three toddlers under the age of four, but to also maintain a sophisticated look. Wallpaper covers the Dining Room, Powder Room, Master Bathroom, and the inside of the Entry Closet for a fun treat each time it gets opened! With furnishings, lighting, window treatments, plants and accessories RBD transformed the home from mostly grays and whites to a space with personality and warmth.
With the partnership of Ted Boerner RBD helped design a custom television cabinet to conceal the TV and AV equipment in the living room. Across the way sits a kid-friendly blueberry leather sofa perfect for movie nights. Finally, a custom piece of art by Donna Walker was commissioned to tie the room together. In the dining room RBD worked around the client's existing teak table and paired it with Viennese Modernist Chairs in the manner of Oswald Haerdtl. Lastly a Jonathan Browning chandelier is paired with a Pinch sideboard and Anewall Wallpaper for casual sophistication.
Photography by: Sharon Risedorph
16