
Search results for "Type correctly" in Home Design Ideas
 Ferriss - Architectural Renderings
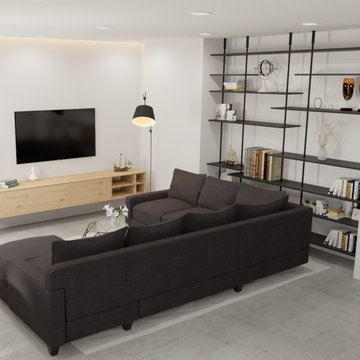
Here are some practical tips for creating a beautiful, comfortable and thoughtful living room design.
The living room in the house is the place where, as the name suggests, receives guests. However, the owners themselves relax here, spending time in front of the TV or a book, with drinks, pleasant conversation and other activities. Therefore, the living room should be the most comfortable place in your home.
The place of the sofa in the design of the living room
The sofa does not need to be placed in a draft. This means that it should not be on an imaginary line from window to door - if you drew a floor plan, it will just be easy to trace.
1. The sofa in front of the TV, diagonally from the door, is a great location. As if inviting you to sit down :)
2. Sofa near the door. A good solution if you often have overnight guests.
3. Corner sofa in the living room. Best placed in the farthest corner from the door. This will make the room look more spacious.
Correct opening of the door in the living room. Inward or outward?
Open inward or outward? There is no clear rule here, because everything depends on the layout and on the furniture placed. The main thing is that the door leaf opens freely and does not interfere with entering and exiting the room. Also, the door should not interfere with free access to the closet or dressing room.
TV in living room size and location. Location.
The TV is placed on the wall opposite to the sofa - this is the most logical and reasonable place for it in the living room. Moreover, the distance to it does not really matter: modern TV models can be placed close to the sofa.
Cabinet or bracket? To your taste. The main thing is that the television zone looks neat and presentable. Provide in advance a cable channel in which all the wires and numerous sockets for the receiver, modem, set-top box, sound bar will hide. Nothing spoils a design like sticking wires!
Height from the floor. It is optimal to place the TV 1 m from the floor to the middle of the screen - this is exactly the level of the eyes of a seated person.
Diagonal size. If there is a financial opportunity, consider options from 50 inches - smaller screens look lonely and lonely on an empty wall.
Living room furniture.
Armchair. Often the chair becomes an accent item in the interior, then its shade, and sometimes its shape, differ from the rest of the furniture. When choosing a chair, be guided also by your habits: for example, it will be more convenient to climb up with your feet and read a book in an armchair with dimensions of 90x90 cm, and you can “just sit comfortably” in a fireplace chair with a high back, comfortable armrests and with a seat 80x80 cm.
TV stand. Large TV stands are no longer as relevant as they used to be, when it was necessary to store a player, cassettes and discs there. For now, a console table or a narrow elegant pedestal is enough.
Coffee table. Nice piece of furniture that creates a cozy atmosphere. Some models, if necessary, can be transformed into a more spacious table for receiving guests - however, finding comfortable and beautiful specimens is not easy, plus they usually cost a lot.
Rack. An extremely useful type of furniture. :) Firstly, a large number of decor items can be beautifully placed on the rack. And secondly, it can also play the role of a light through partition, which divides the room into zones and does not select light at the same time. This is a very big plus for small apartments.
Fireplace. Here we are talking about electric fireplaces. Some of them come with a humidifier and heated, so 3-in-1 models can be very helpful. Fireplace portals have different styles: classic, antique, modern. Inconsistency with the general style of the living room can greatly spoil the impression of the room, so be careful with creativity. Sizing is an important issue. A large wall with a high ceiling also needs a proportionate fireplace; in horror, a small portal will look lonely and ridiculous.
What do you think about our new living room project?
https://www.ferriss.co
#ferriss #We_bring_objects_to_life #3drendering #architecture #San_Francisco
 Ferriss - Architectural Renderings
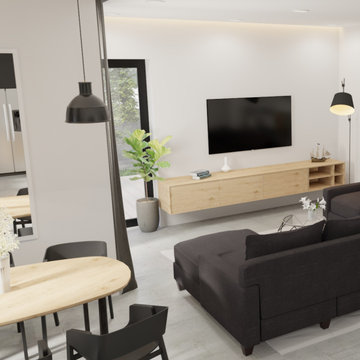
Here are some practical tips for creating a beautiful, comfortable and thoughtful living room design.
The living room in the house is the place where, as the name suggests, receives guests. However, the owners themselves relax here, spending time in front of the TV or a book, with drinks, pleasant conversation and other activities. Therefore, the living room should be the most comfortable place in your home.
The place of the sofa in the design of the living room
The sofa does not need to be placed in a draft. This means that it should not be on an imaginary line from window to door - if you drew a floor plan, it will just be easy to trace.
1. The sofa in front of the TV, diagonally from the door, is a great location. As if inviting you to sit down :)
2. Sofa near the door. A good solution if you often have overnight guests.
3. Corner sofa in the living room. Best placed in the farthest corner from the door. This will make the room look more spacious.
Correct opening of the door in the living room. Inward or outward?
Open inward or outward? There is no clear rule here, because everything depends on the layout and on the furniture placed. The main thing is that the door leaf opens freely and does not interfere with entering and exiting the room. Also, the door should not interfere with free access to the closet or dressing room.
TV in living room size and location. Location.
The TV is placed on the wall opposite to the sofa - this is the most logical and reasonable place for it in the living room. Moreover, the distance to it does not really matter: modern TV models can be placed close to the sofa.
Cabinet or bracket? To your taste. The main thing is that the television zone looks neat and presentable. Provide in advance a cable channel in which all the wires and numerous sockets for the receiver, modem, set-top box, sound bar will hide. Nothing spoils a design like sticking wires!
Height from the floor. It is optimal to place the TV 1 m from the floor to the middle of the screen - this is exactly the level of the eyes of a seated person.
Diagonal size. If there is a financial opportunity, consider options from 50 inches - smaller screens look lonely and lonely on an empty wall.
Living room furniture.
Armchair. Often the chair becomes an accent item in the interior, then its shade, and sometimes its shape, differ from the rest of the furniture. When choosing a chair, be guided also by your habits: for example, it will be more convenient to climb up with your feet and read a book in an armchair with dimensions of 90x90 cm, and you can “just sit comfortably” in a fireplace chair with a high back, comfortable armrests and with a seat 80x80 cm.
TV stand. Large TV stands are no longer as relevant as they used to be, when it was necessary to store a player, cassettes and discs there. For now, a console table or a narrow elegant pedestal is enough.
Coffee table. Nice piece of furniture that creates a cozy atmosphere. Some models, if necessary, can be transformed into a more spacious table for receiving guests - however, finding comfortable and beautiful specimens is not easy, plus they usually cost a lot.
Rack. An extremely useful type of furniture. :) Firstly, a large number of decor items can be beautifully placed on the rack. And secondly, it can also play the role of a light through partition, which divides the room into zones and does not select light at the same time. This is a very big plus for small apartments.
Fireplace. Here we are talking about electric fireplaces. Some of them come with a humidifier and heated, so 3-in-1 models can be very helpful. Fireplace portals have different styles: classic, antique, modern. Inconsistency with the general style of the living room can greatly spoil the impression of the room, so be careful with creativity. Sizing is an important issue. A large wall with a high ceiling also needs a proportionate fireplace; in horror, a small portal will look lonely and ridiculous.
What do you think about our new living room project?
https://www.ferriss.co
#ferriss #We_bring_objects_to_life #3drendering #architecture #San_Francisco
 Ferriss - Architectural Renderings
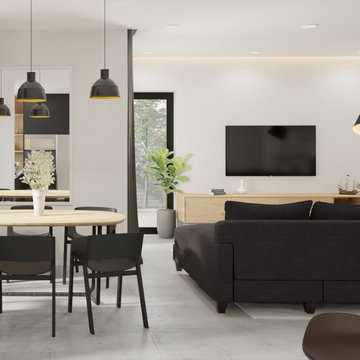
Here are some practical tips for creating a beautiful, comfortable and thoughtful living room design.
The living room in the house is the place where, as the name suggests, receives guests. However, the owners themselves relax here, spending time in front of the TV or a book, with drinks, pleasant conversation and other activities. Therefore, the living room should be the most comfortable place in your home.
The place of the sofa in the design of the living room
The sofa does not need to be placed in a draft. This means that it should not be on an imaginary line from window to door - if you drew a floor plan, it will just be easy to trace.
1. The sofa in front of the TV, diagonally from the door, is a great location. As if inviting you to sit down :)
2. Sofa near the door. A good solution if you often have overnight guests.
3. Corner sofa in the living room. Best placed in the farthest corner from the door. This will make the room look more spacious.
Correct opening of the door in the living room. Inward or outward?
Open inward or outward? There is no clear rule here, because everything depends on the layout and on the furniture placed. The main thing is that the door leaf opens freely and does not interfere with entering and exiting the room. Also, the door should not interfere with free access to the closet or dressing room.
TV in living room size and location. Location.
The TV is placed on the wall opposite to the sofa - this is the most logical and reasonable place for it in the living room. Moreover, the distance to it does not really matter: modern TV models can be placed close to the sofa.
Cabinet or bracket? To your taste. The main thing is that the television zone looks neat and presentable. Provide in advance a cable channel in which all the wires and numerous sockets for the receiver, modem, set-top box, sound bar will hide. Nothing spoils a design like sticking wires!
Height from the floor. It is optimal to place the TV 1 m from the floor to the middle of the screen - this is exactly the level of the eyes of a seated person.
Diagonal size. If there is a financial opportunity, consider options from 50 inches - smaller screens look lonely and lonely on an empty wall.
Living room furniture.
Armchair. Often the chair becomes an accent item in the interior, then its shade, and sometimes its shape, differ from the rest of the furniture. When choosing a chair, be guided also by your habits: for example, it will be more convenient to climb up with your feet and read a book in an armchair with dimensions of 90x90 cm, and you can “just sit comfortably” in a fireplace chair with a high back, comfortable armrests and with a seat 80x80 cm.
TV stand. Large TV stands are no longer as relevant as they used to be, when it was necessary to store a player, cassettes and discs there. For now, a console table or a narrow elegant pedestal is enough.
Coffee table. Nice piece of furniture that creates a cozy atmosphere. Some models, if necessary, can be transformed into a more spacious table for receiving guests - however, finding comfortable and beautiful specimens is not easy, plus they usually cost a lot.
Rack. An extremely useful type of furniture. :) Firstly, a large number of decor items can be beautifully placed on the rack. And secondly, it can also play the role of a light through partition, which divides the room into zones and does not select light at the same time. This is a very big plus for small apartments.
Fireplace. Here we are talking about electric fireplaces. Some of them come with a humidifier and heated, so 3-in-1 models can be very helpful. Fireplace portals have different styles: classic, antique, modern. Inconsistency with the general style of the living room can greatly spoil the impression of the room, so be careful with creativity. Sizing is an important issue. A large wall with a high ceiling also needs a proportionate fireplace; in horror, a small portal will look lonely and ridiculous.
What do you think about our new living room project?
https://www.ferriss.co
#ferriss #We_bring_objects_to_life #3drendering #architecture #San_Francisco
Find the right local pro for your project
 Ferriss - Architectural Renderings
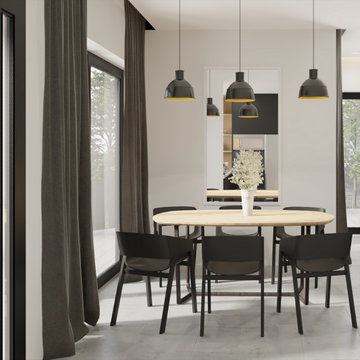
Here are some practical tips for creating a beautiful, comfortable and thoughtful living room design.
The living room in the house is the place where, as the name suggests, receives guests. However, the owners themselves relax here, spending time in front of the TV or a book, with drinks, pleasant conversation and other activities. Therefore, the living room should be the most comfortable place in your home.
The place of the sofa in the design of the living room
The sofa does not need to be placed in a draft. This means that it should not be on an imaginary line from window to door - if you drew a floor plan, it will just be easy to trace.
1. The sofa in front of the TV, diagonally from the door, is a great location. As if inviting you to sit down :)
2. Sofa near the door. A good solution if you often have overnight guests.
3. Corner sofa in the living room. Best placed in the farthest corner from the door. This will make the room look more spacious.
Correct opening of the door in the living room. Inward or outward?
Open inward or outward? There is no clear rule here, because everything depends on the layout and on the furniture placed. The main thing is that the door leaf opens freely and does not interfere with entering and exiting the room. Also, the door should not interfere with free access to the closet or dressing room.
TV in living room size and location. Location.
The TV is placed on the wall opposite to the sofa - this is the most logical and reasonable place for it in the living room. Moreover, the distance to it does not really matter: modern TV models can be placed close to the sofa.
Cabinet or bracket? To your taste. The main thing is that the television zone looks neat and presentable. Provide in advance a cable channel in which all the wires and numerous sockets for the receiver, modem, set-top box, sound bar will hide. Nothing spoils a design like sticking wires!
Height from the floor. It is optimal to place the TV 1 m from the floor to the middle of the screen - this is exactly the level of the eyes of a seated person.
Diagonal size. If there is a financial opportunity, consider options from 50 inches - smaller screens look lonely and lonely on an empty wall.
Living room furniture.
Armchair. Often the chair becomes an accent item in the interior, then its shade, and sometimes its shape, differ from the rest of the furniture. When choosing a chair, be guided also by your habits: for example, it will be more convenient to climb up with your feet and read a book in an armchair with dimensions of 90x90 cm, and you can “just sit comfortably” in a fireplace chair with a high back, comfortable armrests and with a seat 80x80 cm.
TV stand. Large TV stands are no longer as relevant as they used to be, when it was necessary to store a player, cassettes and discs there. For now, a console table or a narrow elegant pedestal is enough.
Coffee table. Nice piece of furniture that creates a cozy atmosphere. Some models, if necessary, can be transformed into a more spacious table for receiving guests - however, finding comfortable and beautiful specimens is not easy, plus they usually cost a lot.
Rack. An extremely useful type of furniture. :) Firstly, a large number of decor items can be beautifully placed on the rack. And secondly, it can also play the role of a light through partition, which divides the room into zones and does not select light at the same time. This is a very big plus for small apartments.
Fireplace. Here we are talking about electric fireplaces. Some of them come with a humidifier and heated, so 3-in-1 models can be very helpful. Fireplace portals have different styles: classic, antique, modern. Inconsistency with the general style of the living room can greatly spoil the impression of the room, so be careful with creativity. Sizing is an important issue. A large wall with a high ceiling also needs a proportionate fireplace; in horror, a small portal will look lonely and ridiculous.
What do you think about our new living room project?
https://www.ferriss.co
#ferriss #We_bring_objects_to_life #3drendering #architecture #San_Francisco
 Tile Doctor Ltd
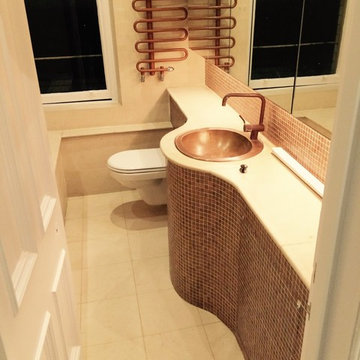
This was a substantial engagement at a luxury rental apartment in Brighton rejuvenating the Limestone tiles in two bathrooms and a hallway taking six days of hard work. In addition, I would be working around two decorators, making for even more testing work conditions.
I first set to work on the smallest bathroom, which featured limestone tiles from floor to ceiling, as well as a large bath, copper sink and a tiled surround. Limestone is a very popular choice for interior and exterior decoration, but the tiles in this bathroom were in need of some care to get them looking their best again. My initial task was to strip away any previous sealer by hand; this was done using a mixture of warm water and Tile Doctor Pro-Clean which, along with Limestone, is also suitable for use on other types of natural stone, such as Granite, Slate and Travertine. Pro-Clean serves both as an effective stripper and cleaner, meaning that once the sealer had been stripped away, the tiles also received a thorough clean. Once I had cleaned the tiles, I sucked up any excess water and residue using a Wet-Dry Vac machine.
Since the tiles would have to be left to dry for a couple of days, I offered to restore the copper sink for the customer, even though this was not actually part of my job description. After conducting some research into copper cleaning, I opted to use a combination of lemon juice, vinegar and salt. The research paid off as, once I began to apply the solution to the sink, the bright orange and brown colours of the copper quickly rose to the surface. Within the space of an hour, I had transformed what initially appeared to be a ruined sink into a lovely, shimmering copper feature for the bathroom. Both the decorators and I were truly amazed at the results – but all credit goes to Google!
The larger of the two bathrooms was a much stiffer test for the Tile Doctor products. It had not been left in great condition, as the shower area had clearly not been sealed correctly, and the tiles had been left in such a manner that soap scum from shampoos, soaps and shower gels had built up on the window sill. In fact, the damage was significant enough that I had to explain to the customer before starting the work that whilst I could greatly improve the appearance of the tiles, I would not be able to restore them to new. This is because many shampoo and body wash products are acidic and can cause permanent damage to stone work especially when left to dwell for a long time.
My choice of product was Tile Doctor Mould Away, a formula which, over time, seeps deeply into the pores of the stone, effectively lifting away the muck. In cases of particularly stubborn areas, it is necessary to apply another covering of Mould Away and leave it for an extended period of time. This is exactly what I did over the next few days, leaving the product overnight to work its magic. The change was certainly drastic, if not perfect.
As both bathrooms required extended periods of drying, I spent two days working on the hallway, which had been partially covered with a plastic sealing for the previous six months due to building work. Needless to say, the hallway was in need of a good clean. I set about cleaning the hallway with a solution of warm water and Tile Doctor Pro-Clean, before once again using a Wet-Dry Vac machine to remove any excess water to prepare the floor for sealing at a later point. It is very important to remove any residue of cleaning solution before sealing, as this may impact the performance of the sealer. Following this, I left the hallway to dry for two days, providing the builders with strict instructions to cover it with blankets for protection while they were working.
While the floor was drying, I sealed the bathrooms – both now fully dried – with Tile Doctor Colour Grow Sealer, a solvent-based sealer that was highly effective at enhancing the colour of the brown tiles around the sinks. The product will also provide durable surface protection. I spent the final of the six days sealing the hallway floor with Tile Doctor Seal & Go, which provides both a stain-resistant surface seal and a durable, low-sheen finish. This was an ideal choice of product, as the customer requested a hard-wearing, yet shiny finish.
The hard work really paid off, as both the customer and the decorators were very impressed with the final results in the two bathrooms and the hallway. I was extremely pleased that I was able to complete this big job to the highest possible standards.
 SUPERIOR CHIMNEY SERVICES CORPORATION
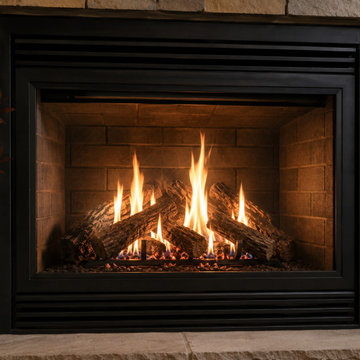
Standard annual or mechanical Chimney cleaning for gas and wood burning fireplaces typically works to remove any type of buildup as well as checking for the structural integrity of the chimney. Maintaining an annual chimney cleaning will meet the national safety standard set by the NFPA, CSIA, IRC and NCSG, helping homeowners avoid chimney fires and blockages.
Why does safety matter? Did you know that there was a chimney fire in Marengo in January? Or a chimney fire at a Peotone home at the end of March? Or a log cabin fire caused by the chimney in June? That’s just a few that happened in the past 7 months.
Why Does a Chimney Cleaning Matter?
Chimney sweeps also known as chimney cleanings, fireplace cleanings, or fireplace sweeps. Regardless of what you call it, it still means the same thing.
Chimney cleaning for gas and wood burning fireplaces serve 3 key purposes:
confirming structural integrity
removing flammable deposits and
obstruction-free assurance.
Homeowners with gas or wood burning fireplaces benefit from each of these safeguards.
The National Fire Protection Association addresses this directly through NFPA 211, a widely recognized fire safety code. The standard states that chimneys, fireplaces, and vents require inspection at least once a year for soundness, free from deposits, and correct clearances, with cleaning, maintenance, and repairs to be done whenever needed.
This annual requirement applies equally to gas and wood burning fireplaces. Organizations including the Chimney Safety Institute of America, the National Chimney Sweep Guild, International Residential code and the National Fire Protection Association each reference this standard as the requirement for home fire safety.
Free 14-Point Certified Written Inspection
Every chimney sweep completed through Superior Chimney includes a complimentary 14-point certified written inspection along with photo documentation delivered to you by email. This documentation gives homeowners a clear visual record of their chimney system.
The written report covers the condition of the flue liner, smoke chamber, smoke shelf, damper, firebox, chimney crown, and chimney cap, among other components examined during a standard visit. Photo documentation captures each area so homeowners can review the findings independently of the technician’s verbal summary. Written inspection reports allow families to track the condition of their fireplace chimney system over time.
Chimney Cleaning and Structural Integrity
A CSIA Certified Chimney Sweep technician, such as Superior Chimney technicians, visually examines the chimney from the top opening to the firebox below, gaining a full evaluation of the interior.
When chimney rods and brushes pass through the chimney system, loose pieces of fire clay tile, damaged tile joints, or crumbling brick sometimes fall down into the fireplace. This debris can mean there is an integrity problem. By knowing this is a problem, will protect families and their homes. Now it’s time to take care of it and call in a certified chimney technician.
Fireplace Cleaning and Creosote Removal
Creosote, is the technical name for soot. Soot forms as a natural byproduct of burning wood. Smoke traveling upward through the chimney and leaves deposits of creosote along the interior walls. With every fire, a little more gets built up.
The issue with creosote is that it is highly flammable and is the leading cause of chimney fires nationwide. Removing the buildup through regular chimney cleanings keeps a fireplace serviceable for continuous use throughout the spring, fall and winter seasons.
Standard and mechanical chimney cleanings pay close attention to the flue liner, smoke chamber, smoke shelf, damper, and firebox in a single service visit. Superior Chimney performs each fireplace chimney inspection using a no-mess process that protects the home during service. This keeps soot contained within specialized equipment rather than the living room.
An Obstruction Free Chimney
Several conditions create blockages within a chimney system. Bird, squirrel, bat and raccoon nesting material, feces, and debris frequently accumulate inside an unprotected flue, especially during spring and summer months when the fireplace sits unused.
Excessive creosote accumulation or a collapsed chimney liner can restrict proper airflow. Homeowners that address obstructions with a chimney inspection will be able to maintain proper draft and ventilation with their gas or wood burning fireplace. This will reduce the risk of smoke backing into the home.
Gas Chimney Cleaning Compared to Wood burning Chimney Cleaning
Gas and wood burning fireplaces share the same annual chimney inspection requirement. Whether you are burning wood, gas or a “pile of shirts” there is still heat and flame that requires worthy firewalls to protect the home from heat transfer. Fire worthiness and checking the firewall integrity is priority.
Wood burning fireplaces generate creosote that builds along the flue liner with every fire. Gas fireplace systems accumulate lighter deposits along with potential venting obstructions, since gas appliances rely heavily on venting for safe combustion byproduct release. Each system accumulates different residues that need attention.
A CSIA Certified Chimney Sweep technician from Superior Chimney adjusts the specific cleaning approach based on fuel type. However, the same core safety elements apply: structural integrity, deposit removal, and clear airflow.
What Happens During a Chimney Cleaning?
A typical chimney inspection begins with a walkthrough of the fireplace and the chimney on top of the roof, allowing the technician to record any visible concerns the homeowner reported in advance as well as any new findings.
The certified technician then covers the immediate hearth area with protective material before setting up specialized equipment designed to contain creosote throughout the cleaning and inspection.
Chimney rods and brushes pass through the flue liner to loosen and remove creosote deposits along the smoke chamber, smoke shelf, and damper. The certified technician inspects each section closely for loose or crumbling firewall, cracked joints, or other signs of weak structural damage.
A final walkthrough of the firebox and chimney completes the visual inspection. Photo documentation captures each component, and the certified written report is sent to the homeowner by email. This consistent process gives homeowners the documentation they need to compare year to year.
Chimney Cleaning Safety Standards
The table below summarizes the organizations that set national chimney safety standards, along with their specific requirements for fireplace chimney sweeps.
NFPA211
National Fire Protection Association
Annual inspection for soundness, deposit buildup, and correct clearances; cleaning and repairs completed as needed
CSIA
Chimney Safety Institute of America
Certifies technicians through testing on chimney and venting system knowledge
NCSG
National Chimney Sweep Guild
Establishes trade standards and best practices for chimney sweep professionals
How Often Should You Schedule a Chimney Cleaning and Inspection?
CSIA recommends scheduling chimney cleaning and inspection annually by CSIA Certified Chimney Sweeps. This recommendation applies to gas and wood burning fireplaces, regardless of how frequently a household uses the fireplace and especially in freeze/thaw geographic areas.
Regular chimney sweeps save lives, since a clean fireplace chimney rarely catches fire. CSIA encourages homeowners to rely on Certified Chimney Sweeps, as these technicians undergo regular testing on the complexities of chimney and venting systems throughout their careers.
Frequently Asked Questions
What is included in a chimney sweep? A chimney sweep includes the flue liner, smoke chamber, smoke shelf, damper, and firebox, removing creosote while checking for obstructions and structural concerns throughout the chimney system (NOT the ashpit).
How often should gas and wood burning fireplaces receive chimney sweeps? CSIA, NFPA, IRC and NCSG guidelines each call for chimney sweeps at least once a year for gas and wood burning fireplace systems.
Why does creosote removal matter for fireplace safety? Creosote is highly flammable and builds along the interior walls of a fireplace chimney with every fire, creating conditions that lead directly to chimney fires when left in place over time. Creosote is unburned particles from the combustion chamber.
Who should perform a fireplace chimney sweep? CSIA Certified Chimney Sweep technicians complete fireplace chimney sweeps after passing regular testing on chimney and venting system knowledge, meeting the certification standard recognized across the industry.
Does a fireplace chimney sweep remove animal nests and debris? No, a fireplace chimney sweep addresses soot and creosote, while significant nesting material, feces, or collapsed liner debris often calls for dedicated obstruction removal alongside the standard service.
What does the free 14-point inspection include? The complimentary 14-point certified written inspection documents the flue liner, smoke chamber, smoke shelf, damper, firebox, crown, and cap through photo evidence delivered directly by email for homeowner records.
Choose Superior Chimney for Your Certified Chimney Inspection
All service technicians completing chimney sweeps through Superior Chimney hold National Certification through the Chimney Safety Institute of America (CSIA), reflecting the training standard recommended by fire safety organizations nationwide.
Scheduling regular chimney sweeps to clean gas and wood burning fireplace systems protects a home from fire risk, preserves the structural integrity of the chimney, and keeps airflow clear for proper, continuous use throughout the year. Contact us today to schedule a chimney inspection at 877-244-6349.

 PropertyLark
The Pros and Cons of Fix and Flip Real Estate Investment
Last week, we covered The Pros and Cons of Buy and Hold Real Estate Investment for rental property investors. This week, we want to talk about the other most common type of real estate investment: “fix and flip.”
The Appeal of House Flipping
We all love the house flipping shows on HGTV and other reality channels. They’re great and they make the prospect of buying, renovating and flipping homes for big profits seem super sexy and fun. However, any experienced real estate investor will tell you it’s not quite as easy as they make it look. There’s a lot of work that goes into a successful fix and flip investment.
The basic premise of a fix and flip investment is pretty simple. You buy a property, usually one that needs some work and is available at a great price. You renovate the property, making the necessary repairs and upgrades to maximize its resale value. Then, you sell the property on the open market for the highest possible price. You get in and out as quickly as possible. Full-time flippers will move from property to property or will have multiple properties being worked on at the same time. Rather than the “buy and hold” strategy where you keep the house while earning rental income and equity over time, you are looking for the quick sale to earn your profits.
If you are going to explore house flipping—whether as a full-time career or just a side hustle—you will want to know exactly what you are getting into. That is why we are going to cover the pros and cons of fix and flip real estate investment in this article.
The Pros of Fix and Flip
Here are some of the pros of fix and flip investing:
Faster Return on Investment—The biggest appeal of fix and flip investing is that it gives you a quicker return on investment. Buy and hold will take you longer to see your ROI. House flipping allows you to see your full profit (hopefully) as soon as the house sells. The average house flip for an experienced investor is around six months. It may take longer for a first-timer who is just learning how to do certain things.
Fairly Safe Investment—As long as you do all your projections and calculations carefully and avoid any major problems along the way, house flipping is a relatively safe investment strategy compared to something as turbulent as the stock market. Real estate markets are generally predictable and the short time frame of a flip helps you avoid losses if the property happens to depreciate over a longer period of time.
Exciting—There is a reason why there are so many reality shows based around flipping and none based on buy and hold investing. It’s an exciting process to buy a home, gut it and completely renovate it. Then, you get the ultimate reward of selling it and collecting the profits—as long as you do things right.
The Cons of Fix and Flip
Here are some of the cons of fix and flip investing:
Upfront Expenses—A house flip will require a lot of upfront expenses. We’re not only talking about financing the house itself, but all the renovation costs and other expenses involved in the flip. You are laying out all that money at the beginning and only seeing your returns when the property sells. This can create cash flow issues and stress if you fall being schedule or go above your initial budget.
Taxes—House flips will usually create dramatic swings in income year over year, and that can increase your tax bill. You have to pace things correctly to take advantage of specific capital gains tax rules. Capital gains taxes are higher on any property owned less than a year, so you have to find that balance of how long you own any specific investment properties and how long it takes to complete the renovation and sale. Before you get too deep into fix and flip investing, you will want to talk with your tax advisor to make sure you have the right plan in place.
Surprises—All real estate investment is susceptible to surprises. You don’t always know what lies behind the walls until you start the renovation process. You cannot plan for everything as a real estate investor, but you have to be prepared for anything. It is a good idea to add some wiggle room in your budget and overestimate your renovation expenses/timeline to cover any surprises that may come up.
These are some of the biggest pros and cons of fix and flip real estate investment. Of course, there are other things you need to know as an investor, so be sure and do your homework in order to get the most out of your investment portfolio. Both fix and flip and buy and hold strategies can be highly lucrative if you do things right. There are no wrong answers, but there are wrong ways of doing things if you truly want to be successful in this field.
If you are looking for great investment properties to fix and flip, join the exclusive PropertyLark home buyers’ network. If you qualify, you’ll have access to our exclusive off-market deals and analytics tools that will help you identify the best investments and get the highest possible ROI. Fill out the contact form and questionnaire on the PropertyLark buyer’s site to apply!
Sponsored
Fredericksburg, OH

High Point Cabinets
Columbus' Experienced Custom Cabinet Builder | 4x Best of Houzz Winner
 Bloomin Blinds of North Charlotte
Discover how premium light-filtering materials and smart-home automation can secure street-level entryway glass without losing natural daylight.
Choosing the right window treatments for a home's front entrance is one of the most challenging design decisions a homeowner can face. The front door is the focal point of a home's curb appeal, often featuring expansive glass panels or side-by-side double doors designed to make a grand architectural statement.
During the day, these large glass features are an asset, flooding entryways and foyers with beautiful natural daylight. However, for homes situated on busy local roads or highly trafficked street-level lots, the dynamic completely changes once the sun goes down.
The moment interior lights are switched on in the evening, a stark contrast is created with the dark outdoors. This creates a severe privacy issue, leaving the entire foyer completely exposed to passing traffic and pedestrians. Finding a solution that delivers absolute evening privacy without permanently plunging the front entrance into darkness during the day requires understanding how modern window treatment materials and operating systems interact.
Light-Filtering vs. Blackout Fabrics
The first step in solving street-level privacy is selecting the correct fabric type. Many homeowners mistakenly assume they need heavy, opaque blackout shades to secure their home from outside eyes at night. While blackout fabrics certainly block 100% of the view, they also block 100% of the natural daylight during the day, forcing you to constantly raise and lower the shades just to see inside your own foyer.
A more effective approach for entryways utilizes premium light-filtering materials. These specialized fabrics are engineered with a precise, tight weave that operates on the principles of directional light and optical density.
Daytime Functionality: When the sun is shining outside, the exterior light levels are significantly higher than the interior light levels. The light-filtering fabric diffuses the intense, direct sunlight into a soft, ambient glow throughout the entryway. This keeps the home bright, eliminates harsh glares, and protects interior hardwood flooring, paint, and trim from damaging UV rays.
Night-Time Functionality: At night, the lighting dynamic reverses. The interior foyer lights make the inside bright, while the outside is dark. Because of the specialized tight weave, the fabric blocks the transmission of clear shapes and details. To a person standing out on the street or driving by on a busy road, the view inside is completely obstructed, delivering total privacy when the family is home for the evening.
Challenges of Front Door Installations
Securing privacy for a double wide front entrance introduces unique structural hurdles that standard windows do not face. Traditional blinds with hanging cords or manual pull chains are poorly suited for front doors. They disrupt the clean architectural lines of a grand foyer, create a safety hazard, and can easily get tangled or damaged when the doors are opened and closed.
The window treatments must be mounted high and wide enough above the door trim to ensure that the front doors can swing open and close freely without ever catching on the fabric or the lower hem bar.
How We Applied These Principles in Sherrills Ford, NC
Applying these exact educational principles to real-world homes is what Cole and I do every day at Bloomin' Blinds of North Charlotte. We recently worked with a homeowner in Sherrills Ford whose beautiful new construction property sat on a highly trafficked road. They loved their double wide front door entrance but felt entirely too exposed to the street at night.
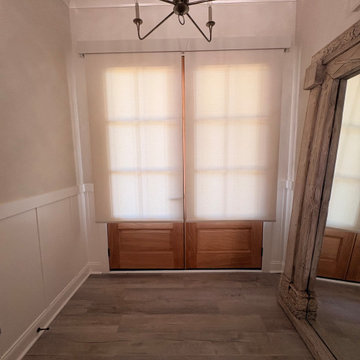
We brought our mobile showroom directly to their driveway. This allowed us to hold up premium light-filtering fabric samples directly against their entryway glass, matching the materials perfectly to their home's natural lighting, interior paint, and trim before making a single cut.
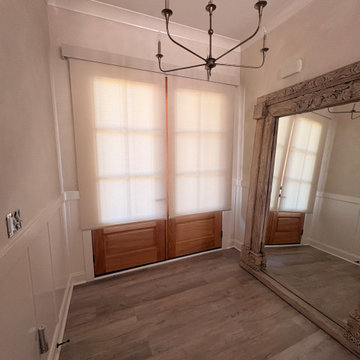
To solve their street-level privacy issue, we custom-built and installed two matching light-filtering roller shades, mounting them flawlessly side-by-side above the front door frame. To keep the home’s interior design completely cohesive, we carried the exact same style to the back of the house, installing a matching single roller shade on the rear door.
Smart Home Window Automation at Your Fingertips
Because entryway windows can be tall and awkward to reach manually, our family team integrated advanced smart-home motorization into this Sherrills Ford project.
Beyond the convenience of a handheld remote control, these automated roller shades feature seamless Wi-Fi integration. The homeowners can control their privacy through a dedicated smartphone app or link the system directly to their existing voice-activated smart home networks, including Amazon Alexa, Google Assistant, and Apple HomeKit.
This allows for complete hands-free window automation. The clients can program custom daily routines—such as setting the front entry shades to automatically lower exactly at sunset—or simply use a voice command to secure the foyer instantly from the comfort of the couch.
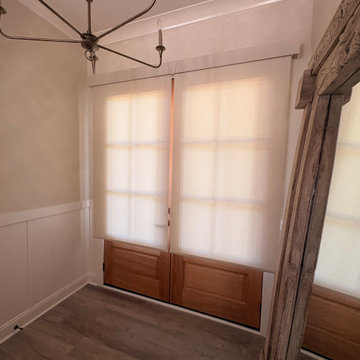 Bloomin Blinds of North Charlotte
Discover how premium light-filtering materials and smart-home automation can secure street-level entryway glass without losing natural daylight.
Choosing the right window treatments for a home's front entrance is one of the most challenging design decisions a homeowner can face. The front door is the focal point of a home's curb appeal, often featuring expansive glass panels or side-by-side double doors designed to make a grand architectural statement.
During the day, these large glass features are an asset, flooding entryways and foyers with beautiful natural daylight. However, for homes situated on busy local roads or highly trafficked street-level lots, the dynamic completely changes once the sun goes down.
The moment interior lights are switched on in the evening, a stark contrast is created with the dark outdoors. This creates a severe privacy issue, leaving the entire foyer completely exposed to passing traffic and pedestrians. Finding a solution that delivers absolute evening privacy without permanently plunging the front entrance into darkness during the day requires understanding how modern window treatment materials and operating systems interact.
Light-Filtering vs. Blackout Fabrics
The first step in solving street-level privacy is selecting the correct fabric type. Many homeowners mistakenly assume they need heavy, opaque blackout shades to secure their home from outside eyes at night. While blackout fabrics certainly block 100% of the view, they also block 100% of the natural daylight during the day, forcing you to constantly raise and lower the shades just to see inside your own foyer.
A more effective approach for entryways utilizes premium light-filtering materials. These specialized fabrics are engineered with a precise, tight weave that operates on the principles of directional light and optical density.
Daytime Functionality: When the sun is shining outside, the exterior light levels are significantly higher than the interior light levels. The light-filtering fabric diffuses the intense, direct sunlight into a soft, ambient glow throughout the entryway. This keeps the home bright, eliminates harsh glares, and protects interior hardwood flooring, paint, and trim from damaging UV rays.
Night-Time Functionality: At night, the lighting dynamic reverses. The interior foyer lights make the inside bright, while the outside is dark. Because of the specialized tight weave, the fabric blocks the transmission of clear shapes and details. To a person standing out on the street or driving by on a busy road, the view inside is completely obstructed, delivering total privacy when the family is home for the evening.
Challenges of Front Door Installations
Securing privacy for a double wide front entrance introduces unique structural hurdles that standard windows do not face. Traditional blinds with hanging cords or manual pull chains are poorly suited for front doors. They disrupt the clean architectural lines of a grand foyer, create a safety hazard, and can easily get tangled or damaged when the doors are opened and closed.
The window treatments must be mounted high and wide enough above the door trim to ensure that the front doors can swing open and close freely without ever catching on the fabric or the lower hem bar.
How We Applied These Principles in Sherrills Ford, NC
Applying these exact educational principles to real-world homes is what Cole and I do every day at Bloomin' Blinds of North Charlotte. We recently worked with a homeowner in Sherrills Ford whose beautiful new construction property sat on a highly trafficked road. They loved their double wide front door entrance but felt entirely too exposed to the street at night.
We brought our mobile showroom directly to their driveway. This allowed us to hold up premium light-filtering fabric samples directly against their entryway glass, matching the materials perfectly to their home's natural lighting, interior paint, and trim before making a single cut.
To solve their street-level privacy issue, we custom-built and installed two matching light-filtering roller shades, mounting them flawlessly side-by-side above the front door frame. To keep the home’s interior design completely cohesive, we carried the exact same style to the back of the house, installing a matching single roller shade on the rear door.
Smart Home Window Automation at Your Fingertips
Because entryway windows can be tall and awkward to reach manually, our family team integrated advanced smart-home motorization into this Sherrills Ford project.
Beyond the convenience of a handheld remote control, these automated roller shades feature seamless Wi-Fi integration. The homeowners can control their privacy through a dedicated smartphone app or link the system directly to their existing voice-activated smart home networks, including Amazon Alexa, Google Assistant, and Apple HomeKit.
This allows for complete hands-free window automation. The clients can program custom daily routines—such as setting the front entry shades to automatically lower exactly at sunset—or simply use a voice command to secure the foyer instantly from the comfort of the couch.
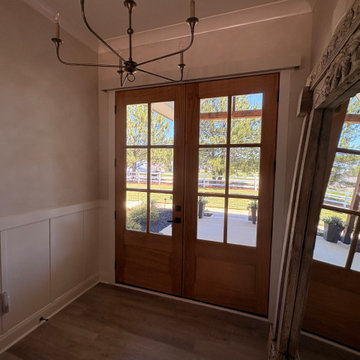 Bloomin Blinds of North Charlotte
Discover how premium light-filtering materials and smart-home automation can secure street-level entryway glass without losing natural daylight.
Choosing the right window treatments for a home's front entrance is one of the most challenging design decisions a homeowner can face. The front door is the focal point of a home's curb appeal, often featuring expansive glass panels or side-by-side double doors designed to make a grand architectural statement.
During the day, these large glass features are an asset, flooding entryways and foyers with beautiful natural daylight. However, for homes situated on busy local roads or highly trafficked street-level lots, the dynamic completely changes once the sun goes down.
The moment interior lights are switched on in the evening, a stark contrast is created with the dark outdoors. This creates a severe privacy issue, leaving the entire foyer completely exposed to passing traffic and pedestrians. Finding a solution that delivers absolute evening privacy without permanently plunging the front entrance into darkness during the day requires understanding how modern window treatment materials and operating systems interact.
Light-Filtering vs. Blackout Fabrics
The first step in solving street-level privacy is selecting the correct fabric type. Many homeowners mistakenly assume they need heavy, opaque blackout shades to secure their home from outside eyes at night. While blackout fabrics certainly block 100% of the view, they also block 100% of the natural daylight during the day, forcing you to constantly raise and lower the shades just to see inside your own foyer.
A more effective approach for entryways utilizes premium light-filtering materials. These specialized fabrics are engineered with a precise, tight weave that operates on the principles of directional light and optical density.
Daytime Functionality: When the sun is shining outside, the exterior light levels are significantly higher than the interior light levels. The light-filtering fabric diffuses the intense, direct sunlight into a soft, ambient glow throughout the entryway. This keeps the home bright, eliminates harsh glares, and protects interior hardwood flooring, paint, and trim from damaging UV rays.
Night-Time Functionality: At night, the lighting dynamic reverses. The interior foyer lights make the inside bright, while the outside is dark. Because of the specialized tight weave, the fabric blocks the transmission of clear shapes and details. To a person standing out on the street or driving by on a busy road, the view inside is completely obstructed, delivering total privacy when the family is home for the evening.
Challenges of Front Door Installations
Securing privacy for a double wide front entrance introduces unique structural hurdles that standard windows do not face. Traditional blinds with hanging cords or manual pull chains are poorly suited for front doors. They disrupt the clean architectural lines of a grand foyer, create a safety hazard, and can easily get tangled or damaged when the doors are opened and closed.
The window treatments must be mounted high and wide enough above the door trim to ensure that the front doors can swing open and close freely without ever catching on the fabric or the lower hem bar.
How We Applied These Principles in Sherrills Ford, NC
Applying these exact educational principles to real-world homes is what Cole and I do every day at Bloomin' Blinds of North Charlotte. We recently worked with a homeowner in Sherrills Ford whose beautiful new construction property sat on a highly trafficked road. They loved their double wide front door entrance but felt entirely too exposed to the street at night.
We brought our mobile showroom directly to their driveway. This allowed us to hold up premium light-filtering fabric samples directly against their entryway glass, matching the materials perfectly to their home's natural lighting, interior paint, and trim before making a single cut.
To solve their street-level privacy issue, we custom-built and installed two matching light-filtering roller shades, mounting them flawlessly side-by-side above the front door frame. To keep the home’s interior design completely cohesive, we carried the exact same style to the back of the house, installing a matching single roller shade on the rear door.
Smart Home Window Automation at Your Fingertips
Because entryway windows can be tall and awkward to reach manually, our family team integrated advanced smart-home motorization into this Sherrills Ford project.
Beyond the convenience of a handheld remote control, these automated roller shades feature seamless Wi-Fi integration. The homeowners can control their privacy through a dedicated smartphone app or link the system directly to their existing voice-activated smart home networks, including Amazon Alexa, Google Assistant, and Apple HomeKit.
This allows for complete hands-free window automation. The clients can program custom daily routines—such as setting the front entry shades to automatically lower exactly at sunset—or simply use a voice command to secure the foyer instantly from the comfort of the couch.
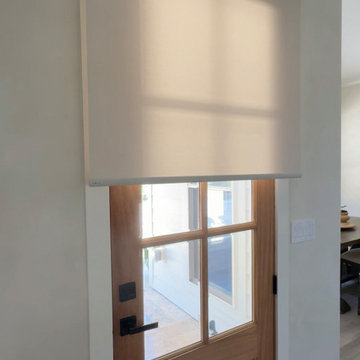 Bloomin Blinds of North Charlotte
Discover how premium light-filtering materials and smart-home automation can secure street-level entryway glass without losing natural daylight.
Choosing the right window treatments for a home's front entrance is one of the most challenging design decisions a homeowner can face. The front door is the focal point of a home's curb appeal, often featuring expansive glass panels or side-by-side double doors designed to make a grand architectural statement.
During the day, these large glass features are an asset, flooding entryways and foyers with beautiful natural daylight. However, for homes situated on busy local roads or highly trafficked street-level lots, the dynamic completely changes once the sun goes down.
The moment interior lights are switched on in the evening, a stark contrast is created with the dark outdoors. This creates a severe privacy issue, leaving the entire foyer completely exposed to passing traffic and pedestrians. Finding a solution that delivers absolute evening privacy without permanently plunging the front entrance into darkness during the day requires understanding how modern window treatment materials and operating systems interact.
Light-Filtering vs. Blackout Fabrics
The first step in solving street-level privacy is selecting the correct fabric type. Many homeowners mistakenly assume they need heavy, opaque blackout shades to secure their home from outside eyes at night. While blackout fabrics certainly block 100% of the view, they also block 100% of the natural daylight during the day, forcing you to constantly raise and lower the shades just to see inside your own foyer.
A more effective approach for entryways utilizes premium light-filtering materials. These specialized fabrics are engineered with a precise, tight weave that operates on the principles of directional light and optical density.
Daytime Functionality: When the sun is shining outside, the exterior light levels are significantly higher than the interior light levels. The light-filtering fabric diffuses the intense, direct sunlight into a soft, ambient glow throughout the entryway. This keeps the home bright, eliminates harsh glares, and protects interior hardwood flooring, paint, and trim from damaging UV rays.
Night-Time Functionality: At night, the lighting dynamic reverses. The interior foyer lights make the inside bright, while the outside is dark. Because of the specialized tight weave, the fabric blocks the transmission of clear shapes and details. To a person standing out on the street or driving by on a busy road, the view inside is completely obstructed, delivering total privacy when the family is home for the evening.
Challenges of Front Door Installations
Securing privacy for a double wide front entrance introduces unique structural hurdles that standard windows do not face. Traditional blinds with hanging cords or manual pull chains are poorly suited for front doors. They disrupt the clean architectural lines of a grand foyer, create a safety hazard, and can easily get tangled or damaged when the doors are opened and closed.
The window treatments must be mounted high and wide enough above the door trim to ensure that the front doors can swing open and close freely without ever catching on the fabric or the lower hem bar.
How We Applied These Principles in Sherrills Ford, NC
Applying these exact educational principles to real-world homes is what Cole and I do every day at Bloomin' Blinds of North Charlotte. We recently worked with a homeowner in Sherrills Ford whose beautiful new construction property sat on a highly trafficked road. They loved their double wide front door entrance but felt entirely too exposed to the street at night.
We brought our mobile showroom directly to their driveway. This allowed us to hold up premium light-filtering fabric samples directly against their entryway glass, matching the materials perfectly to their home's natural lighting, interior paint, and trim before making a single cut.
To solve their street-level privacy issue, we custom-built and installed two matching light-filtering roller shades, mounting them flawlessly side-by-side above the front door frame. To keep the home’s interior design completely cohesive, we carried the exact same style to the back of the house, installing a matching single roller shade on the rear door.
Smart Home Window Automation at Your Fingertips
Because entryway windows can be tall and awkward to reach manually, our family team integrated advanced smart-home motorization into this Sherrills Ford project.
Beyond the convenience of a handheld remote control, these automated roller shades feature seamless Wi-Fi integration. The homeowners can control their privacy through a dedicated smartphone app or link the system directly to their existing voice-activated smart home networks, including Amazon Alexa, Google Assistant, and Apple HomeKit.
This allows for complete hands-free window automation. The clients can program custom daily routines—such as setting the front entry shades to automatically lower exactly at sunset—or simply use a voice command to secure the foyer instantly from the comfort of the couch.
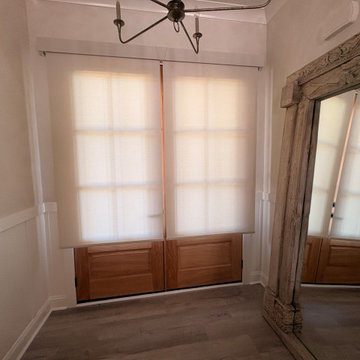 Bloomin Blinds of North Charlotte
Discover how premium light-filtering materials and smart-home automation can secure street-level entryway glass without losing natural daylight.
Choosing the right window treatments for a home's front entrance is one of the most challenging design decisions a homeowner can face. The front door is the focal point of a home's curb appeal, often featuring expansive glass panels or side-by-side double doors designed to make a grand architectural statement.
During the day, these large glass features are an asset, flooding entryways and foyers with beautiful natural daylight. However, for homes situated on busy local roads or highly trafficked street-level lots, the dynamic completely changes once the sun goes down.
The moment interior lights are switched on in the evening, a stark contrast is created with the dark outdoors. This creates a severe privacy issue, leaving the entire foyer completely exposed to passing traffic and pedestrians. Finding a solution that delivers absolute evening privacy without permanently plunging the front entrance into darkness during the day requires understanding how modern window treatment materials and operating systems interact.
Light-Filtering vs. Blackout Fabrics
The first step in solving street-level privacy is selecting the correct fabric type. Many homeowners mistakenly assume they need heavy, opaque blackout shades to secure their home from outside eyes at night. While blackout fabrics certainly block 100% of the view, they also block 100% of the natural daylight during the day, forcing you to constantly raise and lower the shades just to see inside your own foyer.
A more effective approach for entryways utilizes premium light-filtering materials. These specialized fabrics are engineered with a precise, tight weave that operates on the principles of directional light and optical density.
Daytime Functionality: When the sun is shining outside, the exterior light levels are significantly higher than the interior light levels. The light-filtering fabric diffuses the intense, direct sunlight into a soft, ambient glow throughout the entryway. This keeps the home bright, eliminates harsh glares, and protects interior hardwood flooring, paint, and trim from damaging UV rays.
Night-Time Functionality: At night, the lighting dynamic reverses. The interior foyer lights make the inside bright, while the outside is dark. Because of the specialized tight weave, the fabric blocks the transmission of clear shapes and details. To a person standing out on the street or driving by on a busy road, the view inside is completely obstructed, delivering total privacy when the family is home for the evening.
Challenges of Front Door Installations
Securing privacy for a double wide front entrance introduces unique structural hurdles that standard windows do not face. Traditional blinds with hanging cords or manual pull chains are poorly suited for front doors. They disrupt the clean architectural lines of a grand foyer, create a safety hazard, and can easily get tangled or damaged when the doors are opened and closed.
The window treatments must be mounted high and wide enough above the door trim to ensure that the front doors can swing open and close freely without ever catching on the fabric or the lower hem bar.
How We Applied These Principles in Sherrills Ford, NC
Applying these exact educational principles to real-world homes is what Cole and I do every day at Bloomin' Blinds of North Charlotte. We recently worked with a homeowner in Sherrills Ford whose beautiful new construction property sat on a highly trafficked road. They loved their double wide front door entrance but felt entirely too exposed to the street at night.
We brought our mobile showroom directly to their driveway. This allowed us to hold up premium light-filtering fabric samples directly against their entryway glass, matching the materials perfectly to their home's natural lighting, interior paint, and trim before making a single cut.
To solve their street-level privacy issue, we custom-built and installed two matching light-filtering roller shades, mounting them flawlessly side-by-side above the front door frame. To keep the home’s interior design completely cohesive, we carried the exact same style to the back of the house, installing a matching single roller shade on the rear door.
Smart Home Window Automation at Your Fingertips
Because entryway windows can be tall and awkward to reach manually, our family team integrated advanced smart-home motorization into this Sherrills Ford project.
Beyond the convenience of a handheld remote control, these automated roller shades feature seamless Wi-Fi integration. The homeowners can control their privacy through a dedicated smartphone app or link the system directly to their existing voice-activated smart home networks, including Amazon Alexa, Google Assistant, and Apple HomeKit.
This allows for complete hands-free window automation. The clients can program custom daily routines—such as setting the front entry shades to automatically lower exactly at sunset—or simply use a voice command to secure the foyer instantly from the comfort of the couch.
 Bloomin Blinds of North Charlotte
Discover how premium light-filtering materials and smart-home automation can secure street-level entryway glass without losing natural daylight.
Choosing the right window treatments for a home's front entrance is one of the most challenging design decisions a homeowner can face. The front door is the focal point of a home's curb appeal, often featuring expansive glass panels or side-by-side double doors designed to make a grand architectural statement.
During the day, these large glass features are an asset, flooding entryways and foyers with beautiful natural daylight. However, for homes situated on busy local roads or highly trafficked street-level lots, the dynamic completely changes once the sun goes down.
The moment interior lights are switched on in the evening, a stark contrast is created with the dark outdoors. This creates a severe privacy issue, leaving the entire foyer completely exposed to passing traffic and pedestrians. Finding a solution that delivers absolute evening privacy without permanently plunging the front entrance into darkness during the day requires understanding how modern window treatment materials and operating systems interact.
Light-Filtering vs. Blackout Fabrics
The first step in solving street-level privacy is selecting the correct fabric type. Many homeowners mistakenly assume they need heavy, opaque blackout shades to secure their home from outside eyes at night. While blackout fabrics certainly block 100% of the view, they also block 100% of the natural daylight during the day, forcing you to constantly raise and lower the shades just to see inside your own foyer.
A more effective approach for entryways utilizes premium light-filtering materials. These specialized fabrics are engineered with a precise, tight weave that operates on the principles of directional light and optical density.
Daytime Functionality: When the sun is shining outside, the exterior light levels are significantly higher than the interior light levels. The light-filtering fabric diffuses the intense, direct sunlight into a soft, ambient glow throughout the entryway. This keeps the home bright, eliminates harsh glares, and protects interior hardwood flooring, paint, and trim from damaging UV rays.
Night-Time Functionality: At night, the lighting dynamic reverses. The interior foyer lights make the inside bright, while the outside is dark. Because of the specialized tight weave, the fabric blocks the transmission of clear shapes and details. To a person standing out on the street or driving by on a busy road, the view inside is completely obstructed, delivering total privacy when the family is home for the evening.
Challenges of Front Door Installations
Securing privacy for a double wide front entrance introduces unique structural hurdles that standard windows do not face. Traditional blinds with hanging cords or manual pull chains are poorly suited for front doors. They disrupt the clean architectural lines of a grand foyer, create a safety hazard, and can easily get tangled or damaged when the doors are opened and closed.
The window treatments must be mounted high and wide enough above the door trim to ensure that the front doors can swing open and close freely without ever catching on the fabric or the lower hem bar.
How We Applied These Principles in Sherrills Ford, NC
Applying these exact educational principles to real-world homes is what Cole and I do every day at Bloomin' Blinds of North Charlotte. We recently worked with a homeowner in Sherrills Ford whose beautiful new construction property sat on a highly trafficked road. They loved their double wide front door entrance but felt entirely too exposed to the street at night.
We brought our mobile showroom directly to their driveway. This allowed us to hold up premium light-filtering fabric samples directly against their entryway glass, matching the materials perfectly to their home's natural lighting, interior paint, and trim before making a single cut.
To solve their street-level privacy issue, we custom-built and installed two matching light-filtering roller shades, mounting them flawlessly side-by-side above the front door frame. To keep the home’s interior design completely cohesive, we carried the exact same style to the back of the house, installing a matching single roller shade on the rear door.
Smart Home Window Automation at Your Fingertips
Because entryway windows can be tall and awkward to reach manually, our family team integrated advanced smart-home motorization into this Sherrills Ford project.
Beyond the convenience of a handheld remote control, these automated roller shades feature seamless Wi-Fi integration. The homeowners can control their privacy through a dedicated smartphone app or link the system directly to their existing voice-activated smart home networks, including Amazon Alexa, Google Assistant, and Apple HomeKit.
This allows for complete hands-free window automation. The clients can program custom daily routines—such as setting the front entry shades to automatically lower exactly at sunset—or simply use a voice command to secure the foyer instantly from the comfort of the couch.
Sponsored
Columbus, OH

Wannemacher Interiors
Customized Award-Winning Interior Design Solutions in Franklin Cnty OH
 SUPERIOR CHIMNEY SERVICES CORPORATION
A friend noticed a damp, musty smell coming from her living room fireplace the week after a February thaw. When she called a masonry technician from Superior Chimney, to take a look, and found that water had been working its way behind the bricks for years. What started as a small crack now meant her chimney needed structural repairs before she could safely use it again.
Chimney repairs are any work done to restore the structural and weatherproof condition of a chimney. This can include mortar joint repair, brick replacement, crown repair, flue repair, and cap or flashing replacement. Most Chicagoland homeowners discover the need for chimney repairs often times after winter, when the freeze and thaw cycles have already done its damage. Uncovering the symptoms early is the best way to keep chimney repairs down. Let’s discuss how that can be done.
Why Chicagoland Weather Is Especially Hard on Chimneys
Chicagoland has some of the most polarized weather. One day it’s a blizzard and the next week hot, humid and 100 degrees. That swing in weather conditions and temperatures are the real reasons why chimney repairs are needed.
When moisture from humid and rainy days’ soak into brick and mortar and then freezes, it expands. As it begins to thaw, the materials contract. Repeat that cycle dozens of times in a single Illinois winter and even solid masonry in the chimney starts to crack, spall, and separate from the joints holding it together. This is called the freeze thaw cycle. We’ve talked about it many times over the years, and it continues to be the single biggest reason homes need chimney repairs more often than homes in milder climates.
The Chimney Safety Institute of America (CSIA), the leading nonprofit certifying body for chimney professionals in the United States, notes that water intrusion is one of the most damaging and most preventable problems. If the problem is left to mature, it affects more than the appearance. It compromises the structure itself.
What Do Chimney Repairs Involve?
Not every chimney problem requires the same fix. Chimney repairs generally fall into a few categories. Understanding the difference, helps homeowners have a more informed conversation with the expert technician.
Mortar joint repair or tuckpointing. This involves removing deteriorated mortar between bricks and replacing it with fresh mortar, matched to the original color and texture as closely as possible.
Brick replacement. When individual bricks have spalled, meaning the face has cracked or popped off from trapped moisture, those bricks are removed and replaced.
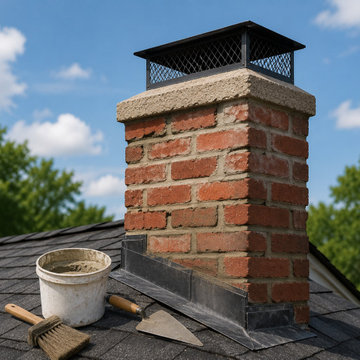
Crown and cap repair. The crown is the concrete slab at the very top of the chimney. Cracks both big and small let water directly into the chimney flue. Chimney crown repair is often one of the most urgent forms of chimney repairs.
Flashing repair. Flashing is the barrier where the chimney meets the roofline. Loose, damaged or poorly installed flashing is a common source for water leaks. The roof gets the blame as it is the largest piece that covers the house. However, it certainly can be the overlooked chimney.
Flue and liner repair. Cracked flue tiles or damaged liners affect how safely a chimney vents smoke and combustion gases.
When to Know a Chimney Needs Repair
Most chimney damage shows up as small, easy to dismiss way. Let’s take a look at the following list. Be sure to print this out and keep it handy so if/when something happens, you know what to look for.
• Water stains near the fireplace or on the ceiling
• A brownish stain on the wall around your fireplace, or a stain on the ceiling near an exterior chimney. This means water is getting in somewhere it should not.
• Crumbling or missing mortar
• If you can see gaps between bricks, or mortar that flakes off when you touch it
• A leaning or visibly shifting chimney
• A chimney that appears to pull away from the house, even slightly, could indicate a structural issue
• White staining on the brick (efflorescence)
• Chalky white residue left behind as water evaporates out of the masonry. It is a visible sign that moisture is moving through brick
• Rusted damper or firebox components
• Metal parts inside a fireplace that are rusting are a strong indicator that moisture is present
• Debris in the fireplace
• Small chunks of brick, mortar, or tile landing in the firebox
What are the Various Types of Chimney Repair?
This is a compiled list of chimney repairs so you can be aware of what to look for. If you have any questions, contact us directly at 877-244-6349.
Homeowners who schedule chimney repairs at the first sign of trouble typically spend far less than those who wait until water damage reaches the interior of the home. This is a great reason to contact Superior Chimney at 877-244-6349.
Why an Annual Inspection Matters More Than People Think
The CSIA and the National Fire Protection Association both recommend that chimneys, fireplaces, and vents be inspected at least once a year, whether or not the fireplace gets used. This recommendation exists because damage does not take a break just because a chimney sits without any use.
According to data stated by the CSIA, chimney related fires still contribute to tens of thousands of residential fires across the United States each year, and a large share of those incidents can be traced back to deferred maintenance. An annual chimney inspection is what catches the small mortar crack or the hairline crown crack before it turns into a repair bill.
Hiring the Right Company for Chimney Repairs
Not every company who offers chimney repair work has the certified training to diagnose a problem correctly. CSIA certification is the most widely recognized credential in the industry, and it requires technicians to study chimney physics, venting systems, and fire codes. After the studies, the new technician needs to pass an exam and agree to a professional code of ethics.
When you call, be sure to ask:
Are your technicians CSIA certified, and can I verify that certification?
Will you show me photos or video of the damage before starting work?
Does the estimate distinguish between cosmetic repair and structural repair?
At Superior Chimney, we welcome these and other of your questions.
How Chimney Repairs Affect Insurance and Resale
A chimney in poor condition can complicate a home sale or an insurance claim. Home inspectors routinely report on visible mortar loss, leaning chimneys, or missing chimney caps. Some insurers will request proof of repair before renewing a policy on an older home. Addressing chimney repairs proactively protects more than curb appeal. It protects the sale timeline and the claims history associated to the property.
Frequently Asked Questions
How often should a Chicago area chimney be inspected? At least once a year, per CSIA and NFPA guidance, regardless of how often the fireplace is used.
Can chimney repairs be done in winter? Some interior repairs can happen in cold weather, but most masonry repair requires temperatures consistently above freezing. Spring and fall are the most common repair times in the Chicago area.
Is tuckpointing the same thing as chimney repair? Tuckpointing is one type of chimney repair, focused on replacing deteriorated mortar joints.
Does homeowners insurance cover chimney repairs? It depends. Sudden damage from a storm may be covered, while gradual deterioration from lack of maintenance typically is not.
So Finally…
Taking care of your home includes a chimney. Just because you don’t see it every day, doesn’t mean things aren’t happening. Be sure to get a chimney inspection done once per year by a certified and credible company such as Superior Chimney to take care of the issues. Contact us today by calling 877-244-6349.
 Dimensions in Wood Inc
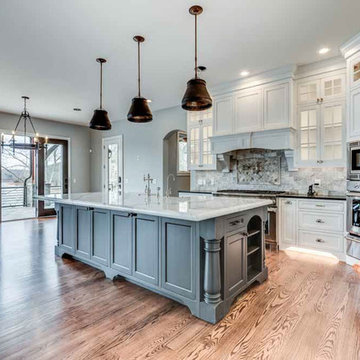
This Historical Home was built in the Columbia Country Club in 1925 and was ready for a new, modern kitchen which kept the traditional feel of the home. A previous sunroom addition created a dining room, but the original kitchen layout kept the two rooms divided. The kitchen was a small and cramped c-shape with a narrow door leading into the dining area.
The kitchen and dining room were completely opened up, creating a long, galley style, open layout which maximized the space and created a very good flow. Dimensions In Wood worked in conjuction with the client’s architect and contractor to complete this renovation.
Custom cabinets were built to use every square inch of the floorplan, with the cabinets extending all the way to the ceiling for the most storage possible. Our woodworkers even created a step stool, staining it to match the kitchen for reaching these high cabinets. The family already had a kitchen table and chairs they were happy with, so we refurbished them to match the kitchen’s new stain and paint color.
Crown molding top the cabinet boxes and extends across the ceiling where they create a coffered ceiling, highlighting the beautiful light fixtures centered on a wood medallion.
Columns were custom built to provide separation between the different sections of the kitchen, while also providing structural support.
Our master craftsmen kept the original 1925 glass cabinet doors, fitted them with modern hardware, repainted and incorporated them into new cabinet boxes. TASK LED Lighting was added to this china cabinet, highlighting the family’s decorative dishes.
Appliance Garage
On one side of the kitchen we built an appliance garage with doors that slide back into the cabinet, integrated power outlets and door activated lighting. Beside this is a small Galley Workstation for beverage and bar service which has the Galley Bar Kit perfect for sliced limes and more.
Baking Cabinet with Pocket Doors
On the opposite side, a baking cabinet was built to house a mixer and all the supplies needed for creating confections. Automatic LED lights, triggered by opening the door, create a perfect baker’s workstation. Both pocket doors slide back inside the cabinet for maximum workspace, then close to hide everything, leaving a clean, minimal kitchen devoid of clutter.
Super deep, custom drawers feature custom dividers beneath the baking cabinet. Then beneath the appliance garage another deep drawer has custom crafted produce boxes per the customer’s request.
Central to the kitchen is a walnut accent island with a granite countertop and a Stainless Steel Galley Workstation and an overhang for seating. Matching bar stools slide out of the way, under the overhang, when not in use. A color matched outlet cover hides power for the island whenever appliances are needed during preparation.
The Galley Workstation has several useful attachments like a cutting board, drying rack, colander holder, and more. Integrated into the stone countertops are a drinking water spigot, a soap dispenser, garbage disposal button and the pull out, sprayer integrated faucet.
Directly across from the conveniently positioned stainless steel sink is a Bertazzoni Italia stove with 5 burner cooktop. A custom mosaic tile backsplash makes a beautiful focal point. Then, on opposite sides of the stove, columns conceal Rev-a-Shelf pull out towers which are great for storing small items, spices, and more. All outlets on the stone covered walls also sport dual USB outlets for charging mobile devices.
Stainless Steel Whirlpool appliances throughout keep a consistent and clean look. The oven has a matching microwave above it which also works as a convection oven. Dual Whirlpool dishwashers can handle all the family’s dirty dishes.
The flooring has black, marble tile inlays surrounded by ceramic tile, which are period correct for the age of this home, while still being modern, durable and easy to clean.
Finally, just off the kitchen we also remodeled their bar and snack alcove. A small liquor cabinet, with a refrigerator and wine fridge sits opposite a snack bar and wine glass cabinets. Crown molding, granite countertops and cabinets were all customized to match this space with the rest of the stunning kitchen.
Dimensions In Wood is more than 40 years of custom cabinets. We always have been, but we want YOU to know just how much more there is to our Dimensions.
The Dimensions we cover are endless: custom cabinets, quality water, appliances, countertops, wooden beams, Marvin windows, and more. We can handle every aspect of your kitchen, bathroom or home remodel.
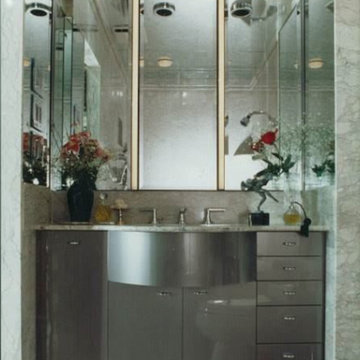
 DAB Interior Design, Inc.
 Winner of NKBA Bath in the Small Bath Category.
Custom designed vanity in a 48" area includes total
organization in a small area. The vanity is a lesser depth with a bump out for the sink area making it less massive in the small space.
It has 3 narrow draws for make-up and a woman sundries. 1 slightly higher draw for bottles and creams, shaving cream a deep draw with a socket and storage for a hair blower, brushes, hair implements and a built in hamper.
The Robern curved reccess medicine cabinet with lights, 2 side cabinets are mirrored inside out, includes adjustable glass shelves, radio, plugs and a defogger to prevent steam from the shower fogging up the glass.
Notice there is a crown molding running around the ceiling in marble, which supports the mirrored ceiling without using unsightly metal moldings for support.
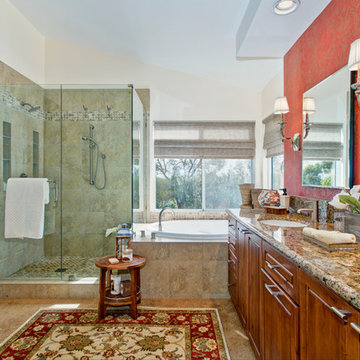
 CairnsCraft Design & Remodel
Great spacious bathroom with lot of amenities.
Photographer: Jon Upson
Large elegant master beige tile and porcelain tile drop-in bathtub photo in San Diego with an undermount sink, raised-panel cabinets, medium tone wood cabinets, granite countertops, beige walls and a two-piece toilet
Large elegant master beige tile and porcelain tile drop-in bathtub photo in San Diego with an undermount sink, raised-panel cabinets, medium tone wood cabinets, granite countertops, beige walls and a two-piece toilet

Sponsored
Sunbury, OH

J.Holderby - Renovations
Franklin County's Leading General Contractors - 2X Best of Houzz!
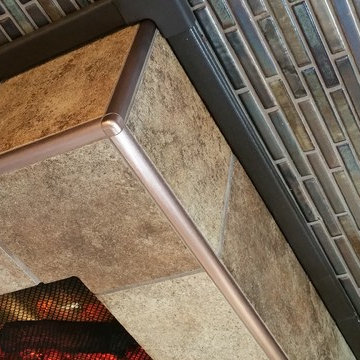
 Complete Flooring
Chris Golden
Inspiration for a transitional carpeted living room remodel in Phoenix with beige walls, a standard fireplace and a tile fireplace
Inspiration for a transitional carpeted living room remodel in Phoenix with beige walls, a standard fireplace and a tile fireplace
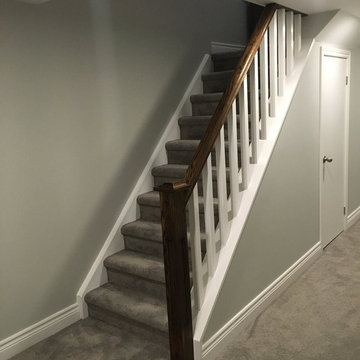
 Hadley-Irvine General Contracting LTD
Staircase - mid-sized traditional carpeted and underground carpeted and gray floor staircase idea in Toronto with wooden risers, gray walls and no fireplace
 Barbara Stock Interior Design
Driftwood look porcelain tile from Arena Marble and Granite, Thousand Oaks, CA
Corner shower - mid-sized coastal master white tile and subway tile porcelain tile corner shower idea in Los Angeles with shaker cabinets, white cabinets, blue walls, an undermount sink and marble countertops
Corner shower - mid-sized coastal master white tile and subway tile porcelain tile corner shower idea in Los Angeles with shaker cabinets, white cabinets, blue walls, an undermount sink and marble countertops
20