
Search results for "Videos changed" in Home Design Ideas
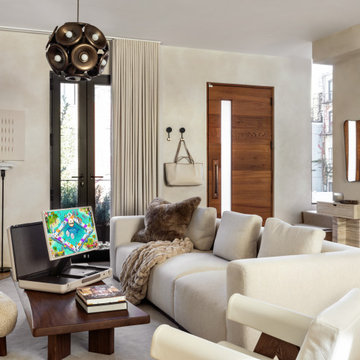


 RAJ Kitchen and Bath, LLC
“Full apartment design”.
IF you have not yet seen this apartment conversion before, we strongly urge you to go to the bottom left of this page and click on the short 2-minutes video. It would put a lot of things into perspective when you come back and continue reading this.
It is true we were literally handed the keys and told a list of things that they wanted to have happen and we were to go into the apartment, look at the space and come up with a design that would satisfy all of that need. UNTIL we showed up! The unit had really seen some better days but we knew we had to look past that and come up with a concept that would work for them.
The immediate challenges were centered around 3 big ideas:
1. Adding a second bedroom to the already small footprint
2. Figuring out a way to make the kitchen bigger, better and brighter
3. Creating a master room walk in closet
It’s always difficult to add new rooms into existing footprint without expanding out or up and not incurring any opportunity cost. In this case, that was exactly what we had to do. Item one and two above had to be tackled as one. We went ahead and switched out the location of the dining room and eliminating an area where there was a “nook” type eat-in area. By doing so, we were able to cut right into that footprint and change the layout of the kitchen.
That one move allowed us to dig into the kitchen design because it was now the main focal point in the apartment. It was no longer an option to keep it in that tiny hole where it was, so we had to ensure that this design was functional and aesthetically pleasing at the same time. By adding the table into the space where an Island typically would go, we were able to both cut cost and still provide a dining experience. The Table serves as an Island as well when cooking.
We then proceeded to block in the existing doorway to the dining room. By doing this, we were able to create a full room which allowed us to put a door on the other side and called that room Bedroom #2. This was easier to do because all of the mechanicals were already in that space (light, heater and windows). By shifting things around, we also achieved a huge wall to wall closet from inside. PERFECT!
Then we moved into the Single bedroom. We thought it was a big room with a small closet, so by creatively adding an L shaped wall and steal some footprint into the bedroom side, we were able to put a door on that new room and design it for the walk-in closet. Even after this, the bedroom still holds a queen size bed with 2 night stands, a TV on the wall, a sitting chair and plenty of room to walk around. This was done by rethinking the location for the bed and night stands.
The bathroom was gutted to make sure there was no leaks and rebuild from the ground up. We kept all of the plumbing where it was, added a new vanity, medicine cabinet, tiles and lighting and it was done.
From there, the rest of the unit had new flooring all throughout, paint, and lighting. After completion and walk through, this project was handed over back to the clients.
Execution and collaboration between all the trades were: Reggie and his team from Premier Interiors and Rohan from RD Mechanical Services.
p.s. Please see our website to see the video.
 RAJ Kitchen and Bath, LLC
“Full apartment design”.
IF you have not yet seen this apartment conversion before, we strongly urge you to go to the bottom left of this page and click on the short 2-minutes video. It would put a lot of things into perspective when you come back and continue reading this.
It is true we were literally handed the keys and told a list of things that they wanted to have happen and we were to go into the apartment, look at the space and come up with a design that would satisfy all of that need. UNTIL we showed up! The unit had really seen some better days but we knew we had to look past that and come up with a concept that would work for them.
The immediate challenges were centered around 3 big ideas:
1. Adding a second bedroom to the already small footprint
2. Figuring out a way to make the kitchen bigger, better and brighter
3. Creating a master room walk in closet
It’s always difficult to add new rooms into existing footprint without expanding out or up and not incurring any opportunity cost. In this case, that was exactly what we had to do. Item one and two above had to be tackled as one. We went ahead and switched out the location of the dining room and eliminating an area where there was a “nook” type eat-in area. By doing so, we were able to cut right into that footprint and change the layout of the kitchen.
That one move allowed us to dig into the kitchen design because it was now the main focal point in the apartment. It was no longer an option to keep it in that tiny hole where it was, so we had to ensure that this design was functional and aesthetically pleasing at the same time. By adding the table into the space where an Island typically would go, we were able to both cut cost and still provide a dining experience. The Table serves as an Island as well when cooking.
We then proceeded to block in the existing doorway to the dining room. By doing this, we were able to create a full room which allowed us to put a door on the other side and called that room Bedroom #2. This was easier to do because all of the mechanicals were already in that space (light, heater and windows). By shifting things around, we also achieved a huge wall to wall closet from inside. PERFECT!
Then we moved into the Single bedroom. We thought it was a big room with a small closet, so by creatively adding an L shaped wall and steal some footprint into the bedroom side, we were able to put a door on that new room and design it for the walk-in closet. Even after this, the bedroom still holds a queen size bed with 2 night stands, a TV on the wall, a sitting chair and plenty of room to walk around. This was done by rethinking the location for the bed and night stands.
The bathroom was gutted to make sure there was no leaks and rebuild from the ground up. We kept all of the plumbing where it was, added a new vanity, medicine cabinet, tiles and lighting and it was done.
From there, the rest of the unit had new flooring all throughout, paint, and lighting. After completion and walk through, this project was handed over back to the clients.
Execution and collaboration between all the trades were: Reggie and his team from Premier Interiors and Rohan from RD Mechanical Services.
p.s. Please see our website to see the video.
Find the right local pro for your project

 Gappsi
This 20' by 50' gunite swimming pool was built in Cold Spring Harbor Long Island, NY. This gunite swimming pool has a double Roman end shape with a raised spillover spa along the 50' side. Steps are incorporated on each side of the spa for entering and exiting the pool. A full-width sun deck is equipped with reversed circular steps to mirror the pool Roman end. The 6' high Porcelain tile was installed and styled to create a unique mosaic design, under the entire pool, coping and spa. The finish for the inside of the pool is Taho Blue Diamond Bright, which was applied on the walls and then acid washed for an etched texture and finish. The masonry for the pool was designed to complement the pool shape and give the customer plenty of patio area around the entire pool. The masonry was also designed to work with the great changes in the backyard slopes. The pool coping, patio and venire for the spa walls, including the retaining walls and steps, are the Melfi natural stones selected from the Gappsi natural stone collection. The pool coping is a multi-sized pattern with a split tumble rock face front. The venire is a combination of 2’ and 4’ split face Tumble. The pavers is a roman pattern, multi-sized natural stones with a natural cleft and tumbled. A 5’ aluminum fencing was installed to surround the entire pool area and a simple landscaping was needed for the aesthetic. The pool and patio design layout have an immaculate beauty because when using the same color and type of stones for the floors/walls in different finishes gives the appearance of a cohesive finish. The design was manufactured by Giuseppe Abbrancati and the job was constructed by Gappsi Group. For more info visit www.gappsi.com or call us at 631-543-1177.
Youtube Video: https://www.youtube.com/watch?v=mBi2ngE57FQ
 Gappsi
This 20' by 50' gunite swimming pool was built in Cold Spring Harbor Long Island, NY. This gunite swimming pool has a double Roman end shape with a raised spillover spa along the 50' side. Steps are incorporated on each side of the spa for entering and exiting the pool. A full-width sun deck is equipped with reversed circular steps to mirror the pool Roman end. The 6' high Porcelain tile was installed and styled to create a unique mosaic design, under the entire pool, coping and spa. The finish for the inside of the pool is Taho Blue Diamond Bright, which was applied on the walls and then acid washed for an etched texture and finish. The masonry for the pool was designed to complement the pool shape and give the customer plenty of patio area around the entire pool. The masonry was also designed to work with the great changes in the backyard slopes. The pool coping, patio and venire for the spa walls, including the retaining walls and steps, are the Melfi natural stones selected from the Gappsi natural stone collection. The pool coping is a multi-sized pattern with a split tumble rock face front. The venire is a combination of 2’ and 4’ split face Tumble. The pavers is a roman pattern, multi-sized natural stones with a natural cleft and tumbled. A 5’ aluminum fencing was installed to surround the entire pool area and a simple landscaping was needed for the aesthetic. The pool and patio design layout have an immaculate beauty because when using the same color and type of stones for the floors/walls in different finishes gives the appearance of a cohesive finish. The design was manufactured by Giuseppe Abbrancati and the job was constructed by Gappsi Group. For more info visit www.gappsi.com or call us at 631-543-1177.
Youtube Video: https://www.youtube.com/watch?v=mBi2ngE57FQ
 123 Remodeling Inc.
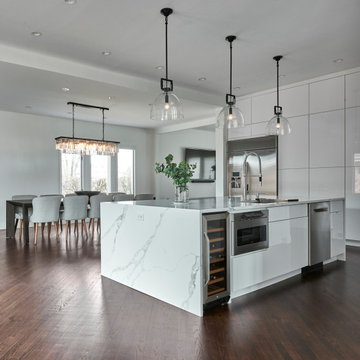
123 Remodeling crew and our in-house interior designer Jenna Rose completely renovated this large kitchen in Skokie, Illinois. Our team created a fresh and modern space to cook and gather with family and friends over a large dining table.
We started with structural changes and demolished a load-bearing wall between the kitchen and dining area to create an open concept. Then we built a massive Carrera marble quartz island that is as functional as luxurious looking with a built-in wine cooler, dishwasher, and microwave. Three stylish pendant lights and a dozen of recessed can lights make the room feel larger and brighter. We opted-in for a counter-depth stainless sub-zero refrigerator and encased it with a custom-made cabinet extension.
While white is traditional and the most popular color for kitchens, it's easy for such a room to look stark and cold. So our designer mixed glossy white cabinets with gray backsplash tiles and white-gray countertops. We also intermixed it with the natural oak shelves and plant decor to add warm contrasting elements.
The open kitchen concept looks good only if all parts of the space are visually appealing - that's why we remodeled the fireplace, refinished the chimney, and enclosed it in concrete.
https://123remodeling.com/

 Bestbath
https://bestbath.com/products/showers
Bestbath commercial shower ada shower composite shower
tub surrounds that look like tile
shower threshold tile
tile shower tub combo
recessed soap dish for tile shower
ada tile shower
recessed soap holder for tiled shower
ada tile shower
barrier free shower pans tile ready
tile look tub surround
custom tile bathtub
tub walls that look like tile
shower tile patterns
tile ready shower pan
barrier free shower pan for tile
tub surrounds that look like subway tile
bath tile trim kit
accent tile
bathtub tile surround
how to tile a tub shower
how to install a fiberglass shower pan with tile
ceramic corner soap dish for tile shower
subway tile shower insert
non slip shower tile
shower surround vs tile
tile look shower surround
tile shower stalls with seat
subway tile patterns showers
shower curb tile ideas
ada compliant tile
corner soap dish for tile shower
how to tile a shower wall with tub
subway tile installation instructions
tile shower and tub
universal tile hours
tileless bathroom
best shower pan for tile
powder room wall tile ideas
tile bath surround design ideas
4 tile patterns
recessed tile soap dish
bathroom tile kits
tile shower base options
tile basin shower base
bathroom shower tub tile
tile shower installation instructions
pictures of tiled tub shower combo
tile around tub surround
houzz subway tile shower
shower pan or tile floor
multy tile
how to install a soap dish in tile shower
ceramic tile threshold options
prefab tile shower
tile around tub shower combo
tile shower systems
tiled tub
tile ready shower base with seat
how to install a shower base with tile walls
shower surrounds that look like tile
bathroom shower tile gallery
ceramic tile inserts
best shower base for tile
tile wall around bathtub
fiberglass shower enclosures that look like tile
textured porcelain tile shower
tile flange kit
fiberglass tub surround vs tile
tile panel kit
how to tile a shower wall with a window
corner ceramic soap dish for tiled showers
best shower curtain rod for tile
shower tile design patterns
tile around bathtub surround
how to install soap dish on tile wall
tubs n tiles
tile tub shower combo
installing shower valve tile wall
tile shower pan installation instructions
tile ready shower basin
tile stopper
tile shower seat
how to care for tile shower
tile tub surround height
fiberglass vs tile shower
tile installation videos free
tile walk in shower kits
accent on tile
how to tile window in shower
ceramic tile shower designs
tile shower base on concrete floor
prefab tile shower walls
pictures of ceramic tile walk in showers
how to tile bathroom walls and shower tub area
how to tile a walk in shower video
ceramic tile patterns for showers
bathroom tile inserts
fiberglass tile shower
drainage tile installation instructions
tile over bathtub surround
subway tile bathroom wall height
prefab tile shower kits
fiberglass shower pan with tile walls
non slip paint for tiles
shower base or tiles
tile shower base pan
tile soap dish
tile around garden tub
tiled roman bathtub
8 tile
walk in tile shower with bench
bath inserts vs tile
tile pieces
tub surround with subway tile
walk in tile shower
tile shower and tub combo
tile ready shower pan 30 x 48
tile ready shower pan with seat
how to tile a bathtub wall
houzz subway tile
tiled shower stalls
how to build a tiled shower enclosure
how to tile a shower stall video
pre tiled shower panels
subway tile tub
how to install a shower pan with tile walls
classic tile inc
walk in tile shower designs
tile threshold
shower pan ready to tile
bathroom tile installation instructions
shower inserts vs tile
tile side of tub
classic tiles trinidad
shower pan vs tile floor
how to tile a tub shower combo
tile walk in shower
tile and bath company
tile trench filler
rippled subway tile
universal tile flange kit
inset tiles
premade tile shower
bathroom shower tile images
shower tile height
prefab shower pan for tile
tile installation
subway tile shower surround
how to replace a fiberglass tub shower unit with tile
how to make a tile bathtub
tub skirt tile ideas
how to tile a bathtub surround
tub surround or tile
tiled tubs designs
open tile shower
pre tiled shower pan
houzz subway tile bathroom
shower floor tiles non slip
diamond tile pattern
custom tile shower ideas
how to tile a shower video
tile shower with fiberglass pan
bathroom surround tile
shower wall tile installation instructions
tile ready shower pan 48 x 72
tile trim around bathtub
interlocking shower tiles
ideal tile flemington
shower wall panels that look like tile
piece of tile
tile tub surround
how to install shower tile video
best tile for shower pan
subway tile tub surround panels
how to tile a jacuzzi tub surround
custom tile shower
tile shower construction
tileable shower base
custom bathroom tile design
how to tile a shower floor video
tile tub shower
tile shower pan installation video
8 inch tile
handicap tile shower designs
bathroom wall panels that look like tiles
can you tile the inside of a bathtub
roll in tile shower
tile ready shower pans cheap
tile shower floor pan
tile band in shower
walk in shower base for tile
fiberglass showers that look like tile
shower pan with tile walls
bathtub surrounds that look like tile
non tile shower walls
tub surround over tile
installing shower base with tile walls
tile shower ledge
grip tiles for bathroom
tiled shower walls with acrylic base pan
bath trim tiles
subway tile dimensions
tome custom tiles
tile tray shower base
powder room tile accent wall
bath tile trim kit
combo tile
premade tile shower walls
tile shower curtain
tile basin shower pan
corner shower base for tile
tile shower dimensions
anti slip shower floor tiles
what size tile for tub surround
shower surround over tile
36 x 36 tile ready shower pan
tub enclosure tile ideas
roman tile tub
subway tile soap dish
tileable shower seat
tile shower floor pan installation
shower inserts that look like tile
bathtub surround tile patterns
acrylic tub with tile surround
images of tiled showers
how to tile a shower surround
ceramic soap dishes for tile showers
shower pans that can be tiled
tub surround tile patterns
drop in tub tile
tile garden tub surround
window trim over tile
custom tile ready shower pan
how to clean a walk in tiled shower
shower kits that look like tile
tiled shower recess
subway tile bathtub surround
best tile hours
36 x 48 tile ready shower pan
vatican gallery tile
bathroom tile corner trim
shower step tile
neo angle shower tile ideas
bathroom shower tile kits
shower pan or tile
subway tile window trim
ceramic tile shower kits
replace shower base with tile
how to make a tiled walk in shower
over tile bath trim
surround tub tile design
shower base with tile walls
tub with tile walls
drop in tub with tile surround
solid surface shower walls that look like tile
how to make a tile shower seat
tile showers with seats
custom shower base for tile
best tiles for shower enclosure
tub tiles pictures
how to install tile shower pan video
powder room floor tile
how to replace a shower pan with tile floor
tub shower tile design ideas
shower tub tile designs
beautiful tile showers
tile surround
tile shower with fiberglass base
tub and shower tile designs
how to tile a bathtub front
bathroom walk in shower tile
bathroom tile soap dish
bathtub wall panels that look like tile
tile free bathroom
install shower base over tiles
prefab tile shower stalls
bathroom tub shower tile designs
tub tile designs
how to tile a shower wall with a tub
is beveled tile hard to clean
classic tile renovations
classic tile designs
best subway tile
tile trim window recess
48 x 48 tile ready shower pan
easy tile shower base
non slip ceramic tile for bathroom
ceramic tile shower accessories
concrete shower floor no tile
shower pans for tile showers
garden tub tile designs
soap dish for tile shower
tile threshold ideas
shower basin for tile
tile ready shower pan 36 x 60
bathroom tub tile surround
bath edging tiles
tile trench drain
inset soap dish tile
tiled shower ideas walk shower
3 accent tile
tileable shower pan
subway tile shower curtain
smooth tile
best tile inc
top tile new hartford ny
subway tile tub surround
tile bathtub shower combo
ceramic tile tub enclosure
tile over bathtub
how to tile a shower enclosure
how to replace a shower pan with tile
antigua subway tile
how to tile a tub surround
shower wall kits that look like tile
curtain tile
classic tile
subway tile bathtub
installing shower curtain rod into ceramic tile
prefabricated tile shower kits
best bathroom tub and tile cleaner
tile shower details
ceramic tile non slip coating
low maintenance shower tile
bathroom tub wall tile
diamond pattern shower tile
best tile for shower surround
tile shower stall installation video
how to tile a bathtub
tile grip
tile shower inserts
low maintenance bathroom tiles
replace shower pan with tile
tub with tile
tub shower with tile
tile shower accessories
how to tile a shower floor without a pan
popular tile patterns
no tile shower
temporary shower tiles
Sponsored
Fredericksburg, OH

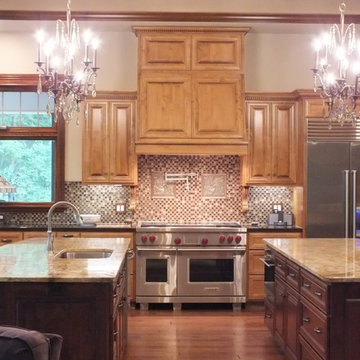
High Point Cabinets
Columbus' Experienced Custom Cabinet Builder | 4x Best of Houzz Winner

 Elegant Hardwood Floors
maple hardwood floor, water-popped, and stained with 50% rosewood and 50% neutral stains.
Inspiration for a timeless medium tone wood floor living room remodel in Salt Lake City
Inspiration for a timeless medium tone wood floor living room remodel in Salt Lake City
 Spire Integrated Systems Inc.
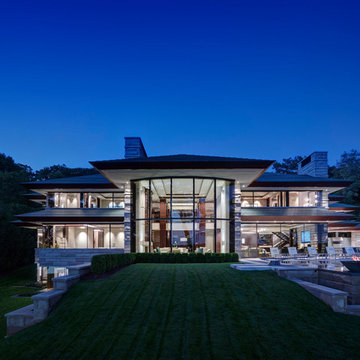
Awarded "Best Smart Home of the Year" by EH.
Spire outfitted this beautiful Michigan home with the best in high quality luxury technology. The homeowners enjoy the complete control of their home, from lighting and shading to entertainment and security, through the Savant Control System.
Homeowners and guests can easily create “scenes” to manage their days and social gatherings. Lutron shades help maintain light, climate and privacy to balance the inside and outside views. Outdoor entertaining is easy with the Sonance Landscape Audio System, Lutron light controls for pools and fountains and Savant control of outdoor fire pits.
The fully managed Whyreboot network allows for uninterrupted system control. To maintain security, Holovision doors and gates are equipped with Doorbird system to notify residents of visitors and to give control to open and close doors and gates. Music lovers can enjoy the highest level in audio from Meridian 7200 speakers in the lower level, as well as, Sonance in wall and in ceiling speakers throughout the home. In order for the homeowners to enjoy different music and entertainment in various rooms, 14 zones of video and 26 zones of audio were necessary.
Spire added many special touches to this amazing home. The master bathroom boasts a MirrorTV so owners can enjoy some entertainment while preparing for the day. A floor lift in the kitchen and dining room allows for entertainment, but can be tucked away when distractions are not wanted. A floor lift in the bedroom makes watching TV convenient, but can be put away when not in use. A fingerprint lock was placed at the bar for peace of mind.
Spire’s expertise and commitment to detail were key to the intricate design concepts throughout the home. Spire worked closely with design teams to ensure under cabinet lighting was just right.
 Wood Floors of Dallas
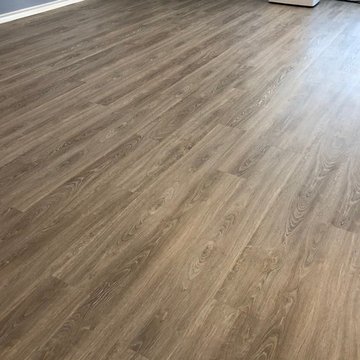
Beautiful Luxury Vinyl Plank that we installed. Luxury vinyl is extremely durable, and a great option for any home.
Example of a classic home design design in Dallas
Example of a classic home design design in Dallas



 C.E. Pontz Sons
This Backyard Waterfall project included installation of a pondless waterfall approximately 15' in length on a sloped bank at the area next to the existing pool. The backyard waterfall cascades down the existing embankment. There is still retaining wall work in progress as of this video and pictures being shot. Future landscaping will be installed once surrounding hardscaping has been complete. Rocks and Boulders for this project were chosen and supplied by home owner. This pondless waterfall project was installed in Mohnton (Berks County), PA.
Pondless Waterfalls are simply a re-circulating waterfall and/or stream without the presence of a pond. You can enjoy the sight and sound of running water without the maintenance of a pond.
The waterfall is undoubtedly the most beautiful and favored feature in a water garden. If space is lacking in your yard or you have safety concerns with a pond, go Pondless! The name basically explains it all. It’s a waterfall and stream, without the pond. So why would you want a waterfall without a pond? The truth is that a Pondless Waterfall isn’t for everyone, but it can be a great alternative for someone who isn’t quite sure if a pond is right for their family.
Because there is no pool of water, a Pondless Waterfall is a great option if you are concerned about safety issues associated with a traditional pond.
Cost can be a big factor when considering the type of pond you want to build. In most cases, the price of a Pondless waterfall will be less than a pond, because there is less labor involved, as well as less rock and materials. Operating costs are also less. Because you’re not dealing with an established ecosystem, it’s not necessary to run the pump 24/7.
The small size of the Pondless Waterfall means you can build and enjoy a beautiful waterfall anywhere in you yard. Taking care of your Pondless Waterfall is easy. Filling the reservoir every few weeks to compensate for water loss because of evaporation is all that’s required.
Perhaps the best part of the Pondless Waterfall is the possibility for the future. If you change your mind later, wishing you’d build a pond, that’s ok! If you leave enough room around the base of the waterfall, it’s easy to add a pond onto a Pondless Waterfall.
A Pondless Waterfall works much like a regular pond. The hole, deeper than a normal pond, is dug then lined with rock and gravel, and filled with water. The water is then circulated from beneath the rocks and gravel by a pump that sits on the bottom, inside a Snorkel™ Vault and Centipede™ Module. A pipe runs from there up to a BioFalls Filter and into an overflowing waterfall, where it falls back into the reservoir. Since the water level never pools above the level of the rock and gravel fill, it give the appearance of a waterfall without a pond, when in fact, the “pond” is there but not visible.
The Pondless Waterfall has made many water-lovers who were previously unable to indulge in the sweet sounds of falling water, very happy. It’s a great alternative for those who are trying to get their feet wet, or looking to fit a little bit of paradise into their own backyard. In other words, when all else fails … go Pondless!

 InnovationLand
This Houston bathroom remodel has it all - from its contemporary, en suite design to its Carrara marble to its luxury spa shower and his-and-her closets!
It's just one example of Outdoor Homescapes of Houston's bathroom remodeling projects - known for their meticulous attention to beauty and perfection.
Like what you see and want your own Houston bathroom remodeled? Just contact us!
Check out the images for more project shots and details.
"You'll notice a lot of differences between the original renderings and the final project," notes Wayne Franks, owner of Outdoor Homescapes of Houston. "That's why our realistic, detailed 3D graphic renderings and virtual video tours are so useful to clients who can't visualize the end result in their heads. With us, they can preview the project from every angle and make sure they get exactly what they want."
Check out the new, 10-foot-long by 4-feet-deep closet for her. It was built along the wall of the new addition, as you can see in the 3D graphic created for the client below.
The first door on the left leads to this closet. The next two doors down lead to the original, 6-foot-long by 4-feet-long by 4-feet-deep closet shared by the couple, but now reserved for him.
As you can see in the graphic, a small, private commode was added onto the back of the new shower. Recessed lighting was also added for more ambient light, along with brushed nickel lighting fixtures.
The closeup of the new shower and dressing suite, meanwhile, shows the black-and-grey border and accents in the shower. The border and accents are a stone-and-glass tile mix from Floor & Décor. The shower floor - a flat mosaic marble pebble - is also from Floor & Décor.
Also notice the view of the Houston bath remodel, looking toward the back yard from the master bedroom. On the right, after the towel hooks and before the French doors, a flat-screen TV has been added for viewing from the shower and dressing area.
This Houston bathroom remodel sprung out of a bachelor's engagement. The original, 300-square-foot master bathroom - still in the 80s with brass fixtures and wallpaper - desperately needed a redesign that could accommodate his future bride.
So Outdoor Homescapes gutted the original bathroom and doubled the size with a 300-square-foot addition off the back of the house.
Check out the full-on view of the project. (This is where our 3D graphic renderings, which allow clients to preview their project from every angle and make changes, come in handy. As you can see, the client went with white instead of dark-wood vanity cabinets, ditched the glass shower surround and scrapped the second vanity area).
 Drury Design
THE SETUP
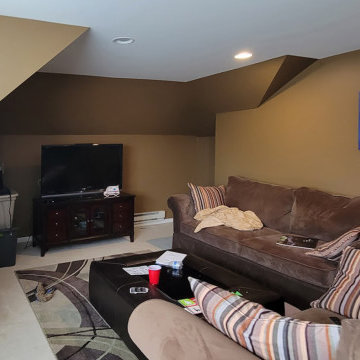
This remodeling project transformed a catchall room into a cinema-style theater designed for family entertainment and relaxation. The original space, which housed a small TV, older furniture, and various children’s toys, was reimagined to create a sophisticated, adult-friendly home theater with ample seating and modern amenities.
Design Objectives:
Create a Dark Theater Space: Ensure the room mimics a traditional movie theater environment.
Provide Comfortable Theater Seating: Include enough seating for the family and guests.
Integrate a Dry Bar Area: Include a space for snacks and drinks.
Optimize Space Utilization: Maintain an open area for additional activities.
Design Challenges:
Natural light: The room was too bright for a theater setting.
Seating: Accommodating six theater seats without obstructing views.
Lighting: Ensuring the lighting does not interfere with the viewing experience.
AV: Finding a clutter-free solution for AV equipment.
Dry Bar: Incorporating a dry bar area without overcrowding the space.
Viewing: Ensuring the TV placement allows for comfortable, optimized viewing.
THE RENEWED SPACE
Design Solutions:
Natural Light Control: Installed blackout remote shades on the back window and painted the walls dark charcoal to reduce natural light infiltration.
Seating Arrangement: Built a second level for the back row of seating to ensure unobstructed views for all movie watchers.
Lighting Design: Installed sconces on either side of the window that shine from the sides (to avoid interfering with the viewing experience).
AV Equipment Storage: Utilized existing recess areas with custom shelves matching the cabinetry and concealed cables using a PVC pipe system.
Dry Bar Integration: Created a dry bar area on the back wall with a refrigerator, candy storage, and a small counter space for a popcorn machine and ice maker, with locked drawers to prevent unsupervised access.
Optimal Viewing Distance: Evaluated multiple floor plans and placed the TV on the most suitable wall to ensure optimal viewing and comfortable reclined seating.
Final Thoughts:
The completed home theater has been a resounding success, providing a versatile space for the entire family. The thoughtful design and meticulous attention to detail have created a functional and enjoyable home theater that meets diverse needs, from watching movies and playing video games to relaxing and reading. The areas to the sides of the theater seats can accommodate spillover seating or activity zones. The area housing the AV equipment also includes extra shelves for storing snuggle-grade movie viewing blankets. This theater space has become a favorite hangout spot, offering comfort and entertainment for everyone.
Another view of before, we changed the entire TV viewing set up so we could fit two rows of recliners in the space with no viewing issues.
 InnovationLand
This Houston bathroom remodel has it all - from its contemporary, en suite design to its Carrara marble to its luxury spa shower and his-and-her closets!
It's just one example of Outdoor Homescapes of Houston's bathroom remodeling projects - known for their meticulous attention to beauty and perfection.
Like what you see and want your own Houston bathroom remodeled? Just contact us!
Check out the images for more project shots and details.
"You'll notice a lot of differences between the original renderings and the final project," notes Wayne Franks, owner of Outdoor Homescapes of Houston. "That's why our realistic, detailed 3D graphic renderings and virtual video tours are so useful to clients who can't visualize the end result in their heads. With us, they can preview the project from every angle and make sure they get exactly what they want."
Check out the new, 10-foot-long by 4-feet-deep closet for her. It was built along the wall of the new addition, as you can see in the 3D graphic created for the client below.
The first door on the left leads to this closet. The next two doors down lead to the original, 6-foot-long by 4-feet-long by 4-feet-deep closet shared by the couple, but now reserved for him.
As you can see in the graphic, a small, private commode was added onto the back of the new shower. Recessed lighting was also added for more ambient light, along with brushed nickel lighting fixtures.
The closeup of the new shower and dressing suite, meanwhile, shows the black-and-grey border and accents in the shower. The border and accents are a stone-and-glass tile mix from Floor & Décor. The shower floor - a flat mosaic marble pebble - is also from Floor & Décor.
Also notice the view of the Houston bath remodel, looking toward the back yard from the master bedroom. On the right, after the towel hooks and before the French doors, a flat-screen TV has been added for viewing from the shower and dressing area.
This Houston bathroom remodel sprung out of a bachelor's engagement. The original, 300-square-foot master bathroom - still in the 80s with brass fixtures and wallpaper - desperately needed a redesign that could accommodate his future bride.
So Outdoor Homescapes gutted the original bathroom and doubled the size with a 300-square-foot addition off the back of the house.
Check out the full-on view of the project. (This is where our 3D graphic renderings, which allow clients to preview their project from every angle and make changes, come in handy. As you can see, the client went with white instead of dark-wood vanity cabinets, ditched the glass shower surround and scrapped the second vanity area).
 Svetlana Amiraghyan
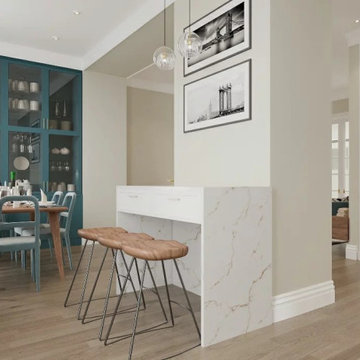
Гостиная с кухней столовой
2 спальни, санузел, постирочная и коридор этого проекта вы уже видели.
Самая большая комната у меня всегда бывает в конце. Тогда уже заказчик знает мой стиль ведения проекта и почти без поправок заканчиваем?.
И так эта очередная совместная комната площадью 38м2 . А общая квадратура квартиры 91м2.
Хозяева 2 великолепные зрелые женщины. Они сестры и предпочитают жить вместе?.
Люди невероятно интересные, харизматичные. Они и похожие друг на друга и очень разные. Можно сказать, что они принадлежат типу советской интеллегенции, с подабающим воспитанием, образованностью и деликатными манерами. Можно ещё сказать, что это вымирающий вид к сожалению.
Если коротко, эаказчицы и знали, что хотят и не знали. С большим интересом и с удовольствием раскрывала я внутренний вкус у них. Никаких навязаний типа так модно, так красиво....., нет?.
Интерьер не модная одежда, чтобы через сезон выкинуть. Да и мода сама придумана, чтобы продать как можно больше. Интерьер - это долгая история и чем больше он будет радовать владельцев, тем выше квалификация дизайнера.
А вот что получилось.
Кстати вы, мои уважаемые подписчики, мне пишете, чтобы я выложила полные проекты. И по окончанию каждого проекта я сделаю ролик для вас. Так и для этой квартиры дальше увидете виды всех комнат?.
Приятного просмотра.
Living room with kitchen dining room
2 bedrooms, bathroom, laundry room and hallway of this project you have already seen. For me, the biggest room is always at the end. Then the client already knows my style of managing the project and we complete it with almost no changes?.
And so this is another common room with an area of 38 m2. And the total area of the apartment is 91m2.
The owners are 2 wonderful mature women. They are sisters and prefer to live together.
They are incredibly interesting and charismatic people. They are both similar and very different. It can be said that they belong to the type of Soviet intelligentsia, with proper upbringing, education, and refined manners. It can also be said that this is an endangered species, unfortunately. In short, customers both knew what they wanted and didn't. I discovered their inner taste with great interest and pleasure. No compulsion, it's so fashionable, it's so beautiful..., no?.
The interior is not a fashionable garment that can be thrown away after one season. And fashion itself was invented to make as many sales as possible. The interior is a long story, and the more it satisfies the owners, the higher the designer's qualification.
This is what happened.
By the way, you, my dear subscribers, write to me so that I can post the complete projects. And at the end of each project, I will make a video for you. So you will see the views of all the rooms for this apartment later?.
Nice viewing.
 C.E. Pontz Sons
This Backyard Waterfall project included installation of a pondless waterfall approximately 15' in length on a sloped bank at the area next to the existing pool. The backyard waterfall cascades down the existing embankment. There is still retaining wall work in progress as of this video and pictures being shot. Future landscaping will be installed once surrounding hardscaping has been complete. Rocks and Boulders for this project were chosen and supplied by home owner. This pondless waterfall project was installed in Mohnton (Berks County), PA.
Pondless Waterfalls are simply a re-circulating waterfall and/or stream without the presence of a pond. You can enjoy the sight and sound of running water without the maintenance of a pond.
The waterfall is undoubtedly the most beautiful and favored feature in a water garden. If space is lacking in your yard or you have safety concerns with a pond, go Pondless! The name basically explains it all. It’s a waterfall and stream, without the pond. So why would you want a waterfall without a pond? The truth is that a Pondless Waterfall isn’t for everyone, but it can be a great alternative for someone who isn’t quite sure if a pond is right for their family.
Because there is no pool of water, a Pondless Waterfall is a great option if you are concerned about safety issues associated with a traditional pond.
Cost can be a big factor when considering the type of pond you want to build. In most cases, the price of a Pondless waterfall will be less than a pond, because there is less labor involved, as well as less rock and materials. Operating costs are also less. Because you’re not dealing with an established ecosystem, it’s not necessary to run the pump 24/7.
The small size of the Pondless Waterfall means you can build and enjoy a beautiful waterfall anywhere in you yard. Taking care of your Pondless Waterfall is easy. Filling the reservoir every few weeks to compensate for water loss because of evaporation is all that’s required.
Perhaps the best part of the Pondless Waterfall is the possibility for the future. If you change your mind later, wishing you’d build a pond, that’s ok! If you leave enough room around the base of the waterfall, it’s easy to add a pond onto a Pondless Waterfall.
A Pondless Waterfall works much like a regular pond. The hole, deeper than a normal pond, is dug then lined with rock and gravel, and filled with water. The water is then circulated from beneath the rocks and gravel by a pump that sits on the bottom, inside a Snorkel™ Vault and Centipede™ Module. A pipe runs from there up to a BioFalls Filter and into an overflowing waterfall, where it falls back into the reservoir. Since the water level never pools above the level of the rock and gravel fill, it give the appearance of a waterfall without a pond, when in fact, the “pond” is there but not visible.
The Pondless Waterfall has made many water-lovers who were previously unable to indulge in the sweet sounds of falling water, very happy. It’s a great alternative for those who are trying to get their feet wet, or looking to fit a little bit of paradise into their own backyard. In other words, when all else fails … go Pondless!

 RJ Construction
Drop-in bathtub - mid-sized rustic master brown tile and ceramic tile ceramic tile drop-in bathtub idea in Dallas with an undermount sink, raised-panel cabinets, white cabinets, granite countertops, a one-piece toilet and blue walls
 C.E. Pontz Sons
This Backyard Waterfall project included installation of a pondless waterfall approximately 15' in length on a sloped bank at the area next to the existing pool. The backyard waterfall cascades down the existing embankment. There is still retaining wall work in progress as of this video and pictures being shot. Future landscaping will be installed once surrounding hardscaping has been complete. Rocks and Boulders for this project were chosen and supplied by home owner. This pondless waterfall project was installed in Mohnton (Berks County), PA.
Pondless Waterfalls are simply a re-circulating waterfall and/or stream without the presence of a pond. You can enjoy the sight and sound of running water without the maintenance of a pond.
The waterfall is undoubtedly the most beautiful and favored feature in a water garden. If space is lacking in your yard or you have safety concerns with a pond, go Pondless! The name basically explains it all. It’s a waterfall and stream, without the pond. So why would you want a waterfall without a pond? The truth is that a Pondless Waterfall isn’t for everyone, but it can be a great alternative for someone who isn’t quite sure if a pond is right for their family.
Because there is no pool of water, a Pondless Waterfall is a great option if you are concerned about safety issues associated with a traditional pond.
Cost can be a big factor when considering the type of pond you want to build. In most cases, the price of a Pondless waterfall will be less than a pond, because there is less labor involved, as well as less rock and materials. Operating costs are also less. Because you’re not dealing with an established ecosystem, it’s not necessary to run the pump 24/7.
The small size of the Pondless Waterfall means you can build and enjoy a beautiful waterfall anywhere in you yard. Taking care of your Pondless Waterfall is easy. Filling the reservoir every few weeks to compensate for water loss because of evaporation is all that’s required.
Perhaps the best part of the Pondless Waterfall is the possibility for the future. If you change your mind later, wishing you’d build a pond, that’s ok! If you leave enough room around the base of the waterfall, it’s easy to add a pond onto a Pondless Waterfall.
A Pondless Waterfall works much like a regular pond. The hole, deeper than a normal pond, is dug then lined with rock and gravel, and filled with water. The water is then circulated from beneath the rocks and gravel by a pump that sits on the bottom, inside a Snorkel™ Vault and Centipede™ Module. A pipe runs from there up to a BioFalls Filter and into an overflowing waterfall, where it falls back into the reservoir. Since the water level never pools above the level of the rock and gravel fill, it give the appearance of a waterfall without a pond, when in fact, the “pond” is there but not visible.
The Pondless Waterfall has made many water-lovers who were previously unable to indulge in the sweet sounds of falling water, very happy. It’s a great alternative for those who are trying to get their feet wet, or looking to fit a little bit of paradise into their own backyard. In other words, when all else fails … go Pondless!
25