
Search results for "Weak spots" in Home Design Ideas


 Heartland Stairways
Tyler Rippel Photography
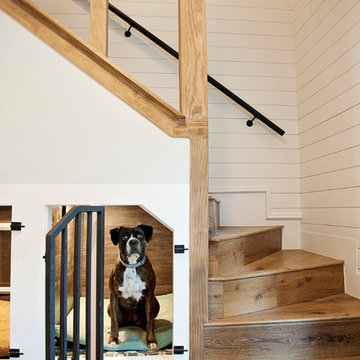
Staircase - mid-sized transitional wooden floating staircase idea in New York with wooden risers
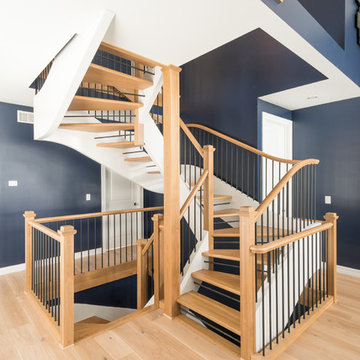
Staircase - mid-sized transitional wooden floating staircase idea in New York with wooden risers
Find the right local pro for your project
 Priestley + Associates Architecture
Trent Bell
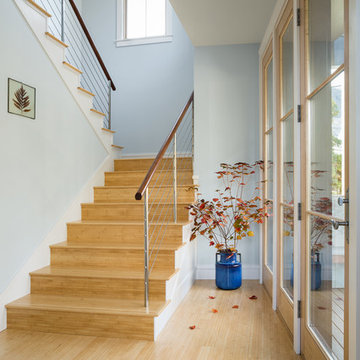
Inspiration for a transitional staircase remodel in Portland Maine
Inspiration for a transitional staircase remodel in Portland Maine
 Caves Kitchens
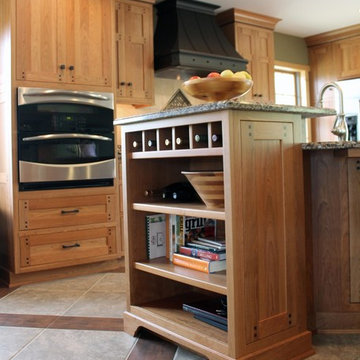
The custom built natural cherry cabinetry detailed with walnut peg accents provide the homeowners with plenty of storage space while maintaining a seamless look.
The open shelved cabinet is a great place to hold cookbooks or decorative pieces.
The top section was designed and crafted to hold bottles of wine.
The homeowners wanted their kitchen to be a place of comfort and accessibility and Caves Millwork acheived that want by providing plenty of storage.
-Allison Caves, CKD
Caves Kitchens
 June Scott Design
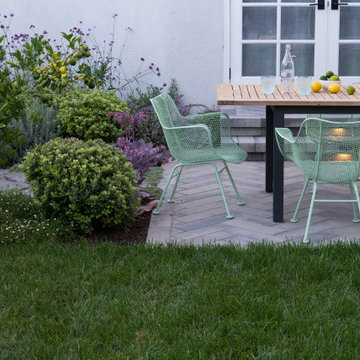
This is a modern take on a classic garden. The paving was designed with precision and then softened with lush planting. Two distinct spaces, a dining area and lounging spot, are delineated with herringbone pavers and linked by a flagstone walk. The walk takes the edge of the design’s geometry and avoids a sense of monotony that might result from repetition of the larger spaces’ paving pattern. Star jasmine and climbing roses soften the walls bordering the space, and citrus trees and herbs fill and spill over the planting beds.

 Ace Deuce General Contractors
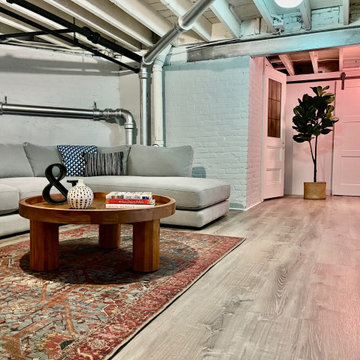
Beautiful basement remodel on the east side of Providence. Water mitigation was what sparked this dream. weak spots in the exterior foundation were sealed. Then we began by "facing" the exposed foundation with a sealant and concrete. A waterproof membrane was installed and capped with tongue in groove OSB, then finally finished with a water resistant laminate floor. Walls were framed to separate living area from storage. Sliding barn style doors add a nice finish while being very functional, allowing airflow and heat into the space. Now the teenagers of the house have a perfect hangout!
Sponsored
Fredericksburg, OH

High Point Cabinets
Columbus' Experienced Custom Cabinet Builder | 4x Best of Houzz Winner
 SUPERIOR CHIMNEY SERVICES CORPORATION
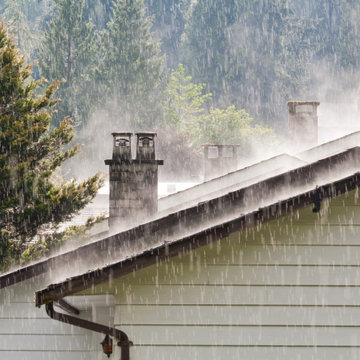
Do you know what ends our time of enjoying the wonderful Fall colors? Rain. The other day when it rained, it took most of those bright yellow leaves and brought them to the ground. It saddened me not only because the colors were gone, but now the leaves have to be cleaned up. And with the trees being larger, those leaves went everywhere. All over the ground, in the tall bushes, stuck on the window sills, lodged in the gutters and up at the chimney. Nature’s going to happen so, what are the effects of Fall rain and the Chimney? Let’s take a further look.
Fall Rain and the Chimney
The Fall leaves are gorgeous and fall is many homeowners favorite time of year. But as with all seasons, it comes to an end. The Fall rain combined with wind takes those colorful leaves and distributes them…everywhere. Especially on the roof where your chimney is located. By having an annual chimney inspection, we’ll take a look to ensure the safety of your chimney stays intact for the upcoming harsher season: Winter.
The Exterior Chimney
With Fall, we have two of the elements to be concerned about and that’s the leaves and rain. Here are a few areas we check and the effects of fall rain and the chimney. Let’s start at the top:
Chimney Cap: The chimney cap is vital for protecting the opening of your chimney which leads to the interior of your home. We inspect the chimney cap ensuring it is tightly secured to the exterior chimney termination. The chimney is typically the tallest part of your home and gets exposed to the harshest winds, rain, snow, animals and blowing debris. All of that hits the chimney cap trying to find that weak spot so it can get inside the chimney. If it does, that debris is easily ignited and can cause harm to your home.
Chimney Crown: This is the slab of concrete that covers the chimney and extends beyond the bricks or materials that make up the chimney. This is to provide protection from the elements. But remember the chimney crown can also develop cracks over time. This is where crown coat can extend the life of the chimney crown ensuring the elements stay where they should… outside.
Brick, Stone and Mortar: The structure of the chimney can be made of brick, stone or other materials. If it is made of brick or stone, then mortar is involved. All of these materials are porous, meaning that it can absorb water and snow melt, which breaks down over time. As a result, this needs to be checked looking for loose bricks, missing mortar, cracks in either one of these materials and more. Tuckpointing is a good solution to ensure the elements stay out. The use of Chimney Saver is a great way to preserve the bricks, stones and mortar as it waterproofs and protects the materials for about 8 – 10 years and slows down the aging process.
Flashing: This is the material that protects the connection of the roof to the chimney. A critical and common area for leaks. The flashing moves the water away from the chimney and down the roof. The flashing adheres to the chimney with a seal, which dries out over time. This area needs to be checked to ensure the seal is strong and doesn’t allow water to get in.
Before the cold sets in and you want to turn on or fire up the fireplace, be sure to take into consideration the effects of fall rain and the chimney. Contact us today at 877-244-6349 to set up an appointment.
 Ace Deuce General Contractors
Beautiful basement remodel on the east side of Providence. Water mitigation was what sparked this dream. weak spots in the exterior foundation were sealed. Then we began by "facing" the exposed foundation with a sealant and concrete. A waterproof membrane was installed and capped with tongue in groove OSB, then finally finished with a water resistant laminate floor. Walls were framed to separate living area from storage. Sliding barn style doors add a nice finish while being very functional, allowing airflow and heat into the space. Now the teenagers of the house have a perfect hangout!
 SUPERIOR CHIMNEY SERVICES CORPORATION
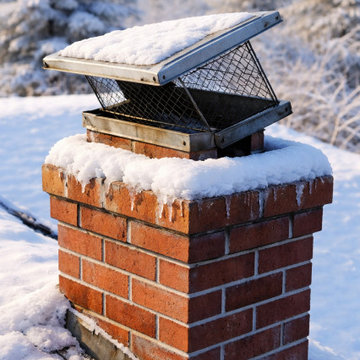
Is it crazy to think about chimney repairs in the winter? It’s cold and snowy outside and the rooftops are solid white, coated with a layer of ice. A homeowner called us with a concern about her home. She reported that a small stream of water was coming down the chimney and into the firebox. To keep the water from flooding the firebox, the homeowner placed a Tupperware container to collect the water. Not a good look. Can chimney repairs in the winter be done by a certified chimney technician?
Chimney Repairs in the Winter
Chimney repairs can be completed in the winter, although it depends on what type of chimney repair is needed. Let’s take a quick look at the different chimney repairs in our cold winter months.
Chimney Cap: If your chimney cap comes loose, or if the winter winds knocked it out of place or blew it off completely, our certified chimney technician can go up on the roof and take care of the chimney cap for you with a chimney cap replacement. Our technicians follow the guidelines for safety, especially in the winter months when roofing systems are the slipperiest.
Flashing: Flashing is the connector from the roofing system to the chimney. It is the barrier that protects water from finding its way into your home. However, if the flashing becomes loose or comes away from the roof and chimney, it is open season for the rain to come directly into your home and create chaos.
Chimney Crown: The chimney crown is the slab of cement that sits on top of the chimney and right below the chimney cap. Hairline cracks can form in the chimney crown allowing water, melted snow, to enter. Even the smallest hairline crack can cause the melted snow to find the weak spot on the chimney crown and make its way into your home.
Remember, hairline cracks can and will grow in width and length with the freeze thaw cycles. When the melted snow freezes at night, it expands inside of the crack. If the temperatures cooperate in the daytime, it melts the snow. But remember, it doesn’t necessarily dry out inside of the crack. It can remain moist and freeze again at night.
Chimney Tuckpointing: Tuckpointing the chimney can be done in the winter, but it certainly isn’t an easy process as we’re dealing with wet mortar. Cracks can create an entry point for melted snow to enter, further deteriorating the mortar.
Although it is not optimal to perform chimney repairs in the winter, Superior Chimney takes precautions to ensure a safe and effective repair. Now the homeowner can get rid of the streaming water in the firebox and enjoy the rest of the winter with a warm and dry fireplace.
Be sure to contact us today if you have a water leak in your fireplace. If you would like to have your chimney inspected and checked for water leaks coming this spring, contact us today to schedule it up in March. This way, you’ll be all set and not compete with others in the Spring.
 Total System Service
As a manager of a building or property, you quickly learn the art of mediation. One minute you may be working with a vendor to keep the building’s operating system running efficient and smooth; the next moment you may be calming a tenant down after finding the change in the system disrupted his office’s workflow. Give and take; it’s the only way to make sure every day runs perfectly.
Overall, you have two goals to strive for in everything you do.
1. Keep the building running properly, upgrading systems as appropriate, and striving to do all you can on a pre-established budget.
2. Keep the building occupants happy, with as little disruption as possible.
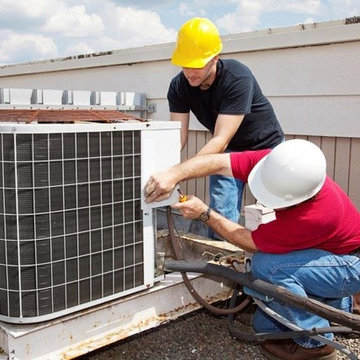
While some changes are minor, barely registering on a building occupant’s mind, with HVAC challenges, that’s rarely the case. If a HVAC contractor is replacing an air handler, for instance, and disconnects one and moves to the next unit, it may cause major disruptions to sensitive areas of a building. And if the occupant wasn’t prepared for the disruption, you can have a mighty unhappy customer on your hand.
Anytime you are working on HVAC projects throughout your building, there are strategies you can put into place to keep things running smooth.
Communicate with occupants
Communication is key to any good relationship, and as a property manager, this rule is a great place to start. If you will be working with the HVAC equipment, block out the timeframe for work to be done, and understand the potential consequences of the process. Then communicate this process with every point of contact you have throughout the building. The more detail you can provide, the less surprises you’ll have throughout the process. You can also work with your building’s occupants before the process begins, finding out if there are better timeframes than others.
Establish a realistic schedule
As a property manager, its easy to provide your expectations for the HVAC project at hand, and request that the proposal be written in such a way that work is completed on your timeframe. Unfortunately, many contractors want your business and will agree to anything upfront in order to win the bid, knowing full well the work will take longer than specified. Instead of projecting your timeframes into the proposal process, ask for HVAC project bids to establish realistic schedules of how long the process will take, and what areas of your property will be most effected throughout the schedule. This will help you avoid crises between you and the contractor, and you and your tenants.
Plan for the whole system
If one small piece of your HVAC system is weak, its easy to fix that one small piece. But how will that impact your overall system? Will it cause weak spots in different parts of the building – maybe a corner office will have reduced air flow, and therefore be colder in the winter and warmer in the summer? When retrofitting new pieces with older existing systems, its easy to reduce the efficiency of your entire system. Before agreeing to certain repairs, make sure you understand how it will impact your entire system overall. An easy way of handling this problem is by working with the same HVAC contractor again and again, He will understand your system’s potential, and know when to make repairs, and when to replace.
Have points of contact available for immediate assistance
In many cases, problems arise because connections can’t be made. Can the HVAC contractor get a hold or you or another person that can make decisions at a moments notice if a problem arises? Do you have access to decision makers throughout the building that may be impacted by this change? Many projects have been put on hold simply because a person in authority can’t be found to give the go-ahead to move forward. If you have access to these people during the time of the project, you’ll be able to complete the project in record time.
Test
Finally, if you can test things in stages, or test when the potential for problems is the smallest, you reduce the chances of bigger emergency issues falling into your lap. If you’ll be installing a new terminal unit, can you make the switch on a Saturday morning when the building is largely unoccupied? If you’re replacing a large system, can you replace and test in phases so the entire project isn’t released at once?
Most issues can be avoided with just a little strategy from the beginning. If you’ve never had a HVAC maintenance team to help you stay on track with your building’s heating and cooling, now may be the time to find out how easy a team approach makes the process.
 Architectural Stone Decor
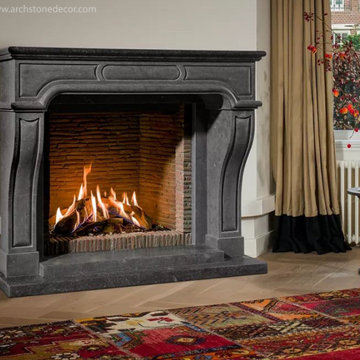
Mantels don't have to be hand carved out of limestone although as you can tell by now, we have a weak spot for limestone. For example this gorgeous mantel is hand carved from Belgian Blue stone Basalt making it very unique. We also custom make marble ones.
 Green Gorge Construction
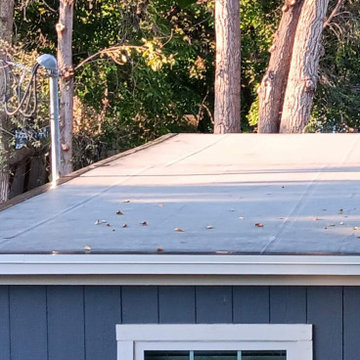
Due to its deteriorating condition, the asphalt roll roofing on this ADU required replacement before the Fall rains. Asphalt roll roofing generally lasts only 5-10 years, leading to ongoing maintenance challenges. The original 1×10 sheathing showed significant sagging in several spots, resulting in standing water not suitable for asphalt. Additionally, there was a complete absence of ventilation after improper installation of R-21 fiberglass insulation, leaving no air gap between the sheathing and insulation. A noticeable hump along the center of the roof indicated that the load-bearing wall had been supporting that section since construction, contributing to light sagging between the walls.
The old roof was completely removed down to the joists, revealing a solid base for the new installation. The central hump was eliminated by shaving the high point along that line. 2×6 beams were ripped in half then nailed on top of the existing joists, creating a 1.5″ gap for insulation and providing strong attachment points for the OSB sheathing, which was secured with screws to prevent any potential issues with nail heads popping through over the roof’s expected lifespan of over 50 years. The EPDM membrane was then adhered using glue and contact cement along the edges of each sheet, with the ends folded over the roof edges and secured with termination bars. Drip edge flashing was added and taped to ensure a water-tight seal, and EPDM-safe caulking was applied over the seams for additional protection. Finally, all exposed wood was primed and painted.
The new roof features a 60mil commercial-grade EPDM rubber membrane, offering a lifespan exceeding 50 years, in stark contrast to the 5-10 year lifespan of asphalt roll roofing.
Using two sheets of EPDM for installation streamlined the process, resulting in one single seam across the entire roof, compared to the asphalt roll’s dimensions of 3 feet wide by 33 feet long, which created 8 vertical seams and 9 horizontal seams—significantly increasing the risk of leakage and failure. Wrapping the rubber over the edge of the roof effectively addressed concerns about water infiltration at the edges, an issue prevalent with the asphalt and drip edge interface.
Another benefit to removing the splitting 1×10 decking and replacing it with OSB sheathing is the increase in structural integrity, moisture resistance, longevity and consistency.
The project successfully transformed the ADU’s roof from a maintenance-prone asphalt roll system to a highly durable 60mil EPDM rubber membrane. By addressing critical structural issues, including sagging sheathing and inadequate ventilation, the team ensured that the new roof not only offers superior water resistance and longevity but also meets higher performance standards for insulation and durability. The replacement process eliminated common weak points, such as numerous seams and poor edge sealing, which were vulnerabilities in the old roofing system. The result is a streamlined, secure installation that provides peace of mind and long-term value, with a lifespan extending well beyond the original roof.

Sponsored
Columbus, OH

Hope Restoration & General Contracting
Columbus Design-Build, Kitchen & Bath Remodeling, Historic Renovations
 F9 Productions Inc.
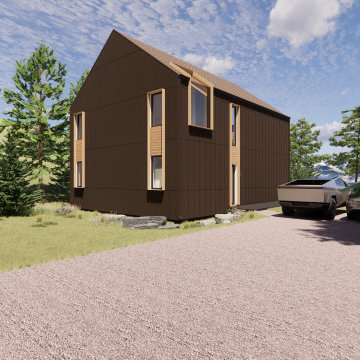
Imagine a sleek A-frame cabin near Fairplay, where mountain views steal the show. Redhill Road is a modern take on a classic shape, small in size but big on quality – perfect for embracing Colorado's wild beauty without extra fuss.
Our clients sought a home that highlighted Mt. Silverheels and Crystal Clear Creek, using a simple gable design that's stood the test of time. With space like a townhome, it focuses on smart layout and top materials for a cozy, efficient life.
In the mountains, cold and wind can drive up costs and discomfort. We tackled that with thick insulation and no weak spots, keeping the home warm and energy bills low for worry-free living.
The concept celebrates basics – a clean roof over sturdy walls, wrapped in metal for a modern edge. A tall stone fireplace adds heart and texture, making the space feel solid and welcoming.
Built with wood and advanced insulation, including spray foam in the thick roof, it's made to handle harsh weather. Metal siding keeps it durable and stylish, blending strength with simplicity.
Cozy on the main floor with open living and dining that soar high, connected by custom stairs to upstairs bedrooms. Windows reach to the roof, letting you sleep under the stars in a light, airy setup.
From its 2021 start, Redhill Road has become a timeless mountain haven. It saves energy, connects you to nature, and offers practical luxury – a home where simplicity sparks joy and lasting comfort.
 F9 Productions Inc.
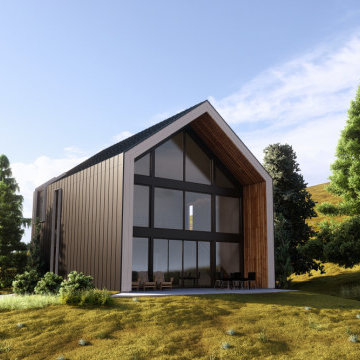
Imagine a sleek A-frame cabin near Fairplay, where mountain views steal the show. Redhill Road is a modern take on a classic shape, small in size but big on quality – perfect for embracing Colorado's wild beauty without extra fuss.
Our clients sought a home that highlighted Mt. Silverheels and Crystal Clear Creek, using a simple gable design that's stood the test of time. With space like a townhome, it focuses on smart layout and top materials for a cozy, efficient life.
In the mountains, cold and wind can drive up costs and discomfort. We tackled that with thick insulation and no weak spots, keeping the home warm and energy bills low for worry-free living.
The concept celebrates basics – a clean roof over sturdy walls, wrapped in metal for a modern edge. A tall stone fireplace adds heart and texture, making the space feel solid and welcoming.
Built with wood and advanced insulation, including spray foam in the thick roof, it's made to handle harsh weather. Metal siding keeps it durable and stylish, blending strength with simplicity.
Cozy on the main floor with open living and dining that soar high, connected by custom stairs to upstairs bedrooms. Windows reach to the roof, letting you sleep under the stars in a light, airy setup.
From its 2021 start, Redhill Road has become a timeless mountain haven. It saves energy, connects you to nature, and offers practical luxury – a home where simplicity sparks joy and lasting comfort.
 F9 Productions Inc.
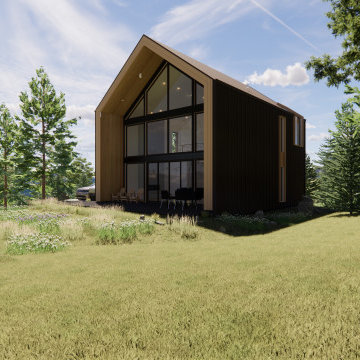
Imagine a sleek A-frame cabin near Fairplay, where mountain views steal the show. Redhill Road is a modern take on a classic shape, small in size but big on quality – perfect for embracing Colorado's wild beauty without extra fuss.
Our clients sought a home that highlighted Mt. Silverheels and Crystal Clear Creek, using a simple gable design that's stood the test of time. With space like a townhome, it focuses on smart layout and top materials for a cozy, efficient life.
In the mountains, cold and wind can drive up costs and discomfort. We tackled that with thick insulation and no weak spots, keeping the home warm and energy bills low for worry-free living.
The concept celebrates basics – a clean roof over sturdy walls, wrapped in metal for a modern edge. A tall stone fireplace adds heart and texture, making the space feel solid and welcoming.
Built with wood and advanced insulation, including spray foam in the thick roof, it's made to handle harsh weather. Metal siding keeps it durable and stylish, blending strength with simplicity.
Cozy on the main floor with open living and dining that soar high, connected by custom stairs to upstairs bedrooms. Windows reach to the roof, letting you sleep under the stars in a light, airy setup.
From its 2021 start, Redhill Road has become a timeless mountain haven. It saves energy, connects you to nature, and offers practical luxury – a home where simplicity sparks joy and lasting comfort.

1