
Search results for "Well functioning website" in Home Design Ideas

 Nautilus Homes
Old Grove estate featuring painted wood floors, built-in custom cabinetry, sliding ladder, and Dutch door leading into the mud room.
Design and Architecture: William B. Litchfield
Builder: Nautilus Homes
Photos:
Jessica Glynn
www.jessicaglynn.com

 Blazeks Home Furnishings
Inspiration for a mid-sized timeless open concept carpeted living room remodel in Chicago with beige walls

 Erika Bonnell Interiors
Study room - transitional built-in desk medium tone wood floor study room idea in DC Metro with blue walls and no fireplace
Find the right local pro for your project

 Alair Homes Plano
Our clients called us wanting to not only update their master bathroom but to specifically make it more functional. She had just had knee surgery, so taking a shower wasn’t easy. They wanted to remove the tub and enlarge the shower, as much as possible, and add a bench. She really wanted a seated makeup vanity area, too. They wanted to replace all vanity cabinets making them one height, and possibly add tower storage. With the current layout, they felt that there were too many doors, so we discussed possibly using a barn door to the bedroom.
We removed the large oval bathtub and expanded the shower, with an added bench. She got her seated makeup vanity and it’s placed between the shower and the window, right where she wanted it by the natural light. A tilting oval mirror sits above the makeup vanity flanked with Pottery Barn “Hayden” brushed nickel vanity lights. A lit swing arm makeup mirror was installed, making for a perfect makeup vanity! New taller Shiloh “Eclipse” bathroom cabinets painted in Polar with Slate highlights were installed (all at one height), with Kohler “Caxton” square double sinks. Two large beautiful mirrors are hung above each sink, again, flanked with Pottery Barn “Hayden” brushed nickel vanity lights on either side. Beautiful Quartzmasters Polished Calacutta Borghini countertops were installed on both vanities, as well as the shower bench top and shower wall cap.
Carrara Valentino basketweave mosaic marble tiles was installed on the shower floor and the back of the niches, while Heirloom Clay 3x9 tile was installed on the shower walls. A Delta Shower System was installed with both a hand held shower and a rainshower. The linen closet that used to have a standard door opening into the middle of the bathroom is now storage cabinets, with the classic Restoration Hardware “Campaign” pulls on the drawers and doors. A beautiful Birch forest gray 6”x 36” floor tile, laid in a random offset pattern was installed for an updated look on the floor. New glass paneled doors were installed to the closet and the water closet, matching the barn door. A gorgeous Shades of Light 20” “Pyramid Crystals” chandelier was hung in the center of the bathroom to top it all off!
The bedroom was painted a soothing Magnetic Gray and a classic updated Capital Lighting “Harlow” Chandelier was hung for an updated look.
We were able to meet all of our clients needs by removing the tub, enlarging the shower, installing the seated makeup vanity, by the natural light, right were she wanted it and by installing a beautiful barn door between the bathroom from the bedroom! Not only is it beautiful, but it’s more functional for them now and they love it!
Design/Remodel by Hatfield Builders & Remodelers | Photography by Versatile Imaging

 B Brooke Interiors
Jake Root
Mudroom - craftsman beige floor mudroom idea in Seattle with beige walls and a medium wood front door
Mudroom - craftsman beige floor mudroom idea in Seattle with beige walls and a medium wood front door
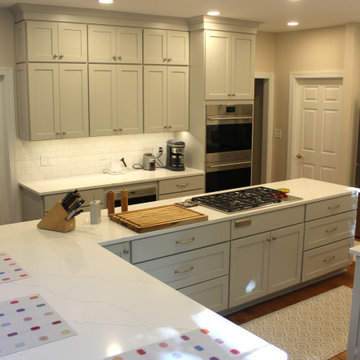
 Talon Construction Inc.
Renovating an open kitchen can be an exciting project that can improve the functionality, aesthetics, and value of your home. Here are some steps to guide you through the process:
Planning and Design:
Define your goals and budget for the renovation.
Determine the layout of your open kitchen. Consider factors like the work triangle (the relationship between the stove, sink, and refrigerator) and the flow of traffic.
Choose a design style and color scheme that suits your preferences and complements the rest of your home.
Research and Inspiration:
Collect inspiration from magazines, websites, and social media platforms to get ideas for your open kitchen design.
Create a mood board or vision board to help you visualize the final look.
Hiring Professionals:
Depending on the scale of your renovation, you may need to hire professionals, such as architects, interior designers, contractors, and electricians. Make sure to check references and get multiple quotes.
Demolition and Structural Work:
If your renovation involves structural changes, like removing walls, this is the time to do it. Ensure that the necessary permits are obtained.
Plumbing and Electrical Work:
Update or reconfigure plumbing and electrical systems as needed. This may include adding or moving outlets, switches, and lighting fixtures.
Cabinetry and Countertops:
Choose and install new kitchen cabinets and countertops. This is a significant part of your renovation and will greatly influence the kitchen's appearance and functionality.
Appliances:
Update or install new kitchen appliances, including the refrigerator, stove, oven, microwave, and dishwasher.
Flooring:
Select and install flooring that is suitable for a kitchen, such as hardwood, tile, laminate, or vinyl. Ensure it complements the overall design.
Backsplash and Wall Finishes:
Install a backsplash that matches your design and protects your walls. Consider materials like tile, glass, or stainless steel.
Lighting:
Choose and install various types of lighting, including ambient, task, and accent lighting. Pendant lights above an island or breakfast bar can add style and functionality.
Paint and Finishing Touches:
Paint the walls and ceiling in the colors you've selected. Add finishing touches like hardware, window treatments, and decorative elements.
Furniture and Accessories:
Bring in furniture, such as a dining table and chairs, barstools, and any other pieces you need to complete the space. Decorate with accessories like artwork, plants, and decorative items.
Final Inspection and Cleanup:
Ensure that all work meets safety and building code requirements. Clean the entire area thoroughly.
Enjoy Your New Kitchen:
Once the renovation is complete and everything is in its place, enjoy your beautiful, functional open kitchen.
Remember that open kitchen renovations can be complex and may require careful planning. It's essential to stay within your budget, communicate with your contractors and designers, and be flexible as unexpected issues may arise during the process. Ultimately, a well-executed open kitchen renovation can enhance the heart of your home and improve your overall living space.
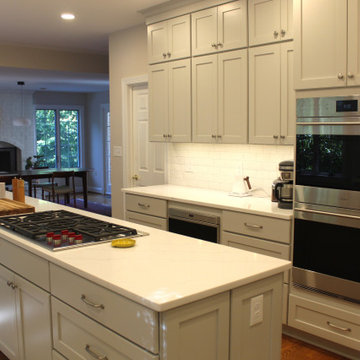 Talon Construction Inc.
Renovating an open kitchen can be an exciting project that can improve the functionality, aesthetics, and value of your home. Here are some steps to guide you through the process:
Planning and Design:
Define your goals and budget for the renovation.
Determine the layout of your open kitchen. Consider factors like the work triangle (the relationship between the stove, sink, and refrigerator) and the flow of traffic.
Choose a design style and color scheme that suits your preferences and complements the rest of your home.
Research and Inspiration:
Collect inspiration from magazines, websites, and social media platforms to get ideas for your open kitchen design.
Create a mood board or vision board to help you visualize the final look.
Hiring Professionals:
Depending on the scale of your renovation, you may need to hire professionals, such as architects, interior designers, contractors, and electricians. Make sure to check references and get multiple quotes.
Demolition and Structural Work:
If your renovation involves structural changes, like removing walls, this is the time to do it. Ensure that the necessary permits are obtained.
Plumbing and Electrical Work:
Update or reconfigure plumbing and electrical systems as needed. This may include adding or moving outlets, switches, and lighting fixtures.
Cabinetry and Countertops:
Choose and install new kitchen cabinets and countertops. This is a significant part of your renovation and will greatly influence the kitchen's appearance and functionality.
Appliances:
Update or install new kitchen appliances, including the refrigerator, stove, oven, microwave, and dishwasher.
Flooring:
Select and install flooring that is suitable for a kitchen, such as hardwood, tile, laminate, or vinyl. Ensure it complements the overall design.
Backsplash and Wall Finishes:
Install a backsplash that matches your design and protects your walls. Consider materials like tile, glass, or stainless steel.
Lighting:
Choose and install various types of lighting, including ambient, task, and accent lighting. Pendant lights above an island or breakfast bar can add style and functionality.
Paint and Finishing Touches:
Paint the walls and ceiling in the colors you've selected. Add finishing touches like hardware, window treatments, and decorative elements.
Furniture and Accessories:
Bring in furniture, such as a dining table and chairs, barstools, and any other pieces you need to complete the space. Decorate with accessories like artwork, plants, and decorative items.
Final Inspection and Cleanup:
Ensure that all work meets safety and building code requirements. Clean the entire area thoroughly.
Enjoy Your New Kitchen:
Once the renovation is complete and everything is in its place, enjoy your beautiful, functional open kitchen.
Remember that open kitchen renovations can be complex and may require careful planning. It's essential to stay within your budget, communicate with your contractors and designers, and be flexible as unexpected issues may arise during the process. Ultimately, a well-executed open kitchen renovation can enhance the heart of your home and improve your overall living space.
Sponsored
Plain City, OH

The Creative Kitchen Company
Columbus Area Kitchen Remodeling and Refacing Professional

 JJ Interiors
Ron Ruscio
Mudroom - rustic travertine floor mudroom idea in Denver with an undermount sink, flat-panel cabinets, red cabinets, granite countertops, brown walls and a side-by-side washer/dryer
Mudroom - rustic travertine floor mudroom idea in Denver with an undermount sink, flat-panel cabinets, red cabinets, granite countertops, brown walls and a side-by-side washer/dryer

 Tate Studio Architects
The Living Room area and linear fireplace that anchors the Great Room with expansive glass that creates a "Live In View" experience in the home. Builder - Build Inc, Interior Design - Tate Studio Architects, Photography - Thompson Photographic.

 Paris Eden - Closet Factory
Food storage has never been more attractive. This maple wood pantry features
pull out baskets, turntable spice storage and wine racks. An organized storage solution for pantry items, this custom built pantry provides easy access for often used kitchen and food items.

 Markel Design Group
Michael Yearout Photography
Open concept kitchen - contemporary l-shaped open concept kitchen idea in Denver with flat-panel cabinets, medium tone wood cabinets, brown backsplash, subway tile backsplash and stainless steel appliances
Open concept kitchen - contemporary l-shaped open concept kitchen idea in Denver with flat-panel cabinets, medium tone wood cabinets, brown backsplash, subway tile backsplash and stainless steel appliances
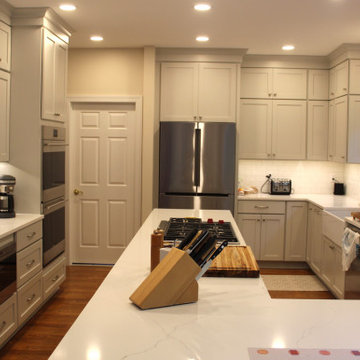 Talon Construction Inc.
Renovating an open kitchen can be an exciting project that can improve the functionality, aesthetics, and value of your home. Here are some steps to guide you through the process:
Planning and Design:
Define your goals and budget for the renovation.
Determine the layout of your open kitchen. Consider factors like the work triangle (the relationship between the stove, sink, and refrigerator) and the flow of traffic.
Choose a design style and color scheme that suits your preferences and complements the rest of your home.
Research and Inspiration:
Collect inspiration from magazines, websites, and social media platforms to get ideas for your open kitchen design.
Create a mood board or vision board to help you visualize the final look.
Hiring Professionals:
Depending on the scale of your renovation, you may need to hire professionals, such as architects, interior designers, contractors, and electricians. Make sure to check references and get multiple quotes.
Demolition and Structural Work:
If your renovation involves structural changes, like removing walls, this is the time to do it. Ensure that the necessary permits are obtained.
Plumbing and Electrical Work:
Update or reconfigure plumbing and electrical systems as needed. This may include adding or moving outlets, switches, and lighting fixtures.
Cabinetry and Countertops:
Choose and install new kitchen cabinets and countertops. This is a significant part of your renovation and will greatly influence the kitchen's appearance and functionality.
Appliances:
Update or install new kitchen appliances, including the refrigerator, stove, oven, microwave, and dishwasher.
Flooring:
Select and install flooring that is suitable for a kitchen, such as hardwood, tile, laminate, or vinyl. Ensure it complements the overall design.
Backsplash and Wall Finishes:
Install a backsplash that matches your design and protects your walls. Consider materials like tile, glass, or stainless steel.
Lighting:
Choose and install various types of lighting, including ambient, task, and accent lighting. Pendant lights above an island or breakfast bar can add style and functionality.
Paint and Finishing Touches:
Paint the walls and ceiling in the colors you've selected. Add finishing touches like hardware, window treatments, and decorative elements.
Furniture and Accessories:
Bring in furniture, such as a dining table and chairs, barstools, and any other pieces you need to complete the space. Decorate with accessories like artwork, plants, and decorative items.
Final Inspection and Cleanup:
Ensure that all work meets safety and building code requirements. Clean the entire area thoroughly.
Enjoy Your New Kitchen:
Once the renovation is complete and everything is in its place, enjoy your beautiful, functional open kitchen.
Remember that open kitchen renovations can be complex and may require careful planning. It's essential to stay within your budget, communicate with your contractors and designers, and be flexible as unexpected issues may arise during the process. Ultimately, a well-executed open kitchen renovation can enhance the heart of your home and improve your overall living space.
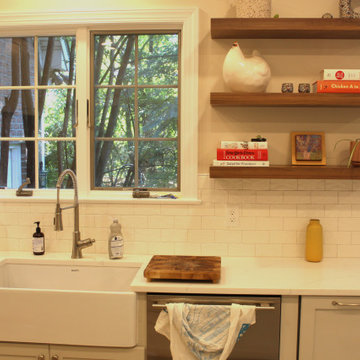 Talon Construction Inc.
Renovating an open kitchen can be an exciting project that can improve the functionality, aesthetics, and value of your home. Here are some steps to guide you through the process:
Planning and Design:
Define your goals and budget for the renovation.
Determine the layout of your open kitchen. Consider factors like the work triangle (the relationship between the stove, sink, and refrigerator) and the flow of traffic.
Choose a design style and color scheme that suits your preferences and complements the rest of your home.
Research and Inspiration:
Collect inspiration from magazines, websites, and social media platforms to get ideas for your open kitchen design.
Create a mood board or vision board to help you visualize the final look.
Hiring Professionals:
Depending on the scale of your renovation, you may need to hire professionals, such as architects, interior designers, contractors, and electricians. Make sure to check references and get multiple quotes.
Demolition and Structural Work:
If your renovation involves structural changes, like removing walls, this is the time to do it. Ensure that the necessary permits are obtained.
Plumbing and Electrical Work:
Update or reconfigure plumbing and electrical systems as needed. This may include adding or moving outlets, switches, and lighting fixtures.
Cabinetry and Countertops:
Choose and install new kitchen cabinets and countertops. This is a significant part of your renovation and will greatly influence the kitchen's appearance and functionality.
Appliances:
Update or install new kitchen appliances, including the refrigerator, stove, oven, microwave, and dishwasher.
Flooring:
Select and install flooring that is suitable for a kitchen, such as hardwood, tile, laminate, or vinyl. Ensure it complements the overall design.
Backsplash and Wall Finishes:
Install a backsplash that matches your design and protects your walls. Consider materials like tile, glass, or stainless steel.
Lighting:
Choose and install various types of lighting, including ambient, task, and accent lighting. Pendant lights above an island or breakfast bar can add style and functionality.
Paint and Finishing Touches:
Paint the walls and ceiling in the colors you've selected. Add finishing touches like hardware, window treatments, and decorative elements.
Furniture and Accessories:
Bring in furniture, such as a dining table and chairs, barstools, and any other pieces you need to complete the space. Decorate with accessories like artwork, plants, and decorative items.
Final Inspection and Cleanup:
Ensure that all work meets safety and building code requirements. Clean the entire area thoroughly.
Enjoy Your New Kitchen:
Once the renovation is complete and everything is in its place, enjoy your beautiful, functional open kitchen.
Remember that open kitchen renovations can be complex and may require careful planning. It's essential to stay within your budget, communicate with your contractors and designers, and be flexible as unexpected issues may arise during the process. Ultimately, a well-executed open kitchen renovation can enhance the heart of your home and improve your overall living space.

Sponsored
Plain City, OH
The Creative Kitchen Company
Columbus Area Kitchen Remodeling and Refacing Professional

 Karen Beam Architect LLC
Home studio - mid-sized traditional freestanding desk light wood floor home studio idea in Philadelphia with white walls and no fireplace

 Elizabeth Strianese Interiors LLC
Meredith Heuer
Example of a large transitional master white tile and ceramic tile porcelain tile bathroom design in New York with a trough sink, flat-panel cabinets, a one-piece toilet and multicolored walls
Example of a large transitional master white tile and ceramic tile porcelain tile bathroom design in New York with a trough sink, flat-panel cabinets, a one-piece toilet and multicolored walls

 Vintage Cellars & Saunas
This gorgeous contemporary glass front custom wine cellar in Corona Del Mar, Newport Beach, California is an eye catcher. The sleek, glass ultra modern wine room was a unique and exciting project for our team here at Vintage Cellars. The stone bar extends into the wine cellar itself, but due to mechanical, cooling, and condensation concerns, our expert custom wine cellar team knew that extra measures needed to be taken to ensure the end quality remained top notch.
The bar itself was divided into two sections, one cut section outside to make up the main seating area and the other inside the glass wine room. The stone bar, which is porous, takes up a good portion of the front facing glass panel. Had the bar simply extended into the wine cellar and been sealed off at the joints, the stone would have eventually transferred in enough heat and moisture to cause condensation. Proper wine cellar design and planning enabled this wine cellar to not only look fantastic, but function perfectly as well.
One interesting unique feature in this Corona Del Mar, Newport Beach, Orange County, California glass and metal wine cellar is an extension of floor to ceiling frames mounted to the backside of the stone bar. This feature was made to seamlessly show consistency in floor to ceiling vintageview frames throughout.
Corona Del Mar, Newport Beach, Laguna Beach, Huntington Beach, Newport Coast, Ladera Ranch, Coto De Caza, Laguna Hills, San Clemente, Dana Point, Seal Beach, Laguna Niguel still remain the areas in Orange County that we build wine cellars most often.
Contemporary wine cellars such as this are becoming more and more popular in modern design trends. Interior Design, Architecture, and Construction all play a part in ensuring that the client’s vision comes to reality. This project was no different. Working closely with David Close Homes, Vintage Cellars was able to meet with the client and team involved, determine the ultimate wine cellar wine room wine closet goals, and see them to the finish.
Upon walking into this glass and metal modern contemporary wine cellar, you become quickly surrounded with triple deep bottles from many of the world’s best wineries. On the left below the countertop is a black stained poplar wine racking system for single 750ml bottles. Above lies room for display case storage, room for large format bottles, and label forward vintageview design racking to the ceiling. On the middle wall of this wine room is room for case storage below, similarly with triple deep vintageview floor to ceiling frames dying into more case storage above. On the right side of this wall lies a vertical space for single large format case storage.
Ultra Modern wine cellars such as this are all the rage in contemporary homes in San Diego, Orange County, and Los Angeles. This glass enclosed wine cellar with a sleek modern contemporary racking system is truly a showpiece in this home in Corona Del Mar, Newport Beach, California. Wine Racking, Wine Cellar Cooling, Wine Cellar design, Wine Cellar Build out and Wine Cellar Installation is what Vintage Cellars does best. Timeless Luxury.

 California Closets HQ
A monochromatic color palette and proper accent lighting elevate a home office to a relaxing gathering place.
Trendy home office photo in San Francisco
Trendy home office photo in San Francisco
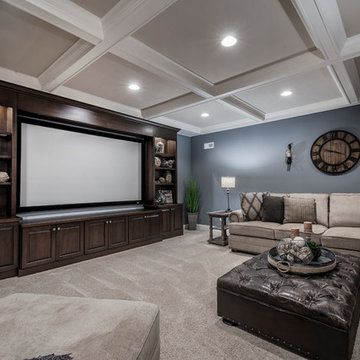
Sponsored
Delaware, OH

Buckeye Basements, Inc.
Central Ohio's Basement Finishing ExpertsBest Of Houzz '13-'21
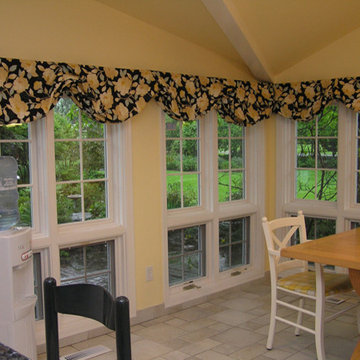
 Well Dressed Windows, Inc.
Another challenging project completed! The drop ceiling in the corner was ever so difficult to work around! Balloon valances that perfectly match the wall color were fabricated and installed by Well Dressed Windows. Visit our website, www.DressedWindows.com for more of our work.

 David Henig, Architect
Eric Rorer
Eat-in kitchen - large 1960s galley medium tone wood floor eat-in kitchen idea in San Francisco with an integrated sink, flat-panel cabinets, white cabinets, wood countertops, white backsplash, glass sheet backsplash, stainless steel appliances and an island
Eat-in kitchen - large 1960s galley medium tone wood floor eat-in kitchen idea in San Francisco with an integrated sink, flat-panel cabinets, white cabinets, wood countertops, white backsplash, glass sheet backsplash, stainless steel appliances and an island

 Normandy Remodeling
The floor to ceiling tile in this master bathroom shower create a relaxing retreat for these homeowners. The zero threshold shower is an ideal element for these homeowners to comfortably age in place in their forever home. The floor to ceiling tile not only adds visual interest to the space, but allow for a steam shower as well.
Normandy Remodeling
182