Software
Houzz Logo Print
mtnfever

put soapstone on 1/4'' plywood?

Does anyone have their soapstone counters laid on 1/4'' plywood to make them 1.5'' thick? Or do you have less than 1.5'' counters?

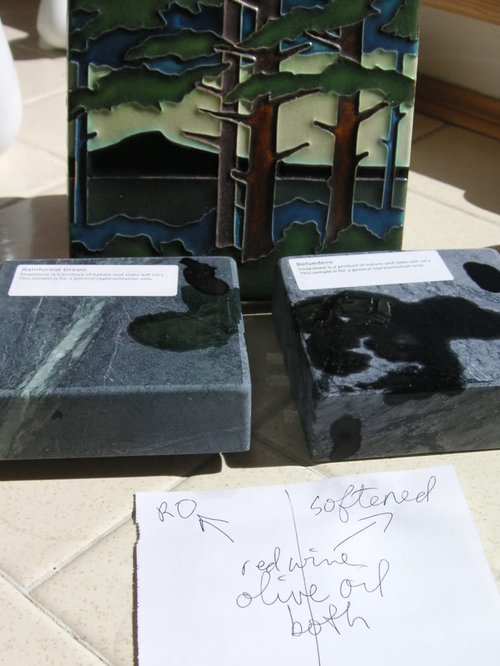
I received Belvedere and Rainforest Green samples today and they're currently undergoing oil, wine, RO H20, softened H2O, and minor league scratch testing. The Belvedere sample is 1 1/4'' and the RFG is 1 1/8'' which I understand are pretty normal thicknesses for soapstone. Here's a pic of the samples along with a bonus shot of my Motawi BS centerpiece tile.


Inside the little black circles are scratches from a tomato paste can, which I had to work pretty hard at to put in the scratch.


In this pic, the RFG (left) is sitting on a 1/4'' shim. The stone projects 1.5'' beyond the shim just like the stone would project beyond the cabinet face frame. So, unless you stoop and look up under the edge, you can't see the extra wood piece. Of course, I would waterproof that wood edge all the way around before installation. The stone still wouldn't match the sink's front depth, I understand that, but the tops would be even.

I have thought that I want 1.5'' thick counters to match my ''mini-apron'' sink front thickness. Here's a pic of the sink which some of you may remember from my ''vintage sink in non-vintage kitchen'' thread (and *many* thanks again to those posted in that thread! It has really focused what I want in the mini-remodel).


Unfortunately I don't have a good picture of the front edge of the sink, and it's in storage so not easy to get a quick pic.

Experiences and opinions welcome, thanks in advance!

cheers

Comments (16)

  • 14 years ago

    I was told not to use any plywood under soapstone as it would show otherwise. I am doing Belvedere and just plan to install right on top of the cabinets

    Lalitha

  • 14 years ago

    I have my soapstone on a 1/2" thick plywood with a notched out area for the DW. The reason for this was that the cabinets were put on the floor that didn't have the same height as the rest of the floor. Along this one wall they sat lower than the rest of the room. It was lower because I took out 60-70 year old cabinets. Some time after the old ones where installed 1/2" or so ply was put down and linoleum placed. The cabinet installer suggested the slight height difference would be helpful to level cabinets...wrong. Fortunately I did split the difference and laid a 1/4" ply down before the cabinets went in. After I measured for the SS counters with the DW in place I realized that the DW sat too high by about 1/4" so the plywood solution came to me with a keyhole to slide the DW in and out with plenty of clearance.

    Another problem was that the new cabinets were too shallow, front to back, compared to the old ones, and there was a narrow gap in front of the toe kick space where the raised flooring didn't quiet meet. My neighbor said have the cabinet people finish a 1x4 and face the toe kick on that run of cupboards. It worked great and I don't notice the shallow toe kick. I don't notice the 1/2" height difference from the other run across the small room.

    Last, there was enough of the finished 1X4 to rip off a 1x1/2 or smaller to face the exposed plywood until you get to the DW. I carved out the plywood back from the edge at the DW and used a black sharpie to blacken it so you can't see it. These pictures are before the Sharpie upgrade.

    Does this make sense?

  • 14 years ago

    I don't understand. Isn't that a self rimming sink? (cut hole in soapstone, drop sink in from the top)

    1/4" ply? Are you topping the cabinet frames with 1/4" ply and then laying the soapstone on top of that?
    If so, just make the ply flush with the face edge of the cabinets, install soapstone, and trim out under the lip with a piece of 1/2" oak quarter round.

    Then again, I may be showing my ignorance. I really don't understand the plan.

  • 14 years ago

    Thanks for replying, Lalitha! From what I could read, pretty much people do just as you say and install right on top of the cabinets.

    The front edge counter depth doesn't matter if you have an undermount sink or a normal apron/farm sink that has a deep front, so I don't think my question is very common.

    I can't wait to see your Belvedere counters!

    thanks again and cheers

  • 14 years ago

    Thanks, enduring, especially for the pics! Yes, what you did makes sense and is similar to what I'm talking about, with you raising the soapstone to accomodate your dishwasher and me wanting to accomodate the sink.

    Thanks for your question, Dando, this sink I don't think is self-rimming. It's the sink pictured in this 1948 AS plumbing catalog (picture from antiquehome.org as linked below).


    From the pic, it looks to me like it's made for laminate counters in the 1.5'' size. I may end up doing laminate but am interested in soapstone if I can make it work for me. And definitely *yes*, when you say ''just make the ply flush with the face edge of the cabinets'' that is *exactly* what I'm talking about so you've got it!

    Because this sink *is* the countertop and takes up enough room, I would be able to do cut-to-size soapstone for the whole kitchen for $1500 and just have to install rectangles of soapstone without no cutouts or faucet holes.

    Thanks again, and cheers!

    Here is a link that might be useful: sink on antiquehome.org

  • 14 years ago

    Unfortunately, the key for us to understand your question is the details of how your (lovely, BTW) sink is mounted.
    My surmise is that:
    (0) your sink has a mini apron front that is 1.5" thick (you stated this)
    (1) the bottom of this apron rests on the top of your cabs
    (2) if you also put your soapstone on the cabs, the countertop would sit ~1/4" lower than your sink.

    If I have that correct, I would say go for it. I agree having the top of the counters level with top of sink would be good.

    Your proposed solution, of course, won't make the SS appear 1.5" thick -- will just make the top of it 1/4" higher.

  • 14 years ago

    Putting a shim under it won't make it thicker, just higher.
    Since the iron sink is made with some kind of radiused edge, it would IMO be better if it were somewhat higher than the abutting C-top sections; otherwise, you have a valley which will fill with crud unless you top it off with caulk or ??
    Casey

  • 14 years ago

    Thanks for replying, Angie_DIY, and are you taking a break from DIYing your own soapstone counters as we speak?? All of your surmises are correct and thanks for the encouragement.

    Here is the underside of the sink to perhaps help clarify, again sorry for a not-so-good pic. On one side you can see big black arrows pointing to the supports underneath the drainboards and the bottom edge (where you can see DH's gloves lol) is the front lip of the sink.


    DH will build supports in the cabs in general and also specifically for the sink support points.

    thanks again, and cheers!

  • 14 years ago

    Looking at the picture that includes your sink model shows the counter below the height of the sink. This seems to be one installation solution. Why. The 1-1/2" sink has a radiused top edge. The flat side area begins below the top level and to mount the sink at the level of the counter will create an indentation along each side front to back. Caulking that space would give a large grout line. Soapstone is kinda soft and could be routed in a curved backcut for a tighter finish showing only at the front corner.

  • 14 years ago

    Thanks for replying, Casey, and you're right, caulk (or?? if someone has a better solution) is the answer to all things sink-counter-gap-wise. Whether the counter is the same height or lower than the sink, it'll be caulked. Discretely but still caulked. Caulk can be removed and replaced easier than I can clean under the rim my current drop-in sink.

    Dan1888, you think that the old picture looks like the laminate metal edge trim is lower than the sink edge? Hm, I guess I wasn't seeing that but maybe so. And I can understand your point about a lower counter height having a smaller caulk line since it would abut the flat side of the sink.

    And also I see now --d'oh!--that's what Casey was saying too about the radiused sink edge working better with a lower counter edge. Ah ha!

    Very good thoughts, thanks again, and cheers!

  • 14 years ago

    I also think, after having read Casey's comment, that the vintage picture you show has the sink "proud" of the countertops.

    Thanks for replying, Angie_DIY, and are you taking a break from DIYing your own soapstone counters as we speak??

    Guilty as charged! The good news is that all of the pieces are now in their assigned places. I have one seam epoxied, and one more to do. (I have to wait on that until I, believe it or not, make one piece of slab thinner by 1/8"!)
    Tomorrow, I get to cut the sink hole out. I think the counters look great!

  • 14 years ago

    Thanks for checking back, Angie_DIY. I think Casey, dan1888, and you all have the right idea to have the sink be above the soapstone.

    Since the Motawi tile will be 'proud' of the field tile, maybe having the sink 'proud' too will become a design element. Yeah, uh huh...

    Thanks to all for contributing!

    cheers

  • 14 years ago

    love your sink!

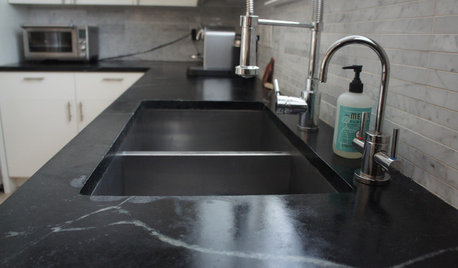
    Maybe these pictures will give you some ideas. Soapstone is 1 1/4" thick.

  • 14 years ago

    Thanks, macybaby! Those are great close ups of your sink and soapstone. It looks nice with the sink rising a little above the soapstone.

    So I don't need no stinkin' plywood :) .

    cheers

  • 14 years ago

    Yours doesn't have the face portion of that farmhouse sink. So it can't mount on top of the counter without being moved back from the edge enough for counter material to run in front for a dimension that fits the front lip width. Eyeball trial and error with samples.

  • 14 years ago

    Thanks, dan1888, you're right that my sink doesn't have an upper rim like macybaby's but I appreciated seeing how they designed their soapstone to meet with their sink. And the extremely unobstrusive caulk joint!

    cheers

Sponsored
Wannemacher Interiors
Average rating: 5 out of 5 stars26 Reviews
Customized Award-Winning Interior Design Solutions in Franklin Cnty OH