Software
Houzz Logo Print
mdodnc

Toe kicks and frameless cabinets

17 years ago

We are going with Scherr's frameless cabinets with the leg levelers. We have a desk area next to the wall oven and a 3' x6' island that will have cabinets on both sides. How do you handle the toe kicks on the end of exposed cabinet sides and the seam where the cabinets back up to each other on the island?

Comments (15)

  • 17 years ago

    I installed our Scherrs and installed the toe kicks. Sorry, I'm not able to make out your question, so I suspect my answer will be off. The toe kicks are determined by where you attach the leg levelers. On our island, I installed them so that the toe kick was consistent all around the island.

    In terms of the seam, we went with end panels. I would suggest you ask Leon about that. Leon will explain your installation and alternatives if you don't like the planned look.

  • 17 years ago

    I have frameless Ikea cabs. At the ends of cabinet runs and at the end of the island, we cut end panels for high cabinets to make base cab end panels that go all the way to the flooring. I thought this was a little more aesthetically pleasing than using the standard base cab cover panels, which would have had toe kick at the bottom-- but it's a preference thing, and having toe kick at the ends is less expensive to do, and eliminates a gunk-collecting inside corner:

    Where we had cabs back to back on the island, we used two end panels, with a seam in the middle. The end panels were finished on both edges, so the seam is neat, though the panels are not grain-matched as they would be in higher-end cabinetry. I have dark cabs, so the seam is not that glaring. Still need to paint that granite support!


    Sorry, those are not the best pics to illustrate what we did, but hopefully you get the idea.

  • 17 years ago

    morton - i love you kitchen! and the brown cabs - what's the SS there with them by the doorways? a freezer?

  • 17 years ago

    Desertsteph-- thanks, and the SS is a 24" "apartment-sized" CD refrigerator-- top half is fridge, bottom half freezer, about 10 cu. ft. total. We use it mainly as the "kids' fridge." It hold extra milk, yogurt, fruit, cheese and drinks in the top half, and ice packs, ice cream, and frozen baked goods in the bottom half. We have a large family and the extra fridge gives us extra space (obviously), and also keeps the kids out of my main cooking area.

  • 17 years ago

    here is a picture of our scherrs island. The wood is red birch and the floor is marmoleum. We painted the toekicks black to give the cabinets separation from the floor.

    My only other recommendation is to talk to Leon about your electrical plans. The drawers are the full dpeth of the cabinet, which is great except for having electrical (or plumbing) accessories. Luckily we wanted plugmold (on the other side), otherwise there wouldn't have been room to put an electrical box in the island.

  • 17 years ago

    overlyoptimistic: Yes, I think you answered my question. Yours is like the whole island is on a pedestal, right? Leon said we could leave a toe kick all around or we could treat it like furniture and they could do something special but I wasn't sure what my options were. I've been trying to look at pics of islands but most, including the one of mine below, don't show the toe kick area of the island. I saw a couple that didn't seem to have any toekick and only one that I remember with the toekick all around.

    When you say you used end panels, do you mean that you attached a fake door panel to the end, or just a plain wood panel? I've heard of people putting "skins" on the ends but I wasn't sure how that worked with frameless cabinets since the box is the side and there's no frame to cover any added wood panel that went to the floor. It sounds like that's what Morton5 did.

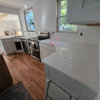
    I am more worried about how that works on an end run, especially at the desk/oven area. Here's a pic of my current kitchen.

    I used a 21" deep, vanity height drawer base for the desk area so it's set back a few inches from the oven cabinet on one side and open on the other side. I think I like that change in depth. The cabinets have a side that goes down to the floor and is notched at the toe kick. It seems like it would look weird to have the toe kick wrap around the corner there.

    Morton5: Thanks for the pics. Very nice kitchen! So the normal base sides have a notch for the toekick in them like what I've got now? Are the end panels the same thickness as the cabinet sides? With frameless cabinets the doors and drawer fronts are full overlay so when you add the end panel do you make that panel flush with the front of the box (recessed from the door) or do you make it flush with the door? I can't tell for sure by your picture.

  • 17 years ago

    My frameless cabinets are Brookhaven, but you have the same issues. My island is made of 21" deep adn 13" deep cabients back to back. One end has a bookcase across it, so there is no seam visible there. There are panels on the side to match the doors. On the other end, we did a solid panel to cover the end and added trim to mirror (not match) the door panel design. The bookcase end has what my cabinet person referred to as a furniture treatment -- the toekick piece sits in front of the cabinet face with a decorative edge on top. The other end is just like the rest of the toe kick -- rubns around recessed. The panel on the end comes down the same as the fronts of the cabinets -- not to the floor.

  • 17 years ago

    Mdod, it sounds like Scherrs and Brookhaven frameless are different than Ikea. Ikea boxes do not come with finished sides. The boxes are covered with door/drawer fronts and cover panels to cover the birch or white melamine. If I am understanding correctly, an end-of-run box in your design has a finished side. Sorry, given the different construction my post was probably not that useful.

    The standard Ikea base cab end panels are not notched, but only cover the side of the box down to the toe kick. So, on an island you would have a pedestal look, like overlyoptimistic's (love those cabinets!). Instead of using base cab end panels, my carpenter cut a tall cab end panel in two, giving us two counter-to-floor end panels. It was a little pricier to do it that way, but I preferred the look. Plus, my carpenter had built a wooden base for the Ikea cabs (he didn't like the adjustable legs), so we needed the longer end panel to cover the base.

    The cover panels protrude forward from the box but are not quite flush with the doors-- they are recessed by about 3/16 inch. This bothered my carpenter and GC-- they thought it looked cheap-- but I was okay with it. It would be better if Ikea made the end panels to be fully flush with the doors, and I'm not sure why they don't do it that way.

  • 17 years ago

    One thing to watch for , this isn't about the toe kick, is that with frameless usually your filler is flush with the box not the door so if in a short run that is open on one side you put on a cover panel or fake door that is flush to the front door then on the wall side your filler would be flush with the box only so it looks a little asymmetrical.

    I can't tell but in the run with the small fridge in morton5's pic it look like the filler on the sides is the same depth as the full height panel between the tall cabs and the fridge opening. If so morton5 how did your contractor do this ? (laminate two filler pieces together? or are the side pieces full panels?).

    You can see here that the fillers are flush with the box:

  • 17 years ago

    Caryscott, the filler pieces on the sides of the fridge/pantry area are made from something Ikea sells called "deco strip" that is used both for filler, and as moulding at the top of cabinets. My carpenter ripped it down to fill the space, and nailed it to framing he put in on either side of the cabinets. It's one of those touches I don't think I would have gotten from an Ikea installer.

  • 17 years ago

    It looks to me like morton5's carpenter used the tall cabinet covers on both sides to attach the deco strip to. That's why the filler is nearly flush with the doors (3/16 inch off, as morton5 said above).

    I have an ikea kitchenette in my basement and I have never noticed this 3/16 offset before reading this thread. Amazing what detail you all notice on this forum!

  • 17 years ago

    My installer had to do something similar for my crown. He nailed a support strip to the box to be flush or nearly flush with the face and then applied the finished piece to that support piece.

  • 17 years ago

    mdod,

    I got my cabinets from Scherr's also, and installed them myself. For toekicks for the exposed ends of runs of cabinets, (such as the peninsula), I did pretty as overlyoptimistic did, and had the toekick recessed along the exposed end similar to the fronts of the cabinets. (Although I think I may have had the end runs of toekicks recessed somewhat less than the toe kicks along the front.)

    Also regarding your island, where two cabinets sit back to back, one possibility might be to have Leon make a double-sized finished end panel that would be shared by both cabinets. After all, Scherr's makes truely custom cabinets. Assuming the cabinets are to be standard depth (24"), it should be possible to make a double width finished end-panel from a 4x8 sheet of veneer surface furniture board.

    Sorry I don't have pictures of the toekicks, I have a bunch from when the kitchen was "mostly done" but the toekicks hadn't been done yet, and since I'm not finished, I haven't taken a newer set of pictures.

  • 17 years ago

    Just to clarify the end panel. The end panel is just a door without any holes for hinges. You connect this door to the side of the box and it makes it look like a door. Some cabinet makers make their end panels as an integral part of the box, others, like Scherrs, makes it as an applique. Like Bob mentioned, Scherrs is fully custom; best to work with Leon to make sure that you understand everything and all of your options.

  • 17 years ago

    overlyoptimistic, your pics must have posted while I was writing. Thanks everyone for the comments and pics. I was wondering how you work with the filler pieces so that picture helps. I'll probably have more questions after I have a chance to sit down and digest this stuff.