Software
Houzz Logo Print
dee850_gw

Finished kitchen: DIY Ikea & mexican tile, low budget

12 years ago

It took over 10 months of work after years of planning, but we finally have a finished kitchen to share. I haven't been on this board in a while, but I received tons of useful advice and opinions from many of you here throughout the planning and in-progress stages, not to mention the info I got from reading others' posts, so I have to say a big thank you to everyone who has participated here for the past several years.

This was a mostly DIY and low budget renovation (just over $11K). We started out with a pretty cute but not very functional kitchen (all fixed shelves, lowers had only half-shelves, drawers literally falling apart), and thought we would just fix some issues and do a bit of cosmetic updating. Then we discovered water damage under the sink and in neighboring cabinets. These were built in place by hand in the 1970's and there was no fixing just one or 2 cabinets. We definitely had to do a full tear-out.

We knew this would be DIY, and initially planned to buy RTA cabinets from Barker's and paint them navy blue. Then I completed some woodworking projects and decided I was sick of finishing, and just didn't have it in me to do all that painting to an acceptable standard. We ended up liking the Ikea Ramsjo white cabinets, and made some minor tweaks to our layout to make those work instead for less money. We also used Ikea numberer wood counters. I must mention that Barker's was awesome with quotes and questions - I would not hesitate to use them on a future project despite the fact that we didn't go with them this time.

The only aspects of the renovation that were not DIY were electrical (new circuit added for oven, plus fixing all manner of scary hazards that had apparently existed in the house for years), plumbing (had to move pipes), and countertops. We could not lift the large countertop for the peninsula, so we had a friend who is a contractor come in with his partner and handle that.

We did not have to re-do the floors, because we had installed those (hickory) when we moved into the house. The flooring at the time was a wreck, so we didn't wait. We did have a spot to patch where the floorplan was not the same, but it turned out to be a pretty easy DIY with the tongue and groove flooring we had leftover from the original installation.

The budget breakdown (approximate):
Cabinets, Ikea Ramsjo White, birch countertops, and Renlig dishwasher: $5,000 We made our purchase during one of their sales and got 15% off.
knobs & pulls, Hafele from myknobs.com: $160
oak shelf brackets, Tyler Morris Woodworking through Amazon: $140
oak 1X12 for shelves, Home Depot: $70
GE single/double oven & Profile cooktop, Sears Outlet floor models: $1600
Elkay double-drainboard sink, e-bay: $160 (probably our best deal - this sink retails for about $1200)
Local metal shop work to fix minor dents in the sink: $30
Danze Parma faucet & soap dispenser, amazon.com: $260
Waste King garbage disposal, amazon: $130
Broan range hood, Overstock.com: $580
Mexican tiles, e-bay: $150
supplies for tiling (grout, caulk, etc): $75
saw blades, nails, glue, additional hardware supplies: $100
Paint, Benjamin Moore (Light Blue walls, Simply White ceiling & trim, custom mix for cabinet molding): $175
painting-related supplies: $50
molding, Home Depot: $150
wood blinds (mocha), justblinds.com: $240
electrician: $1200 (hourly rate including some additional non-kitchen work)
lighting, Lowes: $140
contractor labor for counters: $500
Osmo Top oil for counters: $30
plumber: $200 (included some additional non-kitchen work)

Total: $11,140

Of course, that's not including all the meals eaten out while we were without a functional kitchen! We tried to do the temporary kitchen in the dining room, but restaurants and take-out were often too tempting :)

On to photos.

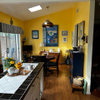
Some befores:

The old backsplash was laminate on particleboard, and was a huge pain to remove. It had been screwed and glued in place before laminate went on.

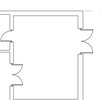
And this is the old layout:

The new layout is nearly identical. We ultimately decided that we really liked the way the U-shape worked for us. But we made the peninsula shorter and wider, so we have 45" between the end of the peninsula and the cabinet next to the fridge, and the peninsula is about 39" wide.

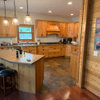
The new kitchen:

The 24" cabinet by the wall on the peninsula is 24" deep with roll-out wire baskets, while the others are 12" deep with adjustable shelves.

We do still plan to change out that "nipple" lamp in the center of the U, so I guess we can't say we're 100% finished.

The 15" cabinet with drawer on top at the end of the peninsula is a pull-out for trash. We love this.

The only upper cabinets are here. We went with the 30" height cabinets because our ceilings are a bit lower than 8 feet and are not level. 36" really would have been perfect, but the only other option with Ikea is 39" unless you use custom doors and cut the cabinets down yourself, which we did not want to do.

The sink is not centered on the window. We made that decision to get a better layout, and have no regrets. That's the Ikea dishwasher with Ramsjo door panel on the left. It is a huge improvement over our old one.

The open shelving has been great for us. We do not miss uppers here at all, and the kitchen is so much brighter. A couple of those plate stacks get a little higher when the dishwasher is emptied.

We did the peninsula end along the lines of how they do them for the Ikea displays. I would have liked to have just 1 panel, but to do that would have involved trimming the cabinets and the counter more, so we opted for the lower-effort approach. This photo also shows the area where we did the floor patch in front of the end of the peninsula. I'm pretty proud of how seamless that turned out.

Closer view of the backsplash:

And finally, our dogs hoping we will drop some food:

Comments (41)

  • 12 years ago
    last modified: 11 years ago

    That looks fantastic! I love it.

  • 12 years ago
    last modified: 11 years ago

    Really beautiful, and fantastic job on an amazing budget! Well done.

  • 12 years ago
    last modified: 11 years ago

    Can you post a closeup of the mexican tile? Everything looks great!! What is the lower cabinet to the right of the sink?

  • 12 years ago
    last modified: 11 years ago

    Really beautiful, and fantastic job on an amazing budget! Well done.

  • 12 years ago
    last modified: 11 years ago

    Looks fantastic! I love how the wall color and shelving really tie in with the tile, it all looks so cohesive. If I had an Ikea closer than 3 hours I would have seriously looked at using them. I have yet to see an Ikea kitchen posted here that I don't love.

    Great job with the floor! And also the bargain hunting :-)

  • 12 years ago
    last modified: 11 years ago

    Nice work! Great use of a colorful tile.

  • 12 years ago
    last modified: 11 years ago

    Thanks everyone!

    TexasPenny, the cabinet to the right of the sink is a 37" lazy susan cabinet. We store all of our pots and pans in there - it is huge inside and the lazy susan mechanism is great. That used to be a blind corner that we really could not use.

    Here's a closer image of the backsplash. We used antique white polyblend grout, and approximately 1/4" spacing, but the tiles are irregular so it varies.

    williamsem, we are actually 5 hours from the nearest Ikea, but we ordered online and had them ship it all for about $300. We had been to the store in person previously to look at things, but didn't want to rent a truck and haul the purchase ourselves. For anyone considering the delivery option, I highly recommend it. There were a couple of screw-ups (missing hardware, door with imperfection), and Ikea immediately shipped replacements for free when we called customer service. We over-ordered a few things just in case - extra end panels, toe-kicks, cabinet legs - and will probably get about $300 back when we get a chance to stop at an Ikea and return them, since there is one along the way on a road trip we'll be doing later this year.

  • 12 years ago
    last modified: 11 years ago

    Amazing! Its so good to see your wide island used as storage instead of the usual stools/overhang too close to the table.
    I wish I knew about drainboard sinks before I did my removal... They are great!

  • 12 years ago
    last modified: 11 years ago

    Very pretty. Congratulations. You have a lot of talent, and did great with your budget.

  • 12 years ago
    last modified: 11 years ago

    Wow, what a fantastic space! You did a great job - including the floor patch - can't tell! The shelves certainly do open things up a bit - I'd be too chicken to do that, but every time I see it in a reveal, I'm very impressed.

    Enjoy your new space; you deserve it! (And drop just a little bit of food, since the dogs did suffer thru reno with you... :) )

    Edited to add: I meant to also thank you for the cost breakdown - as one who has yet to embark on this nightma...I mean journey, it's a big help!

    This post was edited by KBSpider on Sun, Oct 20, 13 at 0:06

  • 12 years ago
    last modified: 11 years ago

    That tile wall is a wonderful statement! It makes your kitchen a one of a kind 'wow' kitchen :)

    Nice job on everything! The open shelves are so handy and the blue looks great, with the white cabinets and wood counter tops.

  • 12 years ago
    last modified: 11 years ago

    great job! your doggies are adorable. i LOVE your mexican tile backsplash. it is a showstopper for sure!

  • 12 years ago
    last modified: 11 years ago

    Can you describe the sort of things that your local metal shop did to the sink?

    I have scored a fab old Lustertone sink that has a few cosmetic issues and needs to be converted from a drop in to an undermount, so I was planning to take it to my metal fabricator for some teaks. I only paid ten bucks for it at the Habitat Restore, so I've nothing to lose it if doesn't work out..

    I envy your double drainboard sink, usually the bowl on those is dinky, but yours is just grand!

    L.

  • 12 years ago
    last modified: 11 years ago

    Thanks for the heads up on the shipping! I might use them for a smaller project next year, but I'm the type of person that makes a few dry runs to spens hours scrutinizing all the pieces available to make my game plan. I spend an obscene amount of time at HD when mapping out my little DIY projects :-). But those Billy bookcases might be too tempting...

  • 12 years ago
    last modified: 11 years ago

    Thanks for posting! I am thinking of doing the same combination for a basement rec room kitchenette. Was the pull out trash an Ikea hack? Or, do they offer that cabinet option?

    Also, I love the tile!

  • 12 years ago
    last modified: 11 years ago

    Just beautiful and one of the more dramatic transformations.
    That tile is such a statement! Makes me want to salt a rim...
    Love the sink - perfect that you didn't center.

  • 12 years ago
    last modified: 11 years ago

    Thanks to all!

    KBSpider, I always appreciate when people give budget details, too. I definitely benefited from others posting theirs so I had a realistic picture of costs.

    williamsem, we are similar - it probably cost us a year on this project because we had to look at things in person "one more time" a few times. We pass a couple of Ikea stores on an annual road trip we do up the east coast, so we were just very patient, lol.

    sreedsq, that pullout is a hack. We purchased the 15" base with top drawer and adjustable shelf, so it came with the correct door size, then we got an extra 15" deep drawer for the bottom pullout. We did need to get some item of extra hardware (I'm forgetting exactly what now) to make the conversion, but an Ikea rep on the phone knew what we needed and sent it free. The only real modification we had to make was to drill a couple of extra holes in the door for it to serve as the drawer front, and it was easy to make a template for those holes from our other 12" pullout door.

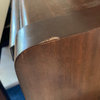
    liriodendron, our sink had a few dents around the lip:


    There was one more even smaller dent at the back. They were relatively minor but would have prevented the sink from sitting flat on the counter. We banged out the side dent pretty well ourselves, but then when I found the metal shop and they said they'd handle it for so little cost, I figured we may as well leave it to the pros! It took them about 20 min to make it just about perfect.

  • 12 years ago
    last modified: 11 years ago

    Congratulations! I love mexican tile and it really adds impact here. It was so smart to get that deal on the double drainboard sink. What a great solution to avoid the hazard of standing water on the counters.

  • 12 years ago
    last modified: 11 years ago

    What I love most about your project is it has personality, not just a cookie cutter version of The kitchen! Thanks for sharing.

  • 12 years ago
    last modified: 11 years ago

    Wow, you really got a lot of bang for the buck! First off, I love the wood floors with the wood counter top. Such a great look in general, but esp. your floors are gorgeous. I think the chunky crown around the uppers looks great. And the sink... spent many an hour perusing those type of sinks when I started my planning. What a deal! Love the mexican tile and the blue walls with the wood and white. Looks crisp and clean and much more open and airy. Ya, and give those pooches a treat, too!

  • 12 years ago
    last modified: 11 years ago

    wow you did a great job! Love the tile. Looks like you've packed a lot of punch in the space.

    Cute dogs!

  • 12 years ago
    last modified: 11 years ago

    Great job, it looks absolutely fabulous! Enjoy it and may it bring you many many years of happiness. :)

  • 12 years ago
    last modified: 11 years ago

    Wonderful job! I am very impressed. Enjoy your new kitchen.

  • 12 years ago
    last modified: 11 years ago

    I want that sink!

    Excellent job - you have both patience and taste and it shows.

  • 12 years ago
    last modified: 11 years ago

    Your old kitchen was adorable, but the new one is really lovely. It has so much personality. I love the warmth of that BS tile and the counters. That looks like a remodel that cost 3x what you spent. And it goes with your dogs! Great job. Congratulations!

  • 12 years ago
    last modified: 11 years ago

    WOW! What an amazing transformation! I love that tile wall!

  • 12 years ago
    last modified: 11 years ago

    Love your wood counters, wood floors, that sink, your crown molding in your frig area & your beautiful tile! Those darling little dogs look like they deserve a treat!

  • 12 years ago
    last modified: 11 years ago

    Love, love, LOVE the backsplash!!! I believe the correct term is a "Home Run"....

  • 12 years ago
    last modified: 11 years ago

    wonderful execution! those tiles are incredible as a focal point.

    That trim looks awesome- could you post your BM matching paint for the Ramsjo? Did you bring in a door for them to color match it? Is there a formula that you could share?
    thanks!

  • 12 years ago
    last modified: 11 years ago

    Thanks for all the positive feedback!

    Scrappy25, yes, we brought a scrap end panel in for custom matching at my local paint shop. They are fantastic (for anyone in Tallahassee, FL: Eppes Decorating on Appalachee). Of course it is not a perfect match because the Ramsjo door has variation with wood grain showing, but they got a terrific match, to the point that you don't see a paint spot on the panel. You can tell the difference by finish in the right lighting. None of the paint finishes perfectly match the one on the Ramsjo, so we went as close as we could.

    We used Benjamin Moore Regal Select pearl finish, formula on the can:
    Y3: 1.8125
    S2: 5.50
    R1: 1.375
    S1: 0.25
    R3: 0.25

    The guys at the shop did a lot of tweaking, so I encourage anyone thinking of using this to test first in case they changed something and forgot to note it on the can!

  • 12 years ago
    last modified: 11 years ago

    You did a fantastic job. I also thank you for the detailed cost breakdown. And I also give you a hearty pat on the back for a well done DIY job. I absolutely love the no uppers in the main part of the kitchen. In a smaller space I think it really opens it up. The open shelves are fabulous.

    First, this in no way looks "budget".

    Second, I know so much money gets saved in labor costs by doing it yourself, I would guess (going through our own DIY which by the way is taking longer if it makes you feel any better) that even more money is saved in the long run of a DIY by having the ability to re-look at things, price shopping, and just taking your time making decisions and looking for the best option before deciding. By my figuring your "budget" renovation was more like $30K. Way to go!

  • 12 years ago
    last modified: 11 years ago

    Your dogs are adorable! What kind are they?

    And the kitchen looks great too!

  • 12 years ago
    last modified: 11 years ago

    Oh I love your kitchen! Simple and gorgeous and warm. I love the open shelving and the counters and of course that wonderful tile - you all did a beautiful job. Enjoy!

  • 12 years ago
    last modified: 11 years ago

    Thanks, all!

    Kali615, I agree, besides the $ savings, the slower pace can actually be an advantage in some ways. There were a number of decisions that changed as we went along, and I think for the better. For example, I originally planned painted white floating shelves instead of the oak with brackets. I don't think white floating shelves would have been terrible, but I feel sure now that the oak with brackets was the best choice for us.

    doodledog, the dogs are mini-pinscher/poodle mixes, called pinny-poo. I'd never heard of that particular hybrid until we saw these boys posted on a local rescue website. We planned on getting just 1 but the foster mom brought over the 2 brothers, and that was the end for us!

  • 12 years ago
    last modified: 11 years ago

    Amazing job.... I'm still working on "little projects" very little. Great job, thanks for sharing - gives me incentive.

    Here is a link that might be useful: Home Improvements Made Easy

  • 12 years ago
    last modified: 11 years ago

    Your tile wall is fabulous! as is the rest of the kitchen. Thanks for sharing the breakdown of costs. It helps to see what is possible in a modest budget.
    Enjoy your lovely new space.

  • 12 years ago
    last modified: 11 years ago

    Your kitchen makes me smile. It's so warm and welcoming, yet clean, crisp and warm at the same time. I love everything about your kitchen. The Mexican tiles and light blue walls are what make your kitchen a real standout. Love all the wood too. Nice choices!

  • 12 years ago
    last modified: 11 years ago

    Oh, I love it, especially the mix of the cabinets, tile, and counters!
    Did you paint the Ramsjo doors? If not, how does their color get along with the white of the appliances? The sample door in the store looks slightly pinkish.

  • 12 years ago
    last modified: 11 years ago

    Such a warm, welcoming kitchen. I'll bet when you have friends and family over they gravitate to your peninsula. Your tile wall is gorgeous. Well done!

  • 12 years ago
    last modified: 11 years ago

    Thanks, all!

    Nosoccermom, we did not paint the doors. We were concerned about that pinkish tint, too, but decided we could always paint in the future if we hated them as they are after installation. As it turns out, they are definitely an off-white, but the pink seems to depend completely on lighting. In natural and direct light, they are warm white but not pink. In dim light, they do take on that pinkish look. We have the white fridge right next to the cabinets, which you can see in a photo I posted above, and in another area there are cabinets adjacent to wainscoting painted with BM simply white. You can certainly see the difference in those locations, but we don't find it jarring. Those spots are the areas where the pinkish tone is most prominent in dim light, though. We didn't replace the fridge, since the old one still works fine, and we are happy enough with the way it looks with the cabinets that we will probably go with white again when this one does need to be replaced. So, I would say to anyone considering these doors, you have to bring a sample home and see how it looks in your home with your lighting to really know how it will look.

  • 12 years ago
    last modified: 11 years ago

    dee, I'm just running across your post & am very impressed. What a great job. Looks like a much more expensive kitchen. That tile is a beautiful focal point, & a sweet find!

    I'm getting ready to use the same cabinets from IKEA, so I'm thrilled to see how nice they look. I'm going to have mine painted because I'm doing more of a cream colored kitchen. You mentioned that you might paint them down the road someday. Do you know anyone that's painted them or heard how they paint? I know the Ramsjo doors are actually wood, but the cabinet boxes are a thin veneer. I have a great painter so hoping everything comes out ok. I'd love to talk to someone that has actually painted this style & hear how it came out. If you've heard anything about that, I'd love to hear how it went.

    Again, great job. I hope you used it for your Thanksgiving meal & had fun with it.

Sponsored
J.Holderby - Renovations
Average rating: 5 out of 5 stars4 Reviews
Franklin County's Leading General Contractors - 2X Best of Houzz!