Software
Houzz Logo Print
weedyacres

Our room addition has begun!

11 years ago
last modified: 11 years ago
All you GW friends have helped us a lot over the past year, from coming up with a layout to hearing me vent about flaky contractors and asking questions about costs. At long last, we're finally beginning, so I thought I'd share the progress with you. Feel free to pipe up if you see issues of concern so we can address them.

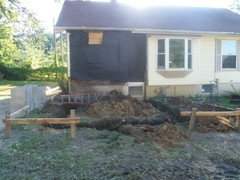
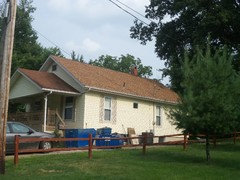
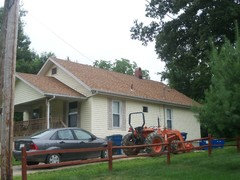
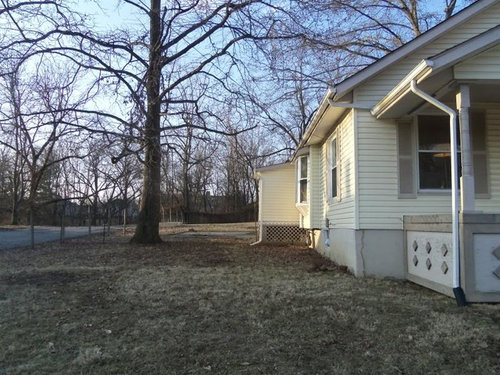
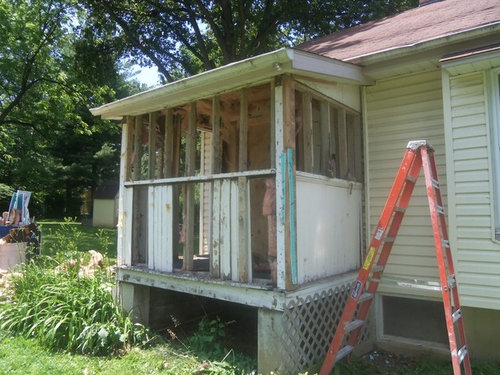
Here's the shack we're replacing (the appendage on the rear).

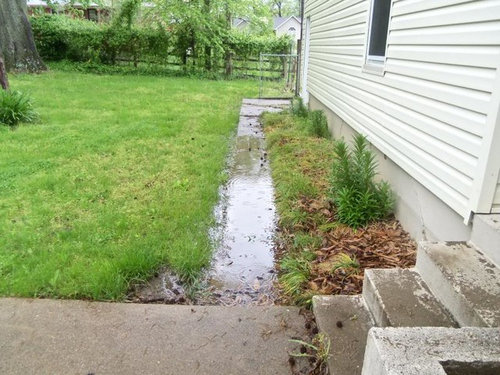
And here's the reason our basement gets wet.

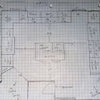
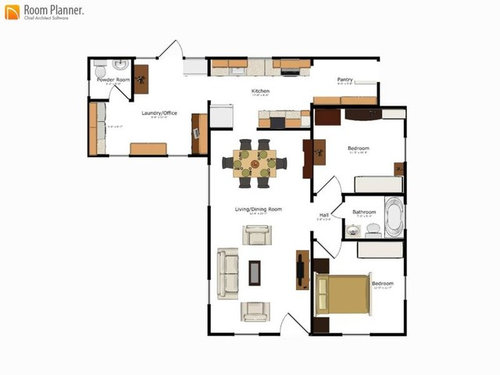
Here's the plan for the end result (a bigger appendage with proper footings).

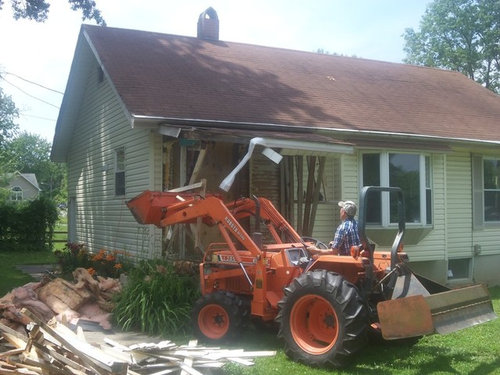
On Saturday we DIY-ed the demo. Found the original porch underneath the scabbed-on room.

Took the structure out with a tractor.

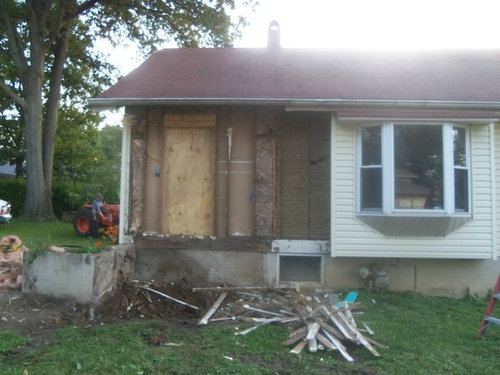
And left it clean for the contractor. Total time: 6 hours x 2 people.

We got torrential rain Sunday/Monday, so covered the opening with tar paper before it hit, and left Tuesday as a dry-out day.

Comments (40)

  • 11 years ago

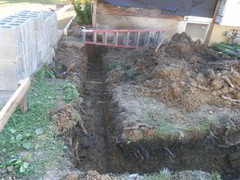
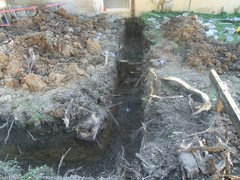
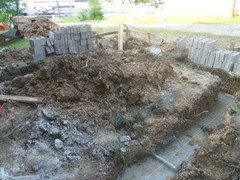
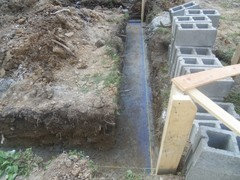
    The Amish boys showed up Wednesday morning, got the footers dug (hired a backhoe) and formed up the sidewalk. Loads of roots from the sweet gum tree we removed last summer.


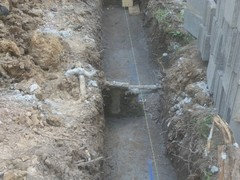
    There was a gas pipe running through the space. They called the dig line, who sent someone out to check it (yes, we had gas lines marked before digging). They didn't show the line on their maps, and the guy traced it to the far end of the back yard. Lots of head-scratching. We opted to leave it in place and encase it in concrete. The plate visible on the RH side is a basement wall stabilizer plate that, again, we'll just encase in concrete.

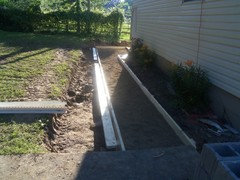
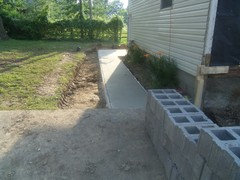
    Here's the new sidewalk. I checked level on it and it's not sloped away from the house, so I'll mention that to them and make sure it's at least 1/2".


    Any other thoughts or comments?

  • PRO
    11 years ago

    I'd insulate that gas line from the concrete.

  • 11 years ago

    It will be fun to watch the progress

  • 11 years ago

    Footings and sidewalk are poured.


    Next up: the block walls. I guess they're going to block around the pipes and wall plate.

  • 11 years ago

    P.S. Joe: I didn't see your note until the pipe was already embedded. Why would you insulate them?

    BTW, we're hypothesizing that a PO ran gas out to a grill in the far back yard (we removed evidence of a fire pit). Don't know if it's still live or was disconnected, as the 811 guy couldn't trace its exact connection to the incoming supply. He said "the gas company doesn't have record of it, so you can cut it. If it explodes it's on them." Uh, no thanks.


  • 11 years ago

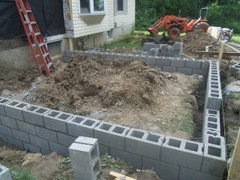
    Day 3: Got 4 courses of block set.


  • PRO
    11 years ago

    "P.S. Joe: I didn't see your note until the pipe was already embedded. Why would you insulate them?"

    You didn't say what the pipe was made of, but copper and concrete don't get along and must be kept apart from each other.

  • 11 years ago

    The pipes are galvanized steel.

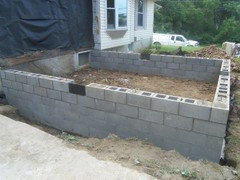
    Day 4: Block finished, inside dirt tamped down. I didn't ask for vents....


  • PRO
    11 years ago

    The vents are a good thing.Let them move on.

  • 11 years ago

    Precision: This crawl space will connect to the basement proper. I'm not keen on having openings for insects to crawl in. And it will be semi-conditioned space (no HVAC in crawl, but again, open to basement).


  • PRO
    11 years ago

    IC.Have them block it in or put a piece of screen wire behind the vents.They are there for circulation which you may or may not need.Talk to the contractor.

  • 11 years ago

    There is screen wire there, but it's still plenty wide to let in bugs and other critters that I don't want in our basement.

    In the meantime, it has rained all week, so nothing more has gotten done.

    I do have one question: they only poured concrete in some of the blocks, to hold the rebar that they'll put the sill plate on. Should there be concrete in all of the blocks? If not needed for strength, what about all the water that has collected in them during these rains? I can't imagine it's a good idea to leave a few inches of water in the bottom of a block foundation.


  • 11 years ago
    last modified: 11 years ago
    Hi Weedyacres!

    Wishing you great success with your project.

    Here's a picture I shot while at the grocery store yesterday I thought you'd get a kick out of. Amish buggy parking spaces, with a Starbucks behind them.

  • 11 years ago

    Weedy! I haven't checked here for a while, but I was thinking about you. So glad you're moving forward with your project! I remember well the multiple iterations and discussions about your addition - and even your reluctance to cut down the old gum tree.

    Thanks so much for the photos and explanations - I hope things continue to go relatively smoothly. It sounds like you've established a good working relationship with your contractors.

    Good luck!

  • 11 years ago

    I left Monday to attend an out-of-town conference. Got back this afternoon and here's what I found:

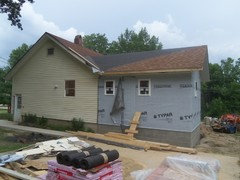
    Yeah, the 2 Amish boys got the rat slab poured, framed the whole thing including the roof tie-in in, installed the soffits and half the roof in 4 days. My jaw dropped when I saw it. They would have torn half the main house roof off, but we're expecting rain tonight and tomorrow, so they restrained themselves.

    I spent 20 minutes with them on Monday before I left, going over the details, with lots of written drawings so they'd put a moisture barrier under the slab, get all the framing right, put the windows where we need them, etc. I'm bummed that I missed the process, as I would have liked to see the step by step close-up.

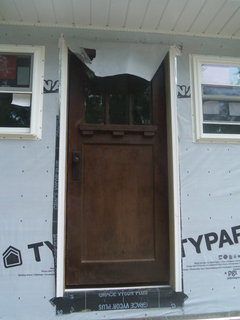
    I can't get inside yet, as the door has Typar stapled over it to keep it water tight. I want to measure everything and post more photos here to ensure we've got everything right.

    Saturday we'll get our CL vintage door hung so they can do the siding next week. Don't want to hold them up!

  • 11 years ago

    That's pretty amazing and doubly so in that they are loading all the roofing by hand. That would be a full day itself for my old tired bones.

  • 11 years ago

    How exiting! You must have had goose bumps when you drove up!


  • 11 years ago

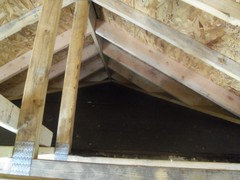
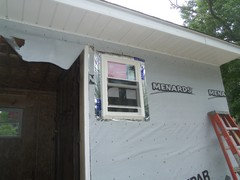
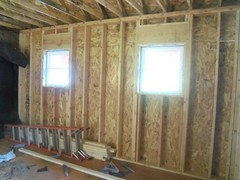
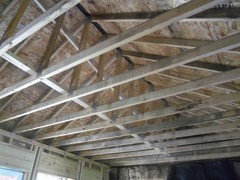
    Well, we cracked open the house-wrap door yesterday, and examined the inside. Here are some shots of the framing. The window and door framing look great. They used trusses on the roof, and then stick-framed the truss connection to the existing roof.


    Anything need pointing out/correcting? The only thing I noticed was that they didn't flash the window sills before installing the windows.

    I got the door frame and outside casing installed, but couldn't hang the door quite yet. We're using a vintage door from CL and have 2x6 walls, so are stick-building the frame. And the local Lowe's only has 5 5/8" thresholds. So I had to order a 7" threshold online ($75 with shipping!!).

    At least the door is flashed and ready for siding installation so the Amish boys can carry on. If the weather cooperates they'll be done this week.

  • 11 years ago

    Are you going to have an access panel in the addition to access the attic space? Reason I ask is, the last addition I worked on, the inspector made us cut a 2'x2' hole in the old roof for access to the addition attic space. It was that or put an access panel in the addition.

    You may have that basis covered already.


  • PRO
    11 years ago

    This ain't their first rodeo.

  • 11 years ago

    roof35: yes, we're going to cut a hole into the main attic. We actually drywalled over the original attic access near the basement stairs, so currently have no way in. We'll cut a hole in the old roof and install some drop-down stairs to access it from this addition.

    Joe: I assume you're complimenting them?


  • 11 years ago

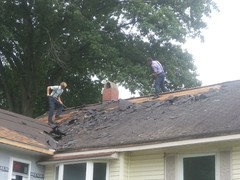
    Day 9: De-shingling the old 2-layer roof and installing the new.


  • 11 years ago

    It looks amazing! How exciting!

  • 11 years ago
    last modified: 11 years ago
    Just thought of this, are those windows large enough for egress? The opening with the window open needs to be a certain size. Probably need one egress in that addition considering you could get trapped in there. Replacing one of them with a casement window would do. Might want to check on that.

  • 11 years ago

    Vith: We have a 36" door. Is that not sufficient egress?


  • 11 years ago
    last modified: 11 years ago
    A door to the outside? I didnt see it in the pics so yea thats good. Must be covered in house wrap, I see it in the design now. :P

  • 11 years ago

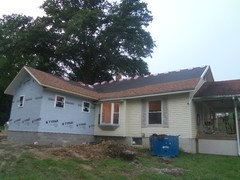
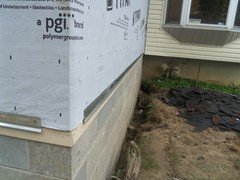
    Day 10: Got half the roof finished and the siding bracket installed around the bottom.


    Oh, and they hung the door in my frame. Is that a cool CL find or what?


  • 11 years ago

    I don't agree with some of these instructions but it's a good place to start. I wouldn't let them start siding until some of these issues are addressed.

    http://www.typar.com/assets/downloads/pdf/TYPAR_WPS_Install_Instructions_5-19-15.pdf

  • 11 years ago
    last modified: 11 years ago
    Nice door. Have them finish up the gaps sooner than later so you dont get mice.

  • 11 years ago

    @ksc: Thanks, I need to talk to them about flashing the windows. By my read, they should have flashed at least the sills before they installed the windows.

    @vith: the threshold is enroute. Lowe's didn't have any that spanned the full 6 1/2" wall width, so I had to order online. It will fill that gap below the door. We've also got the inside door jamb pieces (whatever they're called) to create the seal around the sides and top.


  • PRO
    11 years ago
    last modified: 11 years ago
    weedyacres:

    Download the Grace Vycor Plus flashing installation instructions and see if they match your installation. I cannot overemphasize how important this is. Poor flashing doesn't usually show symptoms until long after the installer's final check has cleared.

    I just got an email from a woman who has two separate ant-infested door jambs. I diagnosed poor flashing instantly from an emailed picture. When I told her I wouldn't come out to bid until she assured me she was comfortable with a two to four thousand dollar budget, she told me it was a problem with the window in the door and that she was contacting her builder. I told her she was getting bad information and that unless it was under warranty, the only person her builder may return a phone call to was her lawyer. She is in complete denial; I see this constantly. She's ripe for a Craigslister with a can of Bondo.

  • 11 years ago

    The Amish boys were back this morning after 2 rain days off. I asked him what his plan for flashing the windows was. He said basically strip across the bottom, then strips up the side, then strip across the top. I mentioned the recommended flashing of the sill underneath the window and pulling the Typar back at the top. He understood the Typar at the top deal, but asked why flashing the entire bottom flange on the outside of the window wasn't sufficient. I don't have a good answer for him, other than "that's what the manufacturer said." Can anyone help with explaining the why behind it? These are vinyl windows, not wood. And the Typar wraps over the sill under the window.

  • PRO
    11 years ago

    I'd want the Grace on the sill to be installed over the Typar and on top of the last row of siding as shown here.

    If I had this contract and my customer were asking for online help, I would tell her to take pictures of my work, post them and the manufacturer's instructions and offer a $10,000.00 bounty to anyone who could find a deviation between the two.

  • 11 years ago
    last modified: 11 years ago
    After reading the instructions, it appears that you are supposed to attach the window flange to the sheathing, flash that all around underneath the house wrap, then do house wrap, then flash the bottom to the house wrap. What they did was put house wrap underneath the window flange. The house wrap is weather resistant, meaning it will protect the sheathing by water running down it but it is not water proof, it allows the sheathing to breath.

  • 11 years ago

    Some catch-up photos.
    Day 11: Got most of the other side of the roof torn off and re-shingled.

    And Day 12: Finished off the porch roof and the ridge.

    And we finally came to agreement on the flashing, which they pulled out the windows and did per manufacturer's instructions. Printing out the instructions for him did the trick.


  • 11 years ago

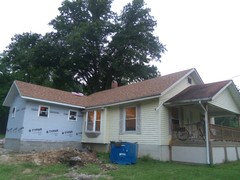
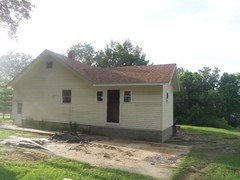
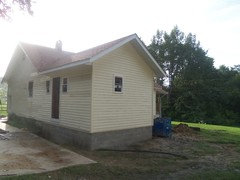
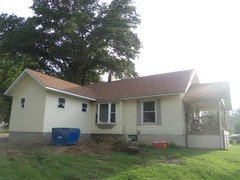
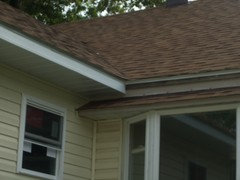
    Day 13 & 13 1/2 (they had a few hours to button up a couple things this morning): we're done!! At least where it involves the Amish boys. They did a great job getting all the siding on, weaving it with the old to make it cohesive.


    Here's an example of their attention to detail:


    Now the ball's in our court. We're going to try to knock out the foundation drainage/waterproofing tomorrow (Mr. Weedy's off) and then we'll putz along on the interior.

  • PRO
    11 years ago

    You've done them a huge favor by insisting on the manufacturer's flashing instructions. I promise they'll be doing it that way on their next job.

  • 11 years ago

    I can't wait to see the inside - I remember how many iterations of the plan you went through!

  • 11 years ago
    last modified: 11 years ago
    Weedy- Looks amazing! Congrats on new addition....but it's difficult to tell you have one :)

Sponsored
Wannemacher Interiors
Average rating: 5 out of 5 stars26 Reviews
Customized Award-Winning Interior Design Solutions in Franklin Cnty OH