Software
Houzz Logo Print
raiceam

Ikea kitchen sale - 20% in gift cards or money back

10 years ago
last modified: 10 years ago

I am in US and waiting for the sale hopefully in February. I did a search and it seems that Ikea has 20% in gift cards in Canada for the end of December if you buy 3 appliances. I don't think I ever saw in USA this kind of sale with gift cards back... We want to buy in January and I am hoping to use the 90 days price policy for Ikea family. I want to do this:

- buy my kitchen plus maybe 3 of the cheapest appliances (is maybe microwave the cheapest?) , get price adjustment when February- March sale comes. If we will not have the gift cards back type of sale and we have the 20% off like always here, then is even better.

- If we are conditioned by buying 3 appliances, then I am covered; if not, I could return 2 of the microwaves

What do you think? does it look like a plan? my kitchen will be aprox 10k, so 20% is a lot!

thanks! I've been dreaming about my kitchen a lot for at least a year.

Comments (368)

  • 10 years ago
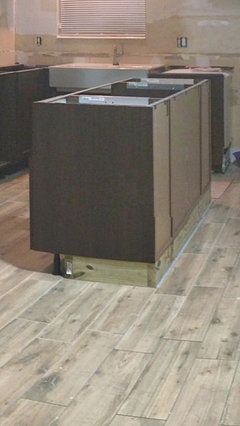
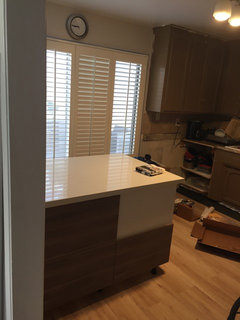
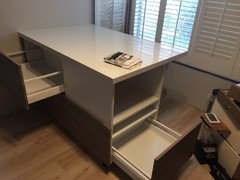
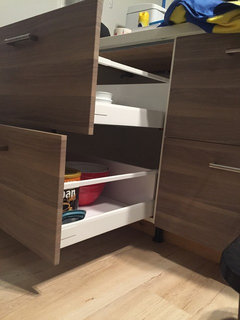
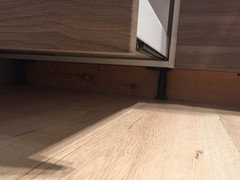
    oh and I did the platform to about 20 inches deep so that I could still use the legs in the front for the sole purpose of attaching toe kicks. no weight bears on them at all.
  • 10 years ago
    unfortunately this is the only picture I have. but again we just screwed the cabinets directly to the base and then to each other.
  • 10 years ago

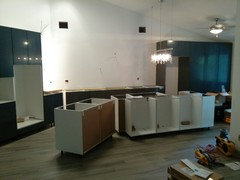
    we did the same as jeimygirl; built a box under the cabinets and screwed the cabinets in it and to each other, I will take better picture with final stage, but here is one of them. Tonight I will take more.

  • 10 years ago
    Island
  • 10 years ago

    RE: discontinued island assemblies: I had the same issue, as the Kitchen Installation Guide mentions them, but doesn't give part numbers. If you look in the very back of the Buying Guide for Cabinets... page 66, you find two parts: Assembly kit for kitchen island 002.984.11 $15. And Support bracket for kitchen island 002.984.06 $14.99.

    I asked an IKEA Kitchen person why those things were discontinued and what I was supposed to do about it. (Notice that you cannot even pull up the manuals from the website) This was his explanation:

    Normally base cabinets are supported by the rail hung on the wall, and the feet just level that up. For an island, they have to be supported and attached to the floor. The support kit provided some pieces of wood and angle brackets to do this. There was nothing special about these parts that couldn't be done with some 2x4s or 2x6s and generic angle brackets from the hardware store. As we see from other postings above.

    Okay, now we have the cabinets off the floor, you can just screw them together to join them as a group, but if you want to attach a cover panel to the back, you run into the problem that the rail brackets are sticking out, and the flimsy back panel doesn't offer a good sturdy surface to attach anything. The Assembly kit contains some screws and substitute angle brackets, And 2 46.5" long 3"x 0.4" wood pieces with markings and holes so that you can cut to fit, and attach across the back to use as an attachment rail. The brackets are designed to replace the rail brackets, and the whole thing sits flush in the back of the frame. I found several of them in the As-Is section one day and bought one. That prompted my questions upstairs. Again, nothing really IKEA specific, that couldn't be done with a generic sticks of lumber from HD, maybe for less money. So they killed them. I have the instruction manual from that kit (28 pages!). I could scan it if anyone is curious. They show several different configurations of islands and how you might put them together.

  • 10 years ago
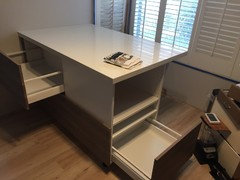
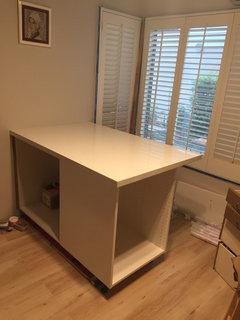
    This is what we did for the island. 2 cabinets, fake doors on one of them, cover panels in the back connected with a T trim from Schluter. Box under for support.
  • 10 years ago
    Details
  • 10 years ago

    Thanks for all the info. I'm using a contractor, but he has never done an Ikea kitchen before and is getting frustrated. I showed him all your pictures, so hopefully he has a handle on how to put the island in now.

  • 10 years ago
    @diana I have never built anything IKEA yet alone a kitchen and did mine without a contractor. he should be just fine. I attached the cover panel directly to the cabinets, no brackets like one of the posts above mentions . here is a link of a how to someone made http://www.pinklittlenotebook.com/creating-an-ikea-kitchen-island/
  • 10 years ago

    @diana I agree with jeimygirl. We are doing our own kitchen including five 90" tall pantry cabinets, an island and multiple wall and base cabinets and if your contractor is getting frustrated by IKEA cabinets, then maybe you need to find a new contractor.

  • 10 years ago

    @jeimygirl - great link. Gave me some ideas. Here is another larger kitchen I found using the older system, but some good island details none the less: http://www.thekitchn.com/faiths-kitchen-renovation-how-we-assembled-and-installed-our-custom-ikea-kitchen-renovation-diary-fa-185658


  • 10 years ago

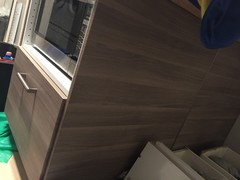
    Okay, stuff delivered today. It's now getting real. I started pulling apart one of the existing cabinets, but my BH has yet to empty all the food and stuff. I should be able to demo that wall of cabs first, and dry fit the first set of IKEA. Maybe in a week. These are the tall cabs, and I want a small gap at the top for lighting, so I've going to tweak on the toe kick height and see how it looks. Also need to do some electric work for the oven. (not yet purchased)

  • 10 years ago
    How did you around dishwasher? Mine has a gap and I don't like it.
  • 10 years ago
    last modified: 10 years ago

    Raise the legs. They are adjustable. You needed a return panel there for stability. The L bracket is insufficient. You've got to be VERY careful moving the range in and out or it will all come crashing down.

  • 10 years ago
    I had to put mine on 2x4's to raise it high enough
  • 10 years ago

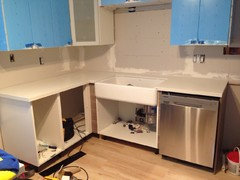
    @monicar - nice pictures. I see that you put some spacers around the sink. Good work there. What gap is your issue? As the Faith kitchen (link) discovered, one critical fit for the dishwasher is height under the counter top. Now if the counter is too high, then you might have to fill there too. A deco strip on it's side maybe?


    @jeimygirl - I'm just going back and looking at your island pic. Mine will be very similar. And I'm going with the legs only for kick attachment. I like your flooring... it's tile (but wood like) I'm hoping to get something like that.

    monicar thanked dave_m
  • 10 years ago

    I lost this thread and just found it again. So nice to see how your projects are coming along. They all look great! I'm learning some good tips from you as I read through.

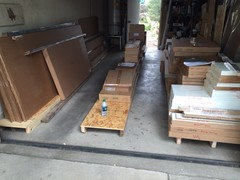
    I just had my kitchen delivered (finally) last Tuesday. 187 pieces. I placed my order online (no Ikea in my state) on Mar. 2nd and had it shipped from a distribution center. I did run into a few problems with missing items and one damaged piece but knew about them when they reached the local shipper. I let them store the order at their warehouse until everything was accounted for. It took a few calls to customer service to get my gift card, but it's all good now - I think. I guess we'll know for sure when we start putting it all together in a few weeks.

    As it turned out, my contractor need extra time to finish another job so the delivery delay worked out fine. Demo starts tomorrow. Yay!!!! My husband and I are actually doing the demo - ripping out old cabinets, taking down a couple of walls and ripping up the flooring. It saved us a chunk of change that went toward our new appliances.

    I was able to plan my orders so I could use the GC on some of the stuff and I bought all sorts of interior organizers I wanted but probably wouldn't have bought if I didn't need to use up the card. I can't wait for this to come together. I've been planning this for such a long time!

    Everything's organized, labeled and ready to go!

  • 10 years ago
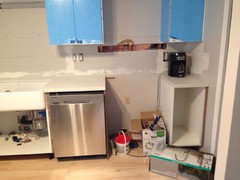
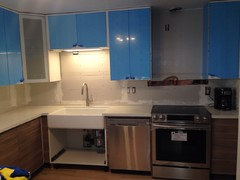
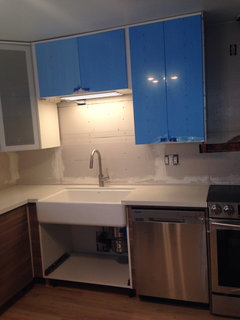
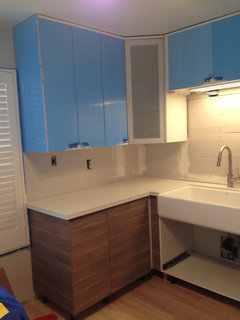
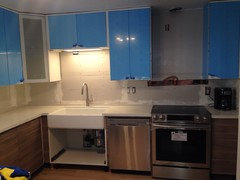
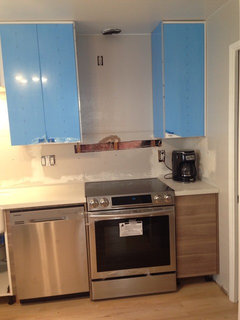
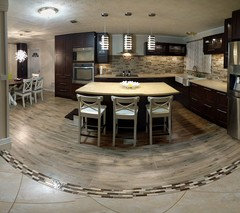
    We put a filler above the dishwasher. Do you put toekick for dishwasher?; not final yet, but closer. At least I have a sink and range now. It was hard to stay without them for a week.

    Now what color of backsplash should we choose for this combination?
    (Blue is just a protective foil for glossy white)
  • 10 years ago
    Do we have to open the wall to reinforce the studs for the exhaust?
  • 10 years ago
    we didn't, right into the stud it went and bits super secure. also I did toe kick under the dishwasher but it was a built in one and I raised it. I'll get a closer picture tonight
    monicar thanked Jeimy R
  • 10 years ago
    Your kitchen is gorgeous Jeimy! Mine has finally made some progress. They should be able to template the counters by the end of the week.
  • 10 years ago

    I have Fixa brackets. If I am installing quartz counters, how should the Fixa brackets be attached? Flush with the sides of the cabinets or raised?

  • 10 years ago
    I installed mine flush. Quartz too. it's just for extra support for the wood/cabinet
  • 10 years ago

    My kitchen is so close to complete, but I'm having trouble picking a backsplash. Any suggestions?


  • 10 years ago
    Love seeing all of these so inspirational. My contractor is still against IKEA cabinets but we are still for. We are giving him a chance to change our mind but I think we are still going with IKEA, such lovely cabinets with great features at an affordable price.
  • 10 years ago
    I like the one you have on the left. the squares. do you have pictures of all your ideas so far?
  • 10 years ago

    My kitchen is a slow slog... I have torn out one wall of cabinets, and the island has been detached and is floating around now. The old range has been removed and we are cooking on the island cooktop plugged into the old range's socket.

    Removing the old tile floor has proven to be rather time and labor consuming. It's thin-set on luan. So I'm prying up the nailed luan from the subfloor. I work around some edges and then across a section. About two thirds done.

    On the constructive front, I laid two pieces of new tile backer on the floor tonight, and plan to build the replacement wall of cabs this week. When that is partially built up, we can remove the remainder of the old cabs.

  • 10 years ago

    Jeimy--I should have taken down those samples before taking a picture of the kitchen because I have decided not to go with any of them. The one on the left is my husband's favorite, but I think it might be too busy because we want to put the backsplash at least to the top of the cabinets. I was thinking of going with something white--maybe with a little texture.


  • 10 years ago
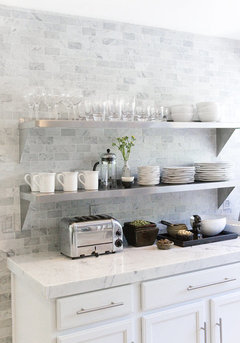
    what about something lime these?
  • 10 years ago

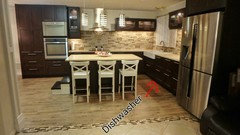
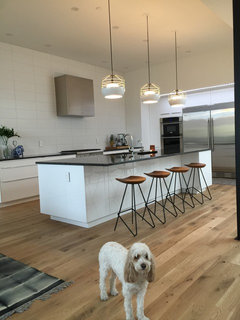
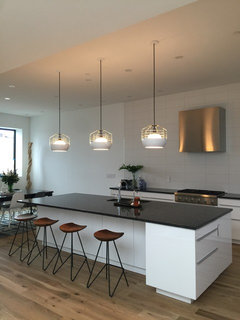
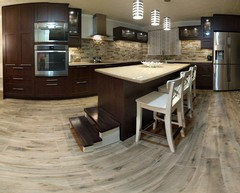
    Some final pictures now that the pendants from Roll & Hill and the stools from Anthropologie arrived - love the cabinetry... great looking and super functional! The whole kitchen exceeded our expectations. Thanks to this thread for the sale notice.


  • 10 years ago
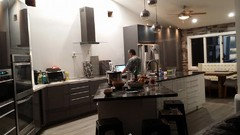
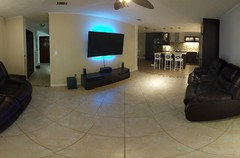
    wow very nice and simplistic! it looks beautiful. I'm still doing some minor things in ours. Cabinet organization is what's left. but my final ones are these. IKEA is slowly taking over my house and we don't even have one in my city. the next project is hanging the TV stand on the wall. Doing lights under that too to tie it all in since it opens to the kitchen
  • 10 years ago

    Looking great! You are almost done... well, are we really ever done! :-)

    It's our first open concept space and we love it. Great refrigerator. Was eyeing that 4 door - Samsung, right? Does it also have a sparkling water option?

    I like the hidden lights behind the TV... we did a strip in the tall cabinet side alcove. Lights up at night and can change colors with Siri (Philips Hue LightStrip).

  • 10 years ago
    Hi demoll, what lighting strip did you buy? that is compatible with Philips hue?
  • 10 years ago
    its the 4 door flex without the family hub (the one with the touch screen) it does not have sparkling water as we don't drink it. I love itm I have kids so they have their own fridge on the bottom right with all their drinks and snacks. I love love love accent lighting now. light strips are amazing. the ones I got were from IKEA to start. the ones under and in the cabinets are white but the ones for the TV are on a color wheel.

    I haven't ventured into Phillips hue yet. my home security system has lighting modules we are using instead for now. I hope to install some can lights and recessed speakers throughout my house as time passes. create a nice calming affect throughout the house when we wake with progressively increasing dining and mediation music. figured I'd be cheaper than adding sky lights haha

    and yes totally agree, never truly done!
  • 10 years ago

    Hi hpatel808 - it's the phillips hue lightstrip plus. our electrician wired it down to our storage/utility room below where the controller unit sits. The strip doesnt have a long wire and needs to be plugged in, so to be code compliant, he soldered a longer wire to get the plug in the utility room.

  • 10 years ago

    Jeimy - that's a good next step, lighting. we have lutron caseta dimmers and switches throughout and they are on programs to turn on and off at various brightness with sunset, sunrise and bedtime. and we can use Siri to control all the lighting... "good night" turns them all off except for the exteriors which come on at dusk. Way cheaper than skylights which we did too... and with all that sun I am looking at skylight covers to reduce the direct sunlight in the stairwell! Hot even with an AC unit that's 2 times what's needed.

    It. Never. Ends!

  • 10 years ago

    I haven't been on this thread in ages but we're almost finished with our kitchen, too! I don't have great pics yet but here are a couple. We haven't put the handles on yet or moved anything back into the cupboards but we're getting there.

  • 10 years ago

    Those photo files might be too big. Let me know if there's a problem and I'll redo them.

  • 10 years ago

    Looks great Kay!

  • 10 years ago
    it looks so pretty!!
  • 10 years ago

    For those that might still be following this thread, it should be noted that IKEA has been running this sale again, for a bit, and the current one expires Sunday Aug 14th.

    Also poking around in the online catalog last week, I noticed that the Kitchen Island Assembly kits have been "re-continued". The "Assembly kit for kitchen islands" - http://www.ikea.com/us/en/catalog/products/00298411/ and the "Support bracket for kitchen island" - http://www.ikea.com/us/en/catalog/products/00298406/ are back! Even if you don't buy them, grab the instructions.

    As for my kitchen... I am finally hanging cabinets on one wall. I hope to accelerate my progress now that 3/4 of the old floor is gone, and we have half the subfloor prepped. Clearly things that should have been done earlier, as we are now way outside the return time-frame for any problems.

  • 10 years ago

    I'm new to your thread - I like the wine storage, and takes so little room! The tile pattern adds interest.

    - thanks dave_m for the sale info - always good to spread the news.

  • 10 years ago

    Will there be another sale this year? Not sure we're going to make it in time!

  • 10 years ago
    who really knows, I would never count on it.
  • 10 years ago
    a little off topic, anyone hear of when Pax is going on sale? I have a connecting office to the kitchen that I'm building a Murphy bed/closet system in. hoping it's soon.
  • PRO
    9 years ago
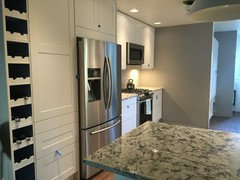
    last modified: 9 years ago
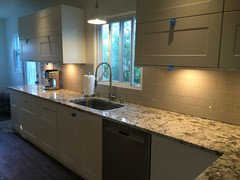
    IKEA KITCHEN SALE HACK: You can force them to split your kitchen order so that you can use the gift card to purchase your kitchen... It's just like the old sale where you'd get 20% off the sale price... It works beautifully! :)


  • 9 years ago
    that's what I had them do, they just split out the cabinets and the accessories, they have to manually separate each item.
  • 9 years ago

    Does anyone know how hard it is to move a floor to celling wall cabinet? My contractor placed it closer to the wall than I wanted. I was wondering if it would be worth the hassle to ask him to move it.

  • 9 years ago
    depends on how they installed it, if they put it on the track, how many screws they used to attach it to the cabinet next to it. for instance on mine, we cut the top track to exactly the width of the cabinet. we would have to unscrew the connecting screws, take down the cabinet, take down the track, move it over, and reinstall everything.

    I installed mine myself and while it wasn't hard, I know exactly how it was put up, so taking it down I would know what it needs. If you know how your contractor put it up it shouldn't be too hard.
  • 9 years ago
    Thanks I will ask. It's a separate floor to ceiling cabinet. They have to come back to put up the molding. So I will ask him then. It's only like 1" off but it's where I wanted to store my brooms and dustpan.