Software
Houzz Logo Print
everett124

Retaining wall design help!

10 years ago
last modified: 10 years ago
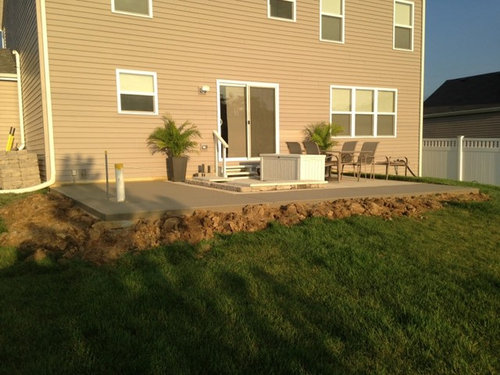
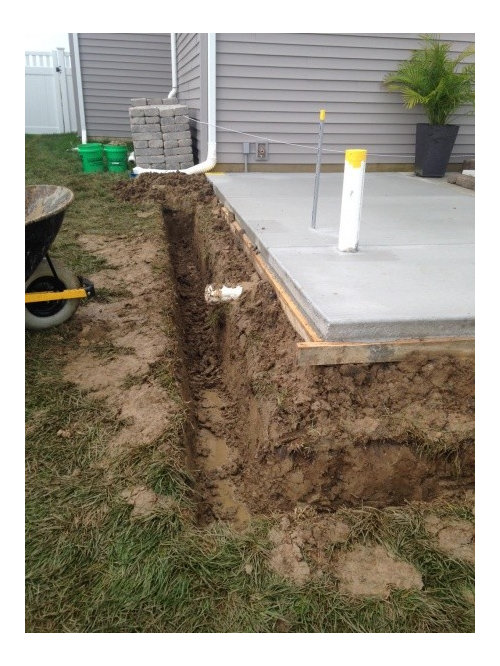
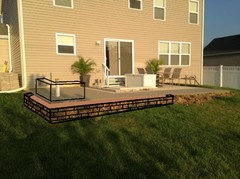
Hi all! I am building a short retaining wall (approx 4-16" tall), along two sides of a new concrete patio, about 12' long on each side. The patio was too high above the ground and the yard slopes enough already that I did not want to just grade it out. The wall will be 23" out from the patio (16" gap), to give me room to plant flowers, and will be as high as the patio.

I am using 7" deep flat Belgian wall block from Menards, bonded with landscape adhesive. I want to use this because it is the same block as I already have to build an outdoor BBQ that will be in the same corner (but up on the patio) as the wall. I am going to use a mix of all three sizes to make a random pattern look. The manufacturer does recommend these for short retaining walls.

I have read several different ways to build a retaining wall, from how much base to use if any at all, how much sand, what to backfill with, etc., so I am not exactly sure what method to use, but I figure the more base and sand layer the better, so am roughly planning on 6" base and 2" of leveling sand. I am using the Pavestonematerial from Home Depot.

I have already dug a rough trench, but need to start filling and have a few questions.

1) The patio slopes, about 3" over the 12' stretch. When I start to put down base material, all instructions I have read have said to level it. Instead should it be okay to make it match the profile of the patio? I would prefer all of the blocks to look aligned with the top of the patio, instead of being too high or too low by three inches on one side. Any negatives with it not being truly level?

2) How deep (wide?) does the base material and sand need to be? Not depth as in thickness, but from the front of the block back toward the patio. I have read anywhere from 2" deeper than the block, to double the depth of the block. Why does it need to be any deeper than the block?

3) What should I use to backfill? I will plan on bringing in some gravel for use, but how much until I can refill with the dirt I've just dug out.

4) Any good tips, or anything concerning?

Thanks!


Edit: Located in Northwest Indiana, with clay soil.

Comments (11)

  • PRO
    10 years ago

    To get question #2 out of the way ... there is a tendency to want to dig just wide enough to fit the material. In practice, things are not perfect and what might look like it "just fits" turns out not to fit once construction begins. Then dirt from the trench ends up being knocked into the sand base during construction process. Or one ends up needing to widen the trench after some sand has already be placed in it, making a mess. Digging it wider to begin with makes everything easier once assembly begins.

    #3 ... if you're going to plant, add soil amendments such that they will turn your Indiana clay into good planting soil and use it in the backfill. Given that your "wall" is barely more than a curb, I don't think hydraulic pressure behind the wall will be much of an issue, except near the corner. Is the construction process such that you can make the wall leak? If you could have a layer of gravel near the back of the wall in that area, and the wall could leak, that may be sufficient.

    Other than to support the portion of the patio that is raised above grade, what is the objective of this "wall"? I can't help but think that this project could be improved upon if we better understood what you are trying to accomplish. Do you have a plan? You should also generally describe the barbecue grill you intend to build. (It's hard to know if components are good unless one understands the whole project.)

    BTW, you are showing the "wall" parallel to the patio edges. It would be better (and look finished) if at each end of the wall it "returned" to the patio (turned at 90* so as to adjoin the patio.) Regarding the question of it being level, it should be. The level wall could match the lowest patio elevation where the two adjoin. It would then be slightly below the patio level at its other end, but this is not a problem. I wouldn't worry about this until knowing the plan is good and completely resolved.

  • 10 years ago

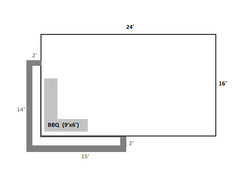
    Thanks for the input. I did plan on also having the wall return back to the patio on each end. I made a (very rough) sketch of what I am trying to do. The purpose of the wall is to avoid adding soil around the new patio, which is higher much than the ground level in some areas. I do not want to just make a mound of dirt next to it, nor grade the yard out, because of adding the slope to the yard, which already slopes plenty for me. The other areas of the patio the existing ground is much closer, and I am okay grading out (you can see some dirt piles in that area, ready to grade).


    With the angle of the pic and my limited MS Paint skills the perspective is off. A bit more clear with an overhead view:


  • PRO
    10 years ago

    Sometimes, after people begin to use a patio, they wish they had made it larger. (It's almost never the case that they wish they had made it smaller!) If there's any possibility that may happen here, I'm thinking that you could kill two birds with one stone by placing the BBQ at the location where you are intending to build a wall. The base of the BBQ could BE the wall, at least to the length the BBQ extends. Then it doesn't take up patio floor space.

    Another thought is that your proposed wall is so close to the floor that it is not functional as a meaningful planting space. The minimum bed width dimension I'd consider would be 3' (and that would be under duress!) If it is less than that, I would eliminate it entirely and build something more like a curb that abuts the edge of patio floor, in which case the top of curb would match elevation of patio floor.

  • 10 years ago

    We actually did just that. The patio was 12'x16', and now expanded 16'x24'. The yard was graded against the original smaller patio, which is why we have the drop off now. And unfortunately it would affect the yard too much to redo the grade.


    The new patio also includes footers for the BBQ, as it will be a little over 8000lbs. We had thought about pouring it such that the BBQ would be just past the patio, but like keeping it inline with the side of the house.

    Now that I look more I agree on making the planter larger. It would be okay for small flowers, but not small bushes or similar. Also I need some more room as I have decided to include drain tile. I am going to bring it out at least another 4-5".

  • PRO
    10 years ago

    1- it is WAY easier to build a segmental wall level than to try and warp it to match. If you have some separation between wall and patio that lets you fake it out a bit.

    2- footer needs to be the width of whatever you're using for compaction. On larger walls, you'll see a 24" wide footer because that accommodates a plate compactor. At the very least you'll want to be wide enough for a jumping jack, with an allowance for when you lose control and it skips 6". If you're just planning on using one of those 8x8 steel plate on a stick things and you're NOT a competitive powerlifter, don't waste your time.

    agree w/ Yard that the "planting" space is too small to add any value

  • 10 years ago

    Have you looked to see where the patio drains to? You don't want to block the flow.

    Mike

  • 10 years ago

    Okay, I have rethought it a bit. I am shortening the length of the two walls a bit. Each will extend 30" past the BBQ. This will leave plenty of access in/out of the patio space.


    I am also changing so the wall will be 30" off the patio, which will give me more room for a larger base and 3" drain tile.

  • PRO
    10 years ago

    That sounds generally like improvements over the original plan.

  • PRO
    10 years ago
    last modified: 10 years ago
    Hi Everett: Thought I might add a bit to the discussion here. In your initial post you mentioned leveling sand. FA-2 (torpedo) sand is for the bedding course on brick patios. You should not be using sand for any part of a wall base.

    Gravel for wall bases in Northwest Indiana should be what is commonly referred to as "Grade 8", also designated as CA-6. This is compactable gravel for the entire wall base. There would be no sand and no other gravel in the base portion. Base compaction is normally done in 2" lifts unless you have an industrial compactor. To echo Revolutionary Gardens comment, using a hand tamper will not be satisfactory to compact the base. Rent the biggest compactor you can handle.

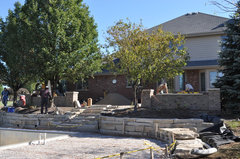
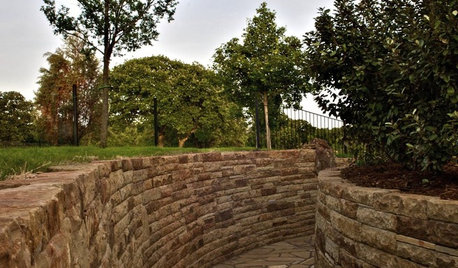
    The gravel behind the wall (between the wall and the patio should be what is commonly referred to as "3/4 Clean", also designated as CA-7. This is free draining gravel and would be behind 100% of all walls we build, whether they are modular like yours or natural stone like the photo below.

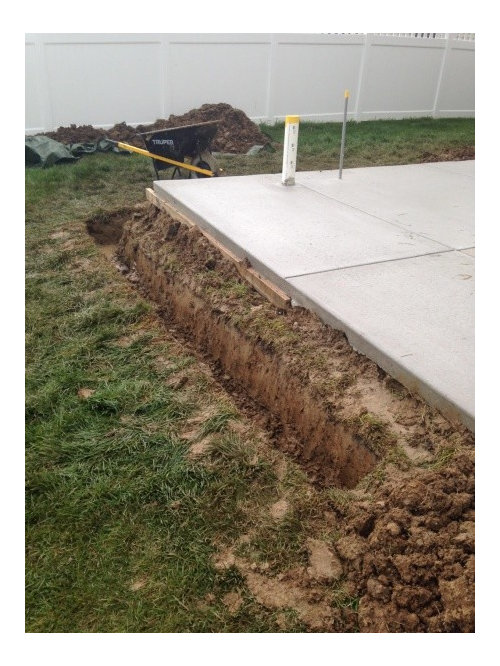
    Free draining gravel eliminates hydrostatic pressure and surcharge, which means your wall will not tip. Your wall height is such that 4-6" behind the wall should be satisfactory. On the outcropping wall in the photo below you can see the space behind the wall during construction. This is where the CA-7 goes.

    From one NW Hoosier (formerly) to another......good luck with your project.

    Frankfort Landscaping · More Info

  • PRO
    10 years ago

    The top of the wall should be level and level with the highest point of the patio. These dry stack walls need only the first course be buried over the compacted base. The sand need only be thick enough for leveling. From the pictures, it looks like you are excavating much deeper than necessary. But now that you have excavated, you might as well fill it in with compactable material for the base.

    A little planter wall no higher than 16" is really not retaining anything if the backfill is soil and planter mix especially if it is level and no surcharge requiring the wall to act more like a true retaining wall vs. a design solution to avoid simply sloping the grade away from the patio and creating a plantable space.

Sponsored
Hope Restoration & General Contracting
Average rating: 4.7 out of 5 stars35 Reviews
Columbus Design-Build, Kitchen & Bath Remodeling, Historic Renovations