Software
Houzz Logo Print
wendys_dream

Nightmare remodel turned into a blessing?

10 years ago

Our remodel has been on hold for months and months due to multiple less that perfect cabinets and less than perfect replacement cabinets. We are now waiting on our 4th set of replacements. Yesterday, we were informed that we will be receiving all the cabinets, including those that are less than perfect. So, a total of 4 33 inch drawers bases and and 4 30 inch glass uppers.

To achieve my "dream", the plan was to do separate sections on a pay as we go basis. But, with the extra cabinets coming, I'm thinking we may be able to use them on the next section in line.

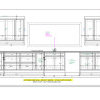
This was the original plan. The next section would be the fridge section on the nook wall.

Original plan:

kitchen: flowing as one space · More Info

kitchen: flowing as one space · More Info

kitchen inspirations · More Info
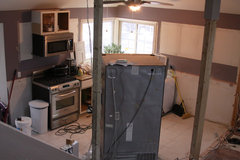
Now, I'm thinking I can slide a free standing 48" counter depth refrigerator down the wall to the right, just before the nook, and use 2 of the drawer bases and 2 of the uppers on the left side of the refrigerator.

This would not be my ultimate dream kitchen, but would make for a perfectly usable and pretty kitchen at a ton of savings. It may actually make for a more interesting design. One of the biggest drawbacks would be that the microwave would have to go on the counter in the lefthand corner and I would lose my coffee cabinet. But those seem like a tiny things compared to the possible money saved.

Anyone see an reason to not go this route?

TIA!

Comments (24)

  • 10 years ago

    Re: "free standing 48" counter depth refrigerator"

    Does this exist? I think at 48" they are all built-in, not freestanding.

    Wendy thanked DIY2Much2Do
  • 10 years ago

    It exists.

  • 10 years ago
    last modified: 10 years ago

    Because cabinet style probably does matter....

    We'll have 3 extra of each of these

    before/after kitchen · More Info

    before/after kitchen · More Info

  • 10 years ago
    last modified: 10 years ago
    Those are pretty--you are being compensated for the long wait. ;)

    FWIW, I'd rather have the MW on the counter than under the counter, unless the counter is raised to a more comfortable level. I hid my MW in a box, on the counter.

    It looks as if you have a nice, wide walkway--is there any possibility of pulling the cabinets (and fridge if necessary) out to make the counters deeper? That would leave more space in front of the MW and coffee maker. Uppers could also be mounted further out on the wall, if you feel that deeper counters are too much of a stretch.

    GW discussions--deeper counters

    Wendy thanked mama goose_gw zn6OH
  • 10 years ago

    Thank you Mama goose. Appreciate that.

    I think they are sending because they don't have anything else to do with them. Either way, it works for us. If not the kitchen, then I'll use them in the garage entrance hall.

    Thanks for the deep counter idea. I'll give that some thought. We really want a drawer. But again, the savings is really making me think compromising a couple things might be best.

  • 10 years ago

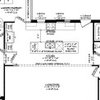
    Did a quick sketch:

    original design

    kitchen inspirations · More Info
    new design using extra cabinets
    before/after kitchen · More Info

  • 10 years ago

    The sink isle is 48, the range isle is 42, the cabinets are inset. I have extended styles to account for hardware, even though we really didn't need the extra room. My hardware is very shallow.

    The isle she is referencing is 6 ft.

  • 10 years ago
    last modified: 10 years ago

    You still need to account for hardware and extending past the cabinet fronts/doors/drawer fronts - so your counters should be b/w 24.5" and 25" deep (25" is better). Maybe your hardware is shallow (be sure it's usable), but you still need to completely cover the front of the cabinets - and a bit more - to prevent spills from running down the front of your cabinets/drawers/doors and spilling into the inside of the cabinets (as well as ruining the fronts of your cabinets/doors/drawer fronts).

    The counter edge must stick out past the front of the cabinets, no matter how deep they are and no matter what type of frame you have.

    Also, be careful - if your pulls/knobs have places to catch things (e.g., knobs or pulls with free ends), then your counters should be deep enough to protect your clothes (especially pockets) from catching on the pulls/knobs.

    See these threads - with shallow counters, it will be worse:

    .

    Aisles - OK, aisle b/w the refrigerator and island is wide - will that walkway be completely clear? I.e., no table or stools on that end of the island? If so, then you can pull the counters out on the refrigerator wall by pulling the cabinets away from the wall 3" or so and use standard depth cabinets (the ones you have). But, be sure the doors of your refrigerator stick out past the surrounding cabinets & counters so they will open fully. Or, use one of the extra cabinets to make your island longer (but you will have to reduce the length of that wall stub to do it.)

    But, your aisle b/w the sink and island is not 48" - even if you have flush counters - it's 45", maybe 46".

    ETA: You might be able to get away with 2" of filler instead of 3" if you have inset in the corners.

    .

    Wendy thanked Buehl
  • 10 years ago

    Wendy - the cabinet frames are beautiful!! May I ask who makes them and what the style and color are? How nice that you have extras now!

    Regarding the dead corner - you could add an inset composter (or are you already planning this? I see a circle).

    We have a dead corner in the pantry but which is accessible from another room, so we turned it into a couple drawers on the other side (not shown), to take advantage of the space (in your case, it's on an outside wall, no?). Below you can see how we installed recessed pulls on the file cabinets, to allow the pull out drawer (single large) on the right to open.

    I love your sketches, but am chuckling over the fridge you drew in (SZ Pro48), and that you used 'budget' in the same thread. I still lust after that one....


    Wendy thanked oldbat2be
  • 10 years ago

    Thanks, Oldbat2be. They are Omega Plainfield in Magnolia.

    Thanks for the idea (it's very clever), but that is an outside wall and yes, there will be an inset compost bin.

    I so love that fridge and will save forever, if we have too, to get it.

  • 10 years ago

    That did strike me as well- budget and 15k fridge in the same sentence. Although it may be even more now...

    Before you sell your kidney, I had a glass door fridge in the last house and it was quite a job to keep it looking nice and organized. Something to keep in mind :)

    Wendy thanked Melissa Johnson
  • 10 years ago

    I don't think it is so odd. I want a nice kitchen, but can't afford to pay for it all at once. So, budget over time.

    Anyone have any thoughts about the new fridge wall design with the extra cabinets? After the sketch, I may prefer it to the original.

  • 10 years ago

    I think the new design will work fine. Why not put your microwave drawer in the island, maybe the end toward the frig, or even make that end cabinet on the island face the frig so your microwave would be close for leftovers, snacks, etc. Those two 33" drawer bases will make a great coffee, breakfast, snack counter. What were you planning to store on that wall? Will the glass door uppers work for you for that storage?

    Looks like you will have a unique and lovely kitchen!

    Wendy thanked nancyjwb
  • 10 years ago

    I wouldn't want to lose that tall cabinet. I love your original design and I think it would be hard emotionally to make these compromises since it sounds like you've planned and saved for awhile. But...if it's a significant savings then I might consider it.

    BTW, I love your cabinets! Would you still choose that brand even with all the problems you've had?

    Wendy thanked traci_from_seattle
  • 10 years ago

    Nancy, thank you. At first, I wanted a a pretty fancy island. That would have worked for a microwave. But, as time has passed, I decided I wanted more of a work table style island. Designed after this table, but with an added shelf.

    Farmhouse Kitchen · More Info

    Traci, the savings using the extra cabinets would come to about a 50% savings on the cabinets (at the price we paid initially, but excluding island).

    The cabinets are beautiful and I would choose them again. The Omega people, along with the design store people, all came to my home and examined every cabinet that was delivered. They were ones that decided we needed a new upper. We had only requested the drawer base, a drawer front, and a door.

    I would also use the design store again. They are giving us a 30% refund, all the extra cabinets, a custom hood w/ insert (to be ordered), and a 10% discount on all future purchases (including sale and discounted prices). They have been stellar. (Opinion may change, based on final outcome.)

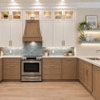
    This is the hood inspiration:

    Contemporary Kitchen · More Info

  • 10 years ago

    wendy - I love what you're doing, including the new fridge wall design. The island work table is genius.

  • 10 years ago

    Thanks Oldbat2be. I really appreciate that and the help.

  • 10 years ago

    could you.. leave the doors off and adjust the shelves, possibly place microwave in "new" upper cabinet of second drawing, or leave the doors on.......make a place on the back panel for the electrical outlet?

    Wendy thanked RL Relocation LLC
  • 10 years ago

    Hi Wendy.

    You may find this info helpful.

    https://www.fix.com/blog/kitchen-design-best-practices/

    Since the refrigerator is about 6 feet from the island (closest surface), I recommend going with the uppers and lowers on the refrigerator wall so you have some counter space. If there's room for the microwave in the island, that's where I'd put it. :))

    Can't wait to see the finished product.

    Wendy thanked Natalie
  • 10 years ago

    Thanks, Downbytheriver and Natalie. We've decided to an island designed after this table:

    Farmhouse Kitchen · More Info

  • 10 years ago

    I was surprised to discover these weren't Norcroft cabinets. Not that the pretty style would be, but in the mistakes and giving you the bad cabinets.

    I ordered 11 cabinets and ended up with 32. Heights, widths, materials, depths, you name it, they came in wrong in several different "replacements." I was ordering through DirectBuy, and the wonderful cabinet guy said, "Want 'em? We can't do anything with 'em."
    Hoarder (and rebuilding DIYer) that I am, I said, "Oh, well. I suppose I could find something to do with them." All the while hearing the marching band cheering and blaring horns in my imagination! Drowning out the game show "you're a winner" bells.

    Kitchen, MBR, MB, and ultimately, my LR got all their cabinetry. I wasn't even shy about retrofitting and rebuilding some of it, since it was free. Much of the deeper cabs I made into inset cabinets. LOVE THEm -- but hate Norcorft's 2.5" deep base cabinet upper drawers. DUuuuuuumB. Anyway.

    Since I bought these way before I had any DIY skills, nor knew of TheCabinetJoint.com, H4H, Goodwill, tools, and innovation on my part, I figured these were a great deal in the long run. Sure, they were, but what I know now? I still wouldn't have bought them.

    So this has nothing to do with your post. Just got me thinking!
    Great job.

    Wendy thanked CEFreeman_GW DC/MD Burbs 7b/8a
  • 10 years ago

    dont you have a round table just in the foreground of the island?

    Wendy thanked RL Relocation LLC
  • 10 years ago
    last modified: 10 years ago

    Sorry, I didn't receive notifications.

    CEFreeman, thank you for sharing. I love your story. At first, I was thinking, what the neck am I going to do with those. But, I after I realized they would in fit the kitchen or the entrance, I was extremely happy.

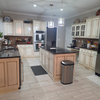
    Downbytheriver, yes, the dining table is on the other side of the column. I don't have the best pics and it is hard to summarize all weve done, but.....

    At first, I was going with a green crackle subway tile, but that has changed. so, maybe layered pain on the island with muted green as the top color?

    This is the table, not the chairs The window behind the table is now a pair of large double hung. The wall to the left of the table is now gone and will be replaced with another column.

    Layout & Decor (before & during renovation) · More Info

    the stacked 2x4s on the right are where the column goes

    kitchen: flowing as one space · More Info