Software
Houzz Logo Print
m_gabriel

Please Help with IKEA Sektion Cover Panels

9 years ago
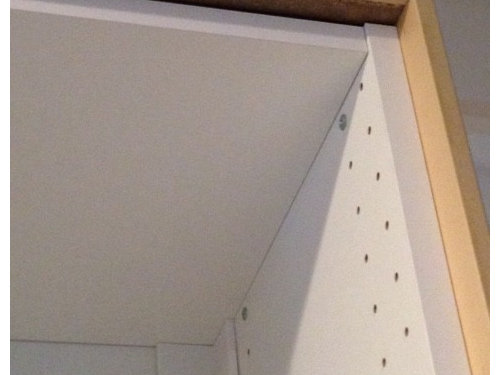
For wall cabinets, at the end of a run - how should the cover panel and trim be installed?

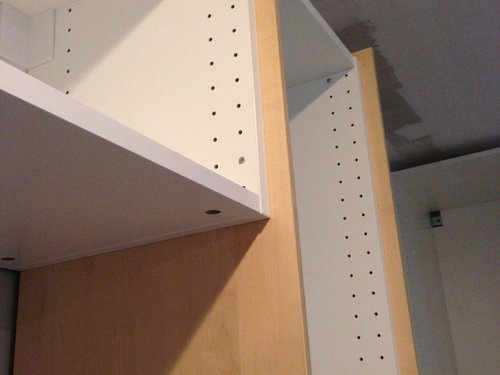
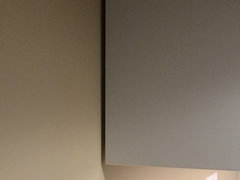
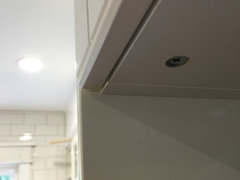
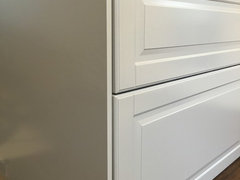
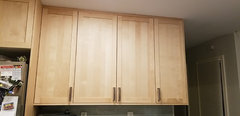
1) To the end of the box with the door sitting in front of the panel? Or, should the panel come out and cover the side of the door? I was thinking the door sits in front of the panel but the guys installing them though it came more forward . But looking at the trim piece (using it on the flat, squared side), it doesn't look like enough finished underside for that to be right:


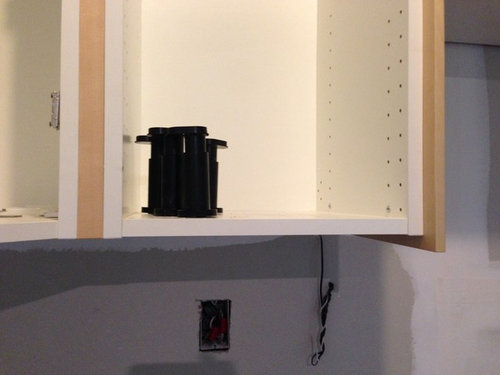
This doesn't look like what I remembered from a past IKEA kitchen (but I was not as involved in the details):

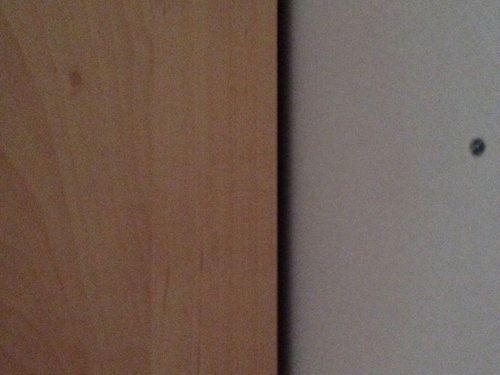
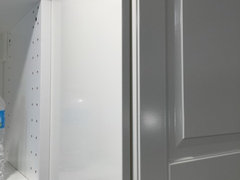
Here is another view in comparison with how a 1" filler piece sits flush with the cabinet. These can't both be right. Does the filler come forward or does the cover panel move back?:

3) Should it go back all the way to the wall to cover the gap from the suspension rail?

4) Placed enough above/below the frame to match up with the trim? (I think we are in agreement that that's a "yes" b/c otherwise the corner would be unfinished cut trim.)


Thank you!! Pics of correct installation would be greatly appreciated.

Comments (20)

  • 9 years ago
    last modified: 9 years ago

    Welcome to the biggest headache with installing Ikea cabinets! (IMO.)

    I discussed some of the issues I had with the panels in this thread.

    We decided to make the cover panels meet up with the front of the doors, and I think that looks more polished. Unfortunately, our cover panels were not quite big enough to do that. (We did custom fronts, but they were based on Ikea measurements.) There are a few places where we had to fill in with caulk to cover up the gap at the wall. We did white cabinets, so that was an option for us. It won't be for you.

    For our tall cover panels next to oven & refrigerator cabinets) we pushed them back so they were flush with the walls. The doors end up sticking out just a bit in front of the cover panels because the panels were not quite wide enough to take into consideration the door depth. I don't love it, but we are not going to change it now. If I were to do the kitchen over, since we did custom fronts, I would order slightly larger cover panels.

    We ended up making one cover panel ourselves from plywood for the end of the peninsula. We wanted that one to be flush with the back cover panel edge on one side and the front of the doors on the other side. The one we ordered was just too small.

    Honestly I think Ikea cover panels are an after thought for them. I think Ikea cabinets probably work best with galley kitchens where you don't have to worry about the ends as much. And if you look at the kitchen displays at Ikea closely, you will notice that the way they use cover panels and light trim is kind of sloppy in places. I never noticed when we first looked at the kitchens, because I was too focused on the drawers and functionality.

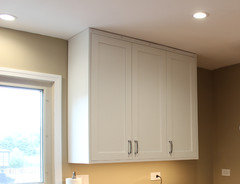
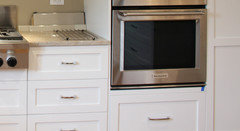
    Here is a picture of a wall cabinet and how we finished it. We still need to add trim to the top, but we are waiting until we add the backsplash which will be going to the ceiling.

    Actually, that reminds me we didn't caulk those gaps because the tile should cover the gap.

    m_gabriel thanked Lisa
  • 9 years ago

    Thank you, Lisa. Our previous IKEA kitchen was, in fact, a galley kitchen so I didn't have this to worry about. (Plus it was installed by contractors who specialized in IKEA.) Your cabinets look pretty! And your ceiling looks straight! Did you have to do any filler between wall cabinets? Did you put it flush with your doors or with the cabinet frame?

  • 9 years ago

    We pulled all the cover panels on the wall cabinets to be flush with the front of the doors. There is a little gap back there. It should be mostly covered when we tile the wall. If we were not tiling to the ceiling, we probably would have moved the cover panel back a bit and let the doors stick out a little past the cover panels.

    We have that situation by our oven where we did push the cover panel back to the wall so it covers the rail. The drawers come out a little further than the cover panel and it is not perfect. But it isn't that obvious to me anymore.

    m_gabriel thanked Lisa
  • 9 years ago

    Those pics helped a lot, Lisa. Your kitchen looks beautiful! When I went back to measure, it looks like the issue is that the panels come out more than they need to to cover the door. If they move them back a little towards the wall, we'll reduce the gap in the back and still be flush with the doors. I can see on your base cabinet pics that the cover panel definitely looks better up flush with the drawer fronts. What do you think about filler pieces? They should they be flush with the doors/drawers, too, right? Or else it will look weird to suddenly dip back. Thank you for chatting about this! I feel like I'm in better shape to discuss tomorrow with the contractor's guys.

  • 9 years ago
    last modified: 9 years ago

    I think the filler pieces between cabinets should be flush with the cabinets. It will dip back, but this is how it would be in other kitchens, as well, unless you were getting custom drawers/doors that could be made to meet up like the rest of the kitchen.


    ETA: i guess you could always add another piece over that piece, but then one side would have a cut/unfinished edge.

    m_gabriel thanked atiman
  • 9 years ago

    That's exactly the dilemma we have, atiman. That's our only piece of filler between wall cabinets so we are trying not to have the dip jump out. Because doors on either side are hinged with the filler in between, we are hoping one unfinished edge is not going to be noticeable if we pull it forward. Another option is to use two finished edge pieces of 1/2" panels for the filler so both sides would be finished but it would have a more noticeable line down the middle.


  • 9 years ago

    For the benefit of someone in the future with the same problem, turns out we DO have to pull the filler out to be even with the doors b/c it is adjacent to a corner cabinet. The way the door sits on the corner cabinet, it needs to meet a door (or door depth filler in our case) on either side to cover the frame on the diagonal. With the filler flush to the cabinet frame, there was a visible gap where the frame is visible.

  • 9 years ago

    I hope you've discussed your concerns with your installer. The panels come in many sizes and are ripped to achieve the desired effect depending on the door/drawer style and your preferences. The IKEA designer should have gone over these details with you to be sure you purchased the correct panels. I'm doing my 4th DIY IKEA kitchen right now and in most cases the panel is pulled forward to match our chosen reveal. The decision should be made taking your soffit trim pieces into account as part of the design. What door style are you using? Mine has detail so I wanted the door and drawers to slightly stand proud.

    Fridge cabinet

    Island

    m_gabriel thanked bbtrix
  • 9 years ago

    Thank you, bbtrix - your cabinets look beautiful! We are doing Bjorket which are much more plain and seem suited to being squared off with the panel. I found a number of pix where the cabs looked good with the doors/drawers flush to the panels and others that looked good with the doors outside and others with variation like yours that looked just right. I have a design with all the panels called out (thank goodness!) - it was just the placement that was throwing us off last night. Our installers are not as IKEA savvy as they made themselves out to be but they are good carpenters and very good natured (so far!) about moving things around so we can look at it together.

  • 8 years ago

    I am using a cover panel to enclose the exposed end of the fridge which is counter depth. There will be a cupboard above it leaving 13.5 inches above the upper cabinet to the ceiling. My question regarding the cover panel is

    " should the cover panel stop at the ceiling or stop at the top of the upper cupboard"

    leaving the 13.5 inches exposed?

    Thanks for any advice!

  • 7 years ago

    m_gabriel , would you mind posting pictures of your finished kitchen? We are installing bjorket (we're painting the doors) but I'm having a hard time deciding how to do the panels and trim pieces.

  • 7 years ago

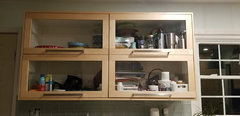
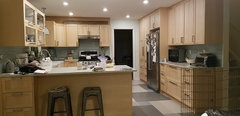
    cherylbirth - here are a few pics of how we did the panels and trim to come out even with the doors and drawers. it''s not perfect everywhere (contractor's crew was a little overmatched) but it's fine and we are happy with the Bjorket. Is it back? It was just getting discontinued when we did our kitchen 2.5 years ago.

  • 7 years ago

    LOL - definitely not a glamour shot here in the midst of making breakfast for the dogs + real life. Ignore the soffit -:we just like that piece of reclaimed wood so we left it there.

  • 7 years ago
    last modified: 7 years ago

    Thank you so much! Your kitchen looks great! We actually started this reno in 2017 and purchased the Bjorket doors because they were deeply discounted due to them being discontinued with the intention of painting them white. We've had one setback after another and have been without a kitchen all this time but we finally have the kitchen sheetrocked and ready for the cabinets.

  • 4 years ago

    Hello,


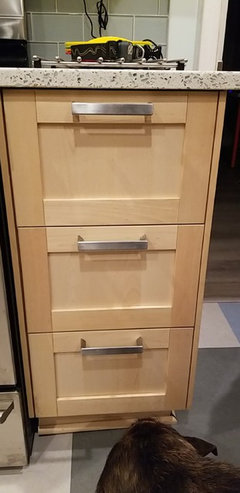
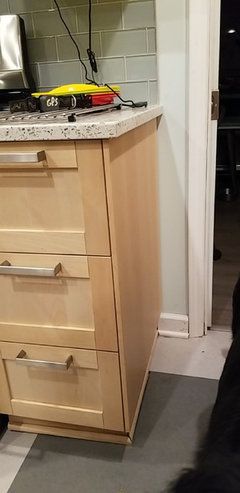
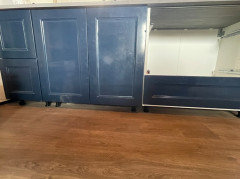
    i was hoping someone can help me with a delimma i am having with my Ikea Sektion cabinets. As you can see in my picture, the drawer front on the left does not come all the way down to cover the rest of the base cabinet like the other two beside. The runner is all the way to the bottom, I’ve tried turning the little screw in the drawer but it doesn’t lower it enough to cover that white part at the bottom and I have installed the fronts according to the instructions. I did call Ikea trying to explain the issue and they said it could be a ”quality” thing and nothing can be done. But why would other cabinets in the series not be like this?? if anyone can help that would be greatly appreciated!! i am getting very frustrated

    and just want that little white patch covered.

  • 4 years ago

    We had the same thing happen - the guys who installed our counters took a drawer out and then put it back in and he had it one hole off. It looks right but it's not quite.

  • 4 years ago

    @Taylor Behn-Tsakoza- Assuming you're using the right holes (they're 1/8" off, and the stupid stickers go at the bottom, even though that put the sticker on all of ours upside down), and have the metal thing going the right way (I did not on the first try), then it's time for vinyl car wrap (or paint) around the edge to camouflage the white.

  • 4 years ago
    last modified: 4 years ago

    The drawer connecting hardware placement is different for the bottom drawers. The bottom drawer uses the two lower holes and all other drawers use the two upper holes. The instructions actually do show this but like most of Ikeas instructions the were made by someone who’s previous job was designing puzzels.