Software
Houzz Logo Print
daduran

Bathroom Vanity Backsplash Tiling Question

9 years ago

Hello Houzzer's. We are installing a new backsplash in our guest bathroom which has a left side wall and back wall. Do I tile the back wall first or the side wall? I've read that I should probably measure to the middle of the back wall and work my way out, but that would mean that even the outside ends would have a cut and I just think the cuts would look better in the corner where I can hide them with decor or soap or something. Does anyone know the proper way to start the tile? Thanks for your help.

Comments (23)

  • PRO
    9 years ago

    Okay, I just wrote a completely different answer, but when I started looking at sample photos I realized it may be wrong.

    The correct answer is: it depends on the tile. If you are doing a border, you should definitely center the tile. If you are using very small tile, starting from the outside isn't a problem.

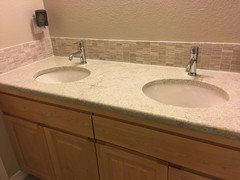
    The issue isn't as much about the cuts as it is about those of us with OCD who see that the faucet is just barely out of alignment with the grout line and it makes us crazy every time we wash our hands...


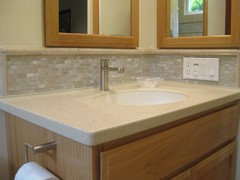
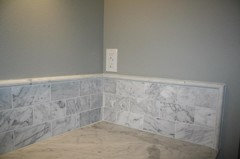
    Like here:

    The back splash doesn't go all the way to the edge of the counter! Aaaaargh!!!!


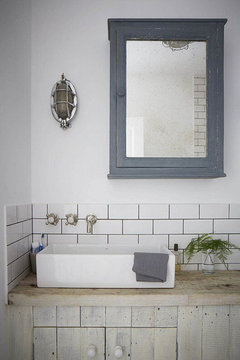
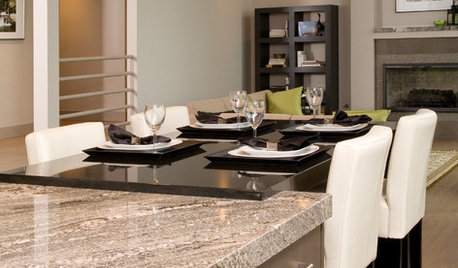
    Or here:


    Are you trying to make me crazy? Arrrrrgh!!


    I think you get the idea. It should look intentional, not like, "Oh yeah, we forgot to put in a back splash."

    D D thanked User
  • PRO
    9 years ago

    It all depend on the size of each tile. Its usually a best practice to start in the middle of a wall so you get the most appealing look in the middle and the ends will have the corrections/cuts. But if you are using very small tiles such as 1X2's or 1X1's you wont have to worry as much with starting in the middle. I would actually start in the corner to give your corner the best appeal. Lay a coat of mortar about 12 X 12 to cover at least one sheet. Use a 1/4th inch trowel to get the best underneath coverage. For smaller backsplash tiles I like to use 1/4th inch but you could probably get away with 1/8th if that's all you have. Just make sure your Trowel lines are defined and smooth. You don't want the mortar to stick to the trowel and create a space where you cant see the trowel lines. Once you have a good underlayment of mortar place the sheet of tile in the corner and try to make it as perfectly perpendicular to the wall as possible. If you want to use a square ruler it can help. The next tile sheet should go on the other wall touching the same corner. That way you have a perfect looking corner and you will go out from the corner. If you get to the end of the sink and your in mid-sheet .... don't worry there are a number of tactics you can use to blend or stop the tile without it looking cheesy or newbish LOL.

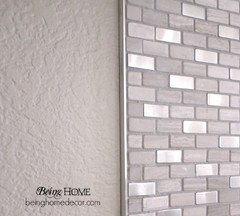
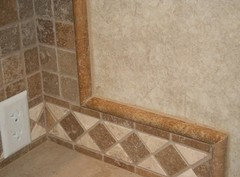
    here are a couple of pics for Stop edging that I've used.

    Pencil Tile, Bull nose, Quarter rounds, Aluminum Edging and Chair Rail tiles can all be used to end a tile job with style.


    I hope this helps. If you have any other questions just ask!!

    D D thanked Logistics, inc
  • PRO
    9 years ago
    last modified: 9 years ago

    Normally we will tile the side walls first so that the back wall over laps the sides in the corners. Depending upon the size of your tile starting from the center working out usually looks best. Would be best for you to template on the wall to determine end cuts to ensure it looks right. If you have tiny slivers to cut for the ends it may be best to off center the tile to avoid those tiny cuts. Personally, I like a tiled bullnose edge (tile or stone) vs a metal schluter strip. I think it looks cleaner.
    If a bullnose is not available, you can paint the edges to match your wall. This also gives a clean look and can save you a little $$ for your pocket.

    D D thanked Cinar Interiors, Inc.
  • 9 years ago

    Thank you all for your expertise. I just finished installing the tile. I started from the outside end of the back wall and worked my way in. I'd laid out the tile a couple of different ways and this actually ended up okay.

    Lydia - your response made me laugh but I do understand about the OCD thing. The "columns" in the tile actually ended up right where the faucet will go. It's a one handle Delta Trinsic, so should look good. The corner ended up with the same tile pattern coming from both sides.

    I wasn't real thrilled with the side wall corner piece, but I'm hoping the caulking and grout will disguise it.

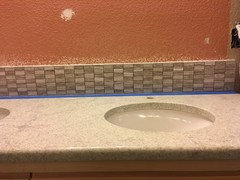
    I'm not a fan of the metal edges and didn't want a "boxed in" look. More than likely I'll soften the edges once it's fully cured and grouted (it's limestone). This tile was a pain to install because the thin horizontal strips were separating from the mesh. I hope it'll look okay with the granite once grouted. The granite is bianco montanha and I had the hardest time finding something that would go with it. Here's a pic without the grout. Don't mind the orange paint, that was behind the mirror and new paint is coming soon.

  • PRO
    9 years ago

    Did you make sure to use Caulk on the joints that touch the sink's counter top? This is an important because over time water can splash onto grout weakening it and causing it to crack and crumble. That is if you used grout on the bottom joints. If you used Caulk... GREAT! :-) Caulking is a better seal for water resistance.

  • PRO
    9 years ago

    Oh lol when I zoom in on your work I noticed you aren't at the grouting stage. Forgive me daduran. You probably have it under control in that case. Just remember fill the bottom space with like colored caulking. They should offer a almond colored one which will be close to the color you need.... I believe.

    D D thanked Logistics, inc
  • 9 years ago

    Greyfox, yes I used a 1/8" spacer (and a level) for caulking. Is that appropriate?

  • PRO
    9 years ago

    That's perfect! I see you have that tape down too. That's an excellent way to avoid getting grout/caulk on your countertops. Nice work! I'm a he fan of using your figure but there are tools out there to get a smooth Caulking edge.

    Also Just make sure when you cut the tip of the caulking tube its at an angle so you can get your tip in the 1/8th inch space. a common mistake is the grout the joints and put caulking over it after. Don't do that. Just fill that bottom joint up with grout and then keep the tape there so you get a smooth line. Also it helps to have a small container of water to dip your figure in. This gives some lubrication so you don't get caulking all over the place LOL. be prepared with plenty of paper towels or rags. Whichever you prefer.

    D D thanked Logistics, inc
  • PRO
    9 years ago

    Nice install


    D D thanked Cinar Interiors, Inc.
  • 9 years ago

    Greyfox, Do you mean I should caulk the bottom before I grout? Or just avoid the bottom while I'm grouting and caulk at the very end?

  • PRO
    9 years ago

    I would do that last because you might get grout mixed with Caulking if you do it first. If a little bit of grout falls in between the tiles use a scrapper to get out the extra bits of grout.

    D D thanked Logistics, inc
  • 9 years ago

    Will do. Thanks for your help.

  • 9 years ago

    make sure you do a 100% silicone caulk. if not, you'll get shrinkage and cracks.

    D D thanked Beth H. :
  • 9 years ago

    Beth, thank you. Glad you posted this comment. I had the Alex Plus All Purpose acrylic latex plus silicone. So I should not use that one?

  • PRO
    9 years ago

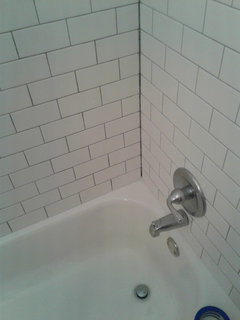
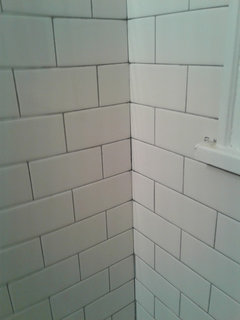
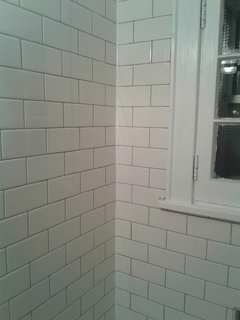
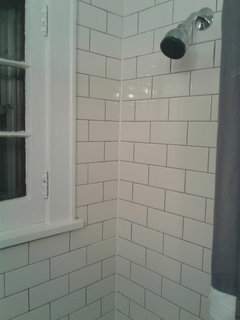
    I just finished with a small project. It appeared that whoever owned this house before used grout between the joints and of course there was dampness and small leakage in the basement below the tub. We traced it back up and it was a cracking weak spot in the grout. I decided to chisel out all the grout in the joints and replace it will silicone caulking. its optional to do this to the vertical joints but since we had cracking in the grout on the vertical joint as well I decided to those too. Ill post pics so you can see where I removed the grout and replaced it with caulking.

    Temp project · More Info

    Temp project · More Info
    these two are after I chiseled out the grout.


    Temp project · More Info

    Temp project · More Info

    I already completed the caulking around the tub before I decided to pull out the phone for a few pics.

    D D thanked Logistics, inc
  • PRO
    9 years ago

    It's always advisable to caulk the corners of a shower and along the base if it is a walk in shower. Whether it's a new home or old home, the house will still shift and move. The corners of showers always crack. Grout caulking allows some movement. And yes they do make silicone grout caulking to match the color grout you use, sanded or non sanded.

    D D thanked Cinar Interiors, Inc.
  • PRO
    9 years ago
    last modified: 9 years ago

    That's so true. We only lived in the house for 4 months and some of the grout started cracking and falling off of the vertical joints.

  • 9 years ago

    Greyfox, that corner you redid looks 100x better...It just looks so much cleaner.

    I finished my backsplash and want to thank you and all who responded. Here's a pic.

  • PRO
    9 years ago

    OH wow that looks fantastic! Nice work Daduran!!

    D D thanked Logistics, inc
  • 8 years ago
    Nice tile job, how tall is the backsplash?
  • 5 years ago


    hey there my name is Jett first time homeowner/tiler lol ... do I grout the bottom to the vanity then silicone after

  • 5 years ago
    last modified: 5 years ago

    Jett,,,no. silicone caulk only goes in between tile/vanity countertop. they will have matching silicone colors to your grout colors.