Software
Houzz Logo Print
mmilos

Is this tile job acceptable?

9 years ago
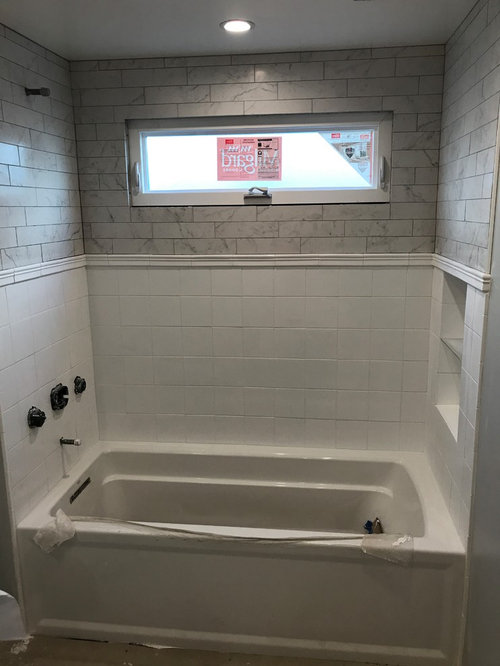
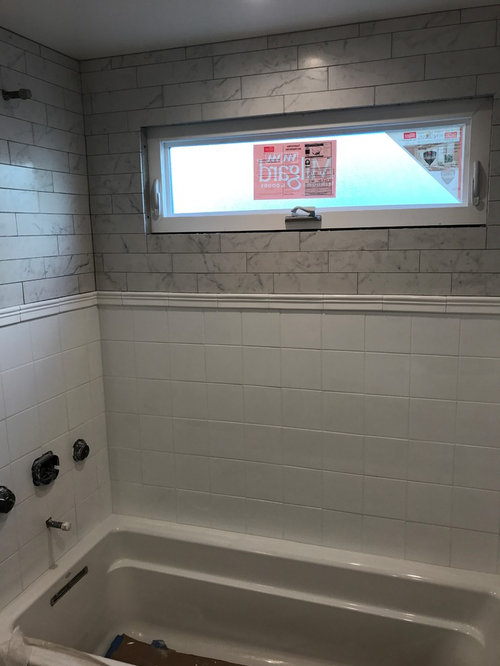
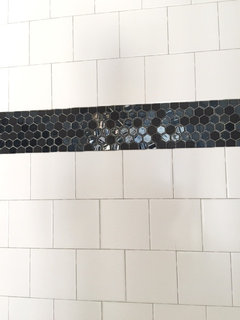
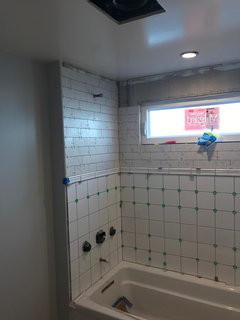
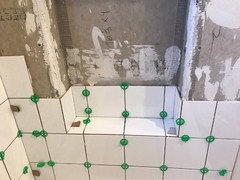
The contractor just grouted the lower tile. It's a plain white 6x6 tile with white grout. With the shower light on, the tiles look uneven. Am I being too picky? Would you have them redo it?

It's irritating because I paid a premium for a contractor and he ended up using his main handyman to do all the tile work.

Comments (56)

  • 9 years ago

    Regardless of the tile work, it all needs to be ripped out because nothing is waterproofed.

  • 9 years ago
    Thanks. I'll talk to the contractor tomorrow.
  • 9 years ago
    Beth, great eye!

    I just noticed what you were saying about the different tile layout on top of the window versus the bottom.

    Thanks all for your help.

    Your tile job is beautiful. I need a pro tile setter.
  • 9 years ago
    last modified: 9 years ago

    mmilos,,,first off, for him to say the joints don't need to be taped, just shows he's clueless w/waterproofing. Now i'm really concerned about the window area. that's going to be the first thing to give you issues if it's not done correctly. What does the tile job in the niche look like?

    tiling 101 Tub or shower wall tile preparation:

    1. Apply a layer of 1/2″ thick cement backer board to the wall studs.
    2. Tape any seams and corners with fiberglass tape.
    3. Apply thin-set adhesive over the fiberglass tape, and allow it to dry.
    4. Roll a waterproofing sealer over the walls, and allow the sealer to dry.

    notice it says fiberglass tape, not regular drywall tape.

    Also, notice the gap between the tub/tile. 1/4". was your gap 1/4 or more?

    As for the layout,i don't mind the 6x6 on top of each other, but w/the chair rail border and then the other tile in the subway layout, it's just too much. now if you had the same color tile on top, I'd say ok.

    I'd rather your border be something a bit simpler if you're going to thrown in different colored tile.

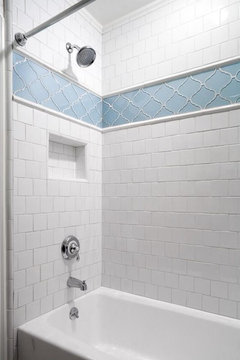
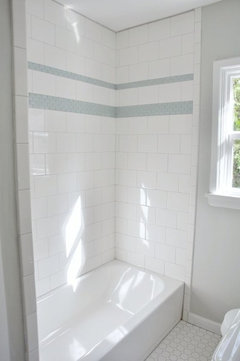
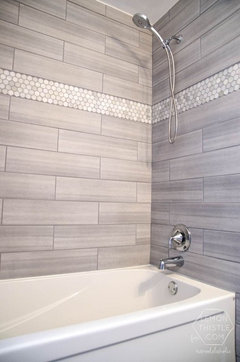
    When using a border in the middle of the tile, you want something that is relatively flat so you have no sitting water. this picture, above, shows similar tile to yours. I'm not sure if it's a bad tile job or if that tile is handmade, resulting in the waves. Notice the chair rail molding. They used it at the very top where it won't catch water. the border was done with 1/2" round molding, easy for the water to drip off. It's a different tile in the border, but it all works. The two tiles you got seem to be from two different showers. Sorry, but I think we could find a better layout for you.

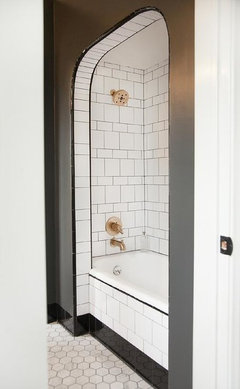
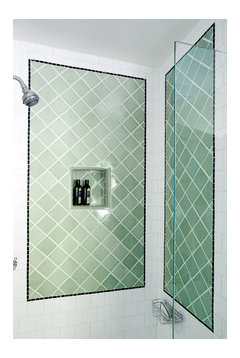
    the pic below, they used different tiles, but from the same family. the black border is a nice contrast.

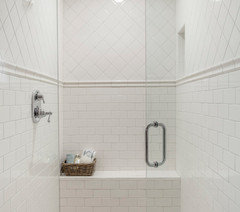
    personally I like 6x6 tiles like this:

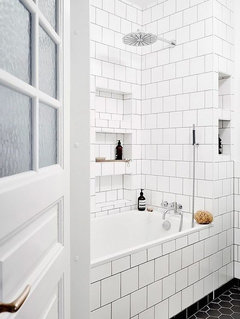
    see how much neater these look w/simple borders and the same tile?

    then if you want to switch the layout do it like this, in the same color fami

    (the chair rail border looks ok on this one because it's all from the same family/color)

    or, same shapes, turned on a diagonal in another color (but same kind of tile)

    if you like the other tile, then keep it all w/that color and do a border that matches that color.

    sorry for the pic overload. I just hate to see you spend good money on a bad install. wanted you to see good jobs and what you can choose from, design-wise.

  • 9 years ago
    Thanks for your thoughts. The examples you show are very nice.

    My thinking on the design was this:

    The floor tile will be 12x24 in the same finish as the 3x12 subway tile.

    I wanted 1/3 offset on the subway tile to match the floor tile offset.

    I thought doing the whole tub/shower in the 3x12 carrara porcelain subway would be too much. But wanted to use it echo the window shape.

    I personally don't like niches with an accent tile. I don't like highlighting shampoo bottles and razors. The tub/shower sits at the end of a hallway and is quite exposed with the bathroom door open.

    I'm also using a shower column with hand spray that will be centered in the upper subway tile portion.

    That was my thinking.

    I agree with you on being simple.

    I'll post my inspiration photo.
  • 9 years ago
  • 9 years ago
    Beth, would you do a light gray tile instead of the white?
  • PRO
    9 years ago

    There could be plastic sheet waterproofing behind the cement board.

  • 9 years ago

    I wouldn't be satisfied with that as a DIY job, much less something I paid a pro for!

    It's going to be lovely when it's done correctly, though.

  • 9 years ago

    Tyvek is a vapor barrier, not waterproof period. It has no business being in a shower. Period. Stop.

    "I originally had handmade tiles and he wasn't able to work with them so I exchanged them for consistent machine made tiles."

    That should have been the first red flag.

  • 9 years ago
    ^ Yes, there have been lots of red flags. I should have been more adamant early on. But they were confident and he had done good work for the other stuff.
  • 9 years ago
    Wow, I'm so sorry for your troubles but i'd consider firing this contractor if you haven't already paid him. The underlying work appears to be improper so I would take it all down and start from scratch. The price you pay down the line could be considerably higher if you have water damage. I am dealing with a house that didn't appear too bad (knew maintenance was an issue at time of purchase) until we started opening things up. Our original estimates to fix and renovate have more than tripled without a good end in sight. Good luck and let us know how it all shakes out!
  • 9 years ago
    last modified: 9 years ago

    To clarify. Tyvek and Black tar? you mean there is 2 layers back to back behind hardieboard. ? Thats a double barrier no no. Worse if combined with also an exterior moisture barrier is A trifecta No.

    The current TCNA spec for tub surrounds DO ACCEPT A Single sheet moisture barrier properly shigle lapped and Over/into tub flange. If you have either 15# felt or TYVEK subsituted. but only one or the other not both. We usually see 15# felt or poly plastic.

    If it were a topically waterp[roofed installation of either sheet membrane or liquid you would then seal the board/flange to the waterproofing on the face and zip it up.

    With the felt or poly or behind the hardieboard and properly lapped over the flange we want to leave the gap open for weep. If id used poly I would have siliconed the poly sheet(only) to the flange and still allow for moisture behind the hardie to weep .

    As long as you meet hardie fastener shecdule, TCNA specs you dont have to have topical waterproofing. You have a failure and tear out if theres a double barrier behind Hardie board and a mess if a triple barrier on an exterior wall in many climate zones

  • 9 years ago
    ^ Thanks for your response.

    I asked the contractor for clarification on what he used.

    Just white Tyvek. He said the LA City building inspector wanted two layers of Tyvek and that's what he said he used behind the Hardibacker.

    No tar.
  • PRO
    9 years ago

    In your inspiration photo, the smaller darker mosaic makes a strong impact in the design. Using white 6x6 does not result in the visual you were after; it would have looked more cohesive if you did the window wall in the 3x12 marble look, and did the short sides in the white tiles.

  • 9 years ago
    ^ Thanks. I agree with you. I'm 100% sure i will have it redone by a tile setter.

    I'll likely change the design and select a different bottom tile.

    One friend, who's a designer/architect, suggests I use same light gray grout on the white tile (except the rail) to tie them in better.
  • 9 years ago

    In short you have zero waterproofing, unfortunately. No if's, and's, or but's about it. Time to start over.


    "He said the LA City building inspector wanted two layers of Tyvek"


    And find out what the hell this guys is thinking as what I mentioned earlier is true, Tyvek is a VAPOR barrier, not a waterbarrier.

  • 9 years ago

    Posting to follow.

  • 9 years ago
    last modified: 9 years ago

    mmilos, gray grout w/the white is fine. keep us posted on what is to transpire. Perhaps if you went old school and had a tile guy who mudded instead of used cement board, if would be better. old school guys know how to make the walls perfectly flat and plumb. that's what my guys did. The issue w/the cement boards is it requires the underlying studs to be straight and plumb, which they never are. if you get a bow in the wall, it's because of the stud. So, a real tile guru will know how to fix and work around these issues.

    your inspiration photo used 2x2 tumbled limestone (lagos azul) and a larger carrara marble tile(8x12 maybe?) w/carrara chair rail.

    so sorry you have to redo all of this.

    and I've never heard of Tyvek used behind cement board. plastic sheeting, yes. I'm also curious about that window being waterproofed. you may have to do your own homework and answer your own questions. JohnBridgeTileForum is a great place where top pros answer questions.

  • 9 years ago
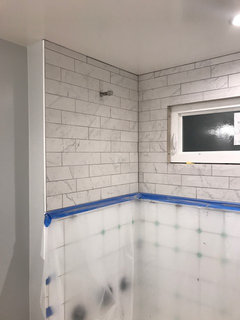
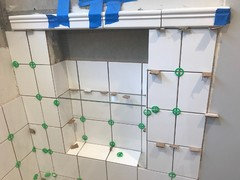
    Beth, more pictures of the tile progress showing niche and window. Looks like tape on the niche edge, but window looks doubtful.

    I saw he used the alkali resistant tape.

    My concern is with just the Tyvek. When I have the tiles removed if I seal with Redgard is that good?
  • 9 years ago

    what's with the cardboard?? did he run out of spacers? no wonder the lines are crooked.

    and yes, with the window there is absolutely no waterproofing or anything done for those joints. sorry.

  • 9 years ago
    ^ I think so... :-/

    I talked to the foreman and he thought it looked great. It looks better in bright sunlight. I told him to look at the pictures I sent.

    He said he will talk to the owner and I will hear back from him.

    I'm at the point of hiring my own tile guy to do the job.
  • PRO
    9 years ago

    Cardboard is a poor mans grout spacer. Tell him to spend the extra $$ to ensure your job is completed correctly or he'll have to come back out and fix again.

  • 9 years ago
    last modified: 9 years ago

    yes it looks better in bright sunlight because there are no shadows. overhead lights at night cast shadows on tiles that are out of whack. that's where you see the obvious mistakes.

    I agree about hiring your own guy, milos,,, You're in LA area? Some tile setters out our way. I would also go to JohnBridge and get tile references from them.

  • 9 years ago
    ^ Yep, San Fernando Valley. :-)

    My brother's friend's dad does tile for a living. We're going to get him to come out and take a look.
  • 9 years ago
    mmilos....this is so disheartening. I'm sorry you have to go through all this junk. You pay good money for quality materials, then suffer the inconvenience of the install only to have it all ripped out. This is becoming SO common. And it's not just tile. In this day and age, you cannot trust anyone to do an expert job....be it tile work, roofing, siding, stone work, fabrication etc. Even when you get recommendations, you just never know. You have to watch everyone like a hawk and almost become an expert yourself (and a noodge as well!).
  • 9 years ago

    nidnay,,exactly right. even tho my tiles guys were experts, I played contractor on my job and watched everything they did. they made a few goof ups w/the cement tile layout and something else w/the grout (they used the black instead of the gray for the white tile). luckily I caught everything because I would pop in and look every few hours! I'm sure they hated working for me. but I don't really care because I was the one w/the money! I want what I want and I was paying for it.

    So, yes, do your homework and research. Unfortunately it's come down to that now since pride and quality seems to be missing w/many 'experts' today. all they care about is getting it done and getting paid. If it's 'close enough', then it's perfect,,,to them. Not me.

  • 9 years ago
    Oh....don't get me started on this!

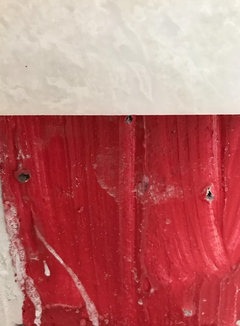
    Seriously, how hard is it to apply Redgard so that you get complete coverage? Upon inspection of the application of it in my master shower, there were large gaps and incomplete coverage and they were perfectly ready to start tiling. I told them they couldn't begin until I saw with my own eyes that it was applied correctly and completely. Each time I went to look at the job, there would be spots with no coverage. It took at least FIVE times for them to get it right. FIVE! I had two other showers they were slated to tile and there was no way I could be there all day to watch over them, so I had them text me pictures before I would let them start tiling. I felt like a nagging wife....it was so exhausting and draining. It's very difficult when you're basically telling them you have zero trust in their integrity and ability. Takes all the joy out of it. Not only that, but once they started tiling, they put a few nails through the shower wall to hold up the heavy tile so it wouldn't slide down the wall thus breaking the waterproof envelope. Were they planning on filling in those holes with more Redgard? Of course not! Again, I had to breathe down their necks. See pic....
  • 9 years ago
    ^ Misery loves company. Hope it all works out.
  • 9 years ago

    "Seriously, how hard is it to apply Redgard so that you get complete coverage? "


    Nothing for nothing but coverage means nothing as far as waterproofing. I believe it requires 2 coats, AND must be guaged to a proper mils in thickness.................

  • 9 years ago
    last modified: 9 years ago

    very common to use nails or screws to hold ledgers, later backfilling , the best of the best do this . More houzz misinformed drama. spreads like the plague

  • 9 years ago
    That'smuchbetter....Sorry, but no misinformed drama here. My problem was not with using nails for support. The problem arose when they had no intention of filling the holes in with waterproofing material - holes that were spread across the entire bottom of the shower. There is no point using redgard if you punch holes across the full length of your shower.
  • 9 years ago
    last modified: 9 years ago

    like i said its common and they get backfilled

  • PRO
    9 years ago

    This is an odd one because they did a lot right but also a lot just odd. The correct screw pattern but sheetrock vs durock screws.

    The joints ARE taped but they laid the thinset over it vs bedding in letting it dry and then tiling. Wrong? technically no because it is taped and thinset was used

    Tyvek? Well the waterproofing police still don't get that not all codes make ANY plastic or roll on waterproofing needed in a normal shower. Never seen Tyvek used but interesting as it would prevent water intrusion and also provides the needed air to dry out.

    Remember old tub/showers were not waterproofed at ALL and few ever leaked. I say it every single time the whole waterproofing issue came about in the late 90's early 2000's when they started using green board in showers which of course when it got wet from a leak crumbled and caused mold issues. Cement board is not effected by water.

    He used spacers and yes cardboard is used sometimes as it has a spring to it. Its tiling and sometimes you have to adjust on the fly.

    The biggest problem is they signed off on his install. He will site that at every argument you have. There are issues and I feel bad but try and work with the installer here and see how it works out.


  • 9 years ago

    old tubs/showers were mudded. inch thick. they didn't need waterproofing. And tiles stayed set for 80 years without any issues. Now you have all these other barriers and products. this one works here, but not there,,,,and you have to use this product with that product,,,yada yada. tile guys should just stick w/the old mud routine. at least that way you get flat/plumb walls for your tiles.

  • 9 years ago
    It seems the contractor is working on a solution. I sent him detail pictures showing the issues and we are communicating. I feel like it will be resolved.

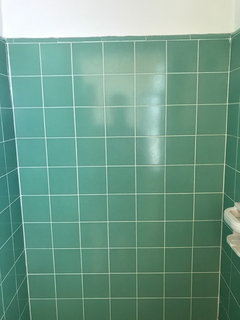
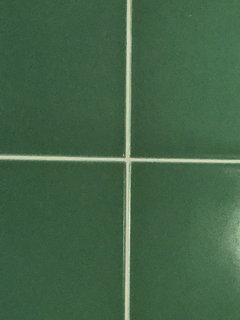
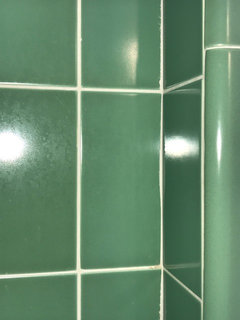
    Beth, it's funny you mention old tile work. I have yet to renovate my master bath, but the tile is in great shape from 1956... green color isn't current but it's a better quality job than my new renovated bathroom (pictures below).
  • 9 years ago

    back then workers actually took pride in what they did. that tile is beautiful. look at those perfectly flat walls/tile!! you ought to show that to the dumbo guy that did yours!

  • 9 years ago
    last modified: 9 years ago

    back then homeowners respected the trades and paid top dollar for craftsman, back then you had to put time in on the tools to get results or you got ran out of the house in short order... those days are dead. People now want cheap fast HGTV results and prices and theres novice hacks all over the desperate country preying on the priceshoppers.

  • 9 years ago

    @wannabath, the screws used for the hardiboard have hex-like heads. It looked different from regular drywall screws.

  • 9 years ago
    last modified: 9 years ago

    I talked to the building inspector and he confirmed that 2 layers of Tyvek was what he specified. He said there is no requirement to seal the joints. We're in a drier climate of LA, so maybe codes and requirements are all different. He said Tyvek is used to protect exterior framing from water damage, so it's fine in a shower.

    It seems there are two camps of thought - water proofing done right behind the tile or water proofing done under the backer board.

    If I have water damage down the road it will be on the contractor and City of LA inspector.

  • 9 years ago
    last modified: 9 years ago

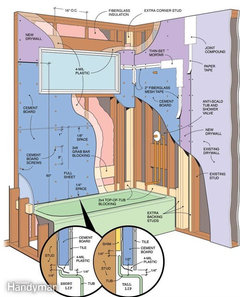
    All horizontal faces should be faced with a waterproofing membrane over the backer board and turned up per the illustration below. That goes for window sills or indented soap holders.

    https://i.pinimg.com/736x/cf/ff/4f/cfff4f72c69f40de2b3e97a91d00f283--tiled-showers-shower-enclosure.jpg


  • 9 years ago

    you will find 99% of professional tilers would disregard that diagram above. Vague, innacurate, incomplete and misleading. But much better than most bad advice we see here on hooz

  • 9 years ago

    "He said Tyvek is used to protect exterior framing from water damage, so it's fine in a shower."


    Maybe ask Dupont but that is a completely assanine statement in my mind.


    "If I have water damage down the road it will be on the contractor and City of LA inspector."


    Warranty will be up in a year and the you will have ZERO chance of getting the inspector or the city to do anything about water damage.

  • 8 years ago
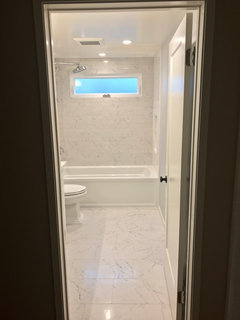
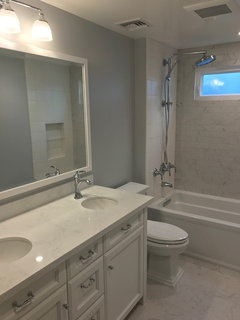
    Update: the tile was ripped out, waterproof membrane installed and redone in a simpler design. Thanks to all for your advice. Quartz frame around window remains to be installed.
  • 8 years ago
    Glad to hear it all worked out. Looks great.
    mmilos thanked User
  • 8 years ago

    Looks fantastic!

    mmilos thanked smitrovich
  • 8 years ago

    Congratulations, it looks great!

    mmilos thanked eaw 513
  • 8 years ago
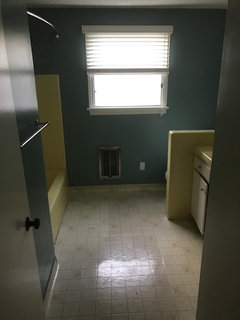
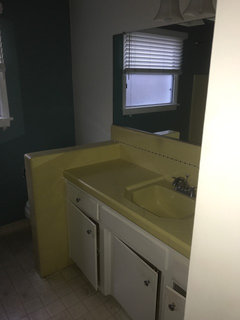
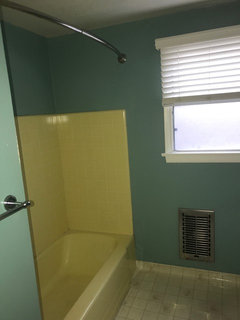
    Thanks! These are the before pictures from the same doorway entrance. We reconfigured the bath by removing an old HVAC/ utility closet and and used the extra space for a larger closet in the master bedroom.
  • 8 years ago

    Looks so much better

    mmilos thanked Elizabeth B