Software
Houzz Logo Print
houzz

POLL: Have you painted your kitchen cabinets yourself?

6 years ago
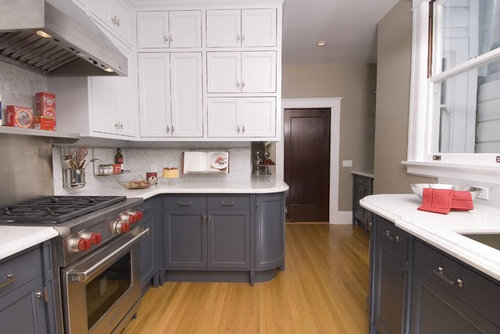
If so, how did it go? What did you learn and do you have any tips to share?


VOTE and tell us about it in the comments!


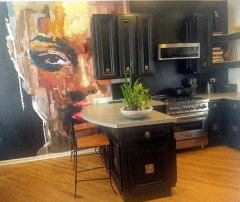
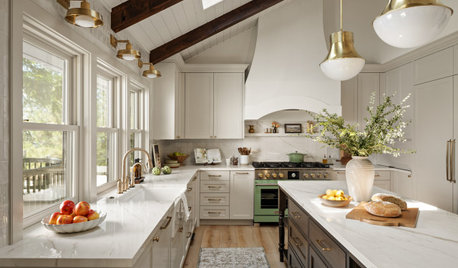
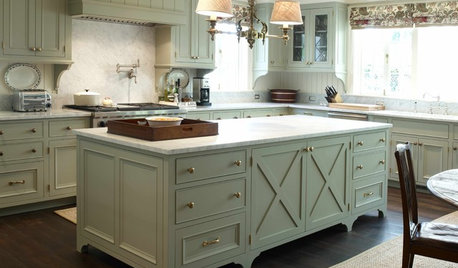
Ashbury Heights Victorian's Remodeled Kitchen · More Info


Yes
No
Other - Tell us about it below!

Comments (118)

  • 6 years ago
    last modified: 6 years ago

    @ilikefriday "I did apply several layers of polyurethane over the chalk paint."


    So then......this tells us nothing about the durability of chalk paint. You used it as a pigment and had to put multiple coats of a clearcoat oil based urethane over the top to protect it. This is like saying "I'm very bulletproof! I just have to be behind 3-4 bulletproof vests."


    Also, putting any kind of topcoat other than wax over chalk paint completely defeats the purpose. You end up with a surface that looks like pigmented polyurethane. The point of chalk paint is its finish texture, WITHOUT a clearcoat over it.

  • 6 years ago
    last modified: 6 years ago

    I think most people who attempt to diy painted cabinets will likely use a protective coating regardless of the type of paint applied. Your comment is absurd.

  • 6 years ago

    I’ve never used or had to use polyurethane on cabinets. You don’t poly over normal products, just chalk paint. That said, I don’t believe you have to wax over general finishes milk paint. I’ve used that and it lasted, but no prep, you are going to see issues that cabinets had before you painted them. They don’t magically disappear.

  • 6 years ago

    i painted my 1956 knotty pine cabinets many years ago. Lots of prep; removed the doors, cleaned, sanded, primed, filled holes, painted two coats of an acrylic paint. Took me three weeks of nights and weekends. It turned out really well and they lasted for 20 years until i redid the whole kitchen. Only a few chips, mainly where i banged something really heavy on them. It's not hard, but it's very tedious.

  • 6 years ago
    last modified: 6 years ago

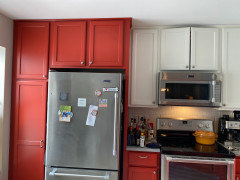
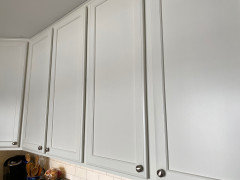
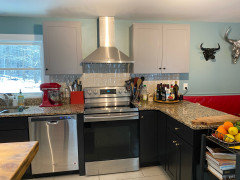
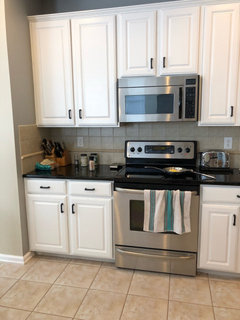
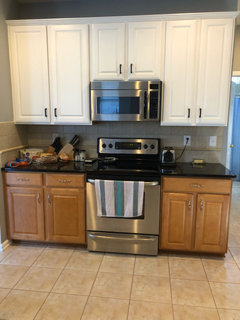
    Step - that is something we can agree on! "You are going to see issues that cabinets had before you painted them. They don't magically disappear." That is why I covered up as much as possible with molding before I began painting. I wanted to see as little oak as possible.


    I did prep my cabinets. I just didn't prime and sand them.

  • 6 years ago

    Lol, I guess that’s one way to do it. that’s a lot of work if you caulked all the seams. Do you have a pic of how much you covered in molding? Was it just a bit of the middle or the whole front?

  • 6 years ago

    Never mind I see your after. From what I can tell, you did a good job with the molding. Must have taken a long time.

  • 6 years ago

    Why is there no cabinets a over your microwave? The position of the new Microwave seems strange, with nothing now above it. May put a picture or shelving up for spices.

  • 6 years ago
    last modified: 6 years ago

    Steph - There was a ton of prep and it took far longer than I originally anticipated. Cutting all those miter joints is very time consuming. And yes, I caulked all the seams. The painting and poly was the easy part.

  • 6 years ago

    Good for you. You have a very nice updated kitchen. Most people would not have the patience to add molding, which is strange you used a non prep method of painting.

  • 6 years ago
    last modified: 6 years ago

    Steph - Thank you. I was originally thinking of doing something different with that space. The microwave was a compromise. We have no reasonable way to vent to the outside and the microwave is essentially useless as a hood. If I lived alone I would have removed all the upper cabinets, including those on the wall with the stove. As it stands, I have a floor to ceiling mural that bleeds into the cabinets to the left of the stove. I thought it looked a little more interesting without the upper cabinets.

  • 6 years ago

    You could add a hood, all the way to the roof. That was one of the first things I had installed in my 80 yr old home.

  • 6 years ago

    I would add maybe a vintage cabinet, that was different than the rest to fill the void above the microwave.

  • 6 years ago

    I thought about making a "hood" to cover the microwave because I'm just that kind of diy gal. It would look professionally done of course ;-).


    In the end, I thought a hood would distract from my mural and I wanted the mural to be the focal point of the room.

  • PRO
    6 years ago

    Yes, listed below is my itemized method:

    1. Remove all hardware & hinges, making sure to number the hinges before removal so I remember where they are supposed to be during install.
    2. Move all doors and drawers to a climate controlled, low dust environment, then Sand doors, drawer faces & cabinets with 150 grit sandpaper to remove any poly, roughness or clear coat. Wipe down thoroughly with tack cloth & repeat with 180 grit & 220 grit sandpaper. Lastly, clean thoroughly.
    3. Apply Sherwin Williams' Oil based preprite problock primer & lightly sand with 220 grit after primer has cured for 24 hrs.
    4. Apply at least 4 coats of Sherwin Williams' ProClassic Waterborne Enamel Semigloss to cabinets while lightly sanding with 220 grit between each coat.
    5. Install hinges to doors, install doors to cabinets & install new hardware such as door pulls.

    Enjoy!

    -Justin Summers

  • 6 years ago

    Would love to see this mural! Anyways, maybe 2 shelves that connect the left and the sad lonely one on the right. Yes it was expensive to install the hood. Maybe $1500.

  • 6 years ago

    You could buy a black hood. Don’t know how a hood would have a microwave at its opening, but I guess.

  • 6 years ago

    It is a non-conventional kitchen. A cabinet above the microwave is too conventional for me ;-)


  • 6 years ago

    Oh wow, okay. I still vote to extend same shelving you used on the right to connect the cabinets. Otherwise, it looks like your microwave is floating.

  • 6 years ago

    Well, Steph you should have told me that when I was planning out the space. Where were you then? I threw those upper cabinets in the dumpster. They are long gone. God, I hated those cabinets! Eventually, I will get my way and it will all be floating shelves and I will ditch the microwave.

  • 6 years ago

    Nah, just add a shelf or two above the microwave, that goes across and connects the cabinets.

  • 6 years ago
    last modified: 6 years ago

    ilikefriday

    "I think most people who attempt to diy painted cabinets will likely use a protective coating regardless of the type of paint applied. ""


    Absolutely not true. I can't believe you think that, to be honest. If the paint I chose needed to have a protective coat over it, I would choose a different paint!

  • 6 years ago
    last modified: 6 years ago

    I could be wrong. It wouldn't the first time 😊

    It seems as normal to me as priming does to most.

  • 6 years ago

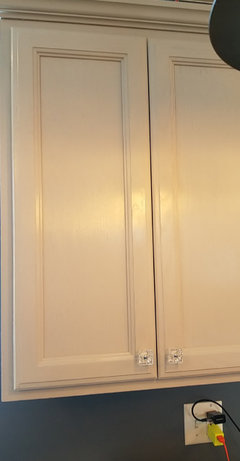
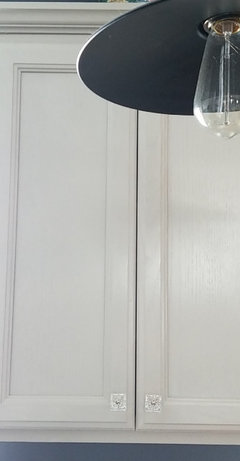
    Steph, the light was on. I'll try tomorrow in daylight with all lights ( kitchen and dining room) on. I know chalk paint isn't for everyone. One thing that drew me was if you have to touch up a spot it will blend right in. And I did have to touch up a spot with no problem.
    Many coats of wax help with durability. (But I agree a cabinet paint is probably more durable) I don't see the problem with dirt or splatters, it wipes right off with a damp cloth. Much better than before they were painted. It's going on 3-4 years now. For someone who doesn't want to spend thousands on new cabinets or the major work of priming & sanding, chalk paint & wax can be an answer (I can only speak for the brand I used).
    And to the poster who mentioned that not all paint make it look plasticky, I don't disagree. It is just that some don't want any wood grain to show through but I prefer to see the natural wood grain and think it looks much better.

  • 6 years ago

    How about choosing something tough enough to not ding in the first place, and properly tough enough to not need 2x as more work “top coating”. If you choose the right product, and the right prep, you get a better job, with less work. The professional Italian 2K poly coatings are half the cost of chalk paint, actually block tannins, lay out like butter, and are tough enough to pass any KCMA testing.


    https://www.kcma.org/certifications/ansi-kcma-standard 


    https://www.facebook.com/groups/PaintingKitchenCabinetsforProfit/?ref=share

  • 6 years ago

    live_wire_oak, I may have done that if I knew about the product when I decided to paint mine. Not sure since I haven't researched it. At the time, I was just not sure about all the sanding needed. Do you need to sand if you prime? Maybe I would have gone another route but I had seen a lot of painted cabinets that looked pretty chipped and thought the option of fixing the chalk paint areas with no noticeable touch ups was appealing.
    Steph here is pic with all lights on. Not much difference....The lights cause that shiny reflection spot. And a pic with lights off, sunlight causing some reflection

  • 6 years ago

    I personally would not use chalk paint in a kitchen, there are no real advantages over other products and a few disadvantageous. Having said that, some of the advocacy for professional products is a bit overblown. There are items painted with rather crappy oil based paints still looking great 60 years later. The marginal difference between decent coatings and great coatings is often pretty slim. One million and fifty dollars is better than one million dollars, but not so much better that I would turn down the million.

    At least eighty percent of the damage done to kitchen cabinets would be done regardless of what they were painted with, and probably closer to 90%. If you are rough on your cabinets then no coating is going to save them and if you are gentle on your cabinets many coatings will suffice.


    Chalk paint needs just as much prep as half a dozen other products. You don't need to sand so long as you knock the sheen down, which is the same thing as many primers. In the end, shellac sticks better and stuff sticks to shellac better, so if you are going to topcoat and you are not into extensive prep, then you might as well use shellac. However, nothing is going to perform better than the coat underneath it. If it is chipping off before you start it will eventually start chipping off again.

  • 6 years ago

    @ljptwt7 nice! Yes, I would advise sanding and priming, unless you are dealing with laminated wood. Sanding removes oils and dirt, along with smoothing our defects. If you hit painted wood hard enough, yes it will chip. That said, most finishes are durable enough that you don’t need to poly and will not chip with regular use. I install slow close hinges to prevent slamming cabinets.

    I started using oil, so cannot comment on durability. The best durable paint I’ve used previously was general finishes milk paint, but advance has a better finish in my opinion. Satin oil Impervo finishes pretty similar to advance, but takes more work or practice getting there.

  • 6 years ago

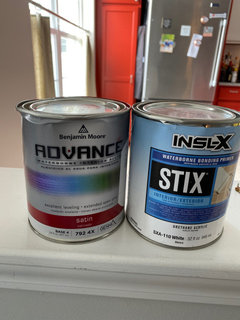
    Just had a professional painter do my ugly 3 year old cabinets. Use Benjamin Moore STIX on the base coat. Cure 2 or 3 days. Then use BenjaminMoore ADVANCE Satin. Perfection!

  • 6 years ago

    Doesn’t Advance fully cure in 30days, not 2-3

  • 6 years ago
    last modified: 6 years ago

    To FULLY cure, yes. 30 days. But dry to the touch in 4-6 hours, and 2nd coats can be applied after 16 hours. I put all my drawers and doors back on one day after painting my final coat. Zero problems.

  • 6 years ago

    jlavrack, did painter use a brush or spray them? Finish looks beautiful.

  • 6 years ago

    Right, but you said cured in 2-3 days. I just wanted to clarify that it’s 30 days for others.

  • 6 years ago

    The painter used a roller, no spray, and nothing ever left the kitchen area. ;)

    And I meant that the first coat of stix was cured/dried for a long weekend, before the advance was applied. And it has only been 2 weeks for the final coats, but the painter mentioned 30 days for full cure of products.

  • 6 years ago

    Oh and he used a foam roller.

  • 6 years ago

    Steph

    Right, but you said cured in 2-3 days. I just wanted to clarify that it’s 30 days for others.


    Huh?? I never said anything like that.

  • 6 years ago
    last modified: 6 years ago

    @jlavrack Looks like a pretty good roll on job. Advance will leave a "bit" of a stipple with a foam roller but it looks like your guy got it as smooth as possible. It is also good that he used the matching "Stix" primer. The standard primer in the cabinet refinish business for many years was Zinsser Cover Stain. It is a good primer, but it is very brittle compared to Advance. Advance will have much better scratch-off resistance with Stix under it in my experience.

    I mean in a perfect world you should have paid for a professional to put a 3-part system: primer, pigment, clear satin topcoat, but that would have cost you quite a bit more in prep time and labor. Plus you can always touch up Advance if it gets a few nicks. Also Advance will continue to get harder and harder for years being an alkyd. 5 years from now it will be much harder than it will be in 30 days.

  • 6 years ago

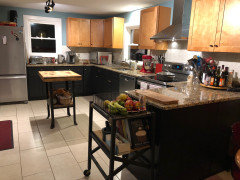
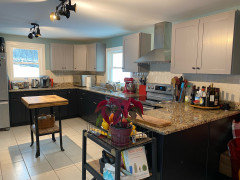
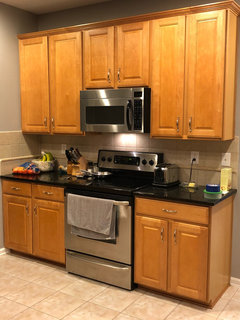
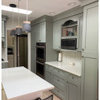
    We went from horrible orange cabinets to black and grey, using 2 coats of stix primer and 3 coats of a custom mix Benjamin Moore cabinet paint. We did it ourselves, it took over a month as we’re limited on basement space to lay out the doors flat. We’re super pleased with what we’ve done, we finished it a month ago and it’s holding up to usual kitchen life.

  • 6 years ago

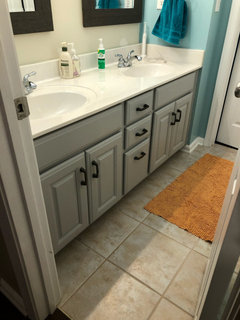
    I used Stix and Advance from Benjamin Moore and it has held up great. My trick is to sand the cabinets to get all of the old varnish off. When priming and painting, do this in either air conditioning or when it is cold outside. Too much warmth makes them dry too quickly... the slower the better as all the stipples from the foam roller flatten out with a slow dry. Also I waited 12-24 hrs between each coat. Here are some pictures.... floors not yet redone, so ignore how ugly they are!

  • 6 years ago

    We had old white thermo-wrapped cabinets that were peeling . We removed the plastic ( most of the time it popped off in one piece) . The doors were made of some kind of pressed particle board. We painted them with semigloss latex paint and 5 years later they look great. The pressed board absorbed the paint quickly so it took quite a bit of paint. We used a roller and brush it get in the grooves.

  • 6 years ago

    What about laminate cabinets? Can these be painted?

  • 6 years ago

    Ask your Benjamin Moore dealer...
    But yes.

  • 6 years ago

    I used Valspar cabinet paint. Lowe’s mixed the color I wanted and I applied the paint with a 6” roller designed to apply paint to cabinets and doors. For four large doors used as barn door application, I sprayed the paint, but I like the roller affect better

  • 6 years ago

    I also used valspar cabinet enamel and a roller meant for cabs. Liked it.

  • PRO
    6 years ago
    last modified: 6 years ago

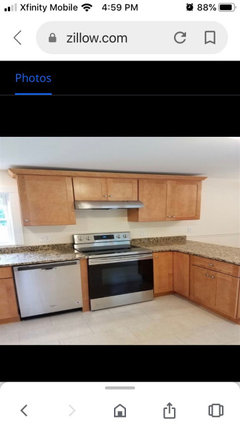
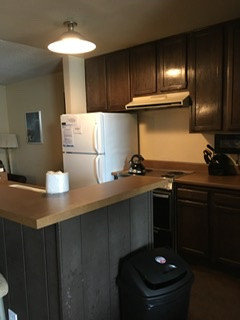
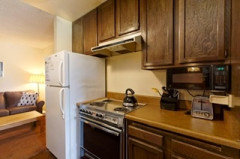
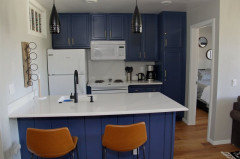
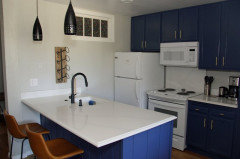
    We purchased a vacation condo that was original 1979 everything. We decided to paint the entire place ourselves including kitchen cabinets. Here’s what I learned:

    1) Prep is key. I watched a lot of YouTube videos beforehand. Make sure they are clean.

    2) Grain filler is a waste of time. I did 3 coats with sanding in between and while it helped, the grain is not entirely gone and for the time and energy it wasn’t worth it.

    3) It‘s incredibly time-consuming and stressful yet rewarding when it comes out nicely. We really strived for perfection and when an electrician came in and thought they’d been done professionally, we were thrilled.

    4) Don’t skip steps. Clean, sand, prime, paint. Do the sanding between coats. We used a sprayer and then I rolled over any drips. Also, use quality paint. I talked to a SW salesperson to get the right paint for the job. Our color is Indigo Batik.

    5) Make sure the cabinets are quality enough to make it worth it. Once we had committed, as I prepped and sanded, they weren’t as solid as I thought. I also struggled with how the inside looked vs. the outside. I got contact paper but they’re still ugly inside overall.


  • 6 years ago

    I am loving all the before and afters in this thread. So fun to see.

  • 5 years ago

    I've done some painting in my day. But unless threatened or blackmailed, never ever will I paint my cabinets again. Sure, they turned out just fine but what an overwhelming job. (Brush not spray) I did break down and paint a door last summer. That's enough.

  • 5 years ago

    I did paint my kitchen cabinet doors once, from white to a gorgeous Mediterranean blue. Just primer, then painted. I loved them, but my real estate agent insisted they go back to white before I put that place on the market :(

  • 5 years ago

    Oh my gosh…It was so incredibly tedious and time consuming. I would probably never ever do it again. It helped tide me over and appreciate my kitchen while we awaited a remodel (and still wait).

  • 5 years ago

    I learned to spray paint my cabinets and they turned out fantastic. I bought new full overlay cabinet doors. Well worth the cost savings.

Sponsored
Loudoun Decks
Average rating: 5 out of 5 stars2 Reviews
Industry Leading Decks, Patios & Outdoor Enclosures in Loudoun CTY, VA