Software
Houzz Logo Print
annapacificnw

Kitchen Before After, Quartz, Painted Cabinets, Open Shelving

5 years ago
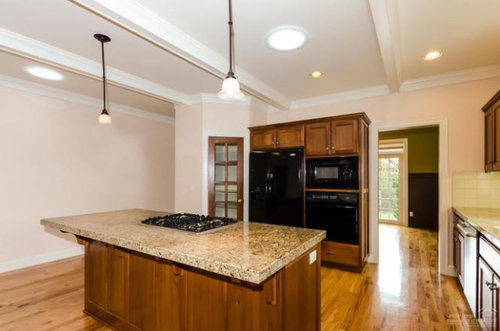
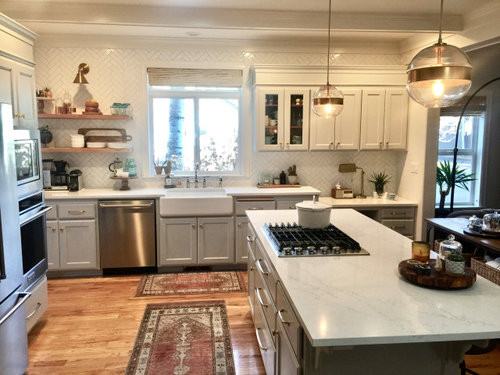
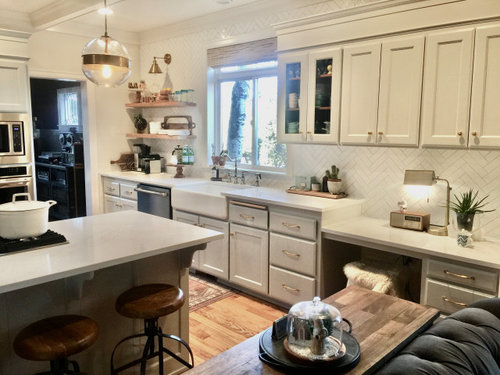
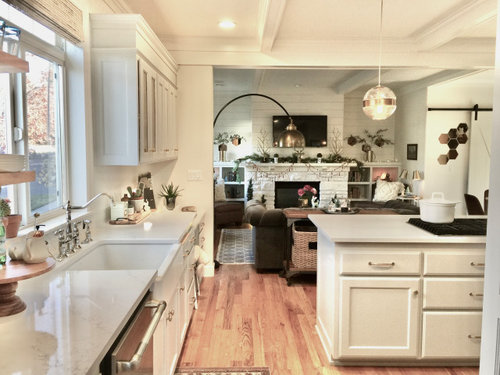
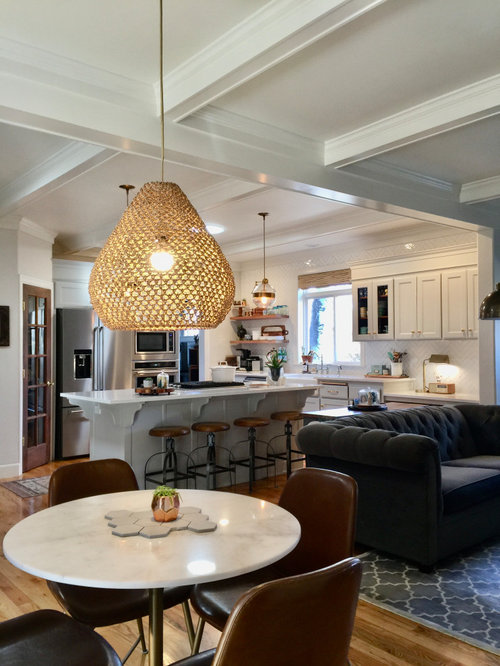
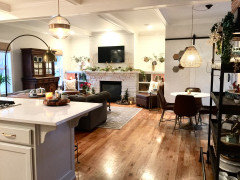
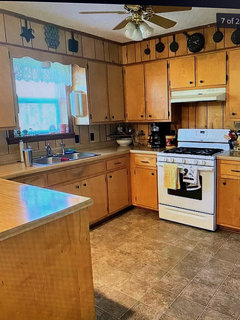
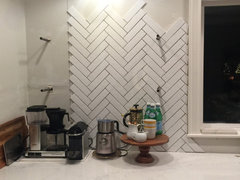
We just finished up our kitchen re-model. We wanted to keep our costs down so we did everything ourselves, except the installation of the quartz. The project included: buying new appliances, sanding all cabinets to bare wood, painting, cut out and install farm sink, extend upper cabinets, install floating shelves, hardware, lighting and herringbone subway tile. Started in earnest in July and just finished this week. So happy to be done!! Thank you for letting me share!


Comments (56)

  • 5 years ago

    And you did it yourself! Truly beautiful! I’m so envious of your talents.

    annapacificnw thanked Barrheadlass
  • PRO
    5 years ago

    Dang. Nice.

    annapacificnw thanked Joseph Corlett, LLC
  • 5 years ago

    Great job!


    annapacificnw thanked designbuff1
  • PRO
    5 years ago

    Awesome job! Enjoy!

  • 5 years ago

    Beautiful! Are your bottom cabinets a different color than top? If so...what color.
    Love!

    annapacificnw thanked jiddie
  • 5 years ago

    Perfection. Congratulations!

    annapacificnw thanked Mama Cita
  • PRO
    5 years ago

    Wonderful! What a transformation! Congratulations on an amazing job.

    annapacificnw thanked Flo Mangan
  • 5 years ago

    What a transformation! Very impressive! How many hours each day did you work on this project? Is your faucet a Newport Brass? You must have had ample space to sand/paint your cabinetry (I'm envious :).

    annapacificnw thanked ceilsan32
  • 5 years ago

    Looks beautiful! Would you mind sharing where your runner is from?

    annapacificnw thanked jk113
  • 5 years ago

    Looks so warm and inviting now. Amazing job!

    annapacificnw thanked K R
  • 5 years ago

    Thank you everyone!!! I do feel really good about the way it turned out! I almost chickened out on doing the herringbone, because, even though I've tiled before, it felt daunting. I'm really happy with the result and glad I took the plunge.

    Jiddie-- the cabinets are painted Repose Gray, using Benjamin Moore self leveling paint. Jk113- the runner came from World Market. They still carry it-- love it.

    Ceilsan32- the faucet is actually Kingston Brass, polished nickel. I was wanting a different faucet (a lot more $$), but ended up deciding to save on the faucet and splurging a little more on the lighting above the island. Once I saw the pendants, I knew I wanted them, so tried to find a trade-off. So far, we've really been happy with the faucet - it feels heavy duty and has the look I wanted. How many hours into sanding/painting the cabinets....hm. That is a great question. I would say between sanding and painting, there were probably about 80 hours of labor. This includes a laundry room that I did at the same time. That is a pretty rough estimate- but we sanded down to bare wood, and of course the little crevices on the cabinet fronts took a bit of time. Between the the primer and paint- I think I put on 4 light coats. I used my back yard for sanding and then set up a large area in my garage for painting and curing. I let everything cure for a good couple of weeks after the final coat of paint.

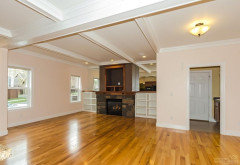
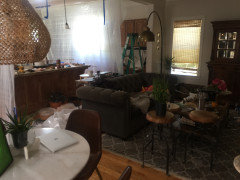
    We had re-worked the living room a couple of years ago, so it was really brightened up, and the kitchen was so heavy, and being that they are in the same open space, it really didn't flow. I am happy to say that now the whole area feels connected and so much brighter. Thank you all again for letting me share and for all your kind words.


  • 5 years ago

    Really beautiful kitchen! LOVE the flooring. Wish I had done lighter flooring in our home. Your kitchen is stunning.

    annapacificnw thanked JL SR
  • 5 years ago

    Great job...now it's time to sit back and enjoy...you earned it!

    annapacificnw thanked susan49417
  • 5 years ago

    Love it! How did you raise and extend the cabinets? Also where did you get herringbone? I'm fixing to redo a new home my self for the first time.

    annapacificnw thanked Carrie Johnson
  • 5 years ago

    Bravo, it’s just beautiful! You did a wonderful job.

    annapacificnw thanked chinacatpeekin
  • 5 years ago

    Carrie Johnson--Thank you! To "raise" the cabinets, we took off the existing moulding around the top and then added 10" of paintable maple veneer, fastened with L brackets, put moulding on the seam, added a little more moulding near the top of the extension and then reattached the moulding we initially took off to the very top. Then painted. We didn't have any soffits, so it was pretty straightforward. I would definitely ask the professionals on Houzz for ideas on re-modeling your kitchen, particularly because of the soffits. To your question about the tile, we found it at a local tile shop- it is a 2X8 subway tile called Modern Surfaces/White. I look forward to seeing what you come up with with your first time remodel! This is our fifth house, and we've just learned as we've gone along!

  • 5 years ago
    last modified: 5 years ago

    Well done! I know that painting those cabinets was a P.I.T.A.. What primer did you use? And did you brush or spray the top coats? I assume the BM paint you used was Advance.

    annapacificnw thanked Sammy
  • 5 years ago

    Sammy-- Yes, the sanding and painting, both major P.I.T.A!! We used Zinsser primer and I painted by hand only because I haven't used a sprayer before and while initially I thought I would learn on this project, I just went ahead and painted by hand. I used a small roller for quite a bit of the project, and found that the Benjamin Moore Advance levels nicely.

  • 5 years ago

    Love all of your light fixtures! Can you name a source?

  • 5 years ago
    last modified: 5 years ago

    ratherbesewing-- the pendants over the island are from Arteriors- Garrison 9" pendant. The brass sconce over the open shelving we bought at Home Depot. The light over our dining table is from World Market. The brass light in living room is from Pottery Barn (not sure if they still sell it as we bought it a number of years ago.) :)

  • 5 years ago

    Very nice!

    annapacificnw thanked porkchop_z5b_MI
  • 5 years ago

    I’m so glad you went with the herringbone! It was the first thing I noticed 😊
    Your kitchen before was so dark and cave like and now is bright and lovely!

    And the floating shelves, can you share your method? We are planning some for our kitchen and I’ve read a few DIY methods but curious about yours.

    annapacificnw thanked Painted Peggies (zone 6a)
  • 5 years ago

    Love the herringbone wall tile!

    annapacificnw thanked Stef Eric
  • 5 years ago

    Paintedpeggies-- We used Sheppard Brackets- Floating Shelf Bracket, Heavy Duty, found on Amazon to install the floating shelves. We drilled holes into the shelf with a 13/16", 7 1/2 inch long bit using a drill guide to keep the holes straight. Then we cut away the sheetrock (to the size of the bracket) and installed the bracket directly on the studs. I hope this helps.

    Yes, it was soooo dark and heavy and because we had already lightened up the living room, the space was so unbalanced! I'm so glad we did the herringbone too! It was worth the extra time to have it done the way we wanted.

    Thank you and good luck on your floating shelves


  • 5 years ago

    You've done a beautiful job. Feels inviting, just as a home should in my opinion. Well done!

  • 5 years ago

    Absolutely gorgeous. Love it. The only thing I would change is I would have wrapped those open shelves around the corner. It all looks amazing! Nice job.

    annapacificnw thanked mscsangel
  • PRO
    5 years ago

    Damn.. what an upgrade! Beautiful!

    annapacificnw thanked Altair
  • 5 years ago

    Ah, come on, you've got to show some photos of the "during" to make your fellow DIY-ers feel better about the current state of their kitchens-in-progress, and see the light at the end of the tunnel. :-)

    annapacificnw thanked weedyacres
  • 5 years ago

    Wow, looks great!!!

    annapacificnw thanked Forever Now
  • 5 years ago

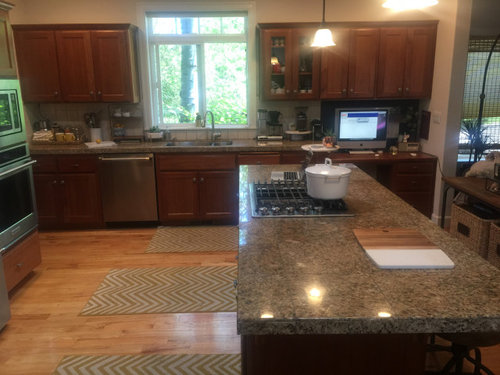
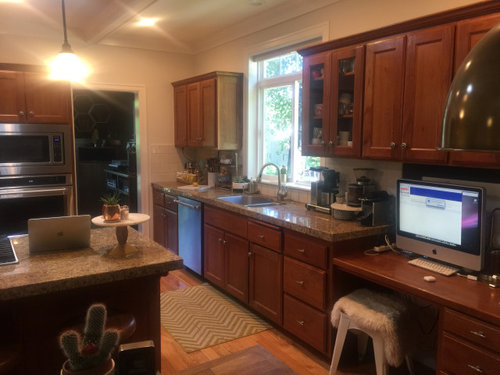
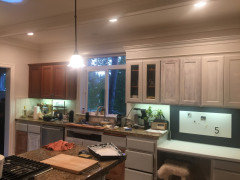
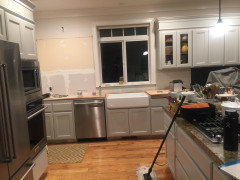
    weedyacres-- Okay, you asked for them-- here are some 'during' pictures!! We hung some plastic to keep the dust off the furniture. The doors were all taken off then sanded outside and painted and cured in the garage.


  • PRO
    5 years ago

    Great job! Much more inviting, homey and airy!

    annapacificnw thanked Norwood Architects
  • PRO
    5 years ago

    Looks great!

    annapacificnw thanked OTM Designs & Remodeling Inc.
  • 5 years ago

    Awesome job!!! Love it!

    annapacificnw thanked Shawna
  • 5 years ago

    Wow! I'm so impressed that you did this yourselves, and result is stunning! Congrats and enjoy.

    annapacificnw thanked chicagoans
  • PRO
    5 years ago

    Looks great!

    annapacificnw thanked OTM Designs & Remodeling Inc.
  • 5 years ago
    last modified: 5 years ago

    There are so many posts on Houzz asking about painting cabinets or leaving them stained. I am currently in the process of trying to decide this issue. Due to all the warnings about how diy painted cabinets never look good, I had decided that I definitely needed to budget $6000-$8000 in order to engage a professional. HOWEVER - your post/photos have now made me rethink this issue.

    Whenever I stumble across a future post asking this question, I am going to refer them to this post! It appears that you did an AMAZING JOB! You should be extremely proud of your finished project! CONGRATS!


    Also - I would love to discuss how difficult it was to install your herringbone backsplash - that’s what I want to do!

    annapacificnw thanked dani_m08
  • 5 years ago

    Thanks again, everyone, for all the kind comments! dmac1108- thank you, too. I really was apprehensive about painting the cabinets, because I've done this a few times over the years, and sometimes they didn't turn out as well as I wanted. So this time, I really slowed down (hard to do because I can be impatient!) and tried to make sure I did everything as carefully as possible, including sanding to bare wood. I also think over the years, paint has gotten a lot better. Had I been proficient with a sprayer it might have turned out even better! Another thing I will say in regards to painting cabinets, particularly if you are going to spend a lot of money to have them professionally painted-- consider the shape of the door front and if it is a style that you like (or can live with). Personally, I think the shape of the doors are more noticeable when painted. Our cabinets are 20 years old, and I would have preferred a clean shaker cabinet, but these were subtle enough and so we moved forward with what we had and I'm happy with the result.

    The herringbone tile! I wish I could say that it was an easy job for us,, but it was pretty tedious!! It's quite time consuming, and my best advice is to just take your time. The tile wall took us about 3 days.

  • 5 years ago

    One more thing about the painting of the doors. In some of the 'during' pictures, they are hung up in the kitchen... this is because the job was kind of drawn out, and it drove me nuts to have all the doors off the cabinets. But, all the painting of the doors were done in the garage, with the doors on little paint risers. Because of the long dry time (16 hours), the number of coats (I think most had 4, which included the primer), this was done over a matter of weeks, not days. Then I let them cure for about 2 weeks after the final coat to make sure they didn't get scratched before installing them.

  • 5 years ago

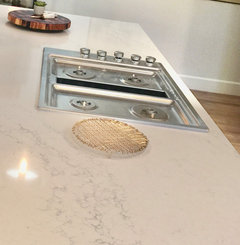
    beautiful transformation! can you tell me the name/brand of your quartz? Also, did you quartz over the desk part? We have a similar setup and want to do that, but wondering what to do for the side that drops down to the desk-is it painted?

    annapacificnw thanked Edna95
  • 5 years ago
    last modified: 5 years ago

    Edna95-- The quartz is LG Muse. We did use it on the desk as well, and yes, painted the cabinet where it drops down. Here's a close-up of the quartz.


  • 5 years ago

    thank you! I was literally just looking at the LG Muse quartz and saying how much I like it!

  • 5 years ago

    Edna95-- yes, I liked that the pattern was noticeable, but still understated. Especially since my kitchen/living room area isn't that big, I thought it was better to have it on the more on the subtle side. It is also quite bright.

  • PRO
    5 years ago

    It looks awesome! Great job!

    annapacificnw thanked Norwood Architects
  • PRO
    5 years ago

    Love the look! Great lighting selections.

    annapacificnw thanked CAGE Design Build
  • 5 years ago

    @annapacificnw, can I ask what grout/color you used? I plan to do a 3x12 subway tile and want a contrasting grout. Yours seems nice and subtle but I can still see the contrast.


    Also, totally unrelated to your kitchen, I was considering a tufted sofa similar to yours. I was wondering how comfortable they are. I love how they look but was wondering if the backs are stiff? The less cushions my kids have to pull off and get all over the floor the better though!

  • 5 years ago

    @Forever Now-- We went with Mapei Frost and I'm happy with the subtle contrast. The couch- we find it to be comfortable enough for us, and it is holding up very well. That being said, I would have to say that having pillows on the back is more comfortable. A good compromise might be getting a deep tufted sofa so that you could put lots of throw pillows on it, which of course will invariably end up on the floor!

  • 5 years ago

    It's funny how we all admired those heavy wood cabinets in the 1990s - 2010 or so, but now they look so dark.

    annapacificnw thanked Ilove MyLife
  • 5 years ago
    last modified: 5 years ago

    Perfection, simply gorgeous! Beautiful in every way.

    annapacificnw thanked wddmlgb
  • 4 years ago

    Thank you thank you thank you for this post! They look fabulous! We just moved in to a beautiful kitchen from 2001 with nice oak wood cabinets.  We are going the route of painting them thanks for this post!