Software
Houzz Logo Print
webuser_250784160

Floor Staining/Refinishing Questions from a DIY-er!

5 years ago
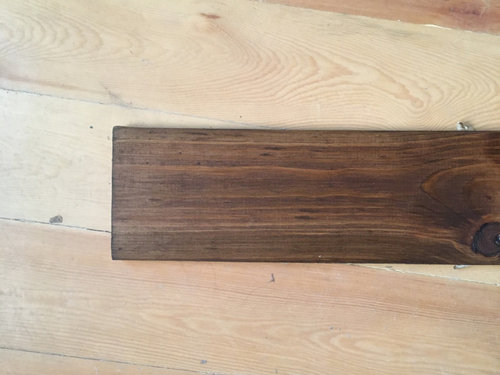
Hi,


I have a company coming to sand my pine floors, but I will do the rest of the work myself. I have a few questions.


1. Can I use more than one coat of stain? I have read that this is not a good idea and have also read it's ok. Btw, I'm using oil based Minwax (only Minwax and Varathane are in the country I'm in).


2. I will water pop before. I tried samples with conditioner and don't like it. I liked my samples with water popping more. I will leave the water to dry overnight--is that ok? Is there such thing as leaving it to dry too long?


3. What materials are best for applying water based poly? T-bar or roller?


4. Can I expect my brown stain color will stay more or less like that color with a water based poly over time? Or can it get amber and orange like what oil based does over time to it?


5. My pine floors are very very long boards that span the whole length of the room. Does this mean I need to hurry and stain each piece beginning to end without stopping?


6. Is water based poly difficult to apply? Any tips about this?


7. Do I need to stand if I do more than one coat of stain? How many hours should I want between stain coats?


8. They will sand professionally for me. I will water pop, stain then poly. Is that all? Or am I supposed to also use sealer in any step or do anything else?


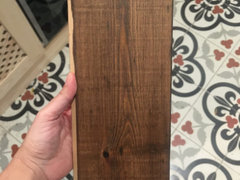
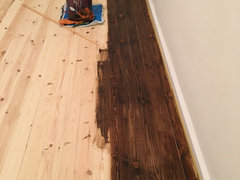
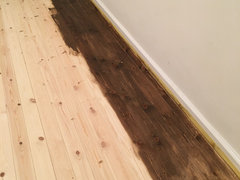
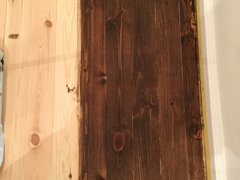
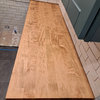
*Photo is the sample I made after water popping then putting two coats of stain (waiting hours between each step).


Comments (101)

  • PRO
    5 years ago

    You are overworking the product. Decide which direction you are going and stick with it. The foam is minimum, if, the product has a defoamer. It will disappear. Swap out your small 2” square end brush for a 3” sash brush. It will help you speed up . Use a high quality sash brush to avoid the tip from flaring out. Remove the plastic on your pad. It is blocking your view. Tip up the pad more, you have it too flat on the floor. If, it is bouncing, either the pad is dry or you need to apply more pressure. Use a snow plow method to direct your finish to one side of the pad To avoid the overflow On both sides. And last but not least. As mentioned earlier, do not watch paint dry. Put it down and walk away.

    C A thanked G & S Floor Service
  • PRO
    5 years ago

    one more thing, drag the finish the length of the room, do not stop in the middle. If, you do feather out the finish.

    C A thanked G & S Floor Service
  • 5 years ago

    How do I know I got the right amount of finish in order to drag it the length on the room? Must I pour the finish on the floor (I do it very messily out of this impossible can and I can’t control how much goes out and have trouble getting a nice thin line of it) or can I put the finish in another wider container and dip my applicator in it? I can’t remove the plastic from the applicator cause it is what is holding that foam pad. When I tried to apply it more tipped up, it bounces, that’s why I had it more flat.

  • 5 years ago

    I have this other brush


  • PRO
    5 years ago

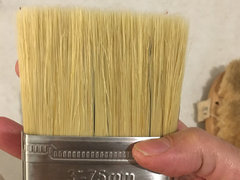
    That brush has the wrong type of bristles. You want synthetic not chinex.


    you can pour the finish in a water can if, it makes it easier.


    How do you know how much finish to pour out? Pour a 4” - 6” line from end to end. Drag the finish the full length 2 feet wide. Stop and feather out the edges Before continuing. When you run out of finish pour more onto the floor. Repeat.

    Hold the paint pole perpendicular to the floor. This will ensure that only the tip of the pad is in contact with the floor. It will help eliminate the bounce.

    C A thanked G & S Floor Service
  • 5 years ago

    G&S, thanks, we will refinish our floors next year. Your experienced info is very appreciated.

  • 5 years ago

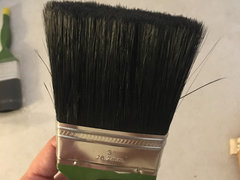
    You’ve been so helpful, thanks. Is this a proper synthetic. It is quite thick though

    brush?

  • 5 years ago

    You’ve been so helpful, thanks. Is this a proper synthetic. It is quite thick though

    brush?

  • 5 years ago

    Im looking at getting a watering can, I found only small ones as the larger ones have those spouts with a bunch of holes in them, the smaller ones I found have a normal unrestricted spout I can pour out of. But then I will not be able to pour all my poly in one container together. I read I’m supposed to do this? Or does it not matter. For the stain, I will pour all the cans into one container to ensure same color

  • PRO
    5 years ago
    last modified: 5 years ago

    Synthetic brush will say synthetic on the label. The color of the brush does not matter. It's the material. Synthetic is more like plastic, which allows the water base finish to slide right off. Chinex or polyester will suck up finish. It will actually leave streaks in water base. You would need to work more with those types of brushes. Make sure it is a angled sash brush.


    As far as the watering can goes, purchase the big one and cut off the spout. Improvise!

    C A thanked G & S Floor Service
  • 5 years ago

    Ok, I think this black one is plastic. cannot find angled ones here though . I so wish I could hire you to come do the job! I just ordered a 6 liter watering can and the pourous tip of the spout is removable . This will house one can of finish at a time, I won’t be able to pour all cans in at once.

  • 5 years ago

    Hey all, sorry to bother. Today they started sanding. They told me that the final sanding will be 80 grit. Is that ok? my pine floors are newly installed from this past summer and were finished with sealer and oil poly. We are sanding that now so I can apply a dark stain then seal with water based poly. I thought the final grit should be more fine than that...

  • PRO
    5 years ago

    Too coarse for pine or softwood. You will see sanding marks and the stain will be blotchy and dark. Pay them to sand it as fine as they can, then finish the rest yourself. You can do a minimum of 150 grit. 180 grit will be better.

    C A thanked G & S Floor Service
  • 5 years ago

    Will it be ok to go as fine as 150/180 when I'm doing a dark color like this?


  • 5 years ago
    last modified: 5 years ago

    He is saying that 180 grit is only possible with hand sanding, and only 150 grit is possible with the machine. So he said he will only go to 150 grit (and then they laughed at how I know nothing and how it really should end at 80 grit and no more....this is why I'm doing the rest DIY, HA!)

  • 5 years ago

    I'm reading info online that says don't sand more fine than 100 grit or the dark color won't take...Not sure what to do and the guys are here sanding now with the machine. What do I tell them?

  • PRO
    5 years ago

    You are water popping and using water base. You will be fine. how Was your sample done?

  • PRO
    5 years ago

    You can stop at 150. Sanding needs to be perfect. As I mentioned earlier, you would need to finish the sanding with a hand held machine.

  • 5 years ago
    last modified: 5 years ago

    I will water pop then use oil based stain then water poly. I did my sample that way too (but obviously I sanded it badly by hand)

  • 5 years ago

    The guy thinks I'm insane cause I told him I want it to be 150 grit. I'm not sure if European sandpaper is different too....that's what we got in this part of the world. I'm afraid it's gonna get super tight and not take the dark color.

  • 5 years ago

    So the machine stops at 150? The guy is telling me that is way too much. As far as hand held machine, they will not do that. They might sand by hand with blocks though.

  • 5 years ago

    They didn't use any machines on the edges by the way, they used a cutter....

  • PRO
    5 years ago

    Reread all your post. You are forgetting and missing valuable information given to you. And Norton makes 180 grit screens for sanding.

  • 5 years ago

    We do'nt have screens...we don't even have applicators here. It's a different way of doing things. I will see if they can sand to 180, but they told me the machine doesn't do that. They said only 150. I'm not sure at all what I'm doing. I usually can't depend on people that come work at my house cause their protocol is just so different than what I grew up with...two cultures and two different ways of doing things.

  • 5 years ago

    Hi all! I'm feeling better about the project. The guys finished sanding yesterday, it looks good. I'm going to water pop tonight and let it dry overnight. But I wanted to ask something, the guys sanded my floors until 120 grit, I'm ok with that. But on the edges, instead of using an edger, they did their old school thing and used scrapers, then sanded by hand. I wasn't totally happy how some parts of the edges looked so they sanded those by hand before leaving as I pointed out some parts I saw that I felt were not right yet.


    On the parts of edges that were quite rough in spots and had some mistakes in them, they used a bit of 240 grit paper in their hand sanding. I'm not sure if this was a big mistake. But those areas where the edges were rougher before, seem one with the middle of the floor now, and no, they are not super fine like glass and polished with that 240 grit. But they had trouble getting some of the roughness out with just 120 grit, that's why they went finer for going over those spots. Am I ok to continue, or should I go over the edges by hand one more time with a 120 grit?


    Thank you all so much again, so much great info and help was shared here and special shout out to G & S Floor Service for your priceless advice.

  • PRO
    5 years ago

    So, 150 or 180!is not available. what Type of machine was used for the 120?

    C A thanked G & S Floor Service
  • 5 years ago

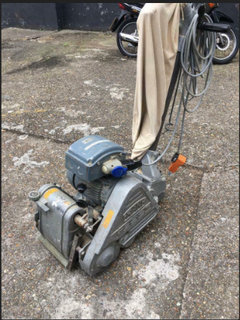
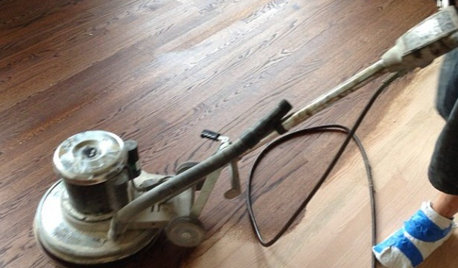
    We have 150 and 180 but they told me they will not do it with the machine (I don't understand them). This is why I'm going DIY on the rest. :-) Ways of doing things and opinions in the place I'm currently based is just so different. I do'nt know the type of machine, but it looked something like this.


  • 5 years ago
    last modified: 5 years ago

    But I'm ok if some edges were touched with some 240 grit hand sanding? Or will this destroy what I'm doing. (they were a bit roughed up by the scraping tool, so they hand sanded a bit with 240---not intense, but to take down the worse rough spots)

  • 5 years ago
    last modified: 5 years ago

    So I guess it was a drum floor sander or belt? Should I just go ahead and water pop or do you think this was wrong and I need to fix something?

  • PRO
    5 years ago

    You should make a sample of their process on a board and compare it to yours first. If, you like it. Then move ahead with water popping. The areas that they hand sanded with 240 will need to be done with 120. It will show up after the stain is applied.


    my opinion , the drum lines will be visible when the stain is applied.


    If, you do not like the Stain result if their sanding process. You will need to go over the entire floor with a hand held and 120 grit Or whichever grit you used on your original sample.

  • 5 years ago

    I already water popped it last night...gosh I hope I have not messed anything up. I’m also worried as I read something online saying I should not use water based poly on water popped floors...I’m really afraid I’m messing this up.

  • PRO
    5 years ago

    You're stressing yourself out with information overload.


    If, you are using a all out water base system. It causes a lot of raise wood fibers. This is why a lot of high end finish manufacturer's recommend a final sanding of 150 grit for hardwood floors for their finishes: Bona, Loba, Ciranova to name a few. The extra sanding/burnishing minimizes raised fibers/grains.


    In your case, you have soft wood, which raises much more than hardwood. It is why i recommended 180 grit. The extra burnishing will keep raised fibers at a minimum.


    Of course, if, a installer does not understand this, they would not recommend it. They will say, "avoid at all cause."


    For the best information, reach out to the manufacturer's.


    The contractors are done with their part. You can continue with the staining. Or pay more money for them to do additional sanding or do-it yourself. The project is in your hands. You control the schedule and quality. The stress is causing impulsive decisions.

    C A thanked G & S Floor Service
  • PRO
    5 years ago
    last modified: 5 years ago


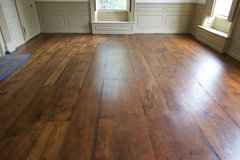
    Dark Stained Floors · More Info


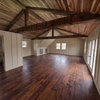
    Here is a project I did a few years back for the Jeremiah Lee museum in Marblehead, MA.. Antique pine, stained with Bona Provincial and top coated with 3 coats of Bona traffic HD satin.

  • 5 years ago

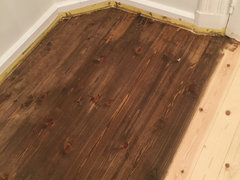
    It's a disaster!! Is it my water popping? God I do'nt know what I did wrong...


  • 5 years ago

    I'm in absolute tears. I do'nt know why I took on this project. I think I need to stop everything. Will they have to sand the whole floor again?? they already took so much of it off...and I water popped these two rooms. The other two rooms I did not water pop. This is a mess and I'm feeling regretful.

  • PRO
    5 years ago
    last modified: 5 years ago

    What is wrong with it? the light spot? Most likely a spot where the 240 grit was used. Unless , you missed or applied uneven water.

  • 5 years ago
    last modified: 5 years ago

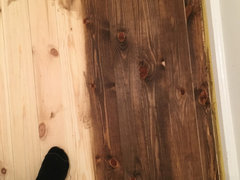
    I think I applied the water evenly, but I feel the floors are still a bit wet, when I walk around on them in socks I faintly feel that....But it's been drying for 14 hours now. Is it not that bad? I think I wiped the stain very badly. I stopped though and didn't finish those boards, so now there is gonna be a problem. I want to get a professional to come in and finish it for me. Will they have to resand the whole floor or just this edge? :-( The stain also looks super dark now....more than the samples I tried with it.

  • 5 years ago


  • 5 years ago


  • 5 years ago


  • PRO
    5 years ago

    It’s just the result of a 120 grit. It will allow the dark spots to show through. It’s more porous in those locations. A finer sanding reduces it. Hence 150 or 180 grit. NWFA teaches us to step outside the box every once in a while to achieve a goal. We are not restrained to standard practice.


    if, you want it lighter, more needs to be done. Otherwise, they will just come in and continue applying the stain.


    you can walk around with a light to find imperfections and repair before moving forward. You will need to water pop those areas again.

  • 5 years ago

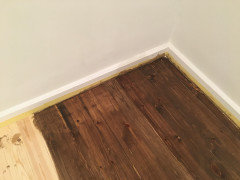
    Check out the edges of the room.....you can actually see where they didn't sand the edges right.


  • 5 years ago
    last modified: 5 years ago

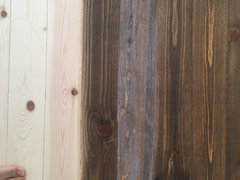
    horrible edges. Maybe I should sand and not have them use this oil based stain. They can use instead the usual water based stuff they use? Or the other thing is they always use shellac here on pine. Of course they need to sand those edges too before we do anything else. (They came and made me this sample on the floor today after the horrible one i made too).


  • PRO
    5 years ago

    Yes, edges are no good. needs rework.

  • 5 years ago

    I can’t even tell if it’s necessarily the sanding job or the way they wiped the stain on the edges....they seem to love to go against the woood grain here and there. I have to watch like a hawk and yell at them when they do

  • 5 years ago

    They told me they are willing to sand my whole floors to 150 grit. But I feel at this point it is too much work. Would rather just do those edges and not have to hit the whole floors. Would the color difference really be that big of a deal?

  • 5 years ago
    last modified: 5 years ago

    Testing the water based finish over the stain...why is this happening!! This is dried...


  • PRO
    5 years ago

    Stain not dry, need 72 hours or longer for Minwax to dry in order to apply water base over

  • PRO
    5 years ago

    Turn up the heat

  • 5 years ago

    Im worried even the water popping wasn’t dry. When they come sand again and I water pop again, can I turn the heat on after? I’m thinking to tell them to sand to 180 everything. Can they just start with that on the hand sander on the edges? Or do they need to go to 150 first then to 180