Software
Houzz Logo Print
webuser_793909529

Replacing old rusted hot water radiator valves

4 years ago
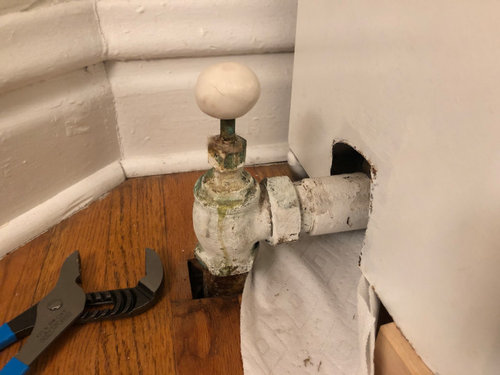
My 1896 house is heated with hot water radiators. One of the radiators on the second floor started leaking a couple winters ago, and we had a pro come out to replace the valve. I watched him work and asked a ton of questions so I could replace the valves in other radiators in the future.


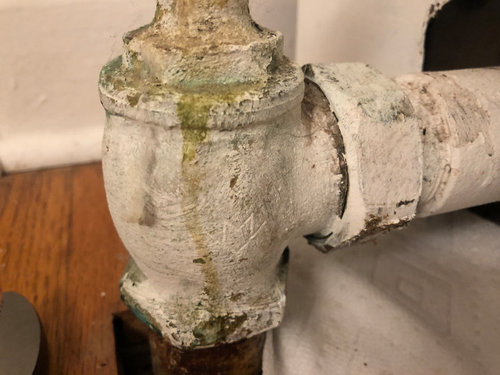
I just drained the system to replace the valves on the three main floor radiators, because they have long since been completely rusted so we cannot adjust the water flow. I want to make sure they are completely open to maximize the heat each radiator produces in this drafty, poorly insulated house.


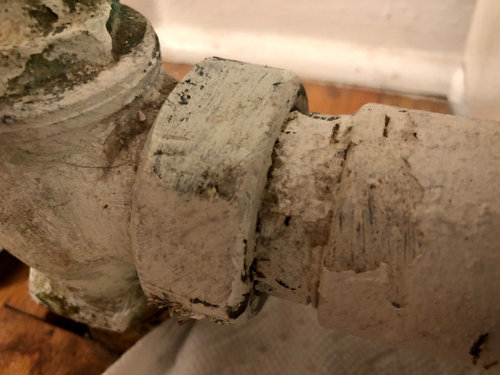
The problem is I sprayed the first one with WD-40 and left it, but even with my large channel locks I can't get the lateral nut to budge a millimeter!


TWO QUESTIONS

1. Any suggestions on how to loosen it?


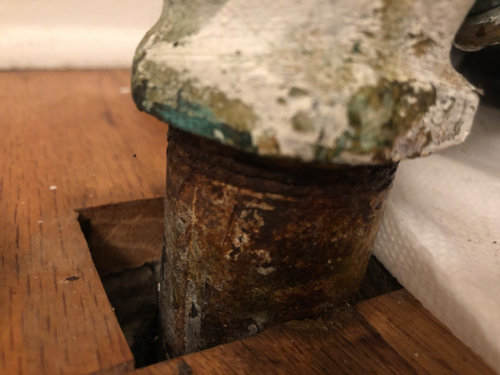
2. Even if I do get it off, the threads (either on the feed pipe from the floor or on the pipe into the radiator itself) may be in such poor shape that a new valve won't keep a good seal anyway, even with teflon tape. What would the next course of action be in this scenario?


For those of you who know about such things, what would you do in this situation? I'd like to do this myself to avoid paying $1,000+.

Comments (6)

  • 4 years ago

    Life will be better with proper wrenches, a pipe wrench for the round pipe and a properly fitting fixed wrench for the nuts. A crescent wrench is OK, but make sure it's snug. You want fairly big ones for this task, like 12-16" long. Probably the right wrenches are all you need. Always have a wrench on both sides of the joint you are trying to loosten and rotate them opposite to each other (use one to hold the joint in place and turn with the other.) Don't be afraind to give it some muscle.


    If they are still jammed then heat the joint with a torch, that's the surest way I know to free rusted joints. The heating/cooling cycle will break most rusted threads free. Note that it will vaporize any lead paint on the pipes and you need a guard behind it so you don't light your house on fire. You can try the PB Blaster first, it's good stuff


    99% sure that proper wrenches will solve your problem.


  • 4 years ago

    I have done this when I lived in the house when steam radiators. Here is a good video showing the techniques plumbers use:

    DIY Radiator Valve Replacement

    A 16 inch pipe wrench with a 2 - 3 foot pipe extension over the handle should work. The pipe extension creates a lot of leverage. You should use two wrenches when you remove the valve from the riser. There is always a danger a 100 year old pipe will break.

  • 4 years ago
    last modified: 4 years ago

    @kudzu9, @rwiegand, and @mike_home, thanks for all the suggestions and that super helpful video!

    Bingo with having the right wrench! I got the nuts loose on two of the radiators. Now my challenge is unscrewing the old valves. Y'all have already figured out I really don't know what I'm doing—I'm sure I'm about to out myself even more embarrassingly . . .

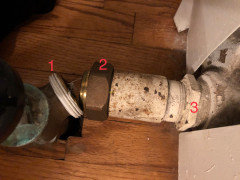
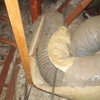
    I figure there must be some step I'm missing, because while I can get the valve to turn no problem, the feed pipe coming out of the side of the valve (1 in the photo below) gets caught on the intake pipe to the radiator (2).

    Since the egress pipe (I know, I'm sure all these terms are incorrect) is fixed going into the floor on the opposite end of the radiator, I can't just push the radiator back to allow room for the valve to turn.

    Am I supposed to detach the feed pipe at point 3? What's the trick? I don't want to just force it and risk breaking any of the pipes.


    Sincerely,

    humble and eager to learn amateur Stefan

  • 4 years ago

    Is it possible to remove coupling (2) only? You can then get the valve in the correct position. You should have enough clearance to thread the coupling into the feeder pipe with your Chanel Lock pliers. Once that is in place you can make the connection to the valve. You want the radiator and valve to line up in a straight line. They don't seem to be in line in the photo.

  • 4 years ago
    last modified: 4 years ago

    @mike_home I am still trying to remove the old valve. They are not in line because I was trying to unscrew the old valve, and the problem is that when I unscrew the coupling, the two pieces are still completely flush with one another, so twisting 1 to remove it is limited by the fact that 2 is blocking it. I got them to that angle by trying to move the radiator a bit to give some room for the old valve (1) to turn, but I don’t see how I can turn it any further left to clear 2, let alone repeat that however many revolutions as would be required to remove the old valve.


    And the same problem would present itself in reverse when trying to put on a new valve. Maybe I just detach the radiator from the outflow pipe on the opposite side (not pictured here) so I can move the entire radiator out of the way? I’m not there right now so don’t know if that’s even an option.

    Any other thoughts/suggestions?