Software
Houzz Logo Print
webuser_853833833

Kitchen Backsplash Advice

4 years ago
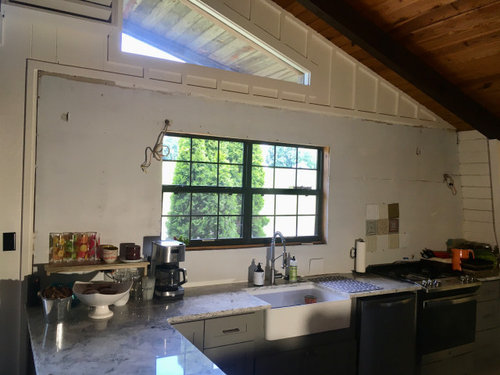
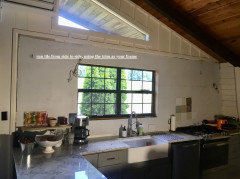
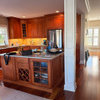
Kitchen remodel of an old, dark, wooden, country house. Kitchen is part of the main level open-plan. High vaulted wood ceilings and wood walls. We have completely remodeled the old kitchen with new granite counters, cabinets, sink, & appliances - and vinyl "wood" flooring. We did not elect to do granite backsplash. Would like to utilize the entire kitchen wall with the window, as it is naturally framed by the cedar plank and trim that makes up the rest of that wall.


It is dark space (very few windows), so we have tried to keep the finishes as white/light/bright as possible. And part of why we opted to not put upper cabinets back along that wall. We are rural and don't have much money and have done all of this ourselves so far. Except the counters, which have been a nightmare.


So while it is tempting to hire a tile-setter or other trade we have not had good luck with that here nor do we likely have the budget. We were just going to paint the wall but due to having to remove the old cabinets and wallpaper, the wall is not in great shape. It would take quite a bit of drywall work to get it paintable. Having just finished re-building a new bedroom and bathroom, I have discovered how much I hate drywall work.


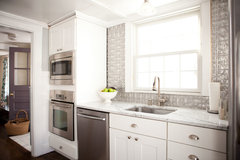
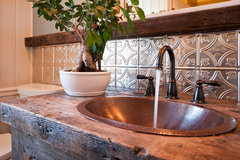
So now we are considering the white semi-gloss painted tin (American Tin Ceilings) "panels" (24"x24") that can be cut and glued up. But we are open to other ideas. I reckon the tin backsplash would run us $5-600 with DIY labor, so I guess that's about our budget. Thanks for taking a look.


Photo:


Comments (14)

  • 4 years ago
    last modified: 4 years ago

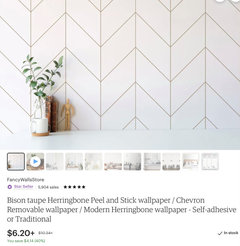
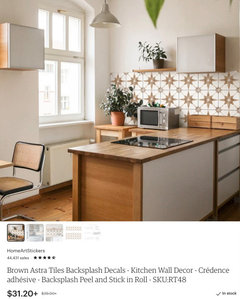
    How about washable wall paper?

    Or decals.


    Larry Arabia thanked eld6161
  • 4 years ago

    Since your kitchen is dark, I would go with just the tin tiles. Not painted. I think it would look great in an old home like yours.

    My Houzz: DIY Love Reforms a Dated Cape Ann Home · More Info


    Silver Wainscot En Suite · More Info


    Larry Arabia thanked Tara
  • 4 years ago
    last modified: 4 years ago

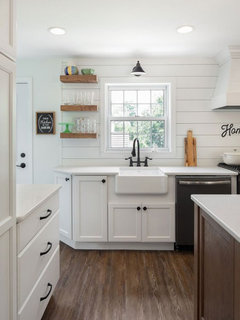
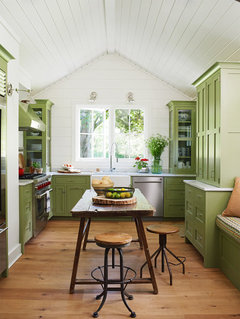
    why don't you just continue w/the board and batten? they shouldn't be too difficult to install.

    Or, get the inexpensive white subway tiles and install it directly to that wall. lots of tutorials on line to guide you.


    or, do these 4x4 plain white tiles. these would be easy to install. just do the math to properly line up your tiles, (laser level) and take your time laying them.


    or, some type of beadboard or nickel-gap panels.

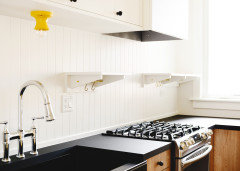
    The used the V-groove panels for this look

    https://www.yellowbrickhome.com/our-diy-beadboard-shelves-backsplash/


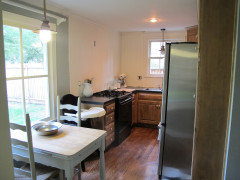
    beadboard:

    https://blog.jennysteffens.com/the-kitchen-dyi-remodel-new-open


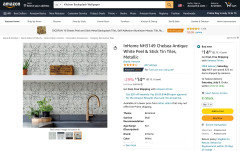
    I don't think plastic looking tin tiles is the answer.

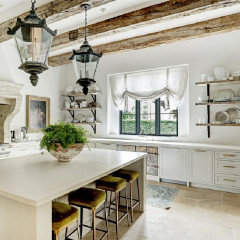
    I think this would look better.


    make your own shelving to go on either side.


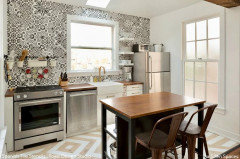
    What if you did the area w/a skimcoat of finishing compound, smoothed it out, and then stenciled a design to look like tiles?


    Larry Arabia thanked Beth H. :
  • 4 years ago

    I like your idea of tin tiles, but since it has to be glued on and costs about $500, I might go with a waterproof, removable wallpaper or tile with the idea of waiting for a more beautiful and permanent backsplash when budget allows.


    Larry Arabia thanked ffpalms
  • 4 years ago

    You did the whole kitchen yourself and you’re afraid to tile the backsplash? No way! You are amazing! Go to a discount tile place and buy tiles, use the tutorial that @Beth H suggested and finish your gorgeous kitchen!! I’m impressed by what you’ve already done.

    If tiling seems like too much work, a vinyl wallpaper, board and batten or beadboard might be the easiest solution. Just make sure to paint the beadboard with a washable paint.

    I love your new kitchen!

    Larry Arabia thanked RedRyder
  • 4 years ago

    Great Ideas, thank you for the input!


    Since the whole house is 110% wood lol, we were trying to move away from wood in general but some of those do look nice. Beth, the bead type panels would probably work but wood is $$ right now and the cedar planks are about $60 a pop so I wouldn't be able to match that. While the all-white looks great I still think the wood surfaces need to be broken up. That wall is the only wall that isn't wood.


    For background, I painted the knotty pine tongue and groove walls white ("butter creme" or somesuch). Same with the rough-cut knotty cedar plank wall. Originally, the whole interior looked like the ceiling still does. So, we were really trying to liven the place up with a different material without getting too modern. But of course, sometimes you embrace what you've got.


    We will be installing shelving where we can on that wall, including some creative (out of necessity) shelving in that corner with the beam. I will make the shelves. Likely out of wood reclaimed from elsewhere in the house. I am framing the interior sill of the window with refinished planks from flooring I pulled up.


    There will be a hood* above the range (TBD) so that will break up the big wall but also potentially make it a bit crowded in the corner.


    We really need the shelf space though, as having only lower cabinets really limits storage. I like the look of the unpainted tin but was afraid it would be too overwhelming and/or too contrasting but I will think on that some more.


    When we were thinking about just painting, we dabbled with something bolder, e.g. blue or sage green on the wall too since our cabinets are kind of utilitarian grey so I guess that is still on the table if we go with some kind of wallpaper or other material. I just don't know how level and finished the wall needs to be in order to take to some of those.


    The peel-n-stick stuff I have seen is actually quite expensive for a large area and it gets poor reviews. Likely installer error, but still.


    And because I had to remove the old cabinets and wallpaper due to water damage, mouse infestation, and mold, I ended up jumping the gun and cleaned and kilz primed the whole wall so there is a school of thought that says that mud won't adhere correctly now.


    *We are debating basic stainless hood or just buying the guts of a hood and building a custom enclosure out of reclaimed wood, painted white to match.


    I like the subway tile look. Really most tile. But I am pretty exhausted and just don't know if I want to learn tile right now. Ha.


    I will look into the removable wallpaper. Again, not sure what condition the wall must be in to acquire a good bond and look.


  • 4 years ago

    You've accomplished a lot! Don't forget to consider flammability since the stove is on this wall. You may be in a rural location and not concerned with codes and inspections, but please make safe choices.

    You mentioned "buttercream" paint and have grey cabinets, so finding a tile that can bridge the warm and cool shades may take some looking. The unpainted tin might be a good choice. Hope you have the chance to bring home some samples. Good luck!


  • 4 years ago

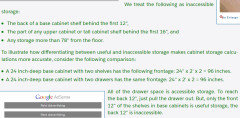
    When you can get around to it, refit those lower cabinet shelves with drawers; here's why.


  • 4 years ago
    last modified: 4 years ago

    they make the beadboard in a pvc material, or an MDF material. could be cheaper than the wood version. And you can always paint the material any color you like.

    Another option is to buy a 4x8 sheet of plywood and cut the boards yourself. paint (or stain). it's cheaper than buying pre-cut ship lap or V-groove.

    If you're near a big city, check on Craigslist or offer-up for people selling leftover wood flooring(you could use it like a shiplap and paint it.), left over tile, left over wood pieces, etc. I've scored big time buying materials from those sites.

    Beadboard isn't that expensive. you could install it, paint it white (it comes pre-primed in the white) or whatever color you like.

    as for wallpaper, buy a thin piece of luan and glue or stick the wallpaper to that.

    I mentioned taking some drywall compound and skimcoating that wall yourself. then you could paint.


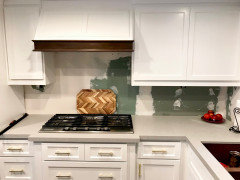
    On mine we installed this greenboard and skim coated it w/drywall compound. I lived w/this for a year before I decided on tile!

    You could always skim coat it, smooth and sand it, prime and paint the stencils over it to hold you over until you can tile later on down the road.


    In any case, $500 is plenty to do any of the things I've mentioned. you just have to know how to shop.

    Larry Arabia thanked Beth H. :
  • 3 years ago

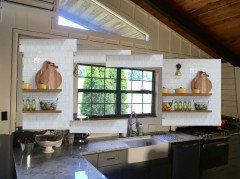
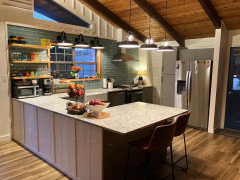
    So after using the tin panels elsewhere in the house I decided I didnt like working with them on such a large format I ended up rebuilding the entire drywall on the kitchen wall. With a mostly level surface I installed 3”x12” ceramic tiles which took forever.


    installed a basic wall vented hood, total pita!, track lights with h track mounted pendents and three big old barn lights in walll sconces i wired when i demod the wall.


    I was also able to mount floating shelf brackets to the studs to make the tile cuts easier and avoid having to drill thru tile to mount after.


    The shelves are just 2”x10”x8’ joists i cut down and finished. window casing is wood i reclaimed from the old floor i had to pull up.


    Didn’t like the long grey skin on the cabinets so used rough hewn cedar planks I pulled off walls downstairs then painted and trimmed to match the back wall.


    Still some tweaks but finally its done! lots of good info and advice from folks here that helped me out, thanks!


  • 3 years ago

    It’s beautiful!!! Great job and I love how you repurposed materials you already had! We’ll done!! TFS the end result…enjoy!

    Larry Arabia thanked Susan
  • 3 years ago

    Looks terrific! Love the green tile.


    Larry Arabia thanked ci_lantro