Software
Houzz Logo Print
annie_kelly32

Ugly fireplace hearth DIY help

last year
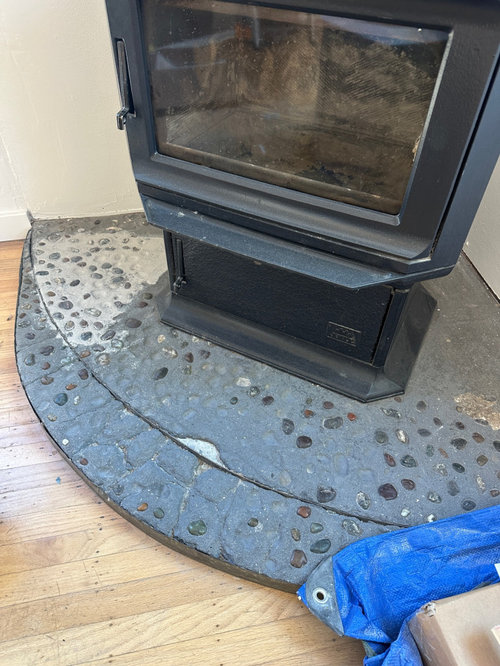
Help! How can I make this hearth look better on a budget? I renovated the rest of the house, but some small projects like this one are DIY because I’m now broke šŸ˜… Any suggestions appreciated!

Comments (37)

  • last year

    What about a heat resistant paint? Rust-Oleum and Krylon are two manufactures who carry this type of paint.

  • last year

    I thought about that, but I really want to even out the surface first just not sure how best to go about it. Some stones are missing, cracks, etc.

  • PRO
    last year

    Unless those walls are noncombustible, that appliance doesn't appear to have proper clearance.

  • PRO
    last year

    I agree that would not pass inspection where I live for install and it starts a fire you will trully be broke . As for what to do we need to see the whole room post the pics here ina comment .

  • last year

    Wonder if you could plaster to smooth out the surface and paint with an appropriate paint.

  • last year

    It looks like it's been skim coated in the past and is chipping. I might see how easy it is to remove the top coat and what's underneath. If you get a flatter surface, you can plaster, time or paint.


    If the walls get hot, you can get heat shield panels to put on the wall. We have one near a wood stove.

  • last year

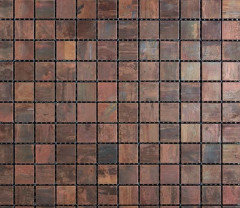
    Do a skim coat to flatten the surface. Use mosaic tiles in an aged copper and with black or dark gray grout.

    Get a black or dark gray stove wall board as recommended.


  • PRO
    last year

    You should be able to just remove that and do anew tile and use it up the wall too.

  • last year

    Hey all, thanks for the suggestions so far!! There are heat shields on the wall behind it, and my house has had so many inspections through our reno with no mention of the fireplace being an issue. (Not to mention we can’t even use it because my husband is allergic to smoke - I just want it to look better). I’ll take a pic of the entire room later today for context.

    As a DIY project, how can I get the stones out so I can level the surface, and what product is best for leveling - heat resistant mortar?

  • last year
    last modified: last year

    YouTube diy a level skimcoat. Round mosaic tile on a mesh would be easy to cut to fit into the curve. So easy to lay down. Any extra space along the edge can be filled with loose pieces of various sizes. Then grout. Perfect.

    From Amazon:


  • last year

    That’s a great idea with the mesh!! Thanks a ton!!

    I definitely want to do a skim coat, but the existing stones are higher than the metal lip around the front so really want to get them out of there first. They are stuck in there, thoughts on best way to get them out?

  • last year

    It looks like a lot of stones have popped out since they are smooth...so a hammer and chisel or screwdriver.

  • last year

    Thank you!

  • last year

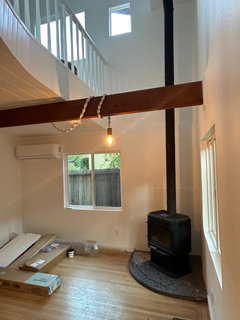
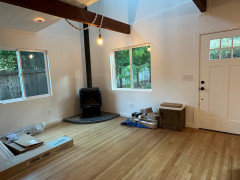
    Here’s pics of the room for my context.

  • last year

    …

  • last year

    All looks so great!

  • last year

    Thank you so much!! 😊

  • last year

    Good job on the renovations! Looks great.


    Consider using Henry Featherweight Finish that is a concrete that you can skim coaat with. I wouldn't use plaster as that would crack easily. It'll take a few coats to get that surface smooth.


  • last year

    Emily, thank you so much, I definitely needed a product recommendation šŸ™šŸ™šŸ™

  • last year
    last modified: last year

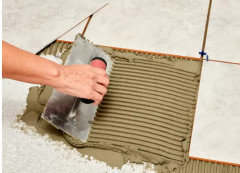
    Oops my bad...I misspoke. You want thin-set mortar, not skimcoat. It's the best and easiest to use to set tile. The ridges in the mortar are more forgiving on an uneven surface.


    Here is an article:


    https://www.thespruce.com/install-ceramic-tile-4173806


    Gorgeous home.


  • last year

    Great job on the renovation so far! I’d pop out the stones, apply a heat resistant coating to smooth it out, paint it a heat resistant matte black , and be done. No tile or other embellishment. No need to draw attention to it, especially if you never use the stove.

  • last year

    Thank you, flopsycat1! Agree on the minimalist approach. šŸ‘

  • last year

    I don’t think you can DIY and make it look much better unless you are going for a cabin or lodge rustic look. Save your dollars until you can have the stove and hearth removed and feather in new flooring, repair the exhaust hole. You may even be able to sell the stove. After integrate that corner into the rest of the room. If you like the stove for ambiance there are smaller scale electric stoves that don’t emit smoke.

  • PRO
    last year

    I love tracefloyd's idea of adding tile especially if you sculpt the heart into a better shape beforehand. You could also add a tile surround on the walls to match to help with fire resistance.

  • last year
    last modified: last year

    Wow great house! if it were me, I would just want it to disappear esp since you’re not using it - honestly, I paint it flat matte black and a put a large fern in a basket on one side and a pile of wood on the other - once the room is finished no one will be looking at it :)

  • last year

    Why not just have it disappear, literally? If you cannot use the stove anyway, it sure takes up a lot of space in the room. Would your home be seriously devalued if you did not have it?
    Your renovations are WOW, btw! Seriously beautiful! šŸ‘šŸ¼

  • last year

    Thanks y’all! In an ideal world, it’d be gone, but it was a want not a need to remove it, so removing it will have to wait. If I’m being honest with myself, I do want it to disappear, as to me it weighs down that corner and takes up valuable living room real estate. In the meantime I am dialing in to my desire for having it be minimalist, and love La-la girl’s idea of a doing the mat black with a fern on one side and wood on the other. I’ll report back!

    And thanks for all the love on the Reno! Now I need to show y’all the before and afters. The house was a hot mess! It’s come a long way.

  • last year

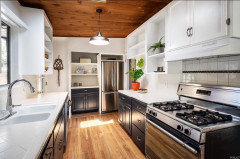
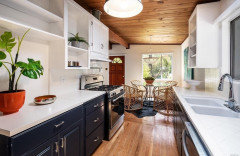
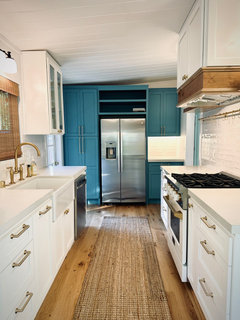
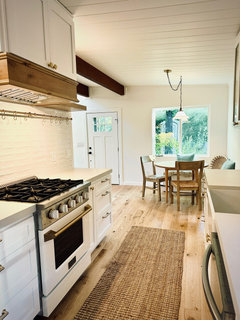
    Kitchen before / after

  • last year

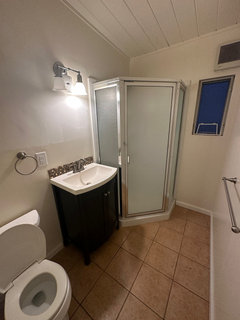
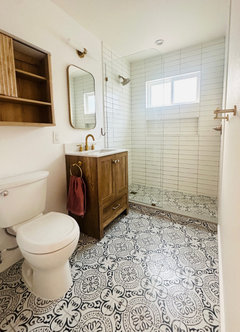
    Hall bathroom before / after

  • last year

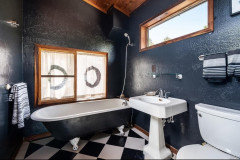
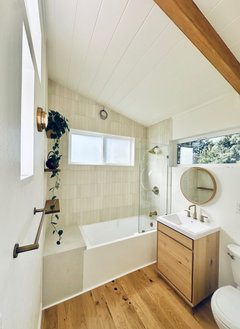
    My favorite transformation - primary bath before after.

  • last year

    Hi. We also had a wood stove that took up valuable real estate (and leaked). The stove pipe went up through a second floor closet and then the roof. Had to go.The only real cost of removing it was patching the hole in the roof. We DIY'd the removal but got a pro to do the roof. Research the cost of removal, it may be affordable and worth it to reclaim square footage. Your home is beautiful. Good luck.

  • last year

    Thank you, Sue! I figured it might be costly since we’ll have to patch the floor, the roof, and do the drywall where the heat shields are… but you’re right, it doesn’t hurt to know what it will run. I’m impressed you DIYd the removal! Standing on a ladder that tall freaks me out šŸ˜…

  • last year

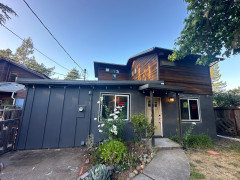
    Really beautiful job! I’m curious about the exterior. More pics?
    .

  • last year

    Exterior does not match inside yet. Needs new siding, new paint, and some landscape love, but here it is at the moment.

  • last year

    Cool house!