Software
Houzz Logo Print
webuser_26843280116

Shower Niche - How to Avoid a Schulter Trim

4 months ago
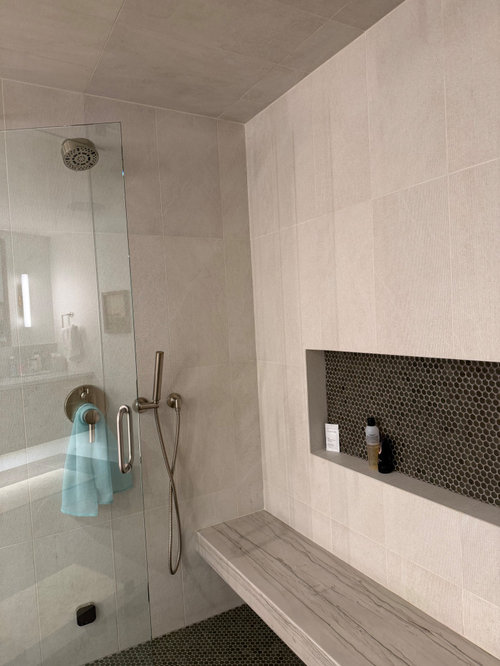
I really don’t like the look of the schulter trim around a shower niche, especially the metalic ones. I just want the edges of the niche to blend in to the surrounding tile. I don’t believe the tile I’ve chosen comes with any type of bullnose and I don’t really like that either. What do I ask for to get a clean look?

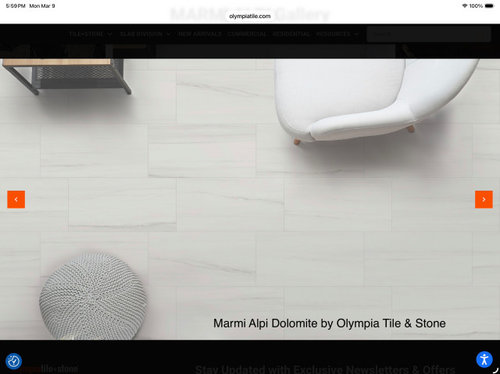
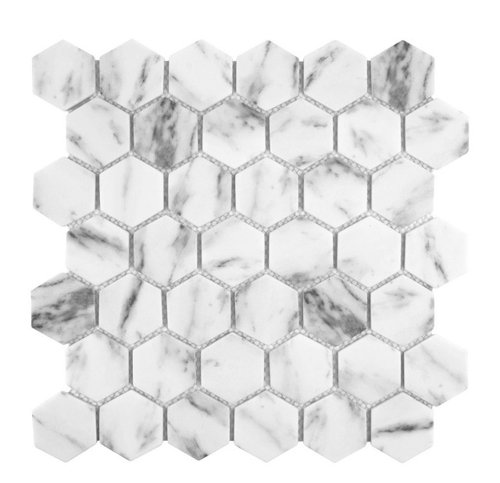
The tile I’ve chose is a 12 x 24 (Thomson Tile Marmi Alpi Matte Bianco Dolomite), laid horizontally. The back of the Niche will probably have the floor tile which is Thomson Tile Anthology Fabrique & Nature Carrara Hexagon Mosaic.


Comments (16)

  • 4 months ago

    Not really sure what you are asking. You do want all seam to be water tight. Is the picture offered is your goal? You aren't seeing the grout line, get a expert tile installer.

  • PRO
    4 months ago

    I am a no niche girl never needed to use shampoo bottles for decor and niches often the source for leaks.. I also like minimal grout lines in a shower and for sure no accent tile in a niche. I do not think those 2 tiles work together but that could be just the monitor. I would not do an accent tile on the floor of the shower just the wall tile in a smaller size. I like abath caddie that can be cleaned easily and really not every user needs every thing in the shower all the time . The choices you show for sure should not have a bullnose and Schuler in a stainless would be almost invisible itf you must have the niche.

  • PRO
    4 months ago

    Have you spoken with your contractor? You should be able to describe what you are wanting. He or she should be able to tell you if they can acheive the look you want.

  • 4 months ago

    Pick a tile that includes all the needed bullnose parts iin its range. There are about a million of them out there, surely you can find one that works.

  • 4 months ago

    I picked some marble tile for a shower last week and the salesperson had several edging pieces to choose from, that were not specific to the pattern/manufacturer I picked, but were the same type of marble and matched .

    I picked a very simple and narrow (about 1/4-3/8") marble square shaped trim to cover the abutting tiles on the edges of the niche.

    This was in a specialty tile store, not a big box store.

    Maybe there is one in your area you can visit to ask about different shapes and sizes that will match your tiles.


  • PRO
    4 months ago

    There are transition metals that will coordinate with your tile. Without bullnose, that’s visually the best option you have.

    You could also use quartz for the sides of the niche to avoid metal transitions but that will not result in the same aesthetic.

  • 4 months ago

    We're using a solid surface material we got at a tile store.

  • 4 months ago

    Schluter trim doesn’t have to be a metal look. If you select a grout color that matches one of the colored shades then it just blends with the grout….that being said, and like Skippack noted, an ‘excellent’ tile installer can mitre the edges. Very critical that they can show that they have done this before. Just like one should see how their penny tile installations turn out if one wants penny tile. Takes a skilled hand.

  • PRO
    4 months ago

    You have to go up several categories in skill from the usual builder's tile guy, in order to find a tile professional that can miter, and have it not look like the dog chewed it apart. If you aren't paying above 10K in labor to the tile guy, then you don't have that guy.

  • 4 months ago

    😂a dog chewed it….good analogy.

  • 4 months ago

    Natural stone tile makes it easier to avoid metal style tile trim (like Schluter). My tile pro was able to polish the edges of larger pieces of marble in order to avoid using pencil trim (which I am not fond of) or metal trim (which I think doesn't look good with natural stone tile). Larger pieces of marble were used for the bottom/sides/top of the niche.


    He also could have made bullnose pieces if that's what I wanted - however, I wanted the solid pieces for the sides/top/bottom of the niche instead of using tile.


    Originally, I was going to use the hexagons on my shower floor for the back of the niche - however, I decided to just use marble on the back of the niche.


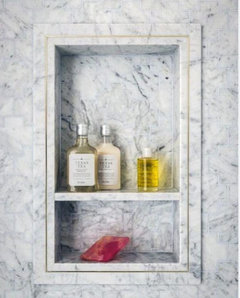
    The niche below uses thicker marble pieces (with mitered corners) to trim out the niche + add a shelf. They also used metal trim (maybe Schluter) and turned it in order to create the brass inlay design.


    You don't have to use pieces of dolomite that are as thick as the marble pieces used in the above and below niches - they can be the same thickness as your dolomite wall tile. In fact, if your dolomite tile is long enough, your tile pro will be able to simply cut down the width of pieces of your wall tile in order to frame out the inside of your niche.


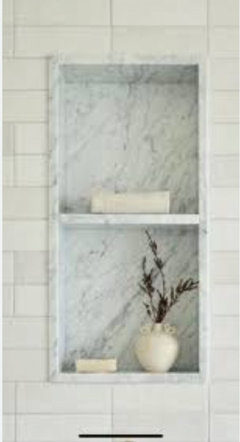
    The photo below shows how it would look without adding an extra "frame" piece around the niche - mine is like the one below (however, my niche is installed horizontally across the back wall of my shower + I have marble tiles on the walls).


    One of the most important things when having a niche designed is that the top/bottom of the niche are in line with tile grout lines. A skilled tile pro makes his/her own custom niches in order to correctly size the niche to align with the size of the wall tile.


    My niche is aligned with the grout line of the tiles above the niche above and below it. It runs the length of the wall = there is no tile along the right/left side of the niche (my tile was installed in a running bond pattern = I wouldn't have been able to match a grout line along the entire side - every other line would have had 50% tile pieces).


    In the above photo, the shower tile has two rows of horizontal stacked tile - but instead of running the horizontal stacks all the way up the wall, it looks like they alternated by offsetting the next two rows by 50%. They should have widened the niche in order to have the width = two lengths of tile. The right side looks better than the left because it has no cut pieces along the side of the niche.

  • 4 months ago
    last modified: 4 months ago

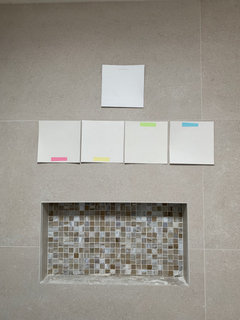
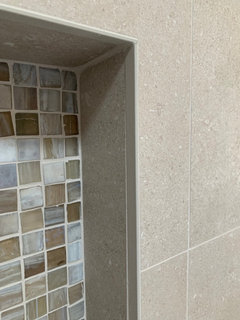
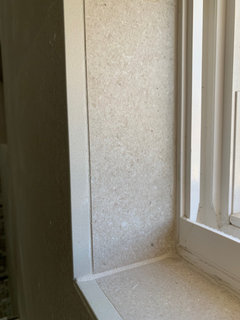
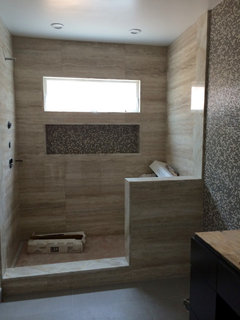
    My tile contractor offered to miter the porcelain tile edges around the niche (and window), but it would have been more expensive. Instead, I chose a Schluter edge in a light greige color. It is easier to miter edges on marble and on ceramic tiles that are not porcelain.

    Photo attached.

    Note: the bottom sill of the niche will be getting a stone slab to match the vanity top.

    Still undecided on the paint color for the walls (and ceiling).


    Edited to add: The OP has selected a dolomite-looking porcelain tile, not natural dolomite (which is similar to marble).

  • 4 months ago

    @coastal_vibe , it’s a bit blurry on the image i see, but i like that your tile contractor was able to find a schluter that closely matched your tile. I’m still going to ask for a mitered edge, but if i can find such a close match to the tile, that could be an option.

  • 4 months ago

    @HU-26843280116, I am attaching two closeups of the Schluter: one in the niche and the other at the window. Hope this helps.


    My tile setter is proficient in laying large-format (24x48-inch tiles) and paper-faced glass mosaic tiles, but he prefers to not have to take the extra time to mitre the edges on porcelain tiles.


    Another option is to surround the niche with your countertop material, if it matches closely to your wall tile.


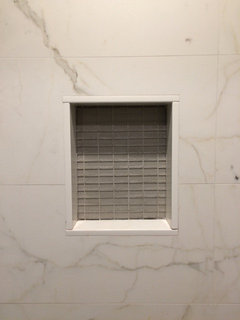
    In the primary bathroom, which I renovated previously, the quartz countertop material matched closely to the porcelain wall tile and I had enough slab material to wrap the niche and window in it. See the 3rd photo below.


    Same, with the guest bathroom renovated previously. The natural stone (Mont Blanc quartzite) matched the travertine-looking porcelain tile. See 4th photo below.


  • 4 months ago

    @coastal_vibe thank you for sharing more photos. It was helpful 😊