This website was so useful in learning about range hood design and selection, so I wanted to contribute some of my own findings that others may find useful. Thanks to @kaseki and @opaone for their wealth of information!
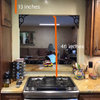
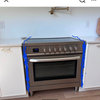
Our house is fairly small (750 sq ft) and there is currently no hood above the stove - just a 12" deep cabinet. Our attic is easily accessible. Because of these constraints, I knew I wanted a remote blower range hood. I mocked up under-cabinet units with cardboard but didn't care for how much they visually protruded into the (limited) space, so I started looking into shallow "insert" style hoods.
I understand the "insert" capture area is very limited and I'm leaving a lot on the table, but figure if I'm able to get a "true" 400 CFM removal, it should still be a significant improvement over nothing, and I do most of the truly smokey cooking on the grill outside.
The only insert with remote blower that I could find as a complete package was the Awoco RH-IT06 Split Insert Range Hood 800 cfm.
My concerns were as follows:
- It's not a name brand. They do claim to be ETL certified though, and looking up Awoco in the ETL directory, this does appear valid.
"800 CFM"
- If this number was real, it would be way more than I need and I didn't want to deal with makeup air. Thanks to the instructions documentation on the Awoco site though, I figured I could just leave the highest speed wire capped as a sort of DIY "Code Ready Technology" (To take Broan's terminology) and use the lower speeds.
- This number is likely inflated though - given the rated power for the hood is only 150 Watts, I figure the actual CFM would be closer to 400 CFM (which it was).
FIRST IMPRESSIONS
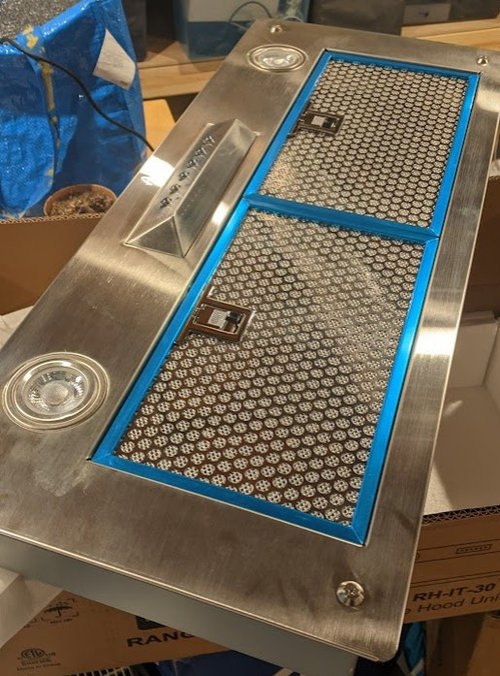
Overall feels kinda cheap (but it is, at under $500 for blower and insert). The buttons don't feel very substantial when clicking, they have blue backlighting (manufacturers, please stop with the BLUE LEDs), and the filters have "shiny" stainless which doesn't match the brushed finish (the blue frame is just protective film)
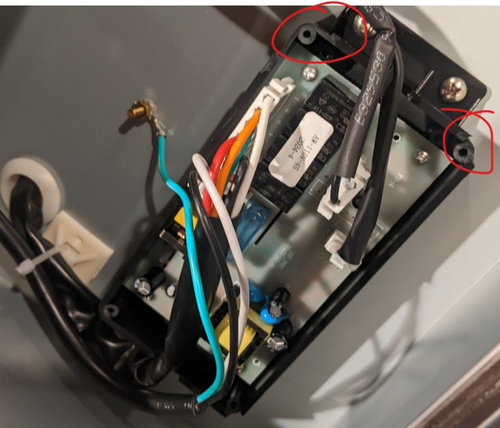
The lid of the control box in the insert had cracked off in shipping. I called the company and spoke to a gentleman who was very knowledgeable and got me a replacement part. They have a couple YouTube videos on troubleshooting their equipment, so I think it's a fairly small operation.
The blower unit is very substantial though. The squirrel cage turns smoothly and has some heft to it.
GROUNDING WIRE?
As you can see in the photo of the insert control box, there's a ground wire coming from the wall plug that is attached to the chassis. This appears correct.
The multi-color wire cable harness (red, orange, white, green, black) goes to the blower unit, but none of those wires is a ground (the green wire is "medium speed"). The blower unit itself has a green/yellow striped wire that is attached to the metal enclosure but no matching wire in the cable harness.
I talked to the company and asked how the blower was meant to be grounded, and he stated to find a junction box in the attic and ground it there.
I'm not an electrician but that didn't seem like the proper solution to me. I decided to add a ground wire to the cable harness. The wires are 18 GA Style 1015 VW-1 Rated. You can get similar wire on McMaster-Carr, but I found a spool in my workplace scrap pile.
I taped a "pull wire" onto the existing wire ends, pulled the harness jacket onto the "pull wire", added my ground, then pulled the harness back through. A helper is definitely needed. If this is unclear, take a look at how electricians pull wire through conduit. Proceed at your own risk of course.
FAN CURVE
Now onto the DATA portion of the review.
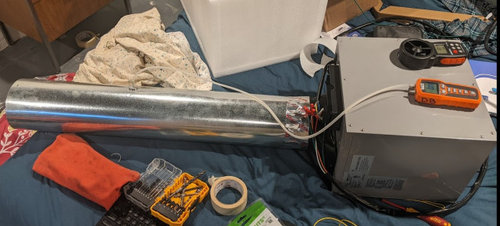
I have a cheap anemometer and digital manometer - great tools if you're every trying to balance a furnace, and probably less than $50 if you get them used on Ebay. With just these tools, a length of duct, and some tape, I was able to generate a fairly respectable fan curve. CFM was measured from the intake of the blower. Static pressure was measured halfway down the discharge duct. I progressively taped over the end of the duct to increase the pressure.
Apologies for the mess, I never said this was a professional test bench!
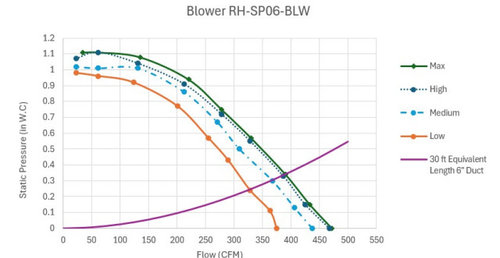
And here's the data! I've added a "System Curve" that is a rough estimation of the pressure losses when installed in my house (taking into account two elbows, grease filter, roof exhaust). So the actual flow should be under 400 CFM. I will follow up with actual losses (filter, no filter, etc.) when I actually get around to installing it.
As you can see, the actual blower flow is close to 475 CFM at "zero" static pressure. Of course, we've already added "base resistance" in the form of the blower enclosure. Perhaps the 800 CFM is the "naked" blower without the enclosure, but I don't have an accurate way to measure that, and at any measure, it's not a very useful number.
Of note - Awoco does sell the blower as a standalone unit for $330 and the more powerful version for $360. The wiring instructions in the box indicate you could run it as a single speed blower - just wire 120V to the speed tap you want and cap off the others (don't forget neutral and ground of course). A good value option if you're piecing together a system and need and inline blower.
That's all I got for now!













kaseki
Related Professionals
London Kitchen & Bathroom Designers · Harrisburg Bathroom Remodelers · Des Moines Kitchen Remodelers · Elizabethtown Kitchen & Bathroom Designers · Virginia Beach Kitchen & Bathroom Designers · Manchester Kitchen & Bathroom Designers · Lubbock Kitchen & Bathroom Designers · Jackson Kitchen & Bathroom Designers · Anchorage Kitchen & Bathroom Designers · Pine Bluff Kitchen Remodelers · Youngstown Kitchen Remodelers · Brattleboro Kitchen Remodelers · Orange County Kitchen Remodelers · Redding Kitchen Remodelers · Roanoke Custom Countertops