Software
Houzz Logo Print
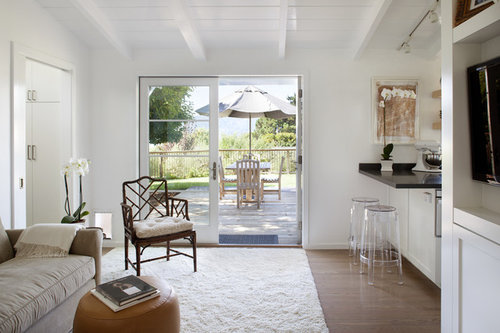
I want to do this type of open ceiling at a lake cottage as the ceilings are low. I am wondering how you make an open ceiling like this look so nice? What type of paint should you use, what type of prep work needs to be done, what about eposed nails, etc. Any advice is much appreciated. Thanks
Marin Bungalow · More Info

Comments (6)

  • PRO
    14 years ago
    Robin,
    Is the ceiling currently open like this? If so, just some finish work, prep and sanding on the ceiling and paint it a nice bright color which will compliment your walls in the rest of the house. Nails are slightly countersunk and then puttied over. If you have photos please share it is always easier for us to assist you with photos. A cottage by the lake sounds good right about now.
  • 14 years ago
    Thanks! I will submit some photos when I take some. The cabin is an hour away and we haven't taken pics yet. It's kind of a unique there is an existing ceiling that is not exposed yet and there will be a whole new part of ceiling because we are adding on to an upstairs loft area. Is there a certain type of wood that could be used on the new area that would look nice enough to not do anything with?....a type that wouldn't break the bank.
  • 14 years ago
    Some of those ceilings are fake and there's about a 6" gap filled with insulation which is why you don't see any roof nails. Insulation may depend on where you live and building codes. Inside ceilings are a different matter. Just prep and paint like you would any other wood.
  • 14 years ago
    My husband has been bombarded with photos of these open ceilings as well :-) It looks soo nice but I have heard (and will repeat here) all my husbands excuses...err, I mean reasons. Which after thinking about, I buy.

    This type of ceiling really has to be "designed" as apart of a room. Meaning that upon construction (or reno) it had to be known so that all electrical, plumbing and HVAC would be rerouted to other paths. In my house, we have electrical wires running through here and it would be extremely costly to redo (so now we are talking of a costly reno).
    The finish of lumber used in the joists and floor boards might have been considered. We have rough cut lumber. Very rough and a dust magnet! Sure, you could slather on the high gloss, super thick white paint, but unless its a look your going for, it will be rough and dusty.
    Also, if your in a newer home you may not have plank floor boards ( it may be ply sheets).
    Insulation is another factor. Insulation is key not only for retaining heat where you want it but for sound absorption as well.
    There is nothing much you can do with the nails.. They are there from keeping the floor boards in place and you could take the time to grind all the ends off them but you'll still see every last one of them. ( I don't even know whether anything will happen if you cut the nails, like floor boards popping up or anything, but I'd check )

    In the end, I decided just to do a paneled wood ceiling, painted white, to get the look without all the work. For extra pop, add some wooden beams over the paneling (bead board) and fake it.
  • 14 years ago
    We just installed a brand new tongue and groove ceiling ( full replacement of old ceiling) so I can vouch for how much work this job is. First, you can purchase the cheapest pine out there but you will have split boards, extremely rough boards etc. We chose to use select pine which has smaller, tighter knots and should have no splits. Upon delivery of the wood, we noticed at least 50% of the boards shouldn't have been even graded "select" due to the flaws. The roofer just said, "well select pine isn't what it used to be" if you get a good painter, then they can cover over all of this.....

    Well let me tell you, my husband spent 4 full days from sun up to sunset sanding, priming the boards, then putty over imperfections, then sanding again, then 2nd coat of primer.....it was a huge job and once installed, we realized we needed to apply an oil base primer because the knots were still bleeding through the boards as we had used water based primer....

    So another coat of primer, this time oil based...but now working on a ladder looking straight up as it had now been installed.

    Then you need to decide to caulk or not....depending on who you talk to you will get different answers. If you caulk, it will look good for 6 months but once the wood contracts and expands under heat, the caulking will pull away from the wood and you will have a heck of a time ever getting the boards to look nice again in the grooves..we opted not to caulk & applied 2 top coats of Benjamin Moore Decorators White. Between all that primer and paint, most of the gaps got filled in....it looks GREAT...but my husband literally spent every night painting meticulously for a week.

    It looks fab though....but I wouldn't attempt this unless you realize first hand how much work this is, or have enough cash to hire the whole job out!