Software
Houzz Logo Print
johnfrwhipple

eBook on Barrier Free Showers

12 years ago

I'm working on my first eBook of barrier free showers. This will be one of a series of online eBooks covering the planning and construction of a no-dam, no-curb or hobless shower. If your planning a barrier free shower soon I'm sure much of the planning and material selection process will be of huge help to you.

Have a look. We are at day two only of roughly a 40 day process. Info, pictures, illustrations and text will be added daily. Check back daily to see the days progress and to stay in the loop.

stylized ebook icon — Stock Vector © Willy Deganello #6475000 · More Info

Comments (33)

  • 12 years ago
    last modified: 12 years ago
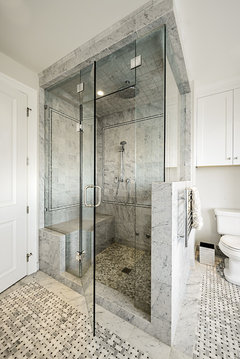
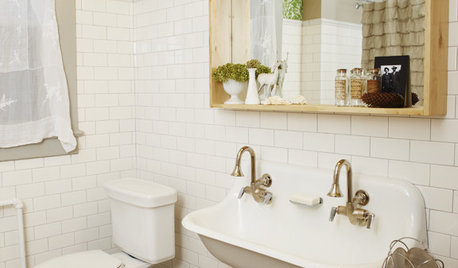
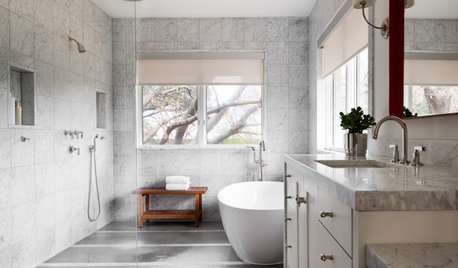
    Just scoping out for now John. Below is my favorite pic
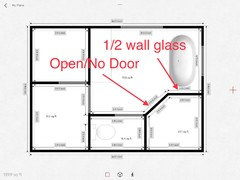
    1) I perfer to have no doors, but other houzzers recommend them so there's no cold drafts. I agree with them so doors it shall be. Will go with water glass though instead of clear.
    2) The privacy wall between the shower and toilet is a must. Incase i want to take my time while showering my spouse (not really married but for together for so long we are anyway) need not strain to hold in :)) and indeed vice-versa...ooh

    Transitional Bathroom · More Info
  • 12 years ago
    Forgot to mention, def need heated floors. Will go with hydro instead of electric. P.S. In your experience though, which lasts longer ?
  • PRO
    12 years ago
    last modified: 12 years ago
    Curt you have to consider if the design is truly for aging in place "What will you do when you need a care giver to use the washroom?" "Is the toilet in a place where your spouse can assist you to use it"?

    The drafty cold issue with no door is a good one. In this eBook I'm writing on my blog page I will be doing three things to address this - maybe four.

    1). Lower the ceiling height
    2). Increase the wall thickness and insulation value of the exterior wall
    3). Heating the entire floor (shower include) & bench (seat and back rest)

    4). Maybe a curtain - but only if steps 1-3 do not cut it...

    Heading back today for "Day Three" and will bust out the walls and start ripping out the crappy OSB subfloor that is in place now.

    Check back tomorrow for today's progress. Keep those questions coming. Thanks for your input and help! JW www.no-curb.com
  • 12 years ago
    last modified: 12 years ago
    John, one thing i like me is this...my imagination!!! i'm aging in place. To be Really truthful, i DO NOT want someone wheeling me into the bathroom, to bath me or do otherwise. I'm a long way off to being that needy, but i see that others NEED that help. We have to perserve their/ my diginity
  • 12 years ago
    What types of tiles are non-skid and not difficult to clean?
  • PRO
    12 years ago
    last modified: 12 years ago
    Curt - I have been told by two separate care givers that the biggest dignity saver is the power toilets with auto bidet seats. Heard nothing but good things about these. I suggested this on my current build and my client purchased a seat for her existing toilet -this install will be featured in my eBook as well.

    Not all bathrooms have the room for either side transfer to the toilet from a wheelchair. Another option is a wheelchair with out a full bottom seat, this allows a user to roll over the toilet without getting out of a wheelchair. These quite common I think in our healthcare facitities. These are awesome when needed. I think we will have to plan for this on this build since making to toilet totally accesible will reduce the vanity size to much.

    I suggest a heated towel warmer today and a custom dressing mirror that will double as small item storage.

    Still itchy from insulation landing on me today while I inspect the attic for proper duct lines for the bathrooms new fan.

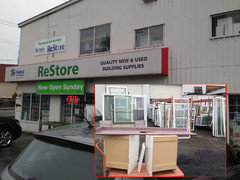
    Tomorrow I start with the floor framing upgrades. Demo'd most of the bathroom and dropped the last of the donations off to Habitat for Hummanity's ReStore....
  • PRO
    12 years ago
    Sarahkshed - your question is the million dollar one. The industry is changing how they rate this slip rating and most suppliers are hesitant to recommend a tile because of liability issues I think.

    The newer tiles today have such texture and many are great options. The tile my client selected was pretty dodgy - might have worked with an acid etch (Johnny Grip etc) but they feared would be harder to clean. I was asked if an acid etching would make things harder to clean and I had to say yes.

    The clients son in law took a day off work and sourced many great options - we picked one today from the sampling that was a "Flamed Porclean" - lots of traction. Looking forward to seeing it installed.
  • PRO
    12 years ago
    last modified: 12 years ago
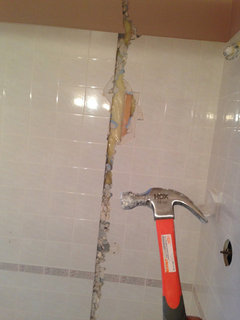
    eTip: DEMOLITION OF WALL TILE in a shower

    When I demo wall tiles in most renovations I come across simple backer boards like drywall or den shield. Often the tile is stuck on with glue or mastic and removal of these showers is a piece of cake since they are built so poorly to begin with.

    To remove these shower walls I first struck a hammer between two wall studs and failed the tile and backer board (den shield here with 6"x6" ceramic tile) in a line all the way down.

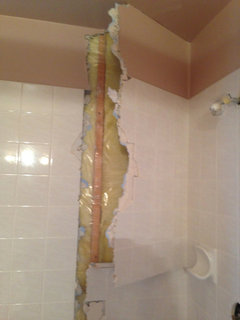
    Then I grab the edge of the blown out area and yank really hard. Typically the entire sheet comes down. This shower was a classic removal - so easy. Took out every wall tile in 8 trips to the truck. 8 bits of backer board.

    In Vancouver you can not dispose of any drywall that has tile stuck to it - so make sure you check where to dump and recycle this. Yet another reason to ban drywall from your shower's tile's backer board selection list.

    This eTiP is slightly expanded here on my blog page: http://no-curb.blogspot.ca/2014/02/etip-demolition-of-wall-tile-in-shower.html
  • PRO
    12 years ago
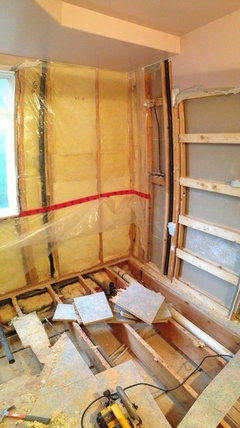
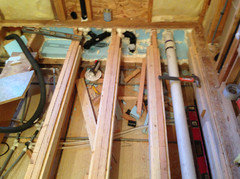
    Looking at the photo of the shower walls gone and some of the floor framing exposed we start to get a clearer picture of how and what kind of shower drain can be used.

    This step allows me to inspect for notched floor joist. Failing floor joists. Missing blocking. Joist spans and on and on. This bathroom typical of a Vancouver Special - so many code steps skipped I lost count.

    I was very please to see nice solid 2"x10" floor joists and a 12' span. Joists are on 16" centres which is great but the subfloor was total and utter crap. OSB topped with more OSB - it's all coming out today.

    I need to get creative around the pocket door (not really suppose to tile the back side of one to start with) and if you look close the wall's framing is on 24" centres - another no no for tile prep.

    I found missing Aucostical Sealant everywhere.

    Missing wire staples for electrical wiring.

    Drain pipes back graded.

    Missing tuck tape.

    Missing pipe protectors and clips

    On and On and On.

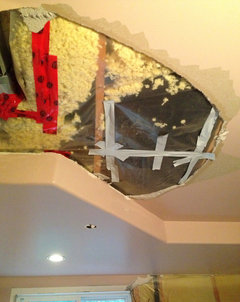
    I busted out the ceiling to inspect the framing for my engineer. All trusses with no point loads coming down on the entry wall (wall with pocket door) or opposite wall (we will be installing a recessed cabinet with full length dressing mirror - framed.

    So all good. Time to get busy....
  • 12 years ago
    John, i'm a newbie to abbreviations, acronyms, etc. What's OSB mean as you mention above ? Sorry if this is dumb question.
  • PRO
    12 years ago
    Not dumb. OSB = Oriented Strand Board....

    http://en.wikipedia.org/wiki/Oriented_strand_board

    It's like wood chips all munched up and pressed together with glue under pressure to make "Pretend Plywood". I hate it and think the stuff is total crap. There are some that is good. Some that is better. But as a group a poor choice in building materials.
  • PRO
    12 years ago
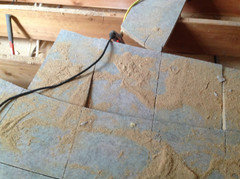
    eTip: REMOVING DOUBLE LAYER OF OSB bathroom demolition prep work

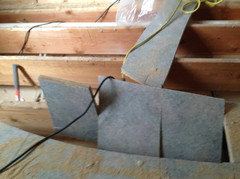
    One of the cheapest ways a low end builder will prepare a floor for tile is to staple a 1/2" layer of OSB over the subfloor (in this case below in photo a 5/8" layer of OSB). Removing the top layer can be a real bitch of a job. I find personally that setting my skill saw to a 1 1/4" depth cut and cutting small squares allows me to remove both layers at once.

    Because the OSB is so weak I can then bend the cut down (pivoting on joist top) and then pul l up. Here is a peak at todays demo stage.
  • PRO
    12 years ago
    Some times a little bash with a baby sledge or a boot stomp is needed....
  • PRO
    12 years ago
    Well - that was not very good about posting every day. Last Friday I was off so no action happened Friday, Saturday or Sunday.

    Went back yesterday and worked on positing the clamping drain's P-Trap. Once we did the demo I found that the right side of this room sticks out a good 11" over the foundation wall.

    We found piss poor insulation. Lots of indication of air leakage and of course a tiny 1.5" drain line.

    Lot of head scratching yesterday to address these issues. Think I'm back on track now.

    I have 4 of 7 floor joists sistered. The two with the big notches are LVL's at 8"

    The extra blocking running alongside the joists is simple 1"x4" which will support a 5/8" sheathing plywood flush with the lower joist height.

    Stand By.
  • 12 years ago
    What is the floor joist sistering for?
  • PRO
    12 years ago
    Floor Sistering is when you bring in new floor joists and nail them to the ones all ready there. This increases the strength of the floor and improves how much the floor can flex or bend down. This is called deflection. Because new wood is added the space between the the floor joists also shrinks. This improves flex this way as well.

    Yesterday we tested the new drain line with a flow test of 2 hours and continued lowering and sistering up the floor joists.

    For this build we added a couple of 8" LVL's for the long 12' spans and a few 2"x10"'s for the shorter 10' spans.
  • PRO
    12 years ago
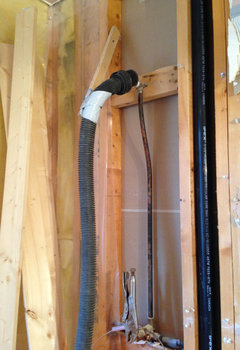
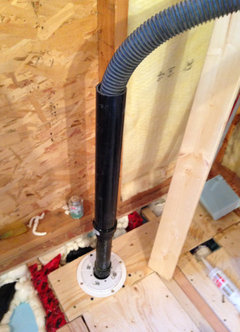
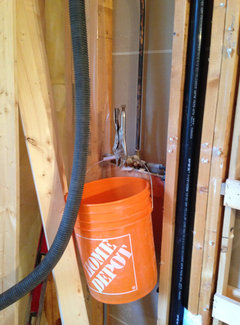
    Above you can see a simple rig I used to flow test the new shower drain and waste line. The original tub shower shared a tiny 1.5" drain line. I wanted a proper 2" drain line for this curbless shower and this simple test is a step above doing nothing as a test but ideally

    The entire work would be isolated and properly flood tested,

    Doing this for this job would have added to the costs and the timeline. Neither a good option.

    Below this space is a finished basement with a T-Bar ceiling so we can closely monitor the showers performance over time.
  • 12 years ago
    John, thanks in explaining OSB to me above. I grew up knowing OSB simply as particle board and that's why i asked. But now, what's LVL ? Thx again
  • PRO
    12 years ago
    LVL's are structural beams for framing.

    Check it out: http://lmgtfy.com/?q=What+is+an+LVL
  • PRO
    12 years ago
    LOL - Sorry for the cheeky link above.... Could not resist! hahahah
  • 12 years ago
    Never be sorry for a sense of humor. Why did the chicken cross the bathroom. To use the toilet. Duh
  • PRO
    12 years ago
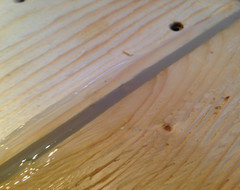
    Why would I add silicone between these gaps in my subfloor?

    eBook: Barrier Free, No-Curb, No-Dam & Hobless Shower Building · More Info


    Answer is located here: http://www.houzz.com/ideabooks/23582341/thumbs/eBook--Barrier-Free--No-Curb--No-Dam---Hobless-Shower-Building
  • 12 years ago
    Why fill the gaps between the floor joists? Is it just for mounting the cement board?
    Also, in the ideabook, you say you reduced the floor joists to 8". I thought you said earlier they were 2x10s, does this mean you cut some of the floor joist height? thanks
  • PRO
    12 years ago
    A 2"x10" floor joist is either full dimension and actually 2"x10" or like most 1.5" x 9.25". I cut a few down to 8" after sistering them up with new joists. I had different spans so I used 2 LVL's and 2-2"x10" common dimensional joists.

    The gaps are sealed to prevent thin-set from blocking the plywood's expansion ability here when the cement board is installed.
  • 12 years ago
    Sorry, I worded that badly. I meant why put the plywood between the floor joist spans?
  • PRO
    12 years ago
    Santos this step adds to the total thickness of the plywood subfloor.

    The very least I could do would be a 5/8" layer of plywood and a 1/4" cement board topper. That's the least.

    I like to start my projects with a double layer of 5/8" plywood. Then cement board. Extra work yes but the feel underfoot is amazing. One feels good the other feels like a tank.
  • PRO
    12 years ago
    John - I always appreciate your sharing your knowledge with us...I really enjoy reading about how things should be done. Many of the tilers around here don't do prep work up to my standards and I'm not particularly knowledgeable. There's a reason that products come with installation instructions, not recommendations.

    One of the benefits of doing work in your own house or rental properties is you get to see how work holds up over time. Most new tile jobs look good at first but a few years worth of use is the real test.

    I had to tell someone recently that I don't care that you have done lots of showers and never used Redgard before...I don't care if you think it is unnecessary. I bought the product and I expect it will be used underneath the tile. My name is on that house, not yours
  • PRO
    12 years ago
    Thanks Linda. I try and understand the layers of a home and how each new layer affects the layer below and above.

    There is so little building codes to follow.

    The TCNA and TTMAC guidelines are improvements to the basic build.

    Today was a boring day - Snow Day and I only worked a half shift framing out the exterior wall and insulation it.
  • PRO
    12 years ago
    I sell to the US as well. Most of the people using me to aid their design are in fact Americans.

    I charge $25.00 per 20 minutes. Have a read of my reviews here on Houzz - everyone is loving this service and I'm catching lots of structural mistakes and design oversights - just from looking at pictures my clients send me.

    If you send me some plans and some pictures a 20-40 minute call is a good place to start.

    You can sign up for these calls on my blog page - http://no-curb.blogspot.ca

    Top left of each page....
  • 12 years ago
    Thanks!
  • 8 years ago

    Does the link for this book still work? I can’t get it to open. Looking for barrier free here