
Search results for "Appears normal" in Home Design Ideas

 VISTA TILES
PLEASE NOTE THAT , in case of return there would be 25% Re stocking fee would apply to the order amount and Returning shipping cost would be pay by the customer .
. Since the bar front corrugated Tile ceramic products are produced by hand workmanship, it is normal for the products to have color tones.
. WOW TILE The back side of the corrugated tiles has a matte ceramic base and serrated, the front side is glazed and glossy polished.
. Our product, which is shown in the front of the bar ceramic picture, is made with a mixture of ceramic tiles and its upper structure is made with tile paint SIR.
. Wow tile bar front tile Bench front, counter front, bench forehead bar front ceramics are glazed and preserve its appearance for many years. No loss of color and pattern
Bar Design tile Handmade Bar front tiles are baked at 1050 degrees (oven). For this reason, it is resistant to weather conditions such as sun, wind, etc.
. The bar front ceramics are water and moisture proof thanks to the glossy glazed finish. For this reason, it does not hold water on its surface, prevents the formation of bacteria
and mold.
. The cafe bar model, which has special design tile colors, is covered with ceramic tiles in front of the bar, and its upper structure is covered with a special tile secret crackle and
its surface is cracked. These cracks remain under the secret.
. Cafe bar restaurant decoration for cafes
. Our under-counter tile products are preferred in your interior and exterior architectural decoration and designs, and in cafe patisserie projects.
Specifications :
Width : 10 cm
Height : 50 cm
Thickness : 2,5 cm
1 m2 Weight : 25,00 kg.
1 m2 Piece : 20
Additional info
PRODUCT DESCRIPTION :
– Production is made with a digital glass printing machine.
– UV printing technology and paint are used.
– It is baked at 980 degrees.
– It adds a visual meaning to the space used.
– Does not release moisture, does not form bacteria and mold.
– There are absolutely no problems such as pattern loss, flying etc. on the interior and exterior.
– Colors remain as vivid as the first day
– We can print all your high resolution images.
 United Porte Inc
SET INCLUDES:
Door Slab, thickness 1 9/16"
Trims
Jamb
Hinges
Passage Handle
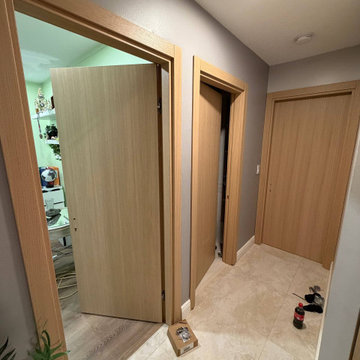
Door made of solid pine Wood and veneer coating. It is not recommended to paint.
Door is not pre-drilled for the hardware and not pre-attached to the frame.
Assembly of frames and trims required. Door works with all swing directions.
Introducing the "Modern Single Interior Door" from the Planum collection, a perfect fusion of contemporary design and natural beauty. Crafted from solid wood with honeycomb with a stunning veneer finish, this door exudes elegance and adds a touch of sophistication to any interior space.
The Modern Single Interior Door features a flush door design, creating a seamless and sleek appearance that complements modern aesthetics. With various hinge options available, this door can be customized to suit your specific needs and design preferences.
Conveniently located in New York, our showroom proudly showcases this exquisite interior door. Step inside to experience the impeccable craftsmanship of the Modern Single Interior Door. With its clean lines, flawless finish, and captivating design, it is sure to inspire your architectural vision.
Built with impeccable quality, this interior door offers exceptional durability and functionality. The solid wood with honeycomb construction with a veneer finish provides a natural look and feel, adding warmth and character to your space. The single door design creates a modern and minimalist entrance.
Whether you're an interior designer, contractor, or homeowner, the Modern Single Interior Door from the Planum collection is the perfect choice for those seeking a harmonious blend of modern design and natural beauty. With its veneer color, flush door design, and various hinge options, it effortlessly enhances any interior setting.
SOLID CORE
solid wood with honeycomb core made by laminated Wood using Ciplex technology.
CIPLEX by SARTO
High-end film layer that is applied on top of the laminated Wood Made in Italy.
NO FORMALDEHYDE
Environmentally friendly using only latest eco-friendly materials.
Company requires use of only the safest materials.
We care about our planet, the environment and you and your loved ones.
Sarto Doors are Ideal for use in hospitals and childcare centers.
SEALING GUM GERMAN COMPANY DEVENTER
It has a special profile that allows to protect your home from dust, makes a cozy and quiet atmosphere around every day.
On another side it allows you to save 35 % more heat and save up to 20% to the bill.
SOUND ATTENUATION
Door's 40mm thick solid wood with honeycomb construction yields 30% noise reduction over standard doors.
CONSTRUCTION
Door is manufactured from a single piece of Wood and will give several generations of normal usage with minimal care.
 Scott Simpson Design + Build
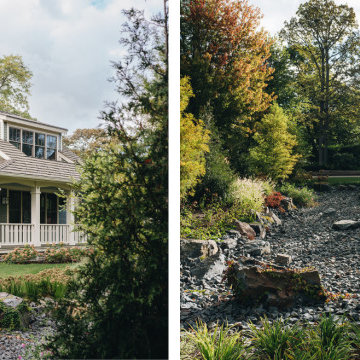
The landscaping incorporates native plants and a rain garden swale to optimize stormwater management on the property – and for the community - while promoting pollinator-friendly habitats. The synthetic roofing, designed to resemble the appearance of cedar shakes, is actually recycled plastic and the roof hosts solar panels as well.
The cedar siding is composed of small pieces of clear cedar that would normally just be put in a landfill. This siding is beveled and also finger-jointed to last a very, very long time. The trim material is made similarly from reused material.
Find the right local pro for your project
 Lighting EVER
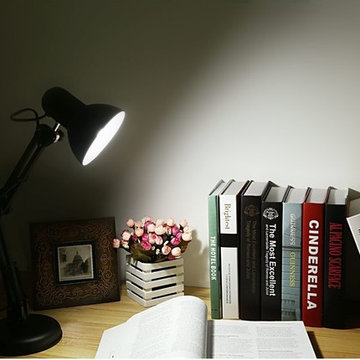
Quite a bit of flexibility
No longer need to move your books or notebooks around to get it in the light at night.
The spring loaded arm makes it easy to swing up and down smoothly, and the head of the lamp also turns around freely.
Versatile
Handy lamp, fits in a number of areas. You can clip it to many places with the C-clamp included.
Say, clamp it on a shelf, chair, bedrail, bench, or any other places you would like to.
With the heavy weighted base, the lamp can also stand on its own without tripping over.
Replaceable bulbs
With an E26 sized screw base, the bulb can be replaced as desired.
The fuse maximum permissible wattage is 100W, and a 40W bulb is bright enough for normal use.
Instant On
The lamp response instantly, there is no waiting for light to appear.
Delicate size
The elegant body of the lamp provides a beautiful and exquisite style that perfectly suitable for you.
It comes with a C-clamp for space saving.
The cord of the adapter is long enough to reach the outlet.
The clamp is screw-on-type rather than a tension-type, which avoid of leaving bite marks on the desk.
Key Data
Brand: Lighting EVER/LE; Item weight: 3 pounds; Shell Color: Black; Finish: Painting; Power source: Corded-Electric;
Input Voltage:110-130V; Base Diameter: 6.02inches; Length of the power cord: 59.06inches.
 Tile Doctor Ltd
This property in Godalming had the whole downstairs floor tiled with Fired Earth Limestone tiles nine years prior and had never had it cleaned or maintained professionally. The once beautiful stone was now looking dull and the grout had turned black with dirt leaving the floor looking uninviting.
This is quite normal for stone floors as it is the sealer that protects the stone from dirt and enhances its look. Most sealers wear off after three to four years sealer and in this case after nine years it was well overdue a deep clean and reseal.
I visited the property to survey the floor. It was indeed looking in need of some attention and the kitchen was particularly bad. To restore the appearance of the Limestone tile and grout the floor would need to be stripped of what remains of the old sealer, then deep cleaned with attention to the grout, polished with burnishing pads and then finally resealed. I was confident I could get it restored to a nearly new finish and to prove it I completed a small demonstration clean which the homeowner was very happy with. They agreed to my quote and we scheduled in a couple of days to carry out the work.
On day one I started by cleaning the grout using a strong dilution of Tile Doctor Pro-Clean. its run along the grout line and then left to soak in for about ten minutes so it can get to work breaking down dirt and old sealer. The grout is then scrubbed using a grout brush which is then scrubbed backwards and forwards along the grout line until clean. The area is then rinsed with water and all the waste removed with a wet vacuum cleaner.
Next, I turned my attention to the Limestone tiles which needed stripping of any remaining sealer, cleaned and polished. I find the best way to do this is by apply a set of diamond encrusted Burnishing pads in sequence starting with a coarse 400-grit followed by 800, 1500 and finally finishing with an extra fine 3000 grit. Water is used to lubricate the burnishing process and the slurry is rinsed and extracted off the floor between pads. Each pad is run over the tiles three times, and it was a large floor so as you can imagine this process took most of the day.
I left the floor to dry out overnight and returned the next day to seal the Limestone. Before doing that, I reviewed my previous day’s work and I cleaned up any areas that needed further attention. Next step was to ensure the floor was dry as I don’t recommend applying a sealer to damp tile as you won’t get an even appearance, so before sealing a floor I tested for moisture using a damp meter.
To seal the floor, I applied two coats of Tile Doctor Ultra Seal which is an impregnating sealer that works by occupying the small pores in the stone to prevent dirt becoming ingrained there. Limestone is a light stone and most customers like that appearance so I find it best not to use a colour enhancing sealer as it can darken the stone. Ultra-Seal doesn’t contain any colour enhancer and leaves the floor with a natural finish whilst allowing the stone variations and patterns to show through.
Once the sealer was dry, I gave it a further polish with the 3000-grit pad which further brought out the natural beauty of the stone. My client was very happy with the floor, it really lifted the who area and the Kitchen in particular.
Rupert Mcleod
West Surrey Tile Doctor

 La Vie Modern Furniture
Product Code: S606, Characterized by straightforward lines that are typical in any style and design of contemporary furniture, the S606 contemporary leather bed gives your bedroom an alluring appeal. Curvilinear lines are seen on the bed frame that features tufting in leather. The two tufted square cushions replaced the normal design of headboard. Platform in appearance, double, queen and king size available. other colors are options!
 Tile Doctor Ltd
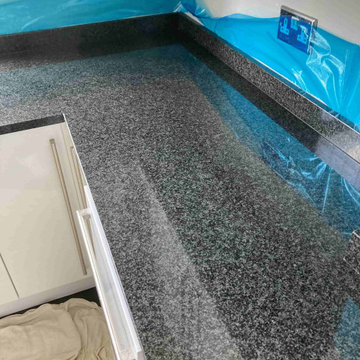
Although expensive Granite makes the most beautiful and practical stone worktop you can install in your kitchen. It gives real wow factor to a room and this kitchen in Folkestone was no different. Normally granite needs little maintenance however Folkestone has very hard water (often referred to as limescale) containing high levels of calcium and over time the calcium in the water gets deposited on nearby surfaces. According to the Affinity Water website the water in Folkestone contains 287.5 mg of calcium per litre which is classed as hard.
The owner of the property contacted us explaining that due to this problem the build-up of calcium deposits had overtaken her sink and countertop to a degree that she couldn`t deal with it through normal cleaning and a restoration was required. There are several household products on the market that can remove limescale however you need to be very careful when using these on natural stone as they use acids to break down the calcium and this can etch stone making the problem worse (always read the label). I went and had a look at the problem and gave her a quote for resolving the problem, which she was happy to accept.
Before starting the renovation, I protected the floor with dust sheets and the walls with a blue film that is easy to remove. Then to tackle the limescale I carefully went over each part of the Granite counter using a set of six-inch Tile Doctor Burnishing pads applying them in sequence from coarse to extra fine. To give extra cleaning power the coarser pads were applied with Tile Doctor Oxy-Gel which is an alkaline cleaning gel. The pads were fitted to a hand buffer and the soil generated by the abrasive pads was rinsed off between pads with water. For the finer detail such as the groves in the granite draining board, I used diamond encrusted handheld burnishing blocks of various grits. With the combination of diamond tooling and lots of elbow grease the job took around five hours to complete and the granite now has the polished look it deserves.
The granite worksurface does not require an actual sealer to be applied. However, maintenance is the key to keeping the stone in great condition so for aftercare I left the owner with a bottle of Tile Doctor Stone Patina Spray. This product is designed for cleaning stone worktops and contains a special ingredient that maintains the lustre. This should ensure the Limescale becomes manageable and can be cleaned more easily.
I made a striking difference to the appearance of the Granite Worktop and the owner was over the moon with the result.
Michael Conlon
South Kent Tile Doctor
 Five Star Tree Care
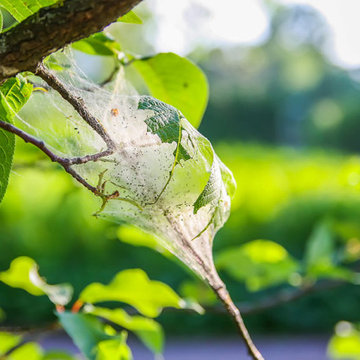
Have you ever looked out at your usually normal tree only to find it draped in hundreds or thousands of eerie looking webs? No, you are not going crazy. Chances are your tree has been visited by seasonal bugs. Typically, Eastern tent caterpillars or fall webworms are the cause of web covered trees. When they visit, they spin nets that resemble spider webs. Five Star Tree Services has put together a quick guide on everything you need to know about web-making caterpillars and how to deal with them.
Eastern Tent Caterpillars vs. Fall Webworms
Both of these pests look similar but there are some differences that set them apart. Eastern tent caterpillars are also called spring webworms. This is mainly because they are often found feeding during the spring seasons, while fall webworms as the name suggest, tend to appear in the autumn months.
The webs of the two pests look different from each other. The eastern tent caterpillar webs have a thick texture that looks like cotton, while the fall webworms have webs that more resemble tulle. Both also prefer to reside in different parts of the tree. Eastern tent caterpillars love to hang out where branches connect, called tree pockets. Fall webworms, on the other hand, like to hang out on the tips of branches.
Each has a different set of preferred tree species for their meals. Fall webworms like more than 100 different types of trees, but they are most often found on:
Black Walnut Trees
Hickory Trees
Wild Cherry Trees
Pecan Trees
Sweetgum Trees
Persimmon Trees
Mulberry Trees
Oak Trees
Pecan Trees
Eastern tent caterpillars also consume many different species of tree, but are most often found on:
Apple Trees
Crabapple Trees
Wild Cherry Trees
Ash Trees
Maple Trees
How to Remove Webworms & Tent Caterpillars
Before you start freaking out about your Halloween tree that suddenly decided to appear in the spring or early fall, it is important to note that these bugs won’t harm your tree. They look gross and will eat a large portion of your leaves, but there are no harmful side effects otherwise.
With that out of the way, getting rid of the webs is pretty simple. You can just remove them by hand and toss them into a bucket of detergent water to prevent sticking. You can also you the end of a stick or broom if you would prefer to avoid touching the sticky webs. For higher branches, we suggest calling a local arborist for assistance to prevent accidental falls.
How to Prevent Webworms & Tent Caterpillar Infestations
If you don’t want to deal with these webs at all, you can prevent an infestation in advance. In the winter, check your trees for tent caterpillar eggs. They are usually reddish in colour and a bit shiny. They can be found along the tree branches and scraped off. Fall webworm eggs look like green clumps and can be found on the bottom of leaves in the summertime. If you are unsure, or if you simply don’t want to deal with the problem on your own, Five Star Tree Services can help. Give us a call at (416) 990-3355 to find out more about our Toronto tree removal and tree care services today.
 Tile Doctor Ltd
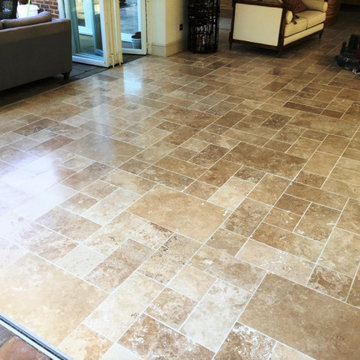
I was contacted about a Georgian property in the Kent village of Leeds , to see if I could do anything to improve a Travertine tiled floor. The use of Travertine was extensive and had been installed throughout the ground floor including the kitchen, dining room, utility and bathroom WC. Travertine is probably my favourite stone, but it is acid sensitive and attracts dirt easily, due to its ‘holey’ composition.
Initially we discussed the floor over the phone where I got to know about the issues they were experiencing, and I detailed the renovation process I normally use to restore it including the products and timelines. Naturally they wanted to me to provide a quote for the work however its tricky to do that accurately without seeing the floor, so I arranged a date to pop over.
Upon arriving I could see the tiles and the wide grout joints had extensive, ingrained dirt indicating the previous sealer had long since worn away. This is a common issue with stone floors, and to re-assure myself and the client it could be resolved I cleaned a small area in the utility room with pleasing results!
This test clean helped me to understand which products and methods would work best on the floor and later that day I emailed over a detailed quote for the renovation. Happy with the quote I received a reply the same day asking when I could start.
My colleague and I arrived on the agreed date and work started with adding protection to all areas that required it. We use a lot of water during the cleaning process and some materials such as MDF can become damaged with water ingress, so it makes sense to do this.
To get the floor clean, a coarse Carbide Brush fitted to a rotary machine was run over the Travertine tiles to scrub in a strong solution of Tile Doctor Pro-Clean. This process generates a lot of slurry as the dirt was washed out of the stone and grout which is extracted with a wet vacuum as we progressed.
Next it was on hands and knees with more Tile Doctor Pro-Clean and handheld brushes run over stubborn areas and along the grout lines to take them from 80% up to 100%.
Happy with the results, the next step was to renovate the stone using a series of diamond encrusted burnishing pads. Using only water for lubrication this process starts with the application of a coarse 400-grit burnishing pad attached to the floor buffer. This produces a lot of slurry which again was removed with a wet vacuum.
This left the Travertine clean, but the pores of the stone had been opened giving the floor a matt finish and more absorbent than it was originally. To further refine the appearance of the stone the next two burnishing pads were applied which are 800 and 1500-grit. These pads polish the stone and close the pores, restoring the natural sheen in the process. After each pad was applied the slurry was rinsed off the floor with water and extracted with the wet vacuum. Once complete the floor was left to dry off fully overnight.
I arrived the next day and took several moisture readings from the floor to check that it had dried off sufficiently overnight. The results were good, so work moved onto sealing the Travertine with two coats of Tile Doctor Ultra Seal which is a natural look impregnating sealer. It works by soaking into the stone, occupying the pores and thereby preventing dirt from becoming ingrained there. This ensures dirt remains on the surface where it is easily cleaned away.
The final step in the floor’s renovation was to apply the last of the diamond polishing pads which is a very fine 3000-grit. This pad further improves the polished appearance of the stone resulting in a satisfying sheen.
The work made a massive difference to the floor, and I received an email the next day from one of the owners who was really pleased with the transformation:
”Floors look brilliant. Very pleased.”
For the care and maintenance of polished sealed floors I recommend the use of Tile Doctor’s Stone Soap which is a gentle but effective cleaning product that won’t impact the sealer and contains a patina enhancer. When it comes to sealed floors my mantra is:
“If you look after the sealer, the sealer will look after the floor!”
Graham Davis
North Kent Tile Doctor
 Tile Doctor Ltd
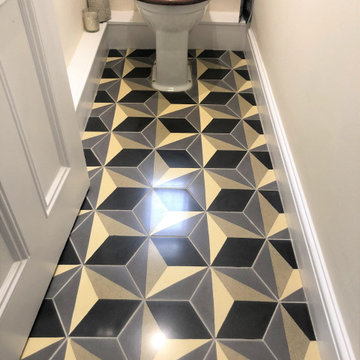
These photographs were taken of a bathroom and WC in a property in Histon The client had just had these modern Encaustic tiles laid a couple of months prior. The owner had never been happy with the final look of them and from the markings on the surface it looked like had been damaged in storage or left outside and neglected. They are a pretty unusual design so I can only assume the tiler thought their appearance was perfectly normal at the time of installation.
I was confident I could improve the appearance of the tiles and gave the client a quote for the work. Whilst she didn’t want to spend more money on her new floor, she did want it to look as it should, so rather reluctantly she agreed to go ahead.
Histon is next to Impington, they are small villages in Cambridgeshire, over the years the two villages have grown and have entwined together. Many villagers in fact do not know where one village starts and the other ends. The have 6 pubs in total!
I wasn’t sure what had been applied to the tiles so after adding protective tape to the wooden skirting I gave them a deep clean with Tile Doctor Remove and Go which was worked into the tiles with a black scrubbing pad. Then to renovate the surface and remove the markings I honed the surface with 400-grit and then 800-grit burnishing pad using water to lubricate the process and rinsing and extracting the soil away after each pad with the wet vacuum.
There were two areas that needed work so whilst one area was drying, I was able to get to work on the second and then return to the first later to apply a sealer. My product of choice for this floor was Tile Doctor Colour Grow which is an impregnating sealer which improves the colour and works by penetrating the pores of the tile and protecting it from within. I applied three coats allowing each one to dry before applying the next. The bathroom now looked as it should have done from the beginning.
My client was very happy with the improvement and left the following 5-Star review.
I only had my floor tiles fitted a few months or so ago and was so disappointed with them. I called Tom and within a few hours, he had transformed them! They look absolutely fantastic! Great value for money as well!
I recommended that in order to maintain the tiles, she should use Tile Doctor Neutral Cleaner, this is a pH neutral cleaner which will keep the floor without harming the sealer. Many tile cleaning products are only designed for Ceramic or Porcelain tiles and are too strong for use on sealed floors where they will strip the sealer off with time.
Tom Conlon
Cambridge Tile Doctor
 Tile Doctor Ltd
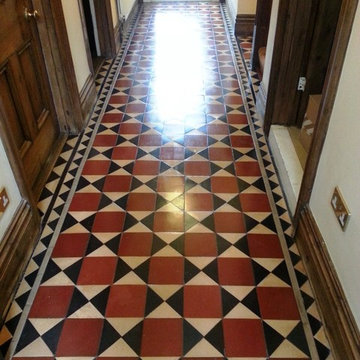
Recently I was contacted by a man in the town of Bedford who was worried that he had damaged his Victorian tiled hallway as a result of dragging a piano across the floor. I went round to the property to get a better look at the problem and, on closer inspection, realised that the tiles were actually fine; however, the piano had torn through the old surface seal.
The 150-year old tiles, dating back – as the name suggests – to the reign of Queen Victoria, had been poorly sealed and additionally had not been maintained correctly with the appropriate cleaning products. I was commissioned to remove the old sealer, clean and re-seal in order to restore this fantastic floor to its former glory.
My first task was to mix a solution of Tile Doctor Pro-Clean and water, which was then spread across the floor. Pro-Clean is a high alkaline cleaner which also contains stripping properties and this helped to break down the old, damaged sealer. The solution was left to dwell for approximately 20 minutes, giving it time to seep into the stone to get underneath, and lift out, any ingrained dirt. Pro-Clean was worked into the tiles using a heavy low speed rotary machine fitted with a black pad.
Once cleaned and stripped, we rinsed the floor using plain, clean water to neutralise the high alkaline Pro-Clean and the removed the resulting slurry using a wet-vac machine.
At this point I noticed that the white/magnolia tiles were particularly well worn and still very dirty and in need of further cleaning. Around this time Tile Doctor had also been discussing the successful use of Burnishing Pads (normally used on polished stone) on Victorian Tiles so I hand burnished the most stained tiles with a small 6 inch diamond encrusted burnishing pad with a little water to help lubricate the process. Following this, I rinsed the entire floor once again.
After leaving the floor to dry for four days, I returned to the house to seal the tiles opting to apply a single coat of Tile Doctor Colour Grow impregnating sealer first followed up with four coats of Tile Doctor Seal & Go. This combination of sealers provides a durable internal and surface stain protection whilst lifting the colours and adding a nice subtle sheen finish.
Once dried and cured, the floor was buffed using micro-fibre clothes to further enhance the appearance of the tiles further. My client was very pleased with the results, and couldn’t believe it was possible to get a floor that was so old appear brand new! The floor will dull with wear so I advised my client on the benefits of a regular maintenance plan going forward to ensure this great flooring feature remains in top condition.
Andrew Evans
Bedfordshire Tile Doctor
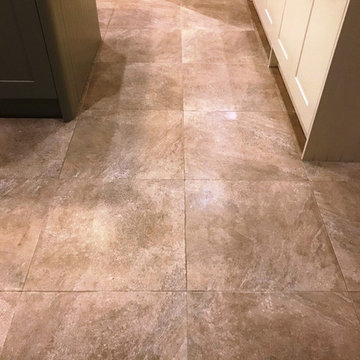 Tile Doctor Ltd
This request came from a client who lives in the Newcastle district of Jesmond who was unhappy with the appearance of their Textured Porcelain floor tiles. The problem was that the Porcelain Tiles were grouted in whilst the underfloor heating was switched on. This resulted in the grout drying out quicker than expected and the tiler struggled to get the excess grout off the tiles. To rectify the problem, the tiler tried to get the dried grout off with acid, but it didn’t work, and the floor was left looking dark and dull. Unable to rectify the problem the client was left with a disappointing pale floor and had searched around the internet for a solution.
Normally grout smears like these (aka Grout Haze) can be removed with an acidic product and Tile Doctor sell Grout Clean-up specially for this purpose. However, some grouts contain acid resistant polymers which need to broken down first. Fortunately, we have a solution for everything tile related and the system we use does not affect the main grout lines only the excess grout. I called in to do a site visit and having surveyed the problem I was confident it could resolved, I gave them a price for the work and agreed a date to return to do the job.
My first task was to spray the tiles with Tile Doctor Remove and Go, this was left to soak into the tile for around ten minutes before being scrubbed in. Remove and Go is a coatings remover that is safe to use on tile and grout; normally we use it to remove old sealers but in this case I applied it to break down the polymers. To work the product into the tile I use a buffing machine fitted with a black scrubbing pad, the mechanical advantage this gives makes the job a lot quicker. Then the slurry generated is rinsed off with water and removed with a wet vacuum. The floor was then left to dry for 30 minutes.
We were then able to remove the excess grout which was done by applying Tile Doctor Grout Clean-Up which I mentioned earlier. The process was the same, i.e. using the buffing machine and a wet vacuum to scrub the floor and extract the soil. The floor was rinsed with water to remove any trace of the products used and dried as much as possible using the wet vacuum. The underfloor heating really helped at this point to dry out the floor.
Once the floor was fully dry including the grout lines a single thin coat of Tile Doctor Colour Grow sealer was applied. The tiles were textured porcelain, so the dirt gets trapped into the textured surface if it is not sealed. We usually find one coat of Tile Doctor Colour Grow is more than enough for this, anything that hadn’t soaked in after three to five minutes was then polished off with clean dry cloths.
The client was very happy with the floor and pleased that the excess grout had been cleaned up and the floor looked as it should. Before leaving I recommended the use a pH Neutral tile cleaner for general cleaning such as Tile Doctor Neutral Tile Cleaner. There is no point sealing the tiles only to have it stripped off later with the use of a bleach based cleaner.
Raf Barrett
Tyneside Tile Doctor
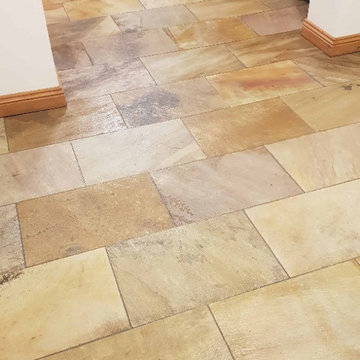 Tile Doctor Ltd
The photos on this page are of a Sandstone Kitchen floor at a house in the High Green suburb of Sheffield. The Sandstone tiles looked grubby and needed some love and attention. Our client was getting fed up trying to keep the stone clean, particularly around the kitchen area where cleaning didn’t seem to make much. You can see how dirty it had become on the before picture below, this is stark contrast to the middle of the of the kitchen where the portable kitchen island normally sits.
I went to the property to get a better look at the problem floor and carried out a small test clean to see which products and methods would have the best impact. The patch came up really clean without much difficulty, so I was confident on being able to restore its appearance.
It was clear to me the original protective sealer had worn off and dirt had become ingrained in the pores of the stone where it was proving difficult to remove. My client was very encouraged by the test clean initial result and agreed to go ahead with the quote. We arranged a suitable time to carry out the work on a day when the family would be out of the way.
I started by taping up the area to make sure the skirting and woodwork were protected from splashing. Once done a strong dilution of Tile Doctor Pro-Clean was sprayed onto Sandstone tile and grout. It was left to dwell for approximately ten minutes to help break down all the grime and dirt and was then worked into the stone using a rotary floor machine fitted with a stiff bristled brush.
This method totally transformed the dull sandstone, the stunning sandstone colours started to leap out and I could see the stone was well on its way to being transformed. The floor was then rinsed several times with water and the now soiled cleaning solution carefully removed with an industrial wet vacuum.
With the floor clean I inspected all the tiles and repeated the process until I was happy the floor was total clean. I should mention It’s not always this easy to clean a stone floor and quite often I find myself having to utilise all sorts of products and methods before I’m totally satisfied it’s as clean as it could possibly be.
With the cleaning done I left the floor to dry out overnight aided with heaters and air blowers.
I returned to seal the floor the next day checking first that the stone was dry with a damp meter. Leaving the blowers on overnight had helped and the readings I took from the floor confirmed it was now ready for sealing.
Earlier I had discussed the different types of sealer available with my clients and they had chosen to have the floor sealed with Tile Doctor Seal & Go. This works really well on Sandstone, enhancing its appearance, improving colour and of course adding protection to the stone to prevent grime and dirt stuck in the pores of the stone. Several coats were applied until I could see if was fully sealed and the right level of finish had been achieved. Sealing a floor can take some time as you need to allow each coat to dry before applying the next.
Once done the floor looked meticulously clean and the new sealer had added a lovely subtle sheen to the stone. My client was very please with the transformation and left the following feedback.
‘Very professional approach, friendly, and offered great advice throughout the job. Very pleased with the finish Cheers Matt we will see you again’
One of the problems we find with many homeowners is that for cleaning they use strong bleach-based cleaning product on their sealed tiles, and this actually strips off the sealer leaving the stone vulnerable to ingrained dirt. As a result, Tile Doctor has developed Tile Doctor Neutral Tile Cleaner, it is pH neutral and gentle enough for everyday use without affecting the sealer.
Matthew Lovett
South Yorkshire Tile Doctor
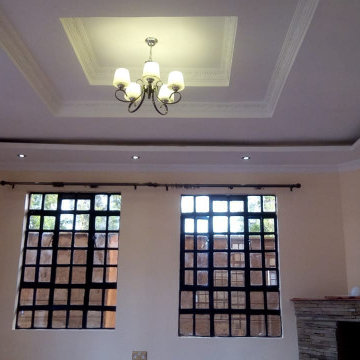
 Jongonga Contractors
Jongonga Contractors we design and serve the entire population regardless of age, stature, size, or physical ability. Traditional homes designed for average families may limit the independence or functionality of some residents; Kitchen counters are too low for very tall individuals and too high for short people. We incorporating features into a home during general home remodeling or rehabilitation project will not change the appearance of the home nor necessarily Increase the project although the cost will be based on the material. We add value and meet an immediate need; the other is to plan ahead to make the home better-fit household needs now and for the future as part of normal home up-grade or remodeling projects used on the project.
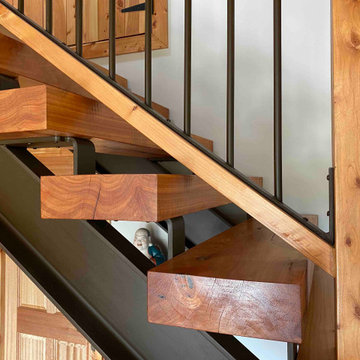
 Stairworks
The client’s goal of this project was for Stairworks to produce a centrepiece staircase that kept with the rustic, ‘imperfect’ aesthetic of the home and appear as if it had always been there. This was quite the challenge as it takes a great deal of work to build a brand new staircase that is accurate but not flawless. However, this challenge made this a very enjoyable project to work on.
For the chunky timber, we hand selected 100mm oiled Macrocarpa with splits and knots that are normally rejected for use on new furniture, and both machined and fitted it on site. In addition, ‘working’ marks in the steel were left exposed and sometimes even added in certain places to achieve the client’s desired look.
 Tile Doctor Ltd
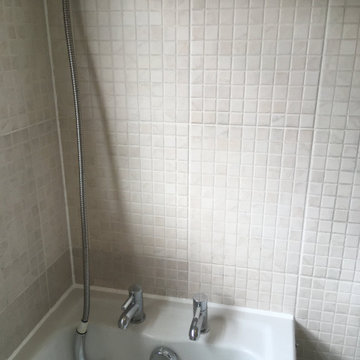
I recently visited a property in Levenshulme where the bathroom tiling and grout needed renovation. Although they resembled small square mosaic tiles, they were actually large 45cm x 60cm sheets of glazed ceramic tiles which are easier to install and require less grouting.
Over time the tiles had attracted a lot of dirt from showering and now needed a good clean, additionally mould had got a grip on the lower tiling and mastic sealant between the tile and bath.
Levenshulme sits halfway between Manchester City centre and Stockport and was recently declared by the Times Newspaper as one of the best places to live in the North West. It’s actually only a few miles drive from my base so well within my service area.
Normally I would look to renovate the grout lines with a grout colourant however grout had only been used between the sheets of tiles and what appeared to be grout between the small square mosaic tiles was in fact part of the glaze. I knew the colourant would struggle to achieve a bond with a glazed surface and so my only option would be to give the tiles a good scrub with a strong cleaning product.
My solution was to spay the tiles with Tile Doctor Duo Clean which is an effective double action grout cleaner and mould remover. It’s designed for cleaning up bathroom tile and can remove mould and blackspot from grout and silicone. I worked in sections allowing the product to soak in for a good ten minutes before scrubbing it in by hand with a stiff brush. After rinsing the tiles down with water, they were inspected and the procedure re-applied if needed. I found in fact that I had to do this several times before I was happy with the tile, grout and silicone were as clean as the could be. I often find longer dwell times can help the situation.
The bathroom looked new by the time I had finished, it was quite the transformation and my client was really happy with the result and left a long testimonial for me which is copied below.
I could not be happier with Kamila’s work. She is delightful, efficient, and quite frankly a genius. My tiles were horrible and my bathroom seal mouldy and disgusting. Now thanks to Kamila I feel like I ha e a new bathroom all over again. She has done the most amazing job and I am so so pleased. I cannot recommend her highly enough! She has done the most outstanding job and the results are better than I could ever have dreamed of. Thank you so much ? – By Sarah B, Stockport, 03 August 2020
Alex Logozny
Greater Manchester Tile Doctor
 Tile Doctor Ltd
The pictures showed are of an Encaustic Cement tiled floor that had been installed in the bathroom of a property in Twickenham. At the time the tiles were installed, they did not seal them and had since accumulated dirt, especially in the grout lines.
Encaustic cement tiles have become extremely popular in the last few years with many beautiful artistic often geometric patterns available to choose from. The very nature of the cement-based tile however does make it slightly porous, and if left unsealed dirt will become ingrained in the tile making it difficult to remove and keep clean. Like grout they do therefore need to be sealed in order to keep them looking at their best for longer.
Now we normally recommend using diamond encrusted burnishing pads when renovating Encaustic Cement tiles however in this case the face of the tiles were not too bad and it was really the grout that needed the most attention. So, to cut the cost for customer, I advised a straightforward alkaline scrub clean and seal.
To clean the tile and grout I sprayed the floor with a strong dilution of Tile Doctor Pro-Clean and left it to soak into the dirt for ten minutes. Space in the bathroom was quite tight so instead of using a mechanical floor scrubber I scrubbed the tile and grout by hand working the alkaline cleaning solution into the pores to release the grout in dirt.
After scrubbing the floor was rinsed with a little water and the soil removed with a wet vacuum. Afterwards the floor was inspected, and any stubborn areas retreated with repeat of the process. After a final rinse, the floor was dried as much as possible with the wet vacuum.
Fortunately, the weather has been amazing of late and so it did not take long for the floor to dry, being a small space and a little encouragement from a heat gun always helps. Removing excess moisture before sealing is essential as even a small amount can cloud the sealer resulting in an uneven appearance.
Once satisfied that the floor was dry, I proceeded to seal it by applying a couple two coats of Tile Doctor Colour Grow across the Encaustic tile and grout. As an impregnating sealer Colour Grow penetrates the pores of the cement occupying the space and thus prevent any dirt from becoming ingrained there. Colour Grow’s colour intensifying properties also helped to deepen the black colour of the tile enhancing the contrast between the tiles and grout.
Now the floor has been properly sealed it will be far easier for the customer to keep them clean in future. For maximum longevity of the sealer I recommend maintenance cleaning with Tile Doctor Neutral Cleaner. Don’t be tempted to use supermarket cleaning products without reading the label first, many are simply too strong for cleaning sealed surfaces and will strip off the sealer prematurely leaving the tiles unprotected.
Jonathan Oldham
South Middlesex Tile Doctor
 Stairworks
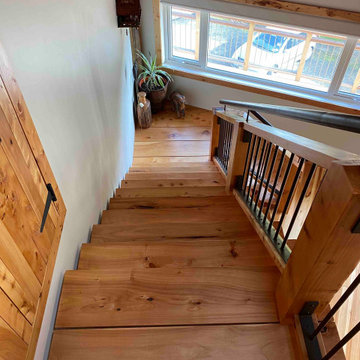
The client’s goal of this project was for Stairworks to produce a centrepiece staircase that kept with the rustic, ‘imperfect’ aesthetic of the home and appear as if it had always been there. This was quite the challenge as it takes a great deal of work to build a brand new staircase that is accurate but not flawless. However, this challenge made this a very enjoyable project to work on.
For the chunky timber, we hand selected 100mm oiled Macrocarpa with splits and knots that are normally rejected for use on new furniture, and both machined and fitted it on site. In addition, ‘working’ marks in the steel were left exposed and sometimes even added in certain places to achieve the client’s desired look.
 Stairworks
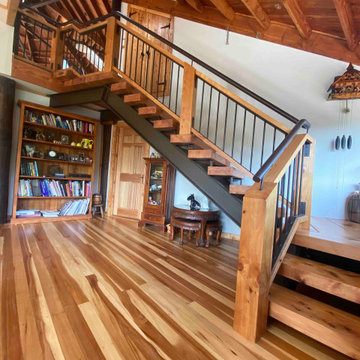
The client’s goal of this project was for Stairworks to produce a centrepiece staircase that kept with the rustic, ‘imperfect’ aesthetic of the home and appear as if it had always been there. This was quite the challenge as it takes a great deal of work to build a brand new staircase that is accurate but not flawless. However, this challenge made this a very enjoyable project to work on.
For the chunky timber, we hand selected 100mm oiled Macrocarpa with splits and knots that are normally rejected for use on new furniture, and both machined and fitted it on site. In addition, ‘working’ marks in the steel were left exposed and sometimes even added in certain places to achieve the client’s desired look.
 Stairworks
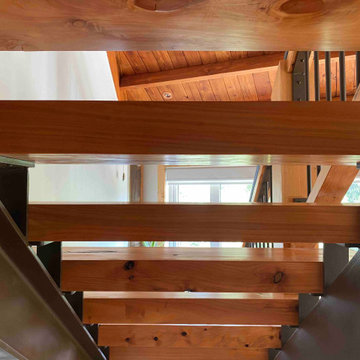
The client’s goal of this project was for Stairworks to produce a centrepiece staircase that kept with the rustic, ‘imperfect’ aesthetic of the home and appear as if it had always been there. This was quite the challenge as it takes a great deal of work to build a brand new staircase that is accurate but not flawless. However, this challenge made this a very enjoyable project to work on.
For the chunky timber, we hand selected 100mm oiled Macrocarpa with splits and knots that are normally rejected for use on new furniture, and both machined and fitted it on site. In addition, ‘working’ marks in the steel were left exposed and sometimes even added in certain places to achieve the client’s desired look.
8