
Search results for "Applied directly" in Home Design Ideas
 Alexander Butler | Design Services, LLC
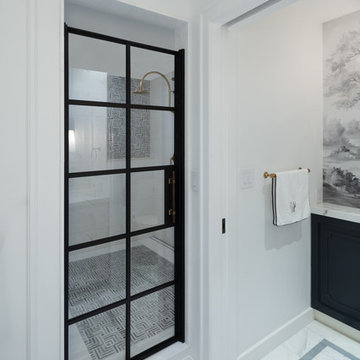
This is a view to the Powder/Toilet Room from our Master Suite Reconfiguration Project in Tribeca. We worked directly with Susan Harter Muralpapers to create the custom color for the feature wallcovering. We also designed custom cabinetry - which our GC (LW Construction) expertly fabricated - to maximize every square inch of storage space. Embellished Shaker Panels received white and black lacquer paint along with a matching Neolith Estatuario Countertop. A centered 'Princeton' sconce from Schoolhouse Electric further enlivens the space.
 Alexander Butler | Design Services, LLC
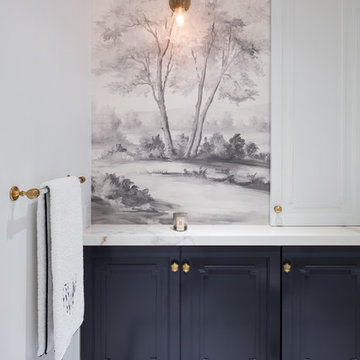
This is the Powder/Toilet Room from our Master Suite Reconfiguration Project in Tribeca. We worked directly with Susan Harter Muralpapers to create the custom color for the feature wallcovering. We also designed custom cabinetry - which our GC (LW Construction) expertly fabricated - to maximize every square inch of storage space. Embellished Shaker Panels received white and black lacquer paint along with a matching Neolith Estatuario Countertop. A centered 'Princeton' sconce from Schoolhouse Electric further enlivens the space.
 Alexander Butler | Design Services, LLC
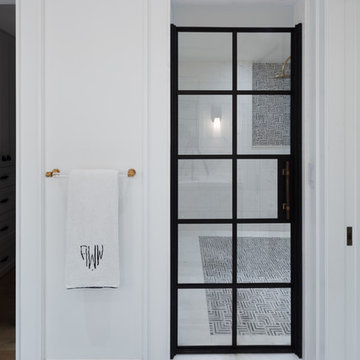
This is a view to the Powder/Toilet Room from our Master Suite Reconfiguration Project in Tribeca. We worked directly with Susan Harter Muralpapers to create the custom color for the feature wallcovering. We also designed custom cabinetry - which our GC (LW Construction) expertly fabricated - to maximize every square inch of storage space. Embellished Shaker Panels received white and black lacquer paint along with a matching Neolith Estatuario Countertop. A centered 'Princeton' sconce from Schoolhouse Electric further enlivens the space.
Find the right local pro for your project
 J. Bryant Boyd, Design-Build
Photo: Carlos Barron Jr // www.cbarronjr.com
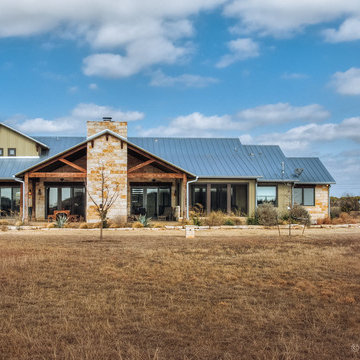
Mid-sized arts and crafts beige one-story mixed siding gable roof photo in Austin
Mid-sized arts and crafts beige one-story mixed siding gable roof photo in Austin
 Windy City Painters
Iron Fence Painting in Wicker Park: A Windy City Painters Case Study
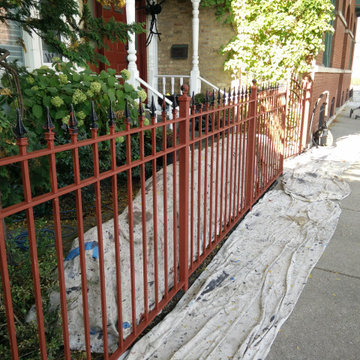
Iron fence painting in Wicker Park is one of the most requested exterior services Windy City Painters performs each season, and this recent project shows exactly why. Set behind an ornate 1890s greystone two-flat, the client's wrought iron fence had endured years of Chicago winters without professional attention. Rust had spread across the pickets, the original black enamel was flaking away in sheets, and the fence's structural hardware had begun to loosen at several joints.
As the trusted local expert for Chicago's North Side and Near West Side, Windy City Painters approached this project the same way we approach every iron fence painting job in Wicker Park: with a methodical, multi-step process designed to outlast Midwest weather rather than simply mask the damage.
The Process, Step by Step
Step 1 — Rust Removal and Surface Preparation. Our crew wire-brushed and mechanically ground every rusted section down to clean, stable metal. For pitted or heavily corroded areas, we applied a chemical rust converter to neutralize corrosion at the molecular level before any coating touched the surface. Furthermore, because this greystone was built well before 1978, Windy City Painters tested the existing paint layers for lead and followed strict containment protocols throughout the removal process.
Step 2 — Spot Repairs. Loose pickets were re-secured, small pits were filled, and hardware at the gate hinges was tightened. In contrast to a quick spray-paint refresh, this stage ensures the fence is structurally sound before a single drop of primer goes on.
Step 3 — Priming. A full coat of rust-inhibiting primer, engineered specifically for ferrous metal, was applied by brush to every surface — with particular attention to welds and joints where moisture tends to collect and restart the corrosion cycle.
Step 4 — Topcoat Application. Two finish coats of industrial-grade, direct-to-metal enamel were applied by brush and roller. This built a durable, uniform barrier in classic gloss black, the most popular finish among Wicker Park's historic properties. Finally, our team inspected every inch of the fence for thin spots or missed sections before calling the job complete.
Project Specs
Surface: Ornamental wrought iron fence, posts, and gate hardware
Products used: Rust-inhibiting DTM primer, chemical rust converter, industrial-grade direct-to-metal enamel
Coats applied: 1 primer coat, 2 finish coats
Finish: Gloss black
Timeline: Completed in under two days
Advice for Wicker Park Homeowners
Before starting a similar iron fence painting project in Wicker Park, homeowners should keep a few things in mind. Notably, never paint directly over active rust — trapped moisture underneath will cause the new coat to fail within a season. Additionally, always ask whether a contractor tests for lead paint on pre-1978 homes, since many Wicker Park greystones fall into that category. Meanwhile, hand brushwork matters: the intricate scrollwork common on Wicker Park ironwork requires careful, detailed application that spray equipment simply cannot replicate. Therefore, hiring a crew experienced specifically in historic Chicago ironwork, like Windy City Painters, makes a measurable difference in the finished result.
Windy City Painters also handles related exterior and interior work for Wicker Park properties, including interior painting, drywall and plaster repair, and additional metal refinishing for porches and railings.
Iron fence painting in Wicker Park protects one of the neighborhood's most defining architectural features while restoring curb appeal instantly. As a result, this greystone now has a fence that matches the quality of the home behind it — and will hold up through many more Chicago winters.
See more of our work and request a free estimate at www.windypainters.com.
Ready to transform your Wicker Park home? Contact Windy City Painters for a free estimate — visit www.windypainters.com today. Proudly serving Wicker Park, West Town, Lincoln Park, Roscoe Village, Lakeview, Ukrainian Village, River North, and all of Chicago.
 Alexander Butler | Design Services, LLC
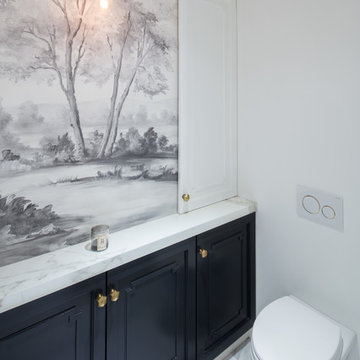
This is the Powder/Toilet Room from our Master Suite Reconfiguration Project in Tribeca. We worked directly with Susan Harter Muralpapers to create the custom color for the feature wallcovering. We also designed custom cabinetry - which our GC (LW Construction) expertly fabricated - to maximize every square inch of storage space. Embellished Shaker Panels received white and black lacquer paint along with a matching Neolith Estatuario Countertop. A centered 'Princeton' sconce from Schoolhouse Electric further enlivens the space.
 Your Space Furniture - Custom Sofa Factory Direct!
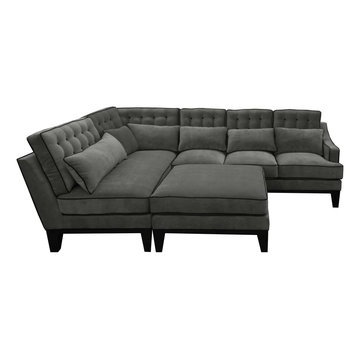
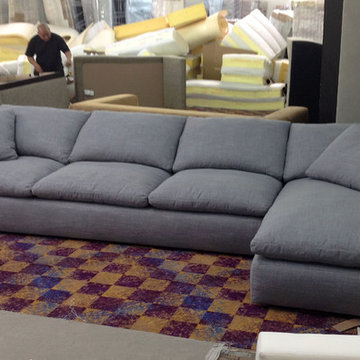
Napa Sectional
From $2499.00
Dimensions: 130x96''W x 34''H x 42''D
Can be ordered in custom size, twenty-four configurations, choice of cushion fill, seat firmness, decorative trim, wood finish and fabric. Please submit Request Custom Quote Form for custom pricing shipping rates and special requests. If you have a difficult area to design for, want to go COM, or just want an exclusive, different design, please, call Customer Service (214) 984-4128.
Quality Construction: Kiln dried hardwood frame, 8 gauge “no-sag” sinuous springs, 3.0-density high resilience foam core wrapped in Darcon polyester fiber. Produced and manufactured in USA.
Warranty: Lifetime warranty on the frame and springs. Additional Guardsman 10 Year fabric warranty against stains, spills, tears, and rips is available to purchase. Learn more about Guardsman
Shipping and Delivery: Can be shipped to any continental United States. Depending on Zip Code, different rates will apply. Please, submit Request Shipping Quote Form for more information.

 Earth Art Landscapes Inc.
Regine Marsh
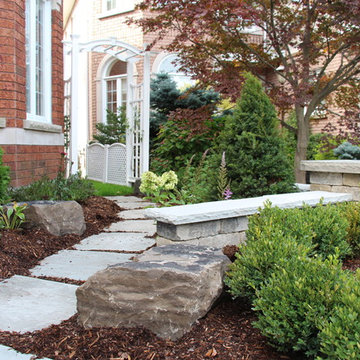
Inspiration for a small traditional partial sun front yard stone garden path in Toronto.
Inspiration for a small traditional partial sun front yard stone garden path in Toronto.
 A. Bollman & Sons.
Athos Kyriakides
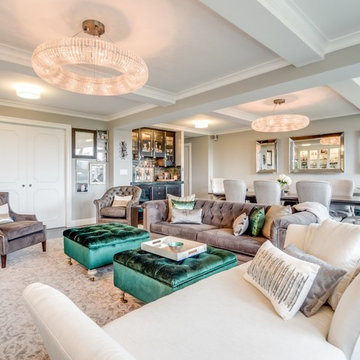
Inspiration for a large transitional formal and open concept dark wood floor and brown floor living room remodel in New York with gray walls, no fireplace and a media wall
Inspiration for a large transitional formal and open concept dark wood floor and brown floor living room remodel in New York with gray walls, no fireplace and a media wall
 Hush House
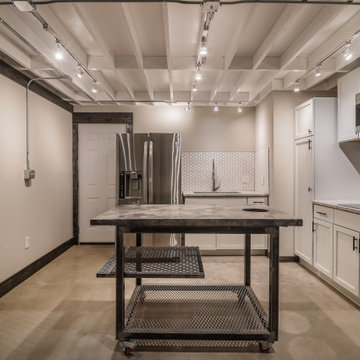
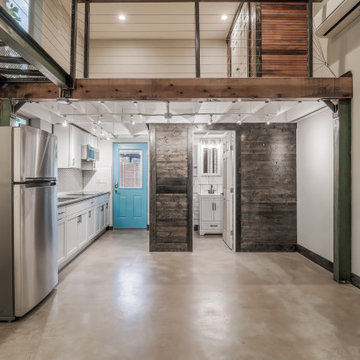
The ShopBoxes grew from a homeowner’s wish to craft a small complex of living spaces on a large wooded lot. Smash designed two structures for living and working, each built by the crafty, hands-on homeowner. Balancing a need for modern quality with a human touch, the sharp geometry of the structures contrasts with warmer and handmade materials and finishes, applied directly by the homeowner/builder. The result blends two aesthetics into very dynamic spaces, staked out as individual sculptures in a private park.
Design by Smash Design Build and Owner (private)
Construction by Owner (private)
 Your Space Furniture - Custom Sofa Factory Direct!
 Can be ordered in custom size, twenty-four configurations, choice of cushion fill, seat firmness, decorative trim, wood finish and fabric. Please submit Request Custom Quote Form for custom pricing shipping rates and special requests. If you have a difficult area to design for, want to go COM, or just want an exclusive, different design, please, call Customer Service (214) 984-4128.
Quality Construction: Kiln dried hardwood frame, 8 gauge “no-sag” sinuous springs, 3.0-density high resilience foam core wrapped in Darcon polyester fiber. Produced and manufactured in USA.
Warranty: Lifetime warranty on the frame and springs. Additional Guardsman 10 Year fabric warranty against stains, spills, tears, and rips is available to purchase. Learn more about Guardsman
Shipping and Delivery: Can be shipped to any continental United States. Depending on Zip Code, different rates will apply.
 Hush House
The ShopBoxes grew from a homeowner’s wish to craft a small complex of living spaces on a large wooded lot. Smash designed two structures for living and working, each built by the crafty, hands-on homeowner. Balancing a need for modern quality with a human touch, the sharp geometry of the structures contrasts with warmer and handmade materials and finishes, applied directly by the homeowner/builder. The result blends two aesthetics into very dynamic spaces, staked out as individual sculptures in a private park.
Design by Smash Design Build and Owner (private)
Construction by Owner (private)


 All Surface Restoration
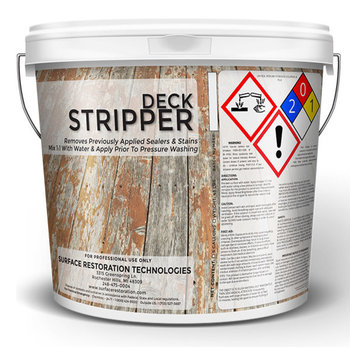
Deck Stripper quickly removes deteriorated semi-transparent oil-based stains and sealers. Deck Stripper will also remove damaged and discolored wood fiber from all exterior wood surfaces including decks, wood siding and log homes. Deck Stripper restore wood to its natural color and prepare surface for re-coating. Deck Stripper also removes gray weathered wood, water stains, mold, mildew and tannin bleeding. Safe for use around surrounding vegetation if pre-wetted prior to application
Restores the natural beauty of wood. Deck stripper is water based & biodegradable & easy to use .
Available in 5 gallon size with concentrated formula.
For Use On All Types Of Exterior Wood Surfaces:
Wood Decks
Fences
Railings
Siding
Log homes
Cedar shakes
Gazebos
Pergolas
Apply liberally with a low pressure sprayer mixed 1:1 with water. Wait approximately 5 to 45 minutes for Deck Stripper to soften the coating. The coating should easily rinse off when ready. Rinse in direction of wood grain with a garden hose or pressure washer at low setting (500-1200 PSI). Coverage is 50 to 150 sq.ft. per US gallon.
Deck stripper will strip most semi-transparent oil based wood-stains.
Wood rich in tannin may darken during restoration. Always apply Deck Brightening Agent after final rinse of Deck stripper to lighten wood & restore the natural ph balance.
Deck stripper can be purchased & shipped via UPS Ground to all 48 U.S. States except Alaska & Hawaii at:
www.surfacerestoration.com/shop
 Howard Katz Architects LLC
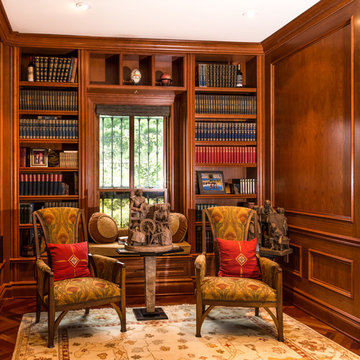
This is the Owners home office and paneled library is accessed via the front entrance hall through an arched opening on the left or the sunroom on the right. The upholstered window seat allows views out to the lush planted garden. The built in desk with shelving is directly behind in this photo.
Photo: Ron Freudenheim

 Beige and Bleu Design Studio
Study room - transitional freestanding desk study room idea in Boston with gray walls

 Tile Doctor Ltd
This Tumbled Travertine tiled floor at a beautiful house in Horley had been poorly maintained through the years using the wrong type of sealer which quickly wore down allowing dirt to become ingrained in the stone. The owner had become concerned about the state of the tiles and decided it was time to call in an expert that could restore the tiles to a condition that complimented the environment in which it was situated.
Travertine is known for being very distinctive in character and very durable, making it a very popular choice for tiled flooring in properties worldwide. However, the stone does require regular professional maintenance and polishing to keep it looking it top shape and home owners rarely realise this when they decide to have it installed. Fortunately, in the UK at least you can rely on your local tile doctor to maintain it for you.
The first part of the job involved giving the floor a thorough clean to remove what was left of old sealers and any polishing compounds that remained on the floor. Before beginning that however I brought in all my equipment and products into the house and then prepped the area by taping up the woodwork to protect it during the renovation process.
To remove what was left of the old sealers and other coatings still present on the floor a strong solution of Tile Doctor Remove and Go was applied to the floor and left to soak in for about ten minutes before being actively worked in with a rotary machine fitted with a black scrubbing pad. The solution turned black with the soil as it was lifted out of the pores of the stone and it was then rinsed off with water and extracted with a wet vacuum.
Following this, we moved on to a process we know as burnishing that hones the stone and brings up the polished appearance. Working in sections due to the size of the floor It involves the application of a series of diamond encrusted burnishing pads from coarse through to very fine.
The coarse 400-grit pad fitted to the rotary floor buffer and run over the floor using only water for lubrication. The water turns into a slurry as the pad does its job removing dirt and this has to be rinsed off the floor and extracted with the wet vacuum before applying the next pad. The process was then repeated with medium 800 grit pad for an initial polish followed by the Fine 1500 grit pad for the second polish using water for lubrication and rinsing and extracting in between each pad.
The last pad is a very fine 3000 grit pad for the final polish and is applied with only a little water sprayed onto the floor using a technique we call a Spray Burnish. This last pad really brings up the polished appearance of the stone.
To bring up the appearance of the stone even further and add a really durable polish Tile Doctor Shine Powder was applied. This is a crystallising powder sealer that ensures a very high shine and a tough, durable finish. This powder is applied directly to the tiles in combination with approximately ½ a litre of water and a soft white buffing pad.
Last step was to add to the protection provided by the Shine Powder with two coats of Tile Doctor Ultra-Seal which is a natural look sealer that doesn’t change the look of the stone and is applied to the stone and grout. This sealer works by seeping into the stone, occupying the pores and preventing dirt from becoming ingrained.
The customer was ecstatic with the results, being particularly pleased that she got the floor looking the way she originally wanted without significant expense, not to mention stress.
Michael Conlon
East Surrey Tile Doctor
Sponsored
Sunbury, OH

J.Holderby - Renovations
Franklin County's Leading General Contractors - 2X Best of Houzz!
 Western Outdoor Designs
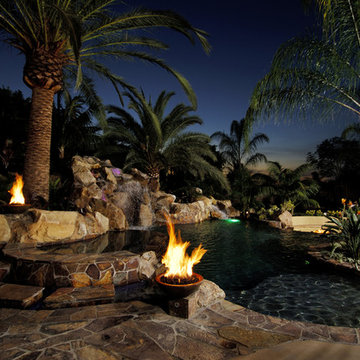
Western Design and Build can design the best pool for your backyard and lifestyle. Call now for a FREE Design Consultation (800) 789-8191
Automated or Manually Operated Systems. Our concrete bowls incorporate a concrete-glass fiber mix, resulting in a lighter but structurally stronger bowl. Our decorative pieces are beautifully finished with a hand applied process that includes multiple stains and washes and includes a final wax seal.The wax seal provides a deep, lustrous finish and protection against fading and discoloration from the outdoor environment.The wax seal requires a healthy dose of direct sunlight to finish the curing process. We could use paint and quick drying stains to speed up cure times but this would sacrifice the quality and beauty of our finished products.
 Tile Doctor Ltd
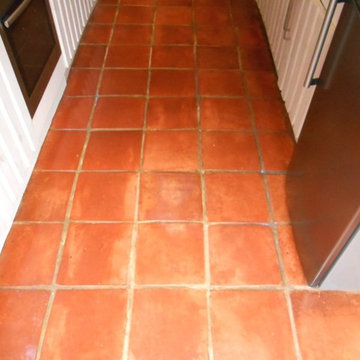
Not too long ago, I visited a house in the town of Fulwood in Preston, Lancashire. My client had a Terracotta tiled floor which had been neglected for many years and in their attempt to improve it had unfortunately been given some very poor advice by tile retailers, all of whom sold him different products, and each of which was unsuitable. Using these different products in succession had resulted in the depreciation of the floor’s texture and smoothness, in turn making the clay difficult to clean and maintain.
As per my usual process I ran a small test clean to demonstrate what could be done to improve the floor and I was commissioned to restore the floor back to its former glory.
I started by mixing a strong cleaning solution consisting of one part Tile Doctor Pro-Clean to three parts water. The solution was applied to the floor and left it to dwell for a short period. The high alkaline cleaner seeps into the pores of the tile getting underneath and lifting out the ingrained dirt and breaking down the old sealers. Then, I agitated the floor using a scrubbing pad fitted to a rotary floor machine before using a wet vacuum to suck up the resulting soiled solution.
There were a few paint marks dotted across the floor, but these were not noticeable until after I had given the Terracotta a deep clean. To remove the paint marks I used Tile Doctor Remove & Go, which is specially formulated to break down paint stains, adhesives and coatings. This product was used in combination with a steamer which, when applied directly to the tiles, helped to lift the paint out. Following this, I rinsed the entire floor a couple of times to remove any trace of cleaning product, and vacuumed up the excess moisture.
It’s always best to let the floor dry completely prior to sealing as applying sealer to a damp floor will affect the sealer. I left the house to allow this to take place overnight returning the next day. To get the best out of the Terracotta I sealed the floor using one coat of Tile Doctor Colour Grow, which is an impregnating sealer that soaks into the pores of the tile and acts as both as a bonding sealer enhancing the natural colours and darkening the clay (as requested by my client).
After the coat of Colour Grow had dried, I applied a further seven coats of Tile Doctor Seal & Go, which achieves a nice, low sheen Satin finish. Before leaving my happy client to enjoy his newly restored Terracotta floor, I made sure to provide some professional cleaning and long-term maintenance advice.
Russell Taylor
Lancashire Tile Doctor
 WindowTintLA.com
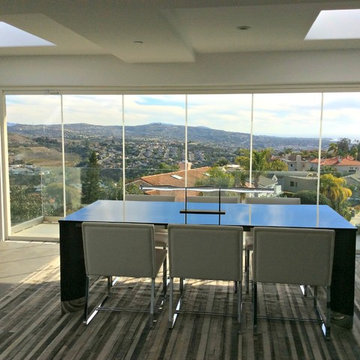
Home Window Tint, San Clemente. For this beautiful home we applied 2 different films- Huper Optik's Ceramic 60 and Klar 85. Klar 85 is a clear film, it won't alter the appearance of the glass but it blocks heat and 99.9% of UV rays and
17