
Search results for "Apply equalization" in Home Design Ideas
 Eco Star Painting
Step #1 Apply BM CLEAN
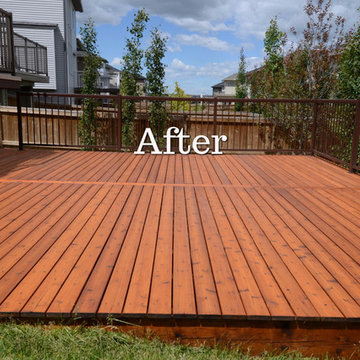
As you can see in the 'Before' picture above, this cedar deck was extremly dirty. This required an extra step in comparison to the typical deck stripping process. My paint rep at Benjamin Moore recommended a product called CLEAN. It comes in one gallon plastic containers and can be applied out of a plastic pail or with a garden sprayer. We used a Garden sprayer and chose a flat tip for application. The three gallon garden sprayer was filled with 2 gallons of water and one gallon of the CLEAN solution. This is a strong mixture and can be reduced to up to 6 parts water and one part of the Benjamin Moore CLEAN.
This approximately 22x20 deck had a board running perpindicular to the rest of the floor boards which divided it into 2 equal parts. Our method was to apply the solution to 3-4 of these 10' boards at a time. Allow it to set up for a few minutes and then scrub away with the deck brush. The agitation loosens up the dirt and grime and is then removed with a pressure washer a board a time. The flat tip on the pressure washer was almost the same width as the floor board. It is important to clean the sides of the board too because any remaining dirt or stain will be visible.
Benjamin Moore Deck Restoration products named Clean,Restore,brighten
Step #2 Apply BM RESTORE
The second step is exactly the same as the first step but with a different solution called Benjamin Moore RESTORE. The deck was dry before we started the 2nd step becuase it was baking hot outside. You use the same 2/1 mixture of water to chemical. This chemical will remove the stain still present in the deck floor. Make sure to rinse the garden sprayer clean before adding the restore solution. Unlike the BM CLEAN, the BM RESTORE has an orange-ish color in appearance. It did a fine job of removing most of the stain, but not 100% of it. There were a few areas that required a 3rd coat of restore but the process was quicker.
Step #3 Apply BM BRIGHTEN
The third step is exactly the same as the first two step but the chemical solution used was Benjamin Moore 'BRIGHTEN'. Again, the garden sprayer was cleaned and filled with 2 parts water and one part Brighten. The brightener not only lightens the wood but it also neutralizes the previous stripper solution. As stated before the Restore adds a bit of color and the Brighten will remove any traces of it. you still have to agitate the brightener with a scrub brush and either pressure wash it off or use a garden hose. We used the pressure washer for faster results. After it dries the wood look a lot brighter but we still found some spots of stain that had not come off.
Apply Sikkens Stain
As stated above the stain we used is called "Sikkens Proluxe" which is basically just a slight re-branding of the classic Sikkens Stain. The formula is exactly the same. In fact, the secondary name is still called 'Cetol' SRD RE. The color chosen was "CEDAR".
The weather was quite hot for a typical Calgary Spring day so we stained a 10' section of floor board at a time. The deck has a metal railing so the supporting feet had to be brushed in with a 2.5" natural bristle paint brush. for the rest of the job a 6" Wooster natural bristle deck brush was used. The handle was remove and a broom handle was inserted. The stain was stirred frequently and poured into a plastic Simms brand roller pan. Semi transparent Oil based stain has the consistency of water so you need to be careful not to spill any of it. When applying to a board you hit the sides first with the brush and then fillin the rest. Ten feet of floor board can be stain in a short period of time. it's important not to leave any streaks so it is adviseable to back-brush the entie length before moving on to the next board. The staining only took about 2.5 hours to complete. One coat is the manufacturers recommendation.
One last thing about Sikkens Stain. To maintain this beautiful look the deck should be re- coated once a year, preferably every spring. It's like applying sunscreen yearly to protect the wood against further damage. Two gallons was enough to cover this 450 sq foot deck.
 House of a Different Color
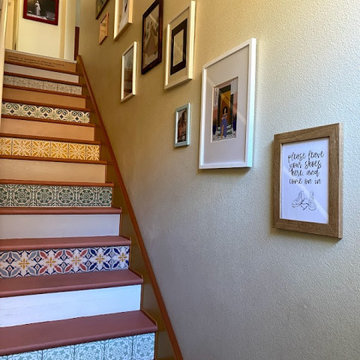
Staircase and entryway renovation.
Ground-floor private entry for second floor condo. Removed carpet on stairs, sanded off glue and filled holes, added staircase skirting and trim to cover gaps along the sides of the stairs, painted treads with high-durability exterior floor paint, hand-painted new riser boards in Spanish tile designs and coordinating solid colors to cover existing chipboard risers, and applied custom-made vinyl lettering to top riser for a unique welcome home statement piece. Also painted front door and coat closet door, replaced porcelain tile entry flooring with LVP flooring to match upstairs, and replaced door handles to updated nickel finish. Also placed mirror with shelf for keys and gallery-style artwork along staircase wall. Cost of the staircase renovation was approximately equal to the cost to remove stair carpet and install LVP flooring on stairs.
 House of a Different Color
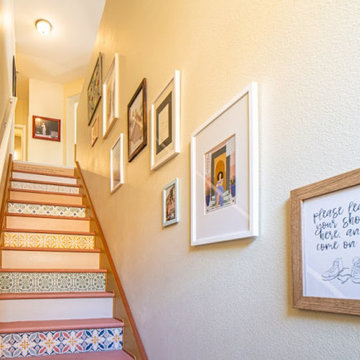
Staircase and entryway renovation.
Ground-floor private entry for second floor condo. Removed carpet on stairs, sanded off glue and filled holes, added staircase skirting and trim to cover gaps along the sides of the stairs, painted treads with high-durability exterior floor paint, hand-painted new riser boards in Spanish tile designs and coordinating solid colors to cover existing chipboard risers, and applied custom-made vinyl lettering to top riser for a unique welcome home statement piece. Also painted front door and coat closet door, replaced porcelain tile entry flooring with LVP flooring to match upstairs, and replaced door handles to updated nickel finish. Also placed mirror with shelf for keys and gallery-style artwork along staircase wall. Cost of the staircase renovation was approximately equal to the cost to remove stair carpet and install LVP flooring on stairs.
Find the right local pro for your project
 House of a Different Color
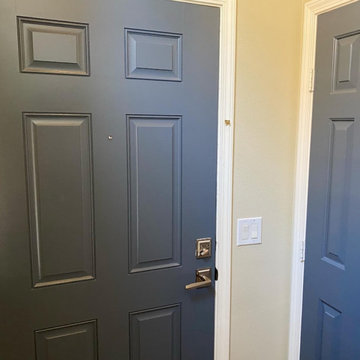
Staircase and entryway renovation.
Ground-floor private entry for second floor condo. Removed carpet on stairs, sanded off glue and filled holes, added staircase skirting and trim to cover gaps along the sides of the stairs, painted treads with high-durability exterior floor paint, hand-painted new riser boards in Spanish tile designs and coordinating solid colors to cover existing chipboard risers, and applied custom-made vinyl lettering to top riser for a unique welcome home statement piece. Also painted front door and coat closet door, replaced porcelain tile entry flooring with LVP flooring to match upstairs, and replaced door handles to updated nickel finish. Also placed mirror with shelf for keys and gallery-style artwork along staircase wall. Cost of the staircase renovation was approximately equal to the cost to remove stair carpet and install LVP flooring on stairs.
 User
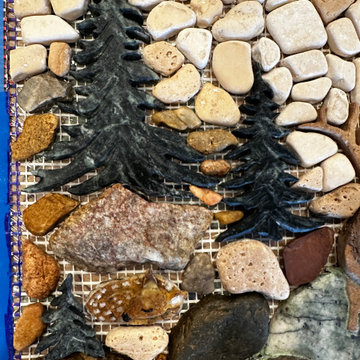
UserWith a Blue Pearl Granite fish clenched in her jaws, a black Limestone mama black bear with Tiger eye eye and crushed tiger eye muzzle exchanges wary looks with an equally alert bull Elk made from sandstone and sporting travertine antlers, who guards his mate as she takes a drink from the pond and a break from her fawn. The fawn, made from Granite with crushed Marble spots, ear, and Black Travertine eye and nose, naps nearby.
The Black bear’s hungry cub climbs boulders to see what the hold-up is. Mountains of Colorado Granite stone with crushed white Agate and white Marble snow tower over the Blue Sodalite lake. Green Granite pine trees sit off to the sides. The stream the bear is standing in and the pond the elk are drinking from/standing in are both different Granites resurrected from a stone fabricator’s dumpster. Little Quartz chips makeup the stream splash/froth.
The mosaic background is Travertine/stone pebble mixture. I glued on my signature ladybug before applying a high-quality enhancer and sealer.
 Tile Doctor Ltd
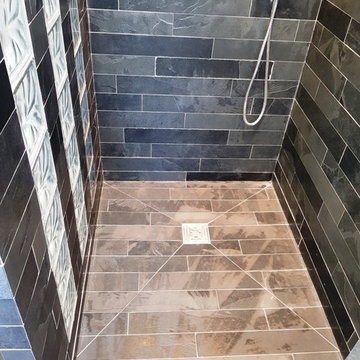
Our client contacted Tile Doctor as they were having problems cleaning their Slate tiled ensuite bathroom. We visited the property in nearby Stevenage, a London commuter town which is between Letchworth Garden City and Welwyn Garden City. The bathroom had been fitted some time ago, but due to the hard water in the area, there had been a large build up of limescale. The dark slate tiles showed this up even more.
My client had tried numerous household products on the tiles, but nothing was shifting the heavy build up. I discussed with them what Tile Doctor could do and completed a small demonstration. They were surprised how easily we were able to improve the tiles. We agreed a price and a timescale and booked the work in for a few weeks’ time.
The ensuite shower required intensive cleaning to the shower walls and floor where excessive limescale was present so we got to work cleaning with Tile Doctor Oxy-Gel, this is a strong alkaline based cleaner and degreaser, it is a gel so it works well on vertical surfaces where a long dwell time is required to break down dirt, grime, soap scum, oil based products. We left the product on the surface for approximately 10 minutes, removing all previous sealers and dirt. The residue was rinsed off and followed this up with a second clean using Tile Doctor Grout Clean-Up.
Grout Clean-Up is an acidic product designed to remove mineral deposits however you need to be careful with some types of stone as it can etch the surface if used incorrectly. To apply the product was diluted with water in a spray bottle and sprayed on to the wall tiles where it was scrubbed in and then rinsed off. The process was then repeated on the floor rinsing down thoroughly afterwards with water.
Once the slate was clean and dry we proceeded to cut out the existing silicone sealant which was equally stained and was beyond cleaning. This is a slow job and care needs to be taken not to scratch the tiles. It is important to ensure all the old silicone is removed so there is a nice clean surface to reapply the new. This also gave the shower area more time to dry out.
We tested with the moisture meter to ensure the shower area was fully dry and then applied the sealer. We chose to apply three coats of Tile Doctor Colour Grow, this is an impregnating sealer that works by occupying the pores in the stone, so dirt can’t become ingrained there, its also a colour enhancing sealer that provides durable protection. We applied the coats then lightly buffed off the excess with a soft cloth and allowed the slate to dry. The following day we returned to re-silicone all the edges and joints.
We recommended to the customer to use a mild solution of Tile Doctor Stone Soap as a maintenance cleaner for the slate. The client was very happy with the result and could see that cleaning with the appropriate product would ensure the ensuite bathroom continued to look good. The whole job took a day and a half to complete.
Robert Voyce
Hertfordshire Tile Doctor
 Le jardinet
Artists; Lewis and Little, WA
Le jardinet
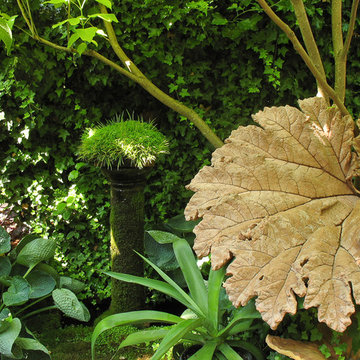
Design ideas for a traditional landscaping in Seattle.
Design ideas for a traditional landscaping in Seattle.
Sponsored
Columbus, OH
Free consultation for landscape design!

Peabody Landscape Group
Columbus' Reliable Landscape Design & Contracting

 Goodall Custom Cabinetry
Living room - traditional formal dark wood floor living room idea in Phoenix with beige walls, a standard fireplace and a media wall
 House of a Different Color
Staircase and entryway renovation.
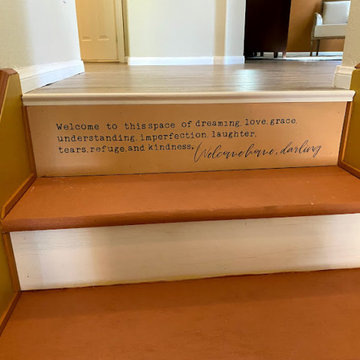
Ground-floor private entry for second floor condo. Removed carpet on stairs, sanded off glue and filled holes, added staircase skirting and trim to cover gaps along the sides of the stairs, painted treads with high-durability exterior floor paint, hand-painted new riser boards in Spanish tile designs and coordinating solid colors to cover existing chipboard risers, and applied custom-made vinyl lettering to top riser for a unique welcome home statement piece. Also painted front door and coat closet door, replaced porcelain tile entry flooring with LVP flooring to match upstairs, and replaced door handles to updated nickel finish. Also placed mirror with shelf for keys and gallery-style artwork along staircase wall. Cost of the staircase renovation was approximately equal to the cost to remove stair carpet and install LVP flooring on stairs.
 House of a Different Color
Staircase and entryway renovation.
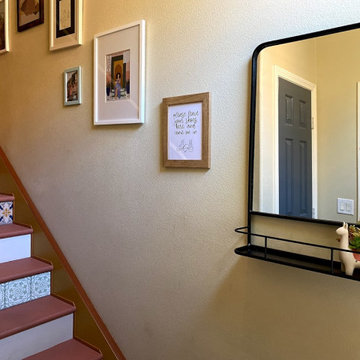
Ground-floor private entry for second floor condo. Removed carpet on stairs, sanded off glue and filled holes, added staircase skirting and trim to cover gaps along the sides of the stairs, painted treads with high-durability exterior floor paint, hand-painted new riser boards in Spanish tile designs and coordinating solid colors to cover existing chipboard risers, and applied custom-made vinyl lettering to top riser for a unique welcome home statement piece. Also painted front door and coat closet door, replaced porcelain tile entry flooring with LVP flooring to match upstairs, and replaced door handles to updated nickel finish. Also placed mirror with shelf for keys and gallery-style artwork along staircase wall. Cost of the staircase renovation was approximately equal to the cost to remove stair carpet and install LVP flooring on stairs.
 MK Development & Investment LLC
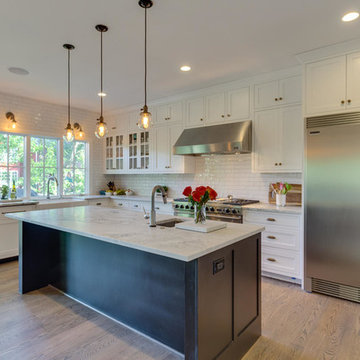
Open Kitchen plan, equipped with an island, 48" range and large ref/freezer. The island has room for seating, as well as a small prep sink, to allow for ease and flexibility of food prep. A white palette provides a light feel, and allows the brass hardware and medium-toned wood floor to accentuate the look.
 House of a Different Color
Staircase and entryway renovation.
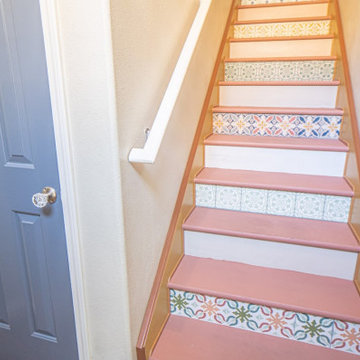
Ground-floor private entry for second floor condo. Removed carpet on stairs, sanded off glue and filled holes, added staircase skirting and trim to cover gaps along the sides of the stairs, painted treads with high-durability exterior floor paint, hand-painted new riser boards in Spanish tile designs and coordinating solid colors to cover existing chipboard risers, and applied custom-made vinyl lettering to top riser for a unique welcome home statement piece. Also painted front door and coat closet door, replaced porcelain tile entry flooring with LVP flooring to match upstairs, and replaced door handles to updated nickel finish. Also placed mirror with shelf for keys and gallery-style artwork along staircase wall. Cost of the staircase renovation was approximately equal to the cost to remove stair carpet and install LVP flooring on stairs.
 McCullough's Flooring
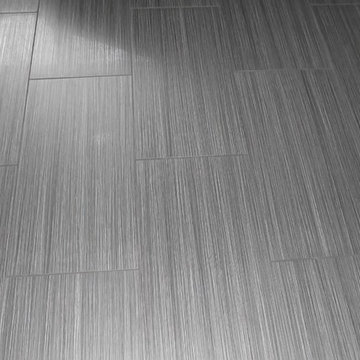
Gorgeous master bath finished with Dal-Tile's Fabrique porcelain tile in the color Noir Linen polished. Tile size is 12"x24" installed in a brick joint pattern. The floor boasts underfloor heating on a timed thermostat.
Sponsored
Columbus, OH
Free consultation for landscape design!
Peabody Landscape Group
Columbus' Reliable Landscape Design & Contracting
 VERMONT WOODS STUDIOS
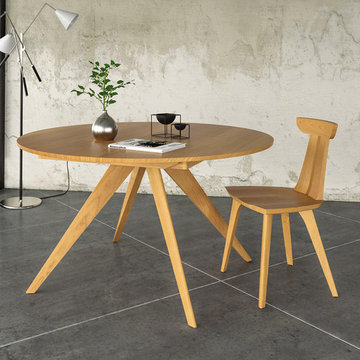
Our modern Copeland Catalina Cherry Round Extension Table is custom handmade to order with solid American Cherry wood. Features elegant lines in its round table top and rounded, angled taper legs. The table opens easily with a single 24" wide self equalizing, ball bearing extension leaf. The self storing butterfly leaf mechanism allows for single handed operation to easily expand or close the table in a matter of seconds.
The 48" round table will comfortably accommodate 4-6 people without the leaf and 6-8 people with the leaf, while the 60" table will seat up to 10 people with the leaf. Best in its class of authentic custom fine dining furniture, this extension table is destined to be a cherished family heirloom! Matching Copeland buffets and chairs sold separately.
Copeland Catalina is real solid wood fine dining furniture crafted for generations of service in your natural home. Custom handmade to order with solid natural American Cherry wood. Mid century, modern, 1950s American design is what the Copeland Catalina dining furniture collection is all about. Handcrafted in Vermont, with sustainably harvested hardwoods, this collection combines the clean, unadorned lines of the International Modernists with organic and geometric forms.
Base Price represents 48" round extension table in natural cherry
Shown In Natural Cherry
Matching Furniture is available online in our Copeland Catalina Dining Collection
Natural variations in solid wood and hand applied finishes make each piece unique. Slight grain and finish irregularities tell you that the furniture has been crafted from solid wood and are considered hallmarks of quality.
Finish: Lacquer
 VERMONT WOODS STUDIOS
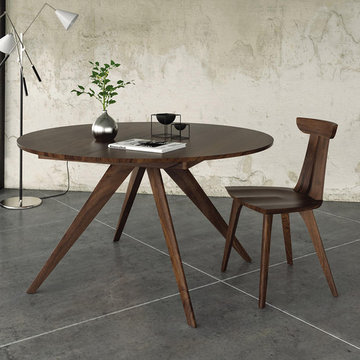
Our modern Copeland Catalina Cherry Round Extension Table is custom handmade to order with solid American Black Walnut wood. Features elegant lines in its round table top and rounded, angled taper legs. The table opens easily with a single 24" wide self equalizing, ball bearing extension leaf. The self storing butterfly leaf mechanism allows for single handed operation to easily expand or close the table in a matter of seconds.
The 48" round table will comfortably accommodate 4-6 people without the leaf and 6-8 people with the leaf, while the 60" table will seat up to 10 people with the leaf. Best in its class of authentic custom fine dining furniture, this extension table is destined to be a cherished family heirloom! Matching Copeland buffets and chairs sold separately.
Copeland Catalina is real solid wood fine dining furniture crafted for generations of service in your natural home. Custom handmade to order with solid natural American Black Walnut wood. Mid century, modern, 1950s American design is what the Copeland Catalina dining furniture collection is all about. Handcrafted in Vermont, with sustainably harvested hardwoods, this collection combines the clean, unadorned lines of the International Modernists with organic and geometric forms.
Base Price represents 48" round extension table in natural walnut
Shown In Natural Walnut
Matching Furniture is available online in our Copeland Catalina Dining Collection
Natural variations in solid wood and hand applied finishes make each piece unique. Slight grain and finish irregularities tell you that the furniture has been crafted from solid wood and are considered hallmarks of quality.
Finish: Lacquer
 VERMONT WOODS STUDIOS
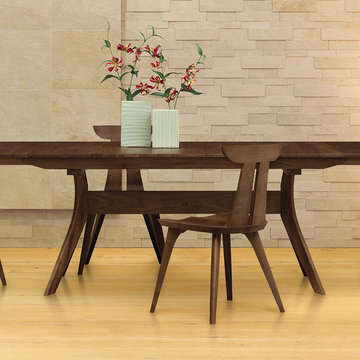
Our modern Copeland Audrey Walnut Dining Extension Table is handmade to order with solid American Black Walnut wood. Features elegant lines in its rectangular table top and trestle base with dynamic double 'X' legs. The table opens easily with a single 24" wide self equalizing, ball bearing extension leaf. The self storing butterfly leaf mechanism allows for single handed operation to easily expand or close the table in a matter of seconds.
Seats 6 people without the leaf and 10 people with leaf. Best in its class of authentic custom fine dining furniture, this extension trestle table is destined to be a cherished family heirloom!
Copeland Audrey is real solid wood fine dining furniture crafted for generations of service in your natural home. Custom handmade to order with solid natural American Black Walnut wood. Handcrafted in Vermont, with sustainably harvested hardwoods, this collection combines the clean, unadorned lines of the International Modernists with organic and geometric forms.
Base Price represents natural American black walnut wood
Shown In Natural American black walnut wood
Matching Furniture is available online in our Copeland Audrey Dining Collection
Natural variations in solid wood and hand applied finishes make each piece unique. Slight grain and finish irregularities tell you that the furniture has been crafted from solid wood and are considered hallmarks of quality.
Finish: Lacquer

 STACT Wine Displays Inc.
 http://www.getSTACT.com
STACT wine racks are incredibly easy to specify and incorporate into wine cellars, wine rooms, kitchens, home bars, commercial bars, and restaurants. Our customers have found that when it comes to modern wine cellar solutions, our system offers a number of advantages versus other wine storage solutions available on the market, here are just a few:
✓ Quality - premium *furniture grade* solution is unique to the industry, with unrivalled refinement when it comes to materials, aesthetic and craftsmanship. Our panels feature a premium high-gloss painted finish (not a laminated surface). Each panel takes more than a week to complete, with meticulous attention to detail. Once numerous coats of lacquer have been applied, each panel is hand buffed to a mirror-like piano finish.
✓ Versatility - mount any way you wish, and designed to work equally well within both commercial and residential applications, our clients have found our modular system to be the most versatile, and easiest to specify, assemble, and install - whether for 9 bottles or 9,000 within a large scale wine cellar application (www.stact.co/cellars). Available on your choice of 10 finishes, mix and match STACT panels to create your own unique look (3,628,800 possible configurations).
✓ Convenience - designed for quick and easy *DIY installation*, our patented system comes ready-to-install to any drywall surface right out of the box, minimizing the costs associated with labor and installation when compared with many custom solutions you will find on the market. Avoiding the need for a dedicated wine cellar builder to produce and arrive on site for assembly and installation. In-stock items typically ship within 1 business day.
✓ Value - direct-to-client distribution model to effectively cut out retail markup. Builders and specifiers have found STACT to be a fraction of the price of what it would cost to develop and produce a comparable custom solution. Plus currently we are offering *free shipping worldwide*.
✓ Design pedigree - created by 2012 ICFF winning designer Eric Pfeiffer, our patented prefabricated ready-to-assemble modular design is unique to the industry.
✓ Space-saving - highest bottle capacity on the market (10.7 bottles / sq ft). Each panel supports 9-12 bottles depending on how they are configured.
✓ Security - superior bottle stability, versus other wall-mounted wine storage solutions on the market. The aircraft grade aluminum bottle support structure ensures a lower center of gravity there is a more substantial portion of the bottle resting below the contact points. Thus a minimalist design aesthetic is retained, while eliminating the need for unnecessary and unsightly materials/clutter such as rubber gaskets, straps, etc.
Credit: VIno Grotto Wine Cellars
 Tile Doctor Ltd
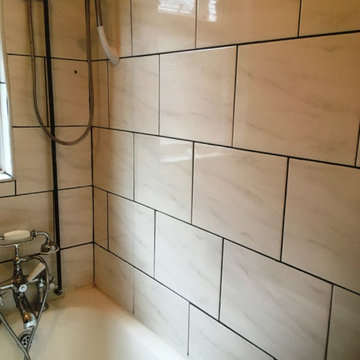
We were contacted by a client from the Levenshulme area of Greater Manchester who had just purchased a property there and hated the state of the grout which despite cleaning did not improve. The owner said she could not use the bathroom in this state as it looked disgusting and unclean and was keen to have it renovated. The rest of the house was being redecorated so whilst that was going on, I was called over to have a proper look at the grout and quote for sorting it out.
It didn’t take long to understand the issue, is seems the previous owner in an attempt to improve the appearance of the grout had touched it up by applying another thin layer of grout on top of the original. Now both the new and old was starting to flake off making a real mess.
I explained to the client we would need to scrape out the new layer, clean the original and then apply a grout colourant to improve the overall appearance. I gave her a price for the work, and she was happy for me to go ahead with the job.
My first task was to scrape off the new layer of grout, so I had a stable grout line to work from. I then started cleaning the grout up using a Tile Doctor Grout Colourant Pre-Treater cleaner, this cleans up the grout and being acidic it etches the surface to provide a better base for the grout colourant to adhere to. The dirt was rinsed off and then the area was dried using a heat gun.
Once dry I used a Tile Doctor Grout Colourant in Charcoal Grey (one bottle was sufficient). This product is equally effective for interior or exterior applications including bathrooms and kitchens and it is available in ten different colours. The client had requested to darken the grout and give it a completely new modern look. The colourant is painted onto the grout with a small brush and any excess which gets onto the tile is removed with a cloth before it dries.
The best thing about the grout colourant is it forms an easy to clean seal over the grout which ensures the grout is protected. Given Ceramic tiles are glazed and therefore don’t need sealing the new combination should ensure the tiles keep their appearance for a very long time with minimal cleaning. The silicone sealant between the bath and the wall tiles looked in good condition and had not discoloured so there was no need for this to be replaced.
The bathroom now looked clean and inviting and I’m pleased to report my client was very happy with the completed renovation and was finally happy to use the bathroom!
I recommended that for on-going cleaning that they use Tile Doctor Aqua-Pro, this is a pH neutral cleaner with a trigger action for easy application. It can be used in the bathroom every day. It helps to keep soap scum and limescale at bay and has a pleasant lemon smell so cleaning should not be too much of a chore.
Alex Logonzy
Greater Manchester Tile Doctor
 Tile Doctor Ltd
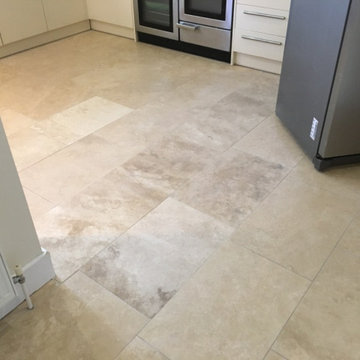
This client from Cobham contacted me in despair, she was quite concerned about her Travertine tiled floor which was cracking. She had the Kitchen and Dining room tiled with Travertine six years ago and recently several cracks had begun to appear in a long line crossing five tiles.
Several holes had also begun to appear and across the threshold to the kitchen from the dining area a serious lip had formed where a tile had risen above its neighbour causing a trip hazard.
After removing a tile from an unobtrusive area, I began to see where the issues lay. The tiler had dabbed the adhesive. This mean that instead of spreading the adhesive equally across the tile and floor they had splurged four lumps in each corner then set the tile down. This is poor working practice that will sooner or later become apparent. It means the areas were no adhesive was applied are eventually compromised resulting in cracking. This could take years or weeks to surface.
After some discussion we decided that I would remove and replace six tiles in total. The client was happy for me to go ahead and agreed a cost for the works to be done.
Returning the following week, firstly I had to remove the grout. This was done with a handheld Fein tool fitted with an oscillating blade. I thought this would be good experience from my son during the holidays, so I took him along and whilst I was working on the grout, he was able to gather the dust in a vacuum cleaner.
Next, I started to remove the cracked tiles with a chisel, starting from the cracks where the tiles would be weakest. This was noisy and messy work which required ear defenders and safety goggles. The process took several hours with the help of my son on general assistance duties. Once the tiles were removed this just left the remaining adhesive attached to the floor to get removed. This was the hardest part of the job, a lot of hammer and chisel work with as much dust gathered as possible to try and contain the mess. I had warned the customer that a considerable amount of mess would be produced and request that she should remove as much items as possible and to tape up her cupboards. Finally, I filled several holes in the sub floor so I would have a flat surface to lay the new tiles on. I left it there for the night to solidify.
Returning the next day, I began laying the replacement tiles down. Colour matching replacement tiles is a difficult task as Travertine is a natural product and colours vary greatly so these were a pretty good match.
Once the adhesive had set, I grouted in the newly laid tiles and once that was dry set about applying a sealer. For this I used two coats of Tile Doctor Ultra Seal which is an impregnating sealer that doesn’t alter the colour of the stone. This would ensure they were nicely protected and hopefully the client will not experience any further issues.
She was very happy with the result and was pleased the floor no long looked unsightly or posed a tripping hazard.
Rupert Mcleod
West Surrey Tile Doctor
 Jack Calderone
This bedroom and full bathroom are part of an adventuresome project my wife and I embarked upon to create a complete apartment in the basement of our townhouse. We designed a floor plan that creatively and efficiently used all of the 385-square-foot-space, without sacrificing beauty, comfort or function – and all without breaking the bank! To maximize our budget, we did the work ourselves and added everything from thrift store finds to DIY wall art to bring it all together.
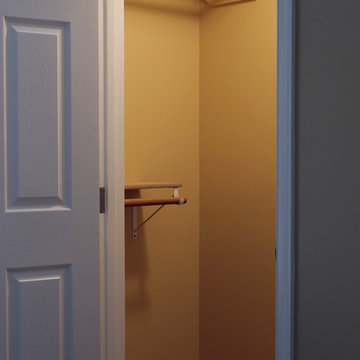
A partial double closet bar adds a little extra space while still leaving room for longer hanging clothes.
4