
Search results for "Apply pressure" in Home Design Ideas

 Solid Rock Remodeling
An elastomeric roof restoration is a painted on product. As with any painting project, the key to a successful long lasting finish is the surface preparation. We pressure washed the roof, applied rust-inhibitive primer and liquid tape. We then applied two coats of Acrymax top coat for a durable and beautiful finish. Note: One of the previous coats was red which gives the impression that the rust was more widespread than it actually was.

 Archadeck of Central GA
In this photo, you can see how this entire porch comes together. Adjoining the back wall of the home, the shed porch creates a cathedral feel and really opens up the space. The cross buck pattern on the door and screened areas lend a bit of Southern charm and farmhouse feel to the room.
 Macson Construction Inc.
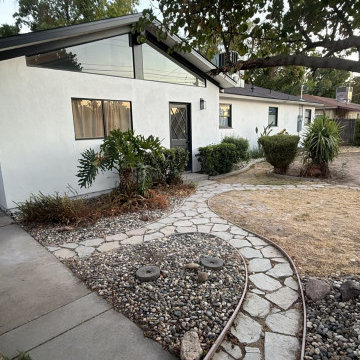
For this exterior renovation, we began by thoroughly preparing all surfaces to ensure a long-lasting, professional finish. The home was pressure washed to remove dirt and debris, loose and peeling paint was scraped away, damaged areas were repaired as needed, and all gaps around windows, doors, and trim were sealed with high-quality exterior caulking. We carefully masked and protected all windows, doors, concrete, roofing, and landscaping before painting.
We applied premium Sherwin-Williams exterior paint, finishing the body of the home in White Picket Fence and the fascia, trim, and accents in Iron Ore to create a clean, modern look with excellent curb appeal. Multiple coats were applied as needed to achieve full coverage, consistent color, and a durable finish designed to withstand the California climate.
Find the right local pro for your project
 Solid Rock Remodeling
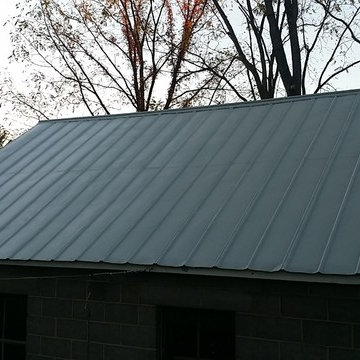
An elastomeric roof restoration is a painted on product. As with any painting project, the key to a successful long lasting finish is the surface preparation. We pressure washed the roof, applied rust-inhibitive primer and liquid tape. We then applied two coats of Acrymax top coat for a durable and beautiful finish. Note: One of the previous coats was red which gives the impression that the rust was more widespread than it actually was.
 EA Home Builders
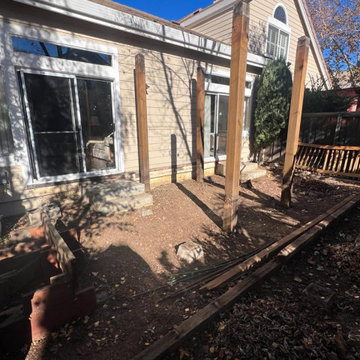
The client's original wooden deck, along with its aging patio cover, had deteriorated and was in need of replacement. The client's objective was to have a low-maintenance deck without a cover while retaining the existing railing.
To begin, we carefully dismantled the old deck and patio cover, clearing the way for the upcoming construction. Following this, we proceeded to install sturdy cement footings to establish a reliable base for the new deck.
The framework for the deck was meticulously crafted using robust 4x6 pressure-treated lumber, ensuring durability and stability. Subsequently, we laid down 2x6 joists on top of this framework, providing essential support for the upcoming decking material.
To safeguard against moisture and enhance the longevity of the deck, we meticulously applied rubber flashing atop the joists. This protective layer serves to prevent water damage and reinforce the structural integrity of the deck.
For the decking itself, we selected and expertly installed Trex, a top-quality composite decking material known for its low maintenance and long-lasting performance. Additionally, the existing railing was carefully refurbished and reinstalled, seamlessly integrating it with the new deck.
Finally, we completed the project by installing the fascia, which not only enhances the aesthetic appeal of the deck but also conceals the ends of the deck boards and joists, contributing to a polished and finished look.
Throughout the entire process, we diligently adhered to local building codes and regulations, ensuring that the final result met the client's desires while delivering a high standard of construction and craftsmanship.

 safe ZOnea
Every year, the same thing happens. The first real snowfall arrives, demand for de-icing materials spikes overnight, and the businesses that waited too long find themselves scrambling for supply at the worst possible moment. Facility managers, property owners, contractors, and municipalities all depend on a steady supply of salt and ice melt to keep their properties safe and operational through winter. The ones who plan ahead sail through. The ones who don't pay more, wait longer, and take on real risk.
Sourcing de-icing materials well is not complicated, but it does require thinking ahead and understanding the options. The choices you make about what to buy, how to buy it, and who to buy it from have a direct effect on your costs, your reliability, and your ability to keep people safe when conditions turn dangerous. This article lays out what matters.
Why Your Choice of Supplier Matters More Than You Think
It is easy to treat de-icing material as a commodity, something you grab whenever you need it without much thought about where it comes from. That works fine until the moment it doesn't, usually in the middle of a storm when everyone needs supply at once and the casual sources have run dry. At that point, the relationships you built before the season become the difference between staying stocked and being stuck.
Reliable supply is the whole game in winter operations. A property that runs out of ice melt during a storm faces safety hazards, liability exposure, and disruption, none of which can wait for a back-ordered shipment. This is why establishing relationships with dependable rock salt suppliers before the season starts is one of the smartest moves a facility manager or contractor can make. It locks in supply, often locks in better pricing, and removes a major source of mid-winter stress.
The lesson here is to treat sourcing as a planning decision rather than a last-minute errand. The businesses that come through winter smoothly are almost always the ones that secured their supply chain early, chose suppliers who could actually deliver when it counted, and never had to gamble on finding material during a shortage. Reliability bought in advance is far cheaper than scarcity paid for in a crisis.
Bagged or Bulk: Matching the Material to the Job
One of the first practical decisions is whether to buy de-icing material in bags or in bulk, and the right answer depends entirely on the operation. Each format has clear advantages, and many operations end up using both for different purposes.
Bagged material offers convenience, control, and easy storage. It is simple to handle, easy to distribute to different locations or crews, straightforward to store without special equipment, and convenient for spot application by hand. It suits smaller properties, businesses without bulk storage, and situations where portion control and tidiness matter. Bulk material, on the other hand, tends to make sense for large operations that go through high volumes, where buying in quantity lowers the per-unit cost and the operation has the equipment and space to store and handle it. The tradeoff is between the convenience and flexibility of bags and the volume economics of bulk.
For many operations, the right approach is a mix: bulk for the high-volume core of the work and bags for flexibility, spot treatment, and locations where bulk handling is impractical. The key is to match the format to how the material will actually be stored, moved, and applied, rather than defaulting to one or the other out of habit. Thinking this through in advance avoids both the waste of over-buying bulk you can't handle and the expense of relying entirely on bags for a large operation.
Rock Salt Is Not Your Only Option
Rock salt, or sodium chloride, is the workhorse of winter de-icing for good reason. It is effective, widely available, and cost-efficient, which makes it the default choice for most operations most of the time. But it has limits, and understanding the alternatives helps you choose the right material for the conditions you actually face.
The most important limitation is temperature. Rock salt becomes less effective as temperatures drop, and in genuinely cold conditions it can struggle to do the job at all. This is where alternatives come in. Calcium chloride, for instance, works at much lower temperatures than rock salt and acts quickly, which makes it valuable when conditions are severe or when fast melting matters. Operations that face hard freezes or need dependable performance in extreme cold often keep calcium chloride for sale on hand for exactly those situations, using it alongside rock salt rather than instead of it.
The practical approach is to understand the conditions your property faces and stock accordingly. For many operations, rock salt handles the bulk of the work while a faster, colder-rated material like calcium chloride covers the extreme days when ordinary salt falls short. Matching the material to the temperature and the urgency of the situation is what separates an operation that stays ahead of winter from one that is constantly reacting to it.
Securing Your Supply Before the Season
Knowing what to buy is only half the equation. The other half is making sure you can actually get it when you need it, which means securing your supply before winter arrives rather than after it has already started. Timing is one of the most underrated factors in winter operations.
The logic is simple. Demand for de-icing materials is highly seasonal and spikes sharply during storms, when everyone needs supply simultaneously. Prices and availability both move against the buyer at exactly those moments. By contrast, planning ahead, estimating your needs and arranging supply before the season, puts you in a far stronger position. Working with established rock salt suppliers ahead of time means your material is accounted for before the rush, often at better pricing and with the confidence that it will be there when the first storm hits.
This kind of planning also lets you think clearly rather than react under pressure. You can estimate your seasonal needs based on your property and past winters, decide on the right mix of materials and formats, and arrange storage in advance. Operations that do this consistently spend less, worry less, and never find themselves making frantic calls during a storm. The effort of planning ahead is modest, and the payoff in reliability and cost savings is substantial.
Storing and Handling What You Buy
Securing supply is not much use if the material degrades before you can use it, which makes proper storage and handling an important and often overlooked part of the equation. De-icing materials are sensitive to moisture, and poor storage can turn a good supply into a clumped, hardened mess that is difficult to apply.
The fundamentals are straightforward. Keep material dry and protected from moisture, since salt and ice melt readily absorb water and can harden if exposed. Store it in a way that suits the format, whether that means a proper bulk storage area or a dry space for stacked bags. Keep it accessible, so crews can get to it quickly when a storm hits and time is short. And handle it with the right equipment for the format and volume, which protects both the material and the people working with it. None of this is complicated, but neglecting it can undermine even a well-planned supply.
Good storage practices protect the investment you made in securing supply early. There is little point in arranging your materials ahead of the season only to have them degrade before use. Treating storage and handling as part of the overall plan, rather than an afterthought, ensures that the material you secured is actually usable when the moment comes. It is the final link in a supply chain built to perform under winter conditions.
Estimating How Much You Actually Need
One question trips up operations of every size: how much de-icing material to buy. Order too little and you risk running short during a storm. Order too much and you tie up money and storage space in material you may not use. Getting the estimate reasonably right is a meaningful part of sourcing well.
Several factors shape the answer. The size and type of the areas you treat, sidewalks, lots, entrances, and drive lanes, set the baseline for how much material each application consumes. The local climate matters too, since colder regions and those with frequent snowfall go through far more material than milder ones. Application frequency depends on how often storms hit and how quickly surfaces need to be cleared, which varies with the kind of property and the expectations of the people who use it. And the type of material plays a role, since different products are applied at different rates.
Past experience is often the best guide. Operations that track what they used in previous winters, adjusted for the size of the property and the severity of the season, can estimate their needs with reasonable confidence. For newer operations without that history, it helps to plan conservatively and to work with a supplier who can replenish stock reliably, so that a low estimate does not turn into a mid-storm shortage.
The goal is not perfect precision but a sound, slightly cautious estimate paired with a dependable supply relationship. That combination lets an operation keep enough material on hand to handle the season without over-committing to volume it cannot store or use. Thinking this through before winter, rather than guessing during it, is one more way that planning ahead pays off when the snow starts to fall.
The Bottom Line
Sourcing de-icing materials well comes down to a few straightforward principles: plan ahead, choose reliable suppliers before the season, match your materials and formats to your actual needs and conditions, and store what you buy properly. The operations that follow these principles move through winter with confidence, while those that improvise pay more and take on needless risk.
Winter is predictable in one respect: it arrives every year, and demand for de-icing material spikes the moment it does. The businesses that prepare for that reality, rather than being surprised by it, are the ones that keep their properties safe, their costs controlled, and their operations running no matter what the season throws at them. A little foresight before the first snowfall pays off through every storm that follows.
 Tile Doctor Ltd
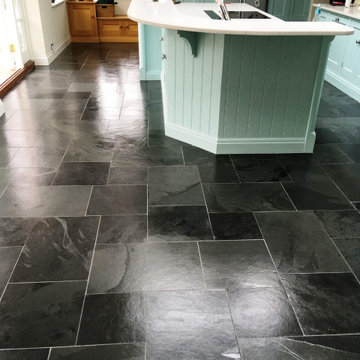
Our client had previously employed another company to tackle this large Slate floor in Walton on Thames but they hadn’t managed to remove the old sealer due to it being an old varnish seal. Varnish was used as a traditional way of sealing stone but can be damaged by scratching and it does little to improve the look of the stone. Varnish is also very difficult to break down which is a problem as it’s important to remove the old sealant before applying new, applying a new sealer onto Varnish simply wouldn’t work.
I visited the property to survey the floor and work out which combination of products and methods would work best and after some testing and I was able to confirm that not only could the old varnish be removed but once re-sealed with a modern sealer the slate would be transformed.
The client was over the moon to hear this news as they had thought there was nothing, they could do to improve the floor.
With a price and schedule agreed I returned to the property at a later date and started by tackling the varnish. The method I used was to apply Tile Doctor Remove and Go, let it soak into the floor for ten minutes and then work it in with a heavy rotary scrubbing machine fitted with a black pad. The soil was then rinsed with water and extracted off the floor with a wet vacuum.
The floor was then inspected, and each tile checked to ensure the varnish was completely gone, any stubborn areas were then spot treated and scrubbed by hand. Once I was satisfied, I set about giving the stone a deep clean by repeating the same process with Tile Doctor Pro-Clean. As before all the soil and cleaning products were then low pressure rinsed off the stone and vacuumed away. The floor was then left to dry overnight.
I returned the following day to apply a new modern sealer. First, I tested the floor was dry using the moisture meter. It was in the acceptable readings range, so I was able to start applying the sealer straight away.
For this floor I chose to apply Tile Doctor Seal and Go, it works really well on Slate tiles and as you can see from the photographs it completely transformed the appearance of the stone. Seal and Go is a water-based blend of acrylic polymers that provides both a stain resistant surface seal and a durable low-sheen finish, being water based it has the added advantage of not giving off any odour as it dries. The client had specified earlier that they didn’t want the floor to look shiny to the resultant silky appearance was the perfect solution. Thee coats were applied, and my client was very pleased with the finish.
Jonathan Oldham
South Middlesex Tile Doctor

 Hisway Painting
At Hisway Painting, we’ve worked hard over the last three decades to build our reputation as one of the Nashville area’s most trusted painting companies. Check out over 100 five star reviews on our Houzz profile. We work with meticulous detail to make sure the job gets done the right way, the first time. We operate from a wide range of expertise in home renovation, and also work with several color consultants and interior designers that will help you make design decisions that will increase the value of your home. We offer interior and exterior painting, pressure washing and deck staining and painting. Hisway Painting has served the businesses and homes of customers in the greater Nashville area for almost thirty years, and would be honored to serve you.
This beautiful Franklin home needed a fresh coat of paint of trim and siding, and after extensive cleaning prep work and caulking we applied a new coat of white duration trim paint and light yellow Sherwin-Williams siding paint.
 Karen's Company
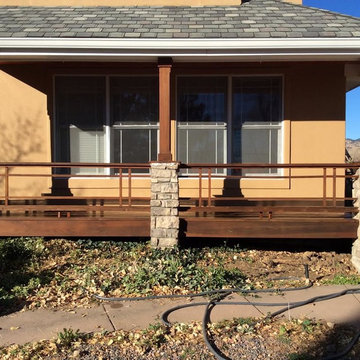
Decking: Scrubbed and power-washed then applied 1 coat of Sikkens SRD stain (oil based penetrating stain).
Railings: Power Washed then applied one coat of Sikkens SRD stain (oil based penetrating stain).
 Tile Doctor Ltd
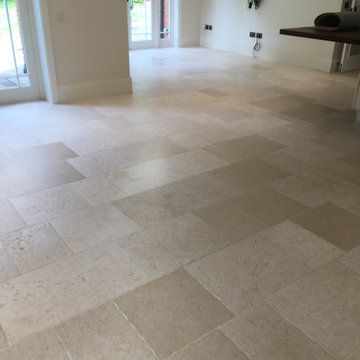
This job was for a repeat client in Toft near Cambridge who had aa stunning large hallway that was tiled in beautiful pale Limestone. My client had asked me back to work on the floor having previously completed the deep clean and seal of a Terracotta floor previously.
The Limestone tiling in the entrance hall had years of some type of topical sealer applied to it. This caused the stone to look slightly discoloured and from certain lights showed up hundreds of scratches and smudges embedded in the seal. I’ve tried to capture this problem in the photographs on this page, but it was very difficult.
A topical sealer sits on the surface of the tile where it is vulnerable to scratching, hallways are generally high traffic areas and so more likely to see this sort of problem. Ideally an impregnating sealer should have been applied, impregnators work by occupying the pores in the stone thus preventing soiling from becoming ingrained in the stone.
Before starting we protected the woodwork against splashing with blue film, I don’t usually make a great deal of mess, but you can never be too careful when working in someone’s property especially one as beautiful as this.
To strip off the old sealer I began by applying a strong dilution of Tile Doctor Remove and Go to the Limestone tiles. I split the floor into sections and used a 400-grit diamond burnishing pad to work the Tile Doctor Remove and Go into the tiles. The floor was then rinsed off using our high-pressure cleaning system that applies pressurised hot water to the floor whilst simultaneously extracting the soil with its built-in vacuum. The system is quite heavy, so it is built into my van, and I run a large flexible hose to a spinner tool that does the cleaning. It is an expensive tool, but it saves a lot of time and leaves the floor fairly dry afterwards.
The 400-grit pad had released a lot of the sealer but there were quite a few layers to get through, so I changed the burnishing pad to a coarse 200-grit pad and repeated the process. After another rinse and extract I would see it had the desired effect and I was able to carry on building up the finish on the Limestone by apply the 400-grit followed by the 800, 1500 grit pads. It was a large floor and so this took up much of the day so once complete I left for the day so it could dry off overnight.
The next day I finished the polishing process with the application of a 3000-grit burnishing pad which is applied with a little water sprayed onto the tile and really brings up the polish on the stone. This process has the added advantage of leaving the floor dry so not long afterwards I was able to move on to sealing.
For this floor two coats of Tile Doctor Ultra-Seal were applied, it is an impregnating sealer that won’t alter the colour of the tiles leaving a natural look.
My client was much happier with the new finish and has asked for another quotation on some more Terracotta flooring that needs attention. For aftercare I recommend using Tile Doctor stone soap, it’s a special formula that builds on the patina which will help maintain the polished appearance of the Limestone.
Tom Conlon
Cambridge Tile Doctor
 Eco Star Painting
Step #1 Apply BM CLEAN
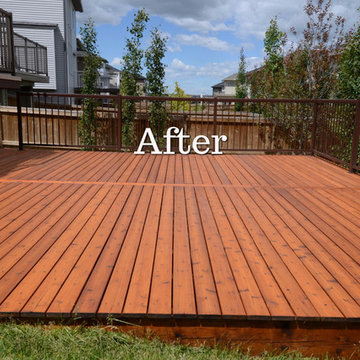
As you can see in the 'Before' picture above, this cedar deck was extremly dirty. This required an extra step in comparison to the typical deck stripping process. My paint rep at Benjamin Moore recommended a product called CLEAN. It comes in one gallon plastic containers and can be applied out of a plastic pail or with a garden sprayer. We used a Garden sprayer and chose a flat tip for application. The three gallon garden sprayer was filled with 2 gallons of water and one gallon of the CLEAN solution. This is a strong mixture and can be reduced to up to 6 parts water and one part of the Benjamin Moore CLEAN.
This approximately 22x20 deck had a board running perpindicular to the rest of the floor boards which divided it into 2 equal parts. Our method was to apply the solution to 3-4 of these 10' boards at a time. Allow it to set up for a few minutes and then scrub away with the deck brush. The agitation loosens up the dirt and grime and is then removed with a pressure washer a board a time. The flat tip on the pressure washer was almost the same width as the floor board. It is important to clean the sides of the board too because any remaining dirt or stain will be visible.
Benjamin Moore Deck Restoration products named Clean,Restore,brighten
Step #2 Apply BM RESTORE
The second step is exactly the same as the first step but with a different solution called Benjamin Moore RESTORE. The deck was dry before we started the 2nd step becuase it was baking hot outside. You use the same 2/1 mixture of water to chemical. This chemical will remove the stain still present in the deck floor. Make sure to rinse the garden sprayer clean before adding the restore solution. Unlike the BM CLEAN, the BM RESTORE has an orange-ish color in appearance. It did a fine job of removing most of the stain, but not 100% of it. There were a few areas that required a 3rd coat of restore but the process was quicker.
Step #3 Apply BM BRIGHTEN
The third step is exactly the same as the first two step but the chemical solution used was Benjamin Moore 'BRIGHTEN'. Again, the garden sprayer was cleaned and filled with 2 parts water and one part Brighten. The brightener not only lightens the wood but it also neutralizes the previous stripper solution. As stated before the Restore adds a bit of color and the Brighten will remove any traces of it. you still have to agitate the brightener with a scrub brush and either pressure wash it off or use a garden hose. We used the pressure washer for faster results. After it dries the wood look a lot brighter but we still found some spots of stain that had not come off.
Apply Sikkens Stain
As stated above the stain we used is called "Sikkens Proluxe" which is basically just a slight re-branding of the classic Sikkens Stain. The formula is exactly the same. In fact, the secondary name is still called 'Cetol' SRD RE. The color chosen was "CEDAR".
The weather was quite hot for a typical Calgary Spring day so we stained a 10' section of floor board at a time. The deck has a metal railing so the supporting feet had to be brushed in with a 2.5" natural bristle paint brush. for the rest of the job a 6" Wooster natural bristle deck brush was used. The handle was remove and a broom handle was inserted. The stain was stirred frequently and poured into a plastic Simms brand roller pan. Semi transparent Oil based stain has the consistency of water so you need to be careful not to spill any of it. When applying to a board you hit the sides first with the brush and then fillin the rest. Ten feet of floor board can be stain in a short period of time. it's important not to leave any streaks so it is adviseable to back-brush the entie length before moving on to the next board. The staining only took about 2.5 hours to complete. One coat is the manufacturers recommendation.
One last thing about Sikkens Stain. To maintain this beautiful look the deck should be re- coated once a year, preferably every spring. It's like applying sunscreen yearly to protect the wood against further damage. Two gallons was enough to cover this 450 sq foot deck.
 Tile Doctor Ltd
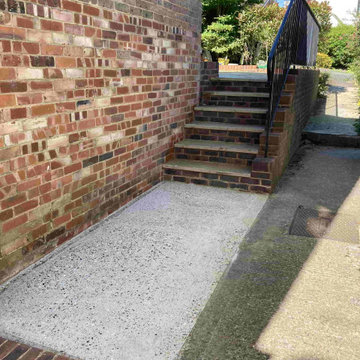
I am sure you will be able relate to this client in Folkstone who had a concrete and brick path and steps to the side of their house that had turned black with dirt. I know many of you reading this post will probably own a Karcher pressure washer and would be happy to do this job themselves, however for those that do not it’s good to know that we don’t just cover expensive patios and driveways and happily deep clean concrete paths as well.
The machine I use for this type of work operates at very high pressure, far higher than that of a Karcher and is so large and heavy its actually installed in a van. This type of machine is known in the trade as a Truck Mount and results in a much deeper clean that cleans and extracts the waste at the same time.
I popped over to see the client to see what needed to be done and gave them a quote for the work. Having looked round the property I was confident of making a difference. I also noted that steps were not only black with dirt but had become green with algae in places which is slippery when wet and dangerous for the elderly.
Before going over with the machine, I wetted the path with Tile Doctor Patio & Brick Driveway Cleaner and left it to soak into the concrete for a good twenty to thirty minutes so it could breakdown the dirt and deal with blackspots, lichen, moss, and general staining.
The concrete path was in several sections so whilst I was waiting for the cleaner to soak into one section, I was able to run the Truck Mount pressure washer over another section. When you use the jet wash at home, it can be a very messy business, bringing up all the dirt and spreading it around the nearby walls and usually the user. With our machine washing and extracting the dirt at the same time there is zero mess, and you can literally see the path become transformed in front of your eyes which is very satisfying.
Once done the concrete path looked like it was laid yesterday. The client was amazed saying it now complimented the work they had recently done on the front and back patios. It does show up the neighbour’s path though so I would not be surprised if I get a call soon to do their path as well!
There was no need to apply any type of sealer to this path. Regular cleaning will maintain it and a once a year deep clean like this would keep it in great shape.
Michael Conlon
South Kent Tile Doctor
 Tile Doctor Ltd
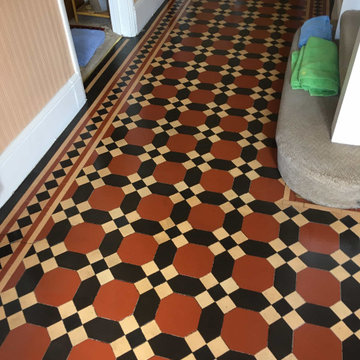
This Victorian floor in Twickenham, Middlesex was in good physical condition for its age but needed a good deep clean. Our customer had informed us that they had never cleaned or sealed the floor in the sixteen years that they had lived there so it was well overdue.
I went over to survey the floor and completed a test clean on a small section of tiling to see which products/techniques would work best. I like to do this as it demonstrates to the client what can be done, and it allows me to come up with an accurate price for doing the work.
As you can see from the pictures, there was quite a difference in the test patch compared to the rest of the floor. Years of foot traffic from the street had taken its’ toll and the floor was very dirty. Luckily, the floor was in very good condition and had not worn too badly.
Once they had seen the test patch, they were confident that it would be worth go ahead with my quote. It would ensure that the period feature was retained for many years to come. The colours on the floor were quite faded so it would be nice to get it restored.
I started the cleaning process by first taping up the surrounding skirting boards and doors to ensure they were protected from potential splashing. Cleaning involved spraying the Victorian tiles with a strong dilution of Tile Doctor Pro-Clean which is a dedicated Tile and Grout cleaning product. This was left to soak in for about ten minutes and then scrubbed in using a black pad fitted to a heavy-duty rotary scrubber.
This gives the floor a good mechanical scrub and works wonders releasing the ground-in dirt and soil from the tiles. The strong dilution of Pro-Clean will also remove any remaining sealers from the tile, however after sixteen years I doubted there would much trace of sealer left. Once done the floor was rinsed with water and all the soils removed with a wet vacuum.
Following the initial clean the colours were already much stronger. Next step however was to improve on that by giving the floor an acid rinse using Tile Doctor Grout Clean-Up. This removes mineral deposits and generally brightens up the appearance of the tile. After another round of scrubbing the floor was rinsed with our high-pressure washer and then vacuumed, extracting all of the dirty water and dirt away in one go. The floor was looking a lot better and was left to dry overnight.
After allowing the floor to dry overnight, we returned the next day to seal the floor. First, checking the floor was dry using the damp meter. Floors of this age can take a little longer to dry as there is no damp-proof membrane so it’s always worth checking as applying a sealer to damp tiles is not a good idea.
Once I was satisfied it was dry eight coats of Tile Doctor Seal and Go sheen finish sealer were applied. This takes a while to do as each coat needs to dry before applying the next. The sealer will protect the Victorian tiles for dirt and stains, it also enhanced the colours in the tile and will make it easier to keep the floor clean going forward.
My client was very pleased with the floor and mentioned that they should have called me in sooner! For aftercare cleaning I recommended Tile Doctor Neutral Clean which is an effective cleaner with a neutral pH, its designed for cleaning tiles without degrading the sealer.
Jonathan Oldham
South Middlesex Tile Doctor
 Tile Doctor Ltd
I received an enquiry from a property in Crowthorne to come and survey an unknown Flagstone Floor in a converted barn that was ready to be rented out. The owners where concerned the stone was letting the rest of the property down due to it being dirty and heavily stained, particularly around the kitchen and entrance areas. If your selling or renting out a property it really needs to look its best if you want to achieve a good price. Having spoken over the phone we agreed a date for me to pop over to complete a survey.
From further inspection I confirmed the stone was in fact a Sandstone, it was also clear that the sealer protecting the stone from ingrained dirt had worn away and was now allowing dirt and staining to ruin the appearance of the flagstones. It was a large floor so I measured up so I could work out the quantities of cleaning and sealing products needed and then walked the customer through the cleaning process. Later that day I sent over a detailed quotation which was accepted, and a date agreed for my return.
I should mention this work took place during the Covid restrictions, fortunately being a rental property, I was able to work in the property alone.
To deep clean the floor and remove the ingrained dirt and staining I used a strong dilution of Tile Doctor Pro-Clean. It is sprayed onto the floor and left to soak in for five minutes before agitating with a Black scrubbing pad fitted to a weighted buffing machine. The resultant slurry was then wet extracted away using a powerful high-pressure van mounted extracting system.
This action cleaned up most of the stone nicely however certain areas where heavily stained, particularly in the kitchen area where food and drink stains were more apparent. To tackle this, I applied a stronger cleaner/stripper product called Tile Doctor Remove and Go this time allowing ten minutes for it to soak in before scrubbing the surface with a very coarse 100-grit soft milling pad. This took quite a few attempts each time extracting the slurry away and then inspecting the floor to see if more work was needed.
Happy the stains have been removed, I then focused on renovating the surface Sandstone after the application of the coarse pad. This involves the application of several finer grit burnishing pads which close the pores and adds a subtle polish to the Sandstone. As I started with 100-grit pad it was necessary to gradually refine the surface with an incremental series of pads that included 200, 400 and finally 800-grit pads. Then to ensure a uniform finish across the floor I continued the 400 and 800 grit pads throughout the property. Water is used to lubricate the process and this turns into a fine slurry that is rinse extracted as before.
The cleaning process took up the whole of the first day and I am pleased to say the Sandstone floor looked very clean after I had finished.
The stone was then allowed dry off overnight with the aid of an industrial air mover and I returned later the next day to apply a new protective seal. In the meantime, my customer had been over to check out the floor and were over the moon with how it looked and wanted to keep the finish as natural as possible.
With this in mind, I applied Tile Doctor Ultra-Seal sealer to the Sandstone throughout, only two coats were needed. This is a premium sealer that is almost invisible and works by penetrating the stone thus preventing dirt from becoming ingrained. Once done the floor looked very clean and much brighter than before, it now had that wow factor which will help it attract a good yield in the rental market.
The trouble with rental properties of course is making sure the tenant uses the right product to maintain the floor and not a typical supermarket tile cleaner that are only designed for use on Ceramic and Porcelain tiles. In fact, these types of cleaning product can slowly strip the sealer off the floor so it’s always worth checking the label before purchasing. Fortunately Tile Doctor sells a product called Neutral Cleaner that is ideal for maintaining sealed stone floors, so I left them with a complimentary bottle and recommended they get some more to leave under the sink for the new tenant.
Dennis Buckland
Berkshire Tile Doctor
 Tile Doctor Ltd
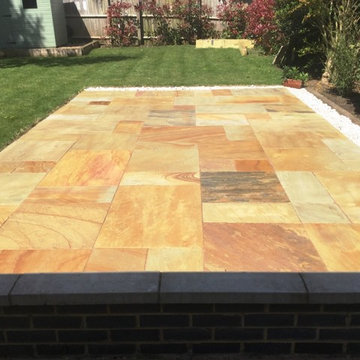
At the start of the year we usually get asked to restore the appearance of patios and other outside areas which have suffered from the staining of autumn leaves and the ravages of winter cold snaps. Most patios are quite straight forward to maintain however when you’re dealing natural stone then it’s best to call in your local Tile Doctor to ensure nothing is applied to the stone that could damage it.
Such was the case with this four-year-old Sandstone Patio at a house in the town of Kettering. Unfortunately, it was not sealed when it was first installed and the combination of weather and UV sunlight had faded the tiles, this together with general soiling had greatly affected the appearance of this beautiful stone and could almost have been mistaken for concrete slabs.
My first course of action was to lightly spray the area with a dilution of Tile Doctor Pro-Clean which is a powerful tile cleaning product that is safe to use on Stone. The solution was allowed to soak in for a while before being agitated with a brush to bring out the dirt. This was followed by pressure washing with a spinning tool at a medium pressure so as to not damage the stone.
Once dry I re-grouted the entire area and then sealed with Tile Doctor Colour Grow Sealant which is a impregnating breathable product (essential for damp environments) that also enhances the natural colours of the stone.
Within hours of finishing the customer came home and called me straight away to say he couldn’t believe the transformation that was achieved and they looked better than when they were first laid.
Phil Vissian
Northamptonshire Tile Doctor
 Tile Doctor Ltd
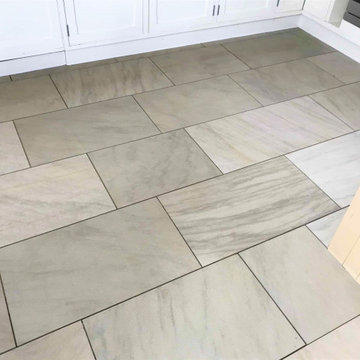
Our client had inherited this Travertine floor when purchasing in a lovely street in Walton-On-Thames, close by was the River Thames which runs all the way into London. The new owners were unhappy with the floor in that it did not look very clean, and they were keen to get this rectified. I arranged a site visit to survey the floor and see what could be done to restore its appearance.
The floor itself was in good physical condition, however, it was apparent from the level of dirt ingrained in the stone that it had not been maintained very well by the previous owner. I carried out a small test clean which came out well and they could see straight away what the floor should look really like! They were happy with my renovation quote and we agreed a mutually convenient time where I could work in relation to the COVID guidelines.
The Travertine floor was scrubbed using a mixture of Tile Doctor Pro Clean and Remove and Go. These are heavy duty cleaning products designed for use on tile and stone can be combined to form a powerful cleaning/stripping solution which is left to dwell on the floor surface. After a short while the solution was worked into the stone using a rotary machine fitted with a black scrubbing pad.
This cleaning recipe works extremely well breaking down dirt, stains, and grease in the stone. Following a machine scrub and a more manual hand scrub of the grout lines, we then pressure rinsed the soil away and then it was extracted using an industrial wet vacuum. In a couple of areas, it was necessary to repeat the process to ensure it was completely clean. Once we were satisfied that the stone was fresh and clean, the floor was left to dry off overnight, so it would be ready for sealing the following day.
After drying overnight, the floor was checked with a damp meter to make sure it was dry. Once reassured I started with the application of the fresh sealer to the floor using Tile Doctor Colour Grow Sealer which is a colour enhancing sealer that works from within by soaking into the pores of the stone. Several coats were applied allowing each one to dry before applying the next. This sealer does not provide a glossy finish, just a nice natural sheen. This brought back the contrast and natural colours in the stone, whilst adding protection to stone for many years to come.
The client was very happy with the work we carried out, the floor had come up much better than they had expected, and it really made a difference to the lovely kitchen space. The floor looked like new. I recommended the regular use of Tile Doctor Stone Soap for future cleaning which will keep the floor in great condition and ensure the longevity of the newly applied sealant.
Jonathan Oldham
South Middlesex Tile Doctor
 Tile Doctor Ltd
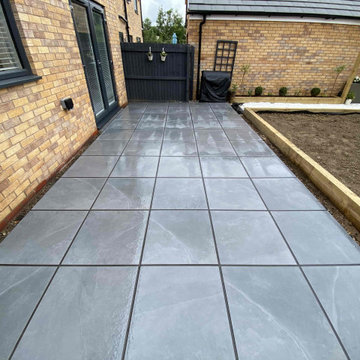
Earlier this summer I was called out to this job in the garden of a house in the city of Ely to inspect a freshly laid porcelain tiled patio with grout haze issues. The builder who had installed the patio hadn’t removed all the grout from the textured surface of the tile before it had dried. This was probably due to the hot weather which reduces drying times and has caught many tilers out. Multiple repeat visits by the builder trying followed who spent countless hours trying to remove the grout haze, unfortunately due to the textured surface of the tile he was unable to remove it and the patio was left looking awful.
Like the builder we are increasingly finding modern grouts, which although more durable, are very difficult to remove. Fortunately belonging to the Tile Doctor network, I had already been made aware of this problem and was able to offer a solution.
I arranged to pay the property a visit to demonstrate a potential solution and quote for resolving the issues. Even though the grout haze was indeed difficult to remove it wasn’t impossible if you know how. The demonstration came out well and relieved that they had finally found a solution to the problem booked me in to get the work carried out.
On my return I started with the application of a strong dilution of Tile Doctor Grout Clean-Up. This product is ideal for removing grout haze or smears as they often referred to; however, being acidic we don’t recommend it for use on every surface so if your using it yourself do check the label first. I left it to soak in for ten minutes before being agitated with a black scrubbing pad fitted to a rotary buffer
The weather was good, so it wasn’t a problem working outside and once all the grout smears were removed, I finished off by giving the whole patio a high-pressure rinse. I use a van mounted rinse/extraction system for this that applies warm water at high pressure onto the patio to dislodge dirt and then extracts the waste into a separate tank in the vehicle. It was an expensive investment but makes light work of jobs like this.
It took around four to five cleans to complete the job, by the late afternoon the grout haze was gone, and the porcelain patio looked completely transformed. It was quite a warm day, so the patio soon dried allowing my client to use it later that day. I should mention that this variety of Porcelain tiles were not the micro porous type and therefore did not need to be sealed.
Relieved the problem was finally resolved and happy with the result my client left the following feedback:
Amazing service, they were able to provide us with a quote and demo before we agreed to work. We are so happy with the results we have as our patio slabs looked ruined to the eye but the Tile Doctor managed to get them looking brand new.
Tom Conlon
Cambridge Tile Doctor
 Student Works Painting
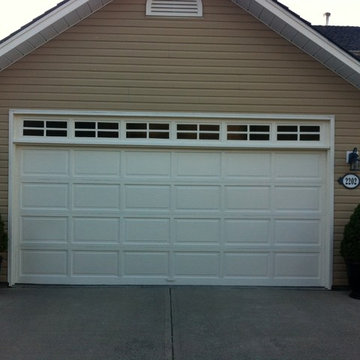
This garage door needed extensive preparation before it would be ready for paint. Any failing/peeling paint was pressure washed off, and then scraped and sanded before a coat of primer was applied over any bare wood areas. Next, two coats of Ecologic Exterior Semi Gloss Paint was applied to the entire garage door, frame and inset windows.
 Student Works Painting
This lovely home in upper Capilano area had recently become covered in mildew, a very common problem in North Vancouver. To correct for this, we pressure washed with a bleach solution to kill any algae spores. Next, an oil based primer was applied to seal in any remaining stains caused by the excessive mildew and algae. Dulux Diamond Exterior Semi Gloss in White was then applied to all trim to protect the wood and provide additional protection.
 Tile Doctor Ltd
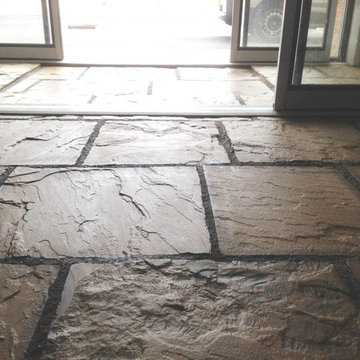
We work on a lot of residential tile installations but also cover commercial properties too, such as this new farm office which was in the process of being built in the market town of Driffield, East Yorkshire where a Flagstone tiled floor had been laid at the entrance. Driffield is known as the ‘Capital of the Yorkshire Wolds’ and lies near the source of the River Hull.
The farm office project was very big and, with the pressure on to complete it in time, the floor had been laid without being sealed first. As a result, the floor was getting dirty very easily, and was proving difficult to keep clean. It was clear that the Flagstone tiles would need to be cleaned and sealed, and I was called upon to get the job done.
To clean the floor I first mixed a 50:50 solution of clean water and Tile Doctor Pro Clean. Pro Clean is a high-alkaline cleaner which is safe to use on a wide range of natural stone floors. The cleaning solution was worked in using a rotary machine fitted with a black buffing pad which proved an effective method, lifting off the dust and residue that had been left on the surface of the Flagstone tiles during the course of construction work.
The excess residue was extracted using a wet-vac machine. I then repeated the whole process over again several times in order to get the floor as clean as possible.
To seal the floor I used a combination of two different Tile Doctor sealers. Firstly, I applied a layer of Tile Doctor Colour Grow to the floor. This colour intensifying sealer is specially formulated to enhance the fantastic natural colours in the stone, while at the same time providing durable surface protection.
The floor was then finished off with a couple of coats of Tile Doctor Seal & Go. This added to the stain resistance of the floor, while also delivering a very nice subtle shine on the surface.
All signs of building work have been removed from the stone floor and it is now looking presentable ready for the opening of the new office, the combination sealer applied to the floor will also make sure it stays that way for some time to come.
Ronnie Phipps
East Yorkshire Tile Doctor
7