
Search results for "Applying" in Home Design Ideas
 Denise Hauser Design Co.
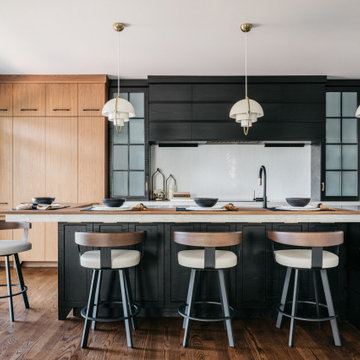
Open concept kitchen - contemporary l-shaped dark wood floor and brown floor open concept kitchen idea in Chicago with an undermount sink, flat-panel cabinets, wood countertops, white backsplash, glass tile backsplash and black appliances
 Newschool Builders LLC
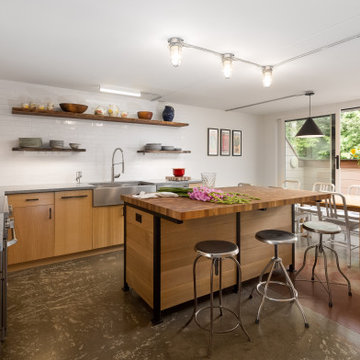
Embracing the natural elements of this circa 1960’s Condo development in Stowe Vermont was a priority for our clients. We worked closely with a great design team and our clients to create this simple, but beautiful minimalist retreat. Our clients, both authors, wanted a place to withdraw from the endless distractions and fast pace rhythms of the city. Custom made cabinets, bookshelves and built ins helped off set the sandblasted CMU block walls and ground concrete floors. A beautiful handcrafted stairwell was a center piece connecting the three floors. A handcrafted integrated concrete sink in the master is was another testament to the mixed mediums used to create this space. We embraced exposed conduit and commercial grade light fixtures throughout which helped add to the overall minimalist feel of the space. There is a beautiful rawness to this project which everyone came to admire.

 Hammer & Hand
We joined forces with JHL Design’s Holly Freres and Liz Morgan to transform a dark and dated Pearl District penthouse into an elegant and timeless home. The space was designed with European metropolitan interiors in mind, giving it the “Parisian Modern” look the clients desired.
The team replaced cherry casework and red and ochre walls with clean white and neutral shades to brighten the space. The new applied wood paneling serves as an interesting architectural detail while modern fixtures and furniture keep it from feeling too traditional. The project also included new casework, new wood floors and carpet, new terrazzo countertops, new vanity and plumbing fixtures, and reworked cabinetry in the kitchen and pantry.
Photos by Haris Kenjar.
Find the right local pro for your project

 Envision Web
Stuart Wade, Envision Virtual Tours
Envision Virtual Tours and High Resolution Photography is your best choice to find just what you are looking for in the Lake Burton Area . Knowing the areas and resources of Lake Burton is our specialty
Lake Burton is a 2,775 acre man-made lake with 62 miles of shoreline located in the northeastern corner of Georgia in Rabun County. It is the first lake in a five-lake series called the Tallulah River Watershed that follows the original course of the Tallulah River. The series of lakes starts with Lake Burton as the northernmost lake followed by Lake Seed, Lake Rabun, Lake Tallulah Falls and the eastern arm of Lake Tugalo (the western arm is formed by the Chattooga River. The lakes are owned and operated by the Georgia Power Company to generate hydroelectric energy for Georgia's largest city, Atlanta. At one time these lakes were the largest producers of electricity in the state of Georgia. Now, they only provide peak power supply.
The lake was built in a deep valley located along a 10 mile section of the Tallulah River. The Lake Burton Dam was closed on December 22, 1919 and the lake started to fill. The dam is a gravity concrete dam, with a height of 128 feet and a span of 1,100 feet. The spillway is equipped with eight gates 22 feet wide by 6.6 feet high. The total capacity at an elevation of 1,866.6 feet is 108,000 acre-ft, of which 106,000 acre-ft is usable storage. The generating capacity of the dam is 6,120 kilowatts (two units).Lake Burton is the highest Georgia Power lake in Georgia.
Lake Burton gets its named from the town of Burton, which was the second largest town in Rabun County with a population of approximately 200 but now lies below the lake's surface. The town (and the lake) was named after local prominent citizen Jeremiah Burton and was situated along the road from Clayton, Georgia to the Nacoochee Valley. Andrew Jackson Ritchie served as the postmaster for the area for several years. Gold was first discovered in Rabun County where Dicks Creek and the Tallulah River come together and was the reason for the town's founding in the early 1800s.
The Lake Burton Fish Hatchery and Moccasin Creek State Park are located on the western side of the lake. Lake Burton is home to several species of fish, including Spotted Bass, Largemouth Bass, White Bass, Black Crappie, Bluegill, Redear Sunfish, White Catfish, Walleye, Brown Trout, Rainbow Trout, and Yellow Perch.
The residents of Lake Burton are a mix of permanent residents and seasonal vacationers who together make-up the Lake Burton Civic Association, a local organization who goal is to maintain the lake through volunteer clean-ups and other such events. Let a Lake Burton resident and expert show you the way
The Lake Burton Civic Association is an active homeowners association for residents of the Lake Burton area and sponsors many events throughout the year such as:
burton, custom, envision, georgia, lake, mountain, nc, north, photography, web, western, Lake Burton, Lake Rabun, Seed Lake,Virtual Tours.

 Tile Doctor Ltd
This job was for a repeat client in Toft near Cambridge who had aa stunning large hallway that was tiled in beautiful pale Limestone. My client had asked me back to work on the floor having previously completed the deep clean and seal of a Terracotta floor previously.
The Limestone tiling in the entrance hall had years of some type of topical sealer applied to it. This caused the stone to look slightly discoloured and from certain lights showed up hundreds of scratches and smudges embedded in the seal. I’ve tried to capture this problem in the photographs on this page, but it was very difficult.
A topical sealer sits on the surface of the tile where it is vulnerable to scratching, hallways are generally high traffic areas and so more likely to see this sort of problem. Ideally an impregnating sealer should have been applied, impregnators work by occupying the pores in the stone thus preventing soiling from becoming ingrained in the stone.
Before starting we protected the woodwork against splashing with blue film, I don’t usually make a great deal of mess, but you can never be too careful when working in someone’s property especially one as beautiful as this.
To strip off the old sealer I began by applying a strong dilution of Tile Doctor Remove and Go to the Limestone tiles. I split the floor into sections and used a 400-grit diamond burnishing pad to work the Tile Doctor Remove and Go into the tiles. The floor was then rinsed off using our high-pressure cleaning system that applies pressurised hot water to the floor whilst simultaneously extracting the soil with its built-in vacuum. The system is quite heavy, so it is built into my van, and I run a large flexible hose to a spinner tool that does the cleaning. It is an expensive tool, but it saves a lot of time and leaves the floor fairly dry afterwards.
The 400-grit pad had released a lot of the sealer but there were quite a few layers to get through, so I changed the burnishing pad to a coarse 200-grit pad and repeated the process. After another rinse and extract I would see it had the desired effect and I was able to carry on building up the finish on the Limestone by apply the 400-grit followed by the 800, 1500 grit pads. It was a large floor and so this took up much of the day so once complete I left for the day so it could dry off overnight.
The next day I finished the polishing process with the application of a 3000-grit burnishing pad which is applied with a little water sprayed onto the tile and really brings up the polish on the stone. This process has the added advantage of leaving the floor dry so not long afterwards I was able to move on to sealing.
For this floor two coats of Tile Doctor Ultra-Seal were applied, it is an impregnating sealer that won’t alter the colour of the tiles leaving a natural look.
My client was much happier with the new finish and has asked for another quotation on some more Terracotta flooring that needs attention. For aftercare I recommend using Tile Doctor stone soap, it’s a special formula that builds on the patina which will help maintain the polished appearance of the Limestone.
Tom Conlon
Cambridge Tile Doctor
 Dixie Belle Paint Company
Materials Needed:
Side Console
Dixie Belle White Lightning Cleaner
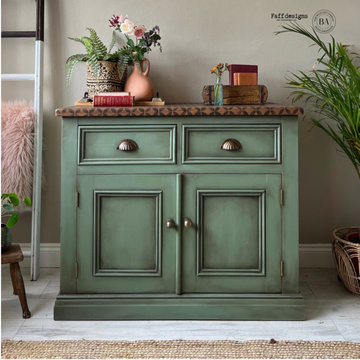
Dixie Belle Weeping Willow Chalk Paint
Dixie Belle Best Dang Wax (Clear)
Dixie Belle Chocolate Chalk Mineral Paint
Dixie Belle Retro Lattice Stencil
Dixie Belle Coffee Bean Chalk Mineral Paint
Dixie Belle Synthetic Paintbrush
Clean, lint-free cloths
Before You Begin:
Ensure that your side console is clean and free from any dust, dirt, or grease. If necessary, sand the surface lightly to create a smooth painting surface.
Step 1: Clean with White Lightning
Use Dixie Belle White Lightning Cleaner to thoroughly clean the side console. This will remove any lingering residues and prepare the surface for painting. Follow the instructions on the cleaner, and make sure the surface is completely dry before proceeding.
Step 2: Paint with Weeping Willow
Stir the Weeping Willow Chalk Paint well before use. Apply an even coat of Weeping Willow paint to the entire side console using a paintbrush or foam roller. Allow the first coat to dry completely before applying a second coat if needed. The chalk paint dries relatively quickly, but follow the recommended drying time on the product.
Step 3: Apply Best Dang Wax with Chocolate Chalk Paint
After the Weeping Willow paint has dried, use a clean cloth or brush to apply a layer of Best Dang Wax (Clear) over the painted surface. For added depth and dimension, mix a small amount of Chocolate Chalk Mineral Paint into the wax. Apply the wax mixture evenly, focusing on details and edges. Allow the wax to dry and buff it to a desired sheen using a clean, lint-free cloth.
Step 4: Stencil the Top with Retro Lattice
Secure the Retro Lattice Stencil to the top of the side console using painter's tape to prevent it from moving during the stenciling process. Using a brush or foam roller, apply Coffee Bean Chalk Mineral Paint over the stencil, ensuring even coverage. Carefully remove the stencil while the paint is still wet to reveal the pattern. Allow the painted design to dry completely.
Step 5: Finishing Touches
Inspect the entire side console for any touch-ups or additional detailing. If needed, apply extra coats of paint or wax to achieve the desired finish. Once satisfied with the results, allow the piece to cure fully according to the paint manufacturer's recommendations.
Step 6: Enjoy Your Upcycled Side Console
Place your revamped side console in its designated space and revel in the transformation. The combination of Weeping Willow, Best Dang Wax, and the Retro Lattice stencil has turned a simple side console into a unique and visually appealing piece of upcycled furniture, adding charm and character to your living space.
 Tile Doctor Ltd
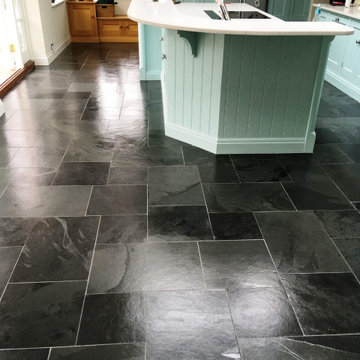
Our client had previously employed another company to tackle this large Slate floor in Walton on Thames but they hadn’t managed to remove the old sealer due to it being an old varnish seal. Varnish was used as a traditional way of sealing stone but can be damaged by scratching and it does little to improve the look of the stone. Varnish is also very difficult to break down which is a problem as it’s important to remove the old sealant before applying new, applying a new sealer onto Varnish simply wouldn’t work.
I visited the property to survey the floor and work out which combination of products and methods would work best and after some testing and I was able to confirm that not only could the old varnish be removed but once re-sealed with a modern sealer the slate would be transformed.
The client was over the moon to hear this news as they had thought there was nothing, they could do to improve the floor.
With a price and schedule agreed I returned to the property at a later date and started by tackling the varnish. The method I used was to apply Tile Doctor Remove and Go, let it soak into the floor for ten minutes and then work it in with a heavy rotary scrubbing machine fitted with a black pad. The soil was then rinsed with water and extracted off the floor with a wet vacuum.
The floor was then inspected, and each tile checked to ensure the varnish was completely gone, any stubborn areas were then spot treated and scrubbed by hand. Once I was satisfied, I set about giving the stone a deep clean by repeating the same process with Tile Doctor Pro-Clean. As before all the soil and cleaning products were then low pressure rinsed off the stone and vacuumed away. The floor was then left to dry overnight.
I returned the following day to apply a new modern sealer. First, I tested the floor was dry using the moisture meter. It was in the acceptable readings range, so I was able to start applying the sealer straight away.
For this floor I chose to apply Tile Doctor Seal and Go, it works really well on Slate tiles and as you can see from the photographs it completely transformed the appearance of the stone. Seal and Go is a water-based blend of acrylic polymers that provides both a stain resistant surface seal and a durable low-sheen finish, being water based it has the added advantage of not giving off any odour as it dries. The client had specified earlier that they didn’t want the floor to look shiny to the resultant silky appearance was the perfect solution. Thee coats were applied, and my client was very pleased with the finish.
Jonathan Oldham
South Middlesex Tile Doctor
 Home support
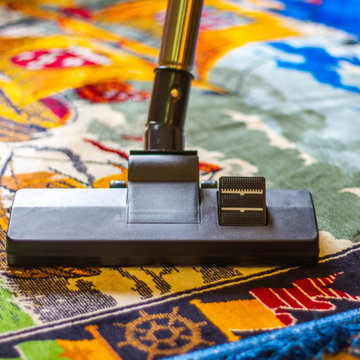
Carpet Cleaning Methods in Singapore
Is your house full of rugs made of different fabrics? And, are you confused about its cleaning methods? This confusion is easy to happen when there are several rugs in your home. In those situations, consulting carpet cleaning services in Singapore is the best solution for you.
Different carpet fabrics require different cleaning methods to be applied, as applying a single method can damage the texture and appearance of the carpet. So, here in this blog, we will discuss the different types of carpet fabrics and the cleaning methods used by the best carpet cleaning company.
Different carpet fabrics require different cleaning methods to be applied
Different carpet fabrics require different cleaning methods to be applied
4 Types of carpets and best cleaning method
Synthetic Carpets: Synthetic carpets are found in most households as they are abundant in the market. They are easy to maintain and need to be cleaned regularly because dusting is quick on such fabrics. For cleaning of synthetic carpets, you can contact cheap carpet cleaning in Singapore, as the frequency of cleaning is high. Also, the method adopted for cleaning synthetic carpets usually involves dry-chem cleaning or soap-free cleaning methods.
Wool Carpets: Wool carpets can stain and collect dust easily, but you shouldn’t clean them with soap and water. Wool has excellent water absorption and takes a long time to dry completely. Therefore, to clean wool carpets, it is better to consult a professional carpet cleaner, as they have a better knowledge of applying the right cleaning method. Usually, the dry cleaning method is applied to make the carpet faster and cleaner.
Polyester Carpets: Polyester is one of the forms of synthetic fabric that has been one of the most popular carpet fabrics for a long time. This fabric is known for its luxurious feel and comes in a variety of colors. These mats are hydrophobic and stain resistant, however, they are not very durable, especially when exposed to the sun. Therefore, you should not apply the usual soap and water cleaning method to this fabric but entrust the task to professionals.
Berber Carpets: Berber carpets give you a soft, comfortable feeling when you step on them, and with this carpet fabric you need to wash it often because the dust treatment process happens quickly. Weekly vacuuming is recommended along with professional deep cleaning every three months. To clean Berber carpets, you can choose the regular soap and water method, but be careful with rubbing as it can damage the fabric texture.
Conclusion
Ocean Cleans Singapore we provide the best cleaning service in Singapore. With our 20 years of experience, you’ll enjoy the luxury of deep-cleaned rugs at an incredible price. We have extensive knowledge of different carpet fabrics and use the most appropriate and advanced cleaning technology and methods. So, to enjoy the pleasure of having clean carpets at your residence, feel free in availing our excellent services!
 Tile Doctor Ltd
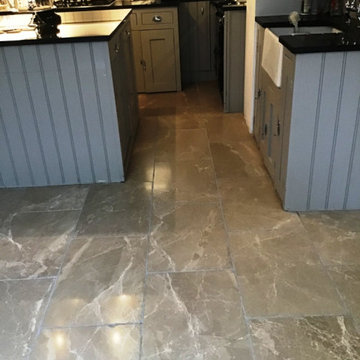
This Limestone tiled floor installed in a kitchen and family room at a property in Wellingborough is a great example of how this material can lose its appearance without a regular maintenance plan in place.
The customer called me as not only was she concerned that the floor had lost its lustre the grey grout had become very stained and almost black in heavy traffic areas, in fact my customer had originally asked about re-grouting but I was confident it could be cleaned.
I provided a quote which they were happy to accept.
The area was a nice wide 6 metre by 5 metre space and except for a few items of furniture that would need moving around there were relatively few obstacles. I reasoned the most efficient way to restore the polished appearance of the Limestone would be to use a set of diamond encrusted Burnishing Pads. These are fitted to a rotary machine and applied to the stone in sequence from coarse to smooth. It’s an effective process that cuts back the layer of dirt on the floor and then we build back up the polish.
We started burnishing the Limestone with a coarse 400-grit pad fitted to a rotary machine and applied with a little water for lubrication. The coarse pad is very good at removing dirt and old sealers from stone and once completed the resultant surface water and loose dirt is removed using a wet vacuum.
At this point I turned my attention to the badly stained grout lines, and applied a strong solution of Tile Doctor Pro-Clean which was scrubbed in along the grout lines using a stiff grout brush, this is necessary as the recessed nature of the grout makes it difficult for the rotary pads to reach it.
I then repeated the burnishing process with the medium 800-grit pad and fine 1500-grit pad, the 800-grit pad removes any small surface scratches and the 1500-grit further refines the look of the Limestone slowly restoring its polished appearance.
After the whole floor had been burnished in this way it was given a further rinse with water and the soil extracted as before. I then inspected the floor to see if more work would be needed.
I was not fully happy with how some of the grout lines had responded, some were still slightly stained, and some marks were visible in the high traffic areas. I had already discussed on my initial visit with the client that this might be the case and it was agreed between us that should this be the case I would apply a Tile Doctor Grout Colourant in Light Grey to recolour all the grout lines and achieve a uniform finish.
The stone and grout was still damp from cleaning and polishing, so I decided to leave the grout colouring until the following day.
On day two I started by grout recolouring all the grout lines, it’s a straight forward process but can be a little tedious where there is a lot of grout to cover. Once complete I allowed the grout colour to dry for a couple of hours before moving onto the next step.
The last pad to be applied in the stone burnishing process is the very fine 3000-grit polishing pad which is applied dry to the tiles using a small amount of water sprayed onto the floor and leaves the stone dry and with a polished silk finish.
The floor was then sealed using two coats of Tile Doctor Ultra Seal Sealant allowing the first coat to dry before applying the second. Ultra-Seal is an impregnating sealer that works by occupying the pores in the stone thereby preventing dirt from becoming ingrained there. It’s also a natural look sealer that doesn’t affect the appearance of the stone.
My customer was very happy with the transformation of her floor and provided the feedback copies below. In-fact she was so impressed with the results that she also used our services to restore the grout and silicon in one of her bathrooms.
“Phil was on time & easy to deal with and did an amazing job on my kitchen and bathroom floors and the carpets & sofa. No fuss, just a great job. Liz O.”
Phil Vissian
Northamptonshire Tile Doctor
 Silver Leaf Interiors
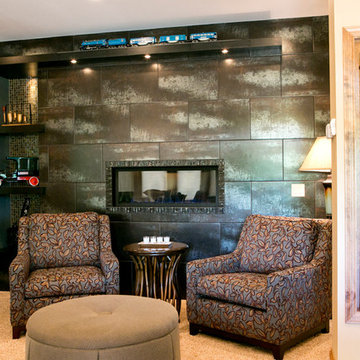
Example of a transitional carpeted and beige floor living room design in Milwaukee with blue walls
 Natasha Jansz Design
Tessa Neustadt
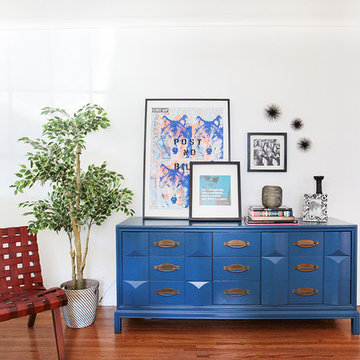
Example of a transitional medium tone wood floor living room design in Los Angeles with white walls, no fireplace and no tv
Example of a transitional medium tone wood floor living room design in Los Angeles with white walls, no fireplace and no tv
 User
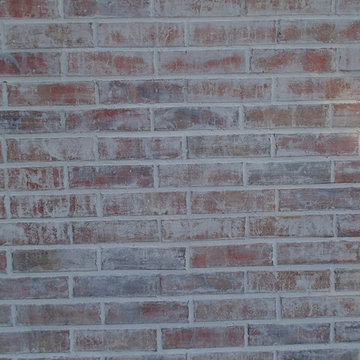
UserThis is an organic Lime Wash done with a true lime wash product as opposed to a brick mortar or concrete that is often seen on new houses. This product can be applied as a solid coating making the surface completely white, or can be applied and "washed off" in many artistic ways, as seen here. If you hate your brick or just want something unique this is a great option!
Photo credit: Jeff Murrey


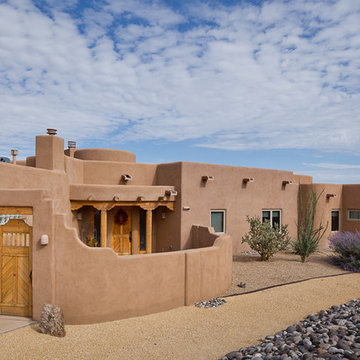

 Applied Imagination Painting
Photo Len Shneyder
Example of a mid-sized urban home bar design in San Francisco
Example of a mid-sized urban home bar design in San Francisco
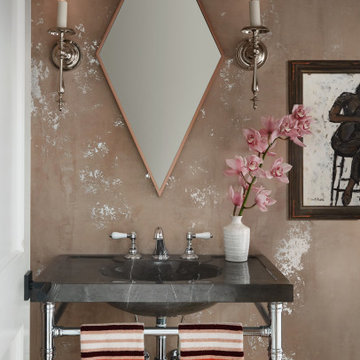
 Cari Giannoulias Design
Silver Leaf Plaster Walls in this Old World meets New World Powder Room
Inspiration for a mid-sized transitional light wood floor and beige floor powder room remodel in Chicago with furniture-like cabinets, a one-piece toilet, pink walls, an integrated sink, marble countertops and brown countertops
Inspiration for a mid-sized transitional light wood floor and beige floor powder room remodel in Chicago with furniture-like cabinets, a one-piece toilet, pink walls, an integrated sink, marble countertops and brown countertops
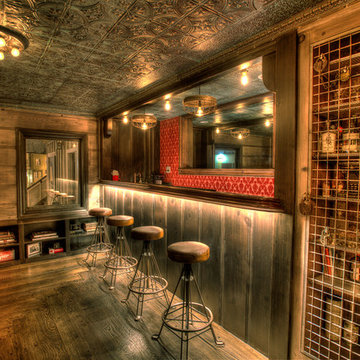 Applied Imagination Painting
Photo Len Shneyder
Home bar - mid-sized industrial home bar idea in San Francisco
Home bar - mid-sized industrial home bar idea in San Francisco
 M. Studio Gallery, Fine & Applied Arts, LLC
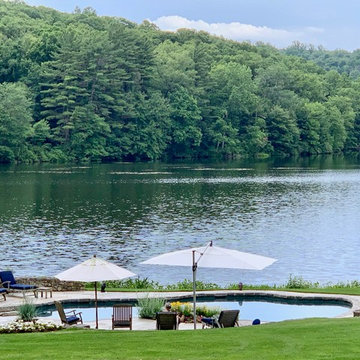
Pool - rustic backyard stone and custom-shaped lap pool idea in New York
 Ashby Collective
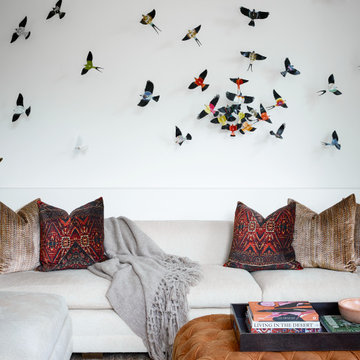
Example of a large trendy open concept medium tone wood floor and brown floor living room design in Austin with white walls

 Laure Nell Interiors
Trendy light wood floor, beige floor and wallpaper bedroom photo in Miami with gray walls
11