
Search results for "Applying" in Home Design Ideas

 Ranch Road 12 Contractors LLC
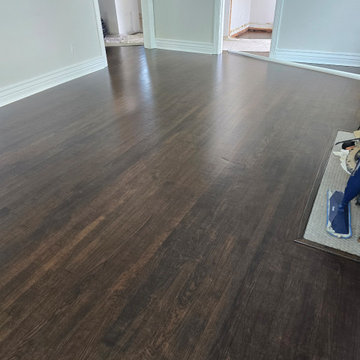
Freshly stained dark hardwood floors in open-concept living area showing rich wood grain and professional finish. Flooring restoration in Austin, TX by RR12 Contractors

Find the right local pro for your project
 Tile Doctor Ltd
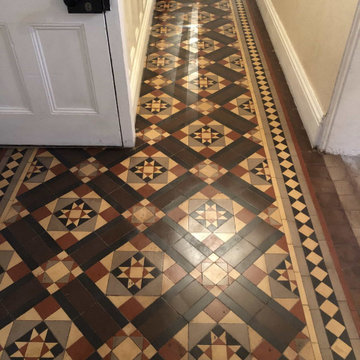
I received this Tile Doctor enquiry from a customer in the historic market town of Kidderminster who had a Victorian Minton Tiled hallway floor that had been covered in carpet for a long time. The carpet had since been removed and now the floor was fully exposed you could see it was covered in carpet glue and dirty with ingrained grime.
I arranged an appointment to inspect the floor thoroughly and provide a quote; you can never be sure what issues you might find, so surveying the floor first ensures I can give an accurate price. As anticipated the entire floor was covered in thick glue, fortunately apart from a few loose tiles the floor was in good order. I explained to the client the process I would use on the floor and that I was confident the floor could be restored for them. My quote was accepted, and we arranged a date to carry out the work.
I often get customers claiming to have an original Minton Tiled floor however there were many manufacturers creating similar patterns at the end of the 19th century, the only way to be certain is to lift a tile and look to see what’s stamped on the back. In this case we had a few loose ones that needed relaying, so I was able to confirm that quite easily.
I arrived on the booked day and the first step was to tape up the surrounding area to prevent any damage from splashing. I was then ready to tackle the glue. I applied a strong solution of Tile Doctor Remove and Go and covered the floor with industrial cling film to allow the solution to get to work without drying out. The film was removed after an hour and then the Remove and Go was worked into the tiles using a coarse 200-grit milling pad to cut through the glue and resurface the tiles.
Afterwards the floor was rinsed with water and the soil removed with a wet vacuum. Some of the glue proved very stubborn to remove and had to be dealt with carefully by hand using an industrial scraper, sometimes a bit of elbow grease is the only way to get the job done.
The floor was then given an Acid Rinse with Tile Doctor Acid Gel, this is designed to further clean the tiles and counter any efflorescent salts that might be present in the tiles due to the lack of damp proof membrane.
After another rinse and soil removal I turned my attention to the loose tiles which were secured by removing the tile, scraping out the adhesive and re-fixing. The appearance of the floor was much improved after day and the floor was then left overnight to dry out in preparation or the sealing process.
Returning the next day, I first checked the floor was dry using a damp meter. Once I was satisfied it was dry, I started to seal the floor. I had selected to use Tile Doctor Seal and Go Extra for sealing. It adds a richness to the colour of the tiles and a subtle sheen finish. I applied three coats, waiting for each one to dry before applying the next.
The pattern on the floor was really nice and the colours were now very vibrant. The client was very pleased and left a great review copied below:
“Our floor wasn’t easy as it had some form of coating on it which was difficult to remove but Mark took a lot of time to ensure the surface was thoroughly clean before the sealant was put down. Very pleased with how it looks. K. B, Kidderminster”
Mark Conway
Worcestershire Tile Doctor
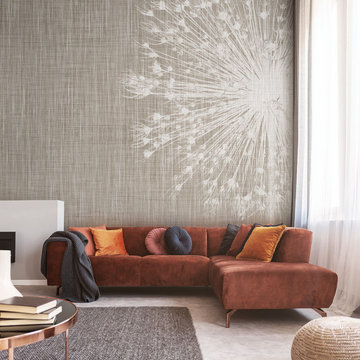
 ELISABETTA MARIOTTI Italian Interiors
Inkiostro Bianco designer wallpaper is the creative wallcovering that confers personality to the home.
Inspiration for a huge contemporary open concept wallpaper family room remodel in Other with multicolored walls
Inspiration for a huge contemporary open concept wallpaper family room remodel in Other with multicolored walls
 Tile Doctor Ltd
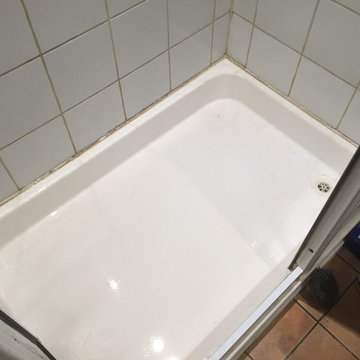
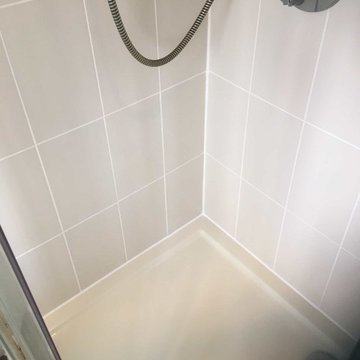
The photographs below are taken from a house in the old market town of Basingstoke which is now the largest town in Hampshire. I was asked to address a very severe case of Limescale build-up in a shower cubicle. The wall tiles were Ceramic and a shocking amount of Limescale had deposited itself on them and the shower tray over the years; the owners were going to have to replace everything if Tile Doctor could not come to the rescue!
The photos below really demonstrate the extent of the problem and needless to say the Gauntlet had been laid down and I was ready for a challenge!
My first task was to provide the Ceramic tiled walls with an initial clean. I did this by firstly mixing a diluted solution of the high alkaline cleaner known as Tile Doctor Pro Clean and then applying this on the tiles and leaving it to dwell for a while before scrubbing it in by hand in order to remove any surface dirt and scum. This was then washed off and I set my mind to the main task at hand: the Limescale removal.
To remove the Limescale it is necessary to apply an acidic product. However, there is an issue for homeowners that most products readily available on the market come in a liquid form, which of course simply drips down the tile, and therefore does not work to the best of its abilities. Fortunately, Tile Doctor recently launched a new product by the name of Acid Gel. Since it’s in a gel form it stays put on the surface and does not evaporate or dry out too quickly. This allows it time to break down the Limescale and other difficult stains.
Acid Gel was thus applied to the affected areas and left to dwell for a short while. I then scrubbed it deeply into the tile and grout lines, and follow up with an application of steam to tackle the stubborn areas and help the Acid Gel to tackle the Limescale.
The results were absolutely fantastic, and even the shower tray – which was in a very poor state indeed – came up very clean. Needless to say, my client was very pleased that they now do not have to replace the shower!
Charles Okwechime
Hampshire Tile Doctor
 Tile Doctor Ltd
I was asked by a Chelford homeowner (near Alderley Edge) to renovate their Ceramic Tiled Shower Cubicle which had an unsightly mould problem. They say pictures speak louder than words, so I’ve added some photos on this page which show how the grout and silicone sealant had become discoloured with mould over the ten years since it was installed.
Mould likes damp warm areas and shower cubicles make a perfect habitat for it, grout especially can be a problem due to its cementitious rough surface that mould can get a grip on. In this case the ventilation in the ensuite was inadequate and ideally there should have been an extraction vent over the cubicle itself. My advice in these situations is to leave doors and windows open after showering and to run the cold water afterwards.
To renovate the Tile and Grout I sprayed on Tile Doctor Duo-Clean which was left to soak into the grout line for ten minutes before being scrubbed in by hand. The Ceramic tiles cleaned quite easily but the grout had to be scrubbed hard and needed several applications before I was satisfied.
The whole shower needed treating in this fashion and once rinsed and dried I set about stripping out all the old silicone sealant that had also been badly affected by mould. This is done carefully using a sharp knife. I removed the debris and moved onto applying a fresh mould resistant silicone sealant.
Last step before leaving was to spray the Ceramic tile and especially the Grout and Silicone with a can of Tile Doctor Aerosol Grout Sealer. This doesn’t last as long as other sealants in the Tile Doctor range but its quick to apply, especially on wall tiles. The sealer ensures water will run straight off the walls into the shower tray and it also makes the shower easier to clean later.
The shower looked like a new installation by the time I had finished, and my client was delighted with the transformation. He was also thankful that I had replaced the silicone, this was something he had considered doing himself but applying it does take practice and you can get yourself into a mess.
Kamila Logonzy
East Cheshire Tile Doctor
 Allstyle Cabinet Doors
Nelson Braga
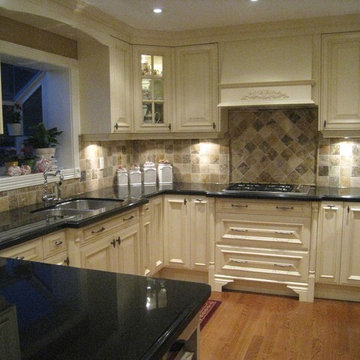
Inspiration for a large timeless u-shaped medium tone wood floor kitchen pantry remodel in Toronto with a drop-in sink, shaker cabinets, beige backsplash and no island
Inspiration for a large timeless u-shaped medium tone wood floor kitchen pantry remodel in Toronto with a drop-in sink, shaker cabinets, beige backsplash and no island

 Chervin Kitchen & Bath Inc.
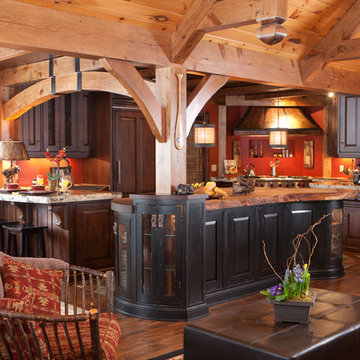
Featuring the client-selected slab of walnut for the island countertop meant incorporating design elements that flowed with its natural curves. Granite slabs were also selected for the other countertops. The resulting masterpiece is a great example of how we work with our clients to bring their dreams to reality.
 Design 2 Finish LLC
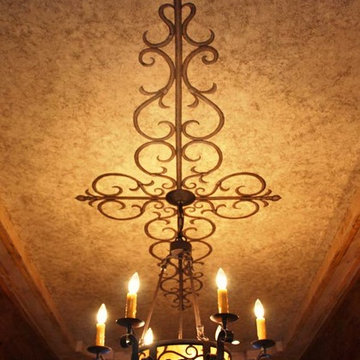
The client and designer wanted an entry that reflected the historic Josiah Joesler home in the foothills of Tuscon, Arizona; and would also incorporate the antique mesquite floorboards. Starting at the top – on the ceiling coffer a visual texture using frottage was applied. Over the frottage design a Joesler-styled faux wrought iron work was designed around the chandelier, painted in the studio and installed. The next architectural element was then painted and design elements from the wall stencil were applied in plaster with two connecting bands then all was distressed. The large crown is originally a plaster element; that was faux grained to blend with the floor. Because Joesler is known for square headed iron nails, the “boards” were then connected by trompe l’oeil nail heads. On the walls, polished Italian plaster was applied then a “broken” stencil pattern was dry-brushed on in two colors; the walls were then rubbed out in glaze to age.
 Sierra Living Concepts Inc
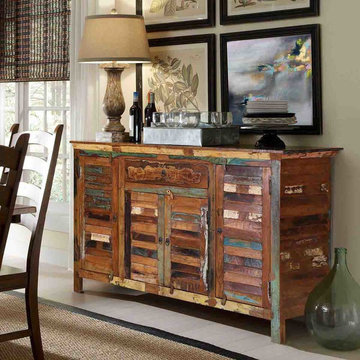
Rustic reclaimed charm meets the spirit of global color in the Tangier 60" Shutter Design 4-Door Reclaimed Wood Dining Room Sideboard. This 100% handcrafted piece is constructed of reclaimed solid wood and features the original finishes that have been reworked and distressed to create a bright and lively design. A medium wood finish is hand applied to the entire piece that showcases the natural wood grain character and aged personality of each piece of wood. A tall shutter style cabinet door rests at either end of the front face of this sideboard while the center portion is comprised of a single long drawer above and two shorter cabinet doors below. Two storage shelves rest behind each of the larger cabinet doors. Behind the two shorter doors, two wide storage shelves are revealed. The large drawer provides ample room for your dining and serving utensils. Each cabinet face features a window shutter design with each slat showing a unique distressed original finish.
Rustic farmhouse charm comes to life in this hand-made global beauty. Any dining room will feel warmer and more centered with the addition of this lively and spirited buffet cabinet.
The unique personality of every reclaimed board is showcased through the tasteful artistry that is evident throughout this piece. Aged and weathered characteristics are celebrated through the application of hand-applied finishes.
Special Features
• 100% handcrafted
• Rustic design with global flair
• Window shutter slat design
• Reclaimed solid wood materials
• Distressed original paint and hand-applied medium wood finish
• Four slat-design cabinet doors
• Six total storage shelves
• Single wide utensil drawer
• Environmentally friendly materials

 Colorado Cabinetry
Example of a large classic single-wall medium tone wood floor eat-in kitchen design in Denver with raised-panel cabinets, white cabinets, an undermount sink, soapstone countertops, gray backsplash, brick backsplash, stainless steel appliances and an island
 TOC design & construction inc.
Designed by : TOC design – Tania Scardellato
Photographer: Guillaume Gorini - Studio Point de Vue
Contractor: TOC design & Construction inc. / Triassi & Ippolito
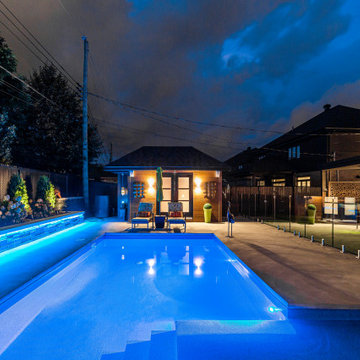
Lighting is as important to a successful landscape design as plants; hardscape, and outdoor structures, like pergolas and arbors. Besides providing safety and security, the right fixtures placed throughout a yard can transform the night into a beautifully illuminated masterpiece.
First impressions are important, and the entryway into your home can say so much about you and your style. Invite people in with a flair.
 Tile Doctor Ltd
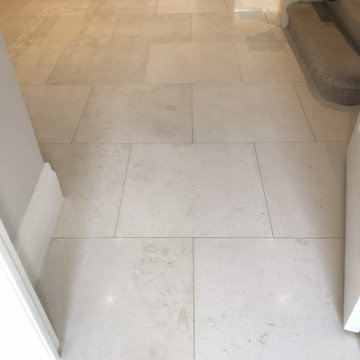
This client from Highgate in North London, N6 contacted us about their large honed Limestone tiled floor that was installed throughout the ground floor. It had been laid seven years prior and was now grubby and in need of a deep clean and seal including the grout which had turned black with dirt.
I visited the property to survey and assess what was required and provided the owner with a quotation for the renovation. The hallway pictured was in the worst condition, it was a busy house with young children and dogs and over the years the sealer had worn down leaving it vulnerable to ingrained dirt. Without a sealer to protect the stone it had become heavily soiled and lost its original polished appearance.
Happy with the quote we scheduled a date for the work to go ahead. The quote included deep cleaning and burnishing the stone to bring back the polish, grout cleaning and re-sealing the Limestone to protect it.
We arrived on the first day and prepared the area by taping up the skirting and woodwork to protect them from potential splashing. Next step was to burnish the floor using a set of Tile Doctor Diamond Burnishing Pads, specifically the 400, 800 and 1500 grit pads fitted to a rotary machine, these were used in sequence running each pad over the tiles several times with water to lubricate the process. The water turns into a fine slurry as pores in the stone are opened and the dirt is released, the slurry is rinsed off with more water and extracted using an industrial wet vacuum after each pad. The finer 800 and 1500-grit pads slowly close the pores and refine the appearance of the stone building up the polish in the process.
A strong dilution of Tile Doctor Pro-Clean was then applied to the grout lines, leaving it for a short while to soak in and then hand scrubbing with a grout brush. The dirty cleaning solution and were then removed from the floor with the wet vacuum.
This process was repeated across the different sections of the Limestone floor until I was satisfied with its appearance. Before leaving for the day, I rinsed the floor again using a buffing machine fitted with a brush fitted to give it a final clean. The floor was dried as much as possible using the wet vacuum and then allowed it to dry off fully overnight.
The following day the final 3000-grit pad in the four-pad set was applied to the floor to bring up the polish even further. The pad is applied dry with only a little water sprayed onto the tile. We call this process a “Spray Burnish” and as well as leaving the floor nice and dry ready for sealing it adds a nice subtle shine to the stone.
The floor was then sealed with two coats of Tile Doctor Colour Grow sealer. This is a colour intensifying impregnating sealer that works by occupying the pores in the stone so dirt cannot become ingrained there. It will provide durable protection and make the floor much easier to keep clean. It worked well on the pale Limestone and beautifully enhanced the colour and features in stone. Once complete the floor looked brand new again.
I left a complimentary bottle of Tile Doctor Stone Soap with the client and gave them some information about how best to maintain the floor. This product is pH neutral and cleans whilst maintaining the patina on the stone helping to keep the floor in great condition.
The client was delighted with the result and left us a great review.
“Andrew is excellent and gets on with the job and we got a fantastic result. Highly recommend. By Aaron S, Highgate, 15 March 2021”
Andrew Newstead
North London Tile Doctor
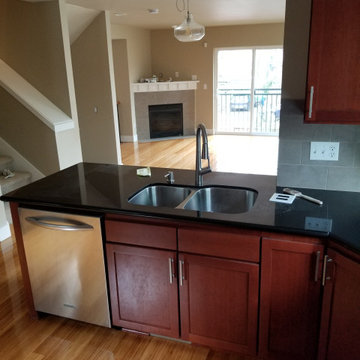
 CASM Contracting, LLC
Have you been considering a kitchen make over?
CASM has completed a fresh and modern kitchen that is crips, clean and fully updated! This full transformation includes using the highest quality materials and a firm timeline to ensure the clients needs were met and succeeded. This open concept kitchen makes for a perfect place to cook and gather with family and friends!
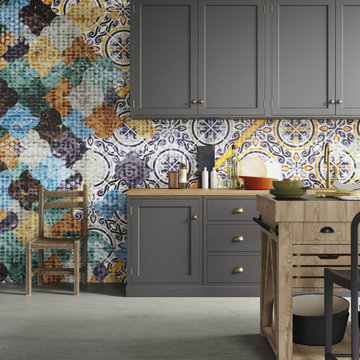 ELISABETTA MARIOTTI Italian Interiors
Inkiostro Bianco designer wallpaper is the creative wallcovering that confers personality to the home.
Huge trendy single-wall concrete floor and gray floor eat-in kitchen photo in Other with recessed-panel cabinets, gray cabinets, wood countertops, an island and brown countertops
Huge trendy single-wall concrete floor and gray floor eat-in kitchen photo in Other with recessed-panel cabinets, gray cabinets, wood countertops, an island and brown countertops
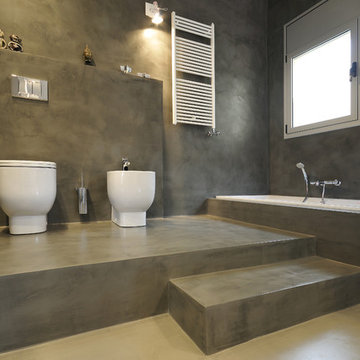
 Topcret Microcement USA
Example of a concrete floor and beige floor bathroom design in Miami with gray walls
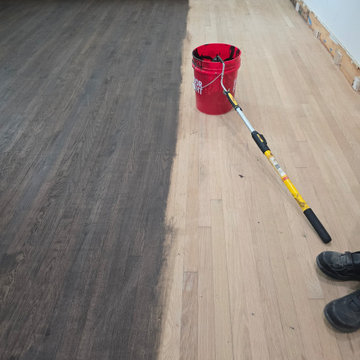 Ranch Road 12 Contractors LLC
Hardwood floor stain application in progress with roller showing the before and after contrast of the dark finish. Professional flooring restoration in Austin, TX by RR12 Contractors
44