
Search results for "Approach challenges" in Home Design Ideas
 THE Remodel Group
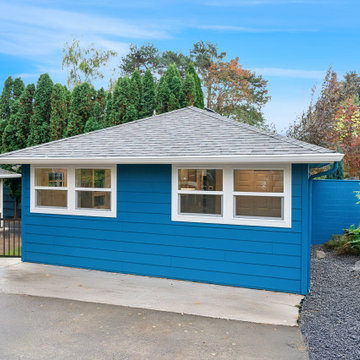
Creating space for a loved one doesn't always mean building a new home from the ground up. For this Southeast Portland garage conversion, the goal was simple but deeply personal: transform a detached garage into a comfortable guest cottage where a family member could live independently while remaining closely connected to the people she loves.
The existing home presented challenges for long-term living, including stairs and limited accessibility. At the same time, the family wanted to provide privacy, dignity, and the comforts of home rather than simply adding another bedroom to the main house. The answer was hiding in plain sight: a detached garage with untapped potential.
While the structure offered opportunity, it also came with significant constraints. A structural concrete block wall, neighboring retaining wall, and compact footprint left little room for expansion. With just 480 square feet to work with, every inch needed to serve a purpose.
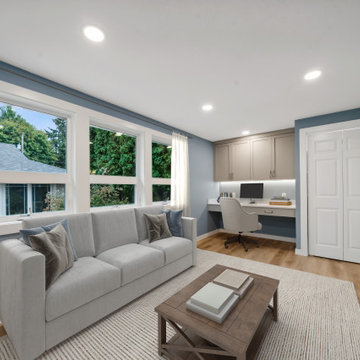
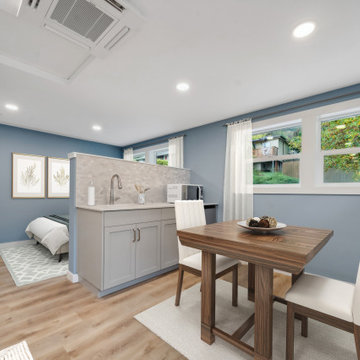
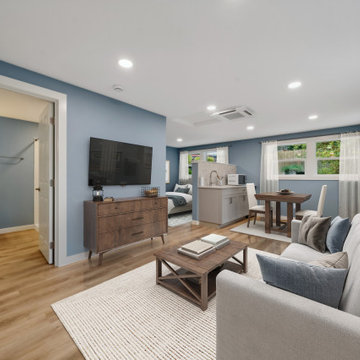
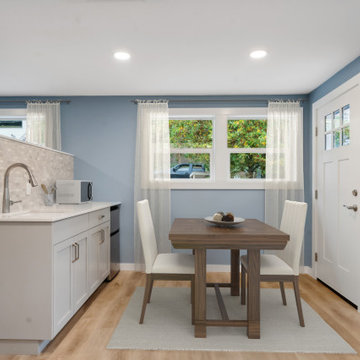
The design process began by focusing on how the space would be lived in rather than how it would look. Multiple floor plan options were explored before arriving at a layout that balances sleeping, cooking, crafting, relaxing, and storage within a bright, welcoming studio environment. Soft blue accents, warm walnut-toned flooring, cream tile, white countertops, and crisp trim create an aesthetic that feels calm, timeless, and intentionally residential rather than utilitarian.
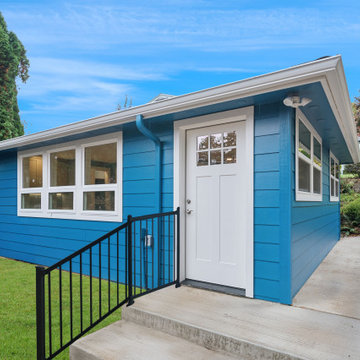
One of the most dramatic transformations came from replacing the original garage door with a wall of windows. Natural light now floods the interior, visually expanding the space and creating a stronger connection to the surrounding garden. Additional windows provide cross ventilation, keeping the cottage bright and comfortable throughout the year.
The material palette was intentionally selected to feel calm, timeless, and residential. Soft blue tones appear throughout the cottage, complemented by light walnut flooring, white countertops, cream tile, and crisp white trim. Together, these finishes create a warm and inviting environment that feels thoughtfully designed rather than utilitarian.
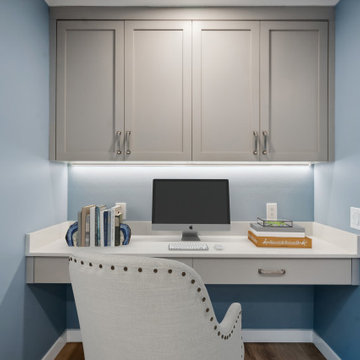
Thoughtful storage solutions help the cottage live larger than its footprint. A spacious bedroom closet, living room storage, full-height bathroom shelving, and carefully planned kitchen cabinetry keep daily essentials organized and out of sight. A built-in desk with integrated cabinetry provides a dedicated space for crafting, sewing, and spending time with grandchildren, reflecting how important hobbies and family connections are to everyday life.
A compact kitchenette, partial privacy wall, and quiet mini-split heating and cooling system complete the home, while a new concrete pathway connects the cottage to the main house for safe and convenient access year-round.
What makes this project special is not simply the garage conversion itself, but the life it makes possible. Through thoughtful space planning, universal design principles, and a collaborative design-build approach, a former garage became a warm, independent retreat that supports aging in place while keeping family close. The result is a cottage that feels less like a conversion and more like a home that was always meant to be there.
 Drury Design
THE SETUP
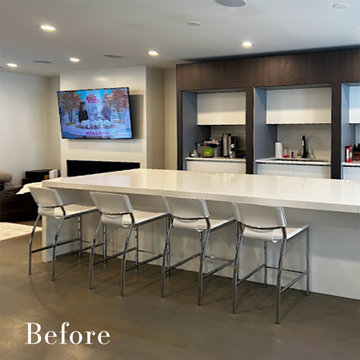
Sam’s client had lived in her downtown townhome home for less than a year when she decided to remodel the spacious second level. This open area consisted of three sections: a TV and fireplace zone, a sparsely furnished dining area, and a dominant central kitchen. The kitchen featured a long back wall with three segmented sections and a massive island housing the cooktop. She found the kitchen’s functionality lacking and its presence overwhelming – it dominated the entire floor, regardless of where you stood.
Design objectives:
- Reconfigure key kitchen elements (sink, cooktop, oven) while minimizing the kitchen’s visual impact
- Optimize the kitchen’s back wall, eliminating existing dead space
- Create a purposeful, well-defined dining area
- Establish a distinct, comfortable living area
- Reuse existing appliances and flooring
- Maintain an overall modern design aesthetic
THE REMODEL
Design challenges to be solved:
- Redesign the island to reduce its overwhelming presence
- Create a comfortable, dedicated living room within the available space
- Establish a distinct, inviting dining area within spatial constraints
- Enhance kitchen functionality and style without dominating the entire floor
THE RENEWED SPACE
Design solutions:
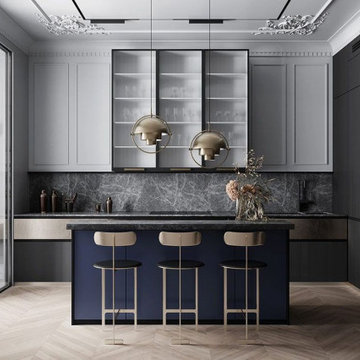
- Sam created raised end caps for the island. This separated the kitchen from adjacent living and dining areas while focusing the kitchen’s functionality. The new sink location offers ample workspace, allowing the cook to interact with guests seated at the island. The redesigned island also provides additional storage.
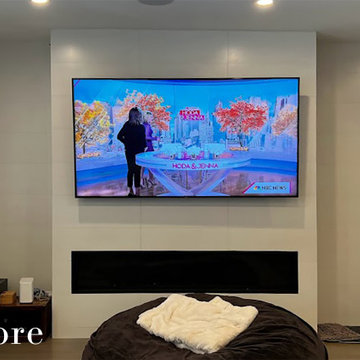
- For the living area, Sam opted for a functional-yet-minimalist approach. Large-format tile creates a natural stone look for the fireplace and TV wall. The recessed TV and extended fireplace shelf maintain a sleek profile. - Artistic wallpaper adds depth and texture, while the intentional lack of extensive shelving keeps the space open and distinct.
- Sam transformed the dining area’s blank wall into a feature, adding a unique dry bar with counter space, open shelves, cabinet storage and a beverage fridge. - - - Wallpaper behind and above the bar contributes to the area’s personality. A mirror adds depth while pendant lights add style and visual interest.
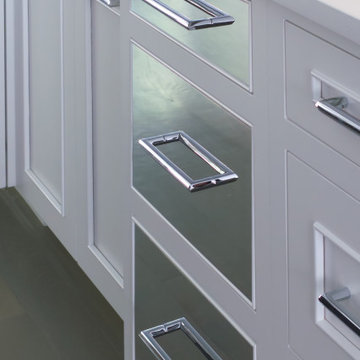
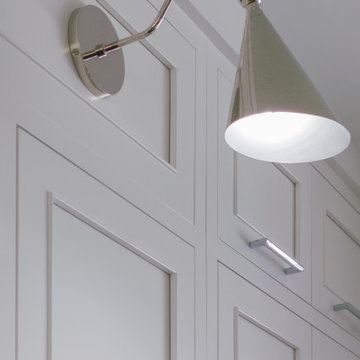
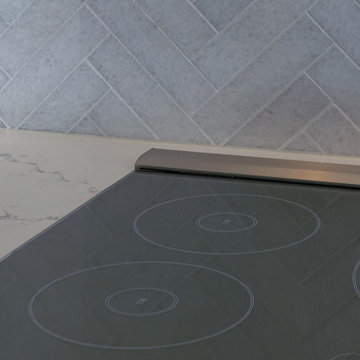
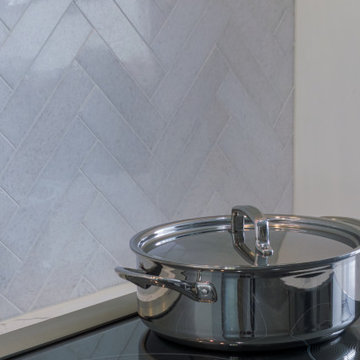
Relocating the cooktop to the back wall facilitates hidden ventilation, reducing visual clutter. Sam balanced transitional and modern elements for a contemporary yet comfortable feel. The digital control panel on the convection cooktop maintains a sleek look, while the wall oven is now at an easy-to-use height. ----- Mirrored base cabinet fronts and a paneled fridge prevent cabinetry monotony.
The redesign has delighted Sam’s client, achieving her main goal of creating a more inviting and visually appealing space. Each section now has its own visual personality and functionality while harmonizing within a monochromatic palette. The entire floor offers wow-factor pop upon first glance, with each area maintaining its distinct character while contributing to a cohesive, modern aesthetic.
 THE Remodel Group
Creating space for a loved one doesn't always mean building a new home from the ground up. For this Southeast Portland garage conversion, the goal was simple but deeply personal: transform a detached garage into a comfortable guest cottage where a family member could live independently while remaining closely connected to the people she loves.
The existing home presented challenges for long-term living, including stairs and limited accessibility. At the same time, the family wanted to provide privacy, dignity, and the comforts of home rather than simply adding another bedroom to the main house. The answer was hiding in plain sight: a detached garage with untapped potential.
While the structure offered opportunity, it also came with significant constraints. A structural concrete block wall, neighboring retaining wall, and compact footprint left little room for expansion. With just 480 square feet to work with, every inch needed to serve a purpose.
The design process began by focusing on how the space would be lived in rather than how it would look. Multiple floor plan options were explored before arriving at a layout that balances sleeping, cooking, crafting, relaxing, and storage within a bright, welcoming studio environment. Soft blue accents, warm walnut-toned flooring, cream tile, white countertops, and crisp trim create an aesthetic that feels calm, timeless, and intentionally residential rather than utilitarian.
One of the most dramatic transformations came from replacing the original garage door with a wall of windows. Natural light now floods the interior, visually expanding the space and creating a stronger connection to the surrounding garden. Additional windows provide cross ventilation, keeping the cottage bright and comfortable throughout the year.
The material palette was intentionally selected to feel calm, timeless, and residential. Soft blue tones appear throughout the cottage, complemented by light walnut flooring, white countertops, cream tile, and crisp white trim. Together, these finishes create a warm and inviting environment that feels thoughtfully designed rather than utilitarian.
Thoughtful storage solutions help the cottage live larger than its footprint. A spacious bedroom closet, living room storage, full-height bathroom shelving, and carefully planned kitchen cabinetry keep daily essentials organized and out of sight. A built-in desk with integrated cabinetry provides a dedicated space for crafting, sewing, and spending time with grandchildren, reflecting how important hobbies and family connections are to everyday life.
A compact kitchenette, partial privacy wall, and quiet mini-split heating and cooling system complete the home, while a new concrete pathway connects the cottage to the main house for safe and convenient access year-round.
What makes this project special is not simply the garage conversion itself, but the life it makes possible. Through thoughtful space planning, universal design principles, and a collaborative design-build approach, a former garage became a warm, independent retreat that supports aging in place while keeping family close. The result is a cottage that feels less like a conversion and more like a home that was always meant to be there.
Find the right local pro for your project
 Drury Design
THE SETUP
Sam’s client had lived in her downtown townhome home for less than a year when she decided to remodel the spacious second level. This open area consisted of three sections: a TV and fireplace zone, a sparsely furnished dining area, and a dominant central kitchen. The kitchen featured a long back wall with three segmented sections and a massive island housing the cooktop. She found the kitchen’s functionality lacking and its presence overwhelming – it dominated the entire floor, regardless of where you stood.
Design objectives:
- Reconfigure key kitchen elements (sink, cooktop, oven) while minimizing the kitchen’s visual impact
- Optimize the kitchen’s back wall, eliminating existing dead space
- Create a purposeful, well-defined dining area
- Establish a distinct, comfortable living area
- Reuse existing appliances and flooring
- Maintain an overall modern design aesthetic
THE REMODEL
Design challenges to be solved:
- Redesign the island to reduce its overwhelming presence
- Create a comfortable, dedicated living room within the available space
- Establish a distinct, inviting dining area within spatial constraints
- Enhance kitchen functionality and style without dominating the entire floor
THE RENEWED SPACE
Design solutions:
- Sam created raised end caps for the island. This separated the kitchen from adjacent living and dining areas while focusing the kitchen’s functionality. The new sink location offers ample workspace, allowing the cook to interact with guests seated at the island. The redesigned island also provides additional storage.
- For the living area, Sam opted for a functional-yet-minimalist approach. Large-format tile creates a natural stone look for the fireplace and TV wall. The recessed TV and extended fireplace shelf maintain a sleek profile. - Artistic wallpaper adds depth and texture, while the intentional lack of extensive shelving keeps the space open and distinct.
- Sam transformed the dining area’s blank wall into a feature, adding a unique dry bar with counter space, open shelves, cabinet storage and a beverage fridge. - - - Wallpaper behind and above the bar contributes to the area’s personality. A mirror adds depth while pendant lights add style and visual interest.
Relocating the cooktop to the back wall facilitates hidden ventilation, reducing visual clutter. Sam balanced transitional and modern elements for a contemporary yet comfortable feel. The digital control panel on the convection cooktop maintains a sleek look, while the wall oven is now at an easy-to-use height. ----- Mirrored base cabinet fronts and a paneled fridge prevent cabinetry monotony.
The redesign has delighted Sam’s client, achieving her main goal of creating a more inviting and visually appealing space. Each section now has its own visual personality and functionality while harmonizing within a monochromatic palette. The entire floor offers wow-factor pop upon first glance, with each area maintaining its distinct character while contributing to a cohesive, modern aesthetic.
 THE Remodel Group
Creating space for a loved one doesn't always mean building a new home from the ground up. For this Southeast Portland garage conversion, the goal was simple but deeply personal: transform a detached garage into a comfortable guest cottage where a family member could live independently while remaining closely connected to the people she loves.
The existing home presented challenges for long-term living, including stairs and limited accessibility. At the same time, the family wanted to provide privacy, dignity, and the comforts of home rather than simply adding another bedroom to the main house. The answer was hiding in plain sight: a detached garage with untapped potential.
While the structure offered opportunity, it also came with significant constraints. A structural concrete block wall, neighboring retaining wall, and compact footprint left little room for expansion. With just 480 square feet to work with, every inch needed to serve a purpose.
The design process began by focusing on how the space would be lived in rather than how it would look. Multiple floor plan options were explored before arriving at a layout that balances sleeping, cooking, crafting, relaxing, and storage within a bright, welcoming studio environment. Soft blue accents, warm walnut-toned flooring, cream tile, white countertops, and crisp trim create an aesthetic that feels calm, timeless, and intentionally residential rather than utilitarian.
One of the most dramatic transformations came from replacing the original garage door with a wall of windows. Natural light now floods the interior, visually expanding the space and creating a stronger connection to the surrounding garden. Additional windows provide cross ventilation, keeping the cottage bright and comfortable throughout the year.
The material palette was intentionally selected to feel calm, timeless, and residential. Soft blue tones appear throughout the cottage, complemented by light walnut flooring, white countertops, cream tile, and crisp white trim. Together, these finishes create a warm and inviting environment that feels thoughtfully designed rather than utilitarian.
Thoughtful storage solutions help the cottage live larger than its footprint. A spacious bedroom closet, living room storage, full-height bathroom shelving, and carefully planned kitchen cabinetry keep daily essentials organized and out of sight. A built-in desk with integrated cabinetry provides a dedicated space for crafting, sewing, and spending time with grandchildren, reflecting how important hobbies and family connections are to everyday life.
A compact kitchenette, partial privacy wall, and quiet mini-split heating and cooling system complete the home, while a new concrete pathway connects the cottage to the main house for safe and convenient access year-round.
What makes this project special is not simply the garage conversion itself, but the life it makes possible. Through thoughtful space planning, universal design principles, and a collaborative design-build approach, a former garage became a warm, independent retreat that supports aging in place while keeping family close. The result is a cottage that feels less like a conversion and more like a home that was always meant to be there.
 THE Remodel Group
Creating space for a loved one doesn't always mean building a new home from the ground up. For this Southeast Portland garage conversion, the goal was simple but deeply personal: transform a detached garage into a comfortable guest cottage where a family member could live independently while remaining closely connected to the people she loves.
The existing home presented challenges for long-term living, including stairs and limited accessibility. At the same time, the family wanted to provide privacy, dignity, and the comforts of home rather than simply adding another bedroom to the main house. The answer was hiding in plain sight: a detached garage with untapped potential.
While the structure offered opportunity, it also came with significant constraints. A structural concrete block wall, neighboring retaining wall, and compact footprint left little room for expansion. With just 480 square feet to work with, every inch needed to serve a purpose.
The design process began by focusing on how the space would be lived in rather than how it would look. Multiple floor plan options were explored before arriving at a layout that balances sleeping, cooking, crafting, relaxing, and storage within a bright, welcoming studio environment. Soft blue accents, warm walnut-toned flooring, cream tile, white countertops, and crisp trim create an aesthetic that feels calm, timeless, and intentionally residential rather than utilitarian.
One of the most dramatic transformations came from replacing the original garage door with a wall of windows. Natural light now floods the interior, visually expanding the space and creating a stronger connection to the surrounding garden. Additional windows provide cross ventilation, keeping the cottage bright and comfortable throughout the year.
The material palette was intentionally selected to feel calm, timeless, and residential. Soft blue tones appear throughout the cottage, complemented by light walnut flooring, white countertops, cream tile, and crisp white trim. Together, these finishes create a warm and inviting environment that feels thoughtfully designed rather than utilitarian.
Thoughtful storage solutions help the cottage live larger than its footprint. A spacious bedroom closet, living room storage, full-height bathroom shelving, and carefully planned kitchen cabinetry keep daily essentials organized and out of sight. A built-in desk with integrated cabinetry provides a dedicated space for crafting, sewing, and spending time with grandchildren, reflecting how important hobbies and family connections are to everyday life.
A compact kitchenette, partial privacy wall, and quiet mini-split heating and cooling system complete the home, while a new concrete pathway connects the cottage to the main house for safe and convenient access year-round.
What makes this project special is not simply the garage conversion itself, but the life it makes possible. Through thoughtful space planning, universal design principles, and a collaborative design-build approach, a former garage became a warm, independent retreat that supports aging in place while keeping family close. The result is a cottage that feels less like a conversion and more like a home that was always meant to be there.
 Drury Design
THE SETUP
Sam’s client had lived in her downtown townhome home for less than a year when she decided to remodel the spacious second level. This open area consisted of three sections: a TV and fireplace zone, a sparsely furnished dining area, and a dominant central kitchen. The kitchen featured a long back wall with three segmented sections and a massive island housing the cooktop. She found the kitchen’s functionality lacking and its presence overwhelming – it dominated the entire floor, regardless of where you stood.
Design objectives:
- Reconfigure key kitchen elements (sink, cooktop, oven) while minimizing the kitchen’s visual impact
- Optimize the kitchen’s back wall, eliminating existing dead space
- Create a purposeful, well-defined dining area
- Establish a distinct, comfortable living area
- Reuse existing appliances and flooring
- Maintain an overall modern design aesthetic
THE REMODEL
Design challenges to be solved:
- Redesign the island to reduce its overwhelming presence
- Create a comfortable, dedicated living room within the available space
- Establish a distinct, inviting dining area within spatial constraints
- Enhance kitchen functionality and style without dominating the entire floor
THE RENEWED SPACE
Design solutions:
- Sam created raised end caps for the island. This separated the kitchen from adjacent living and dining areas while focusing the kitchen’s functionality. The new sink location offers ample workspace, allowing the cook to interact with guests seated at the island. The redesigned island also provides additional storage.
- For the living area, Sam opted for a functional-yet-minimalist approach. Large-format tile creates a natural stone look for the fireplace and TV wall. The recessed TV and extended fireplace shelf maintain a sleek profile. - Artistic wallpaper adds depth and texture, while the intentional lack of extensive shelving keeps the space open and distinct.
- Sam transformed the dining area’s blank wall into a feature, adding a unique dry bar with counter space, open shelves, cabinet storage and a beverage fridge. - - - Wallpaper behind and above the bar contributes to the area’s personality. A mirror adds depth while pendant lights add style and visual interest.
Relocating the cooktop to the back wall facilitates hidden ventilation, reducing visual clutter. Sam balanced transitional and modern elements for a contemporary yet comfortable feel. The digital control panel on the convection cooktop maintains a sleek look, while the wall oven is now at an easy-to-use height. ----- Mirrored base cabinet fronts and a paneled fridge prevent cabinetry monotony.
The redesign has delighted Sam’s client, achieving her main goal of creating a more inviting and visually appealing space. Each section now has its own visual personality and functionality while harmonizing within a monochromatic palette. The entire floor offers wow-factor pop upon first glance, with each area maintaining its distinct character while contributing to a cohesive, modern aesthetic.

 Drury Design
THE SETUP
Sam’s client had lived in her downtown townhome home for less than a year when she decided to remodel the spacious second level. This open area consisted of three sections: a TV and fireplace zone, a sparsely furnished dining area, and a dominant central kitchen. The kitchen featured a long back wall with three segmented sections and a massive island housing the cooktop. She found the kitchen’s functionality lacking and its presence overwhelming – it dominated the entire floor, regardless of where you stood.
Design objectives:
- Reconfigure key kitchen elements (sink, cooktop, oven) while minimizing the kitchen’s visual impact
- Optimize the kitchen’s back wall, eliminating existing dead space
- Create a purposeful, well-defined dining area
- Establish a distinct, comfortable living area
- Reuse existing appliances and flooring
- Maintain an overall modern design aesthetic
THE REMODEL
Design challenges to be solved:
- Redesign the island to reduce its overwhelming presence
- Create a comfortable, dedicated living room within the available space
- Establish a distinct, inviting dining area within spatial constraints
- Enhance kitchen functionality and style without dominating the entire floor
THE RENEWED SPACE
Design solutions:
- Sam created raised end caps for the island. This separated the kitchen from adjacent living and dining areas while focusing the kitchen’s functionality. The new sink location offers ample workspace, allowing the cook to interact with guests seated at the island. The redesigned island also provides additional storage.
- For the living area, Sam opted for a functional-yet-minimalist approach. Large-format tile creates a natural stone look for the fireplace and TV wall. The recessed TV and extended fireplace shelf maintain a sleek profile. - Artistic wallpaper adds depth and texture, while the intentional lack of extensive shelving keeps the space open and distinct.
- Sam transformed the dining area’s blank wall into a feature, adding a unique dry bar with counter space, open shelves, cabinet storage and a beverage fridge. - - - Wallpaper behind and above the bar contributes to the area’s personality. A mirror adds depth while pendant lights add style and visual interest.
Relocating the cooktop to the back wall facilitates hidden ventilation, reducing visual clutter. Sam balanced transitional and modern elements for a contemporary yet comfortable feel. The digital control panel on the convection cooktop maintains a sleek look, while the wall oven is now at an easy-to-use height. ----- Mirrored base cabinet fronts and a paneled fridge prevent cabinetry monotony.
The redesign has delighted Sam’s client, achieving her main goal of creating a more inviting and visually appealing space. Each section now has its own visual personality and functionality while harmonizing within a monochromatic palette. The entire floor offers wow-factor pop upon first glance, with each area maintaining its distinct character while contributing to a cohesive, modern aesthetic.
 Drury Design
THE SETUP
Sam’s client had lived in her downtown townhome home for less than a year when she decided to remodel the spacious second level. This open area consisted of three sections: a TV and fireplace zone, a sparsely furnished dining area, and a dominant central kitchen. The kitchen featured a long back wall with three segmented sections and a massive island housing the cooktop. She found the kitchen’s functionality lacking and its presence overwhelming – it dominated the entire floor, regardless of where you stood.
Design objectives:
- Reconfigure key kitchen elements (sink, cooktop, oven) while minimizing the kitchen’s visual impact
- Optimize the kitchen’s back wall, eliminating existing dead space
- Create a purposeful, well-defined dining area
- Establish a distinct, comfortable living area
- Reuse existing appliances and flooring
- Maintain an overall modern design aesthetic
THE REMODEL
Design challenges to be solved:
- Redesign the island to reduce its overwhelming presence
- Create a comfortable, dedicated living room within the available space
- Establish a distinct, inviting dining area within spatial constraints
- Enhance kitchen functionality and style without dominating the entire floor
THE RENEWED SPACE
Design solutions:
- Sam created raised end caps for the island. This separated the kitchen from adjacent living and dining areas while focusing the kitchen’s functionality. The new sink location offers ample workspace, allowing the cook to interact with guests seated at the island. The redesigned island also provides additional storage.
- For the living area, Sam opted for a functional-yet-minimalist approach. Large-format tile creates a natural stone look for the fireplace and TV wall. The recessed TV and extended fireplace shelf maintain a sleek profile. - Artistic wallpaper adds depth and texture, while the intentional lack of extensive shelving keeps the space open and distinct.
- Sam transformed the dining area’s blank wall into a feature, adding a unique dry bar with counter space, open shelves, cabinet storage and a beverage fridge. - - - Wallpaper behind and above the bar contributes to the area’s personality. A mirror adds depth while pendant lights add style and visual interest.
Relocating the cooktop to the back wall facilitates hidden ventilation, reducing visual clutter. Sam balanced transitional and modern elements for a contemporary yet comfortable feel. The digital control panel on the convection cooktop maintains a sleek look, while the wall oven is now at an easy-to-use height. ----- Mirrored base cabinet fronts and a paneled fridge prevent cabinetry monotony.
The redesign has delighted Sam’s client, achieving her main goal of creating a more inviting and visually appealing space. Each section now has its own visual personality and functionality while harmonizing within a monochromatic palette. The entire floor offers wow-factor pop upon first glance, with each area maintaining its distinct character while contributing to a cohesive, modern aesthetic.
 THE Remodel Group
Creating space for a loved one doesn't always mean building a new home from the ground up. For this Southeast Portland garage conversion, the goal was simple but deeply personal: transform a detached garage into a comfortable guest cottage where a family member could live independently while remaining closely connected to the people she loves.
The existing home presented challenges for long-term living, including stairs and limited accessibility. At the same time, the family wanted to provide privacy, dignity, and the comforts of home rather than simply adding another bedroom to the main house. The answer was hiding in plain sight: a detached garage with untapped potential.
While the structure offered opportunity, it also came with significant constraints. A structural concrete block wall, neighboring retaining wall, and compact footprint left little room for expansion. With just 480 square feet to work with, every inch needed to serve a purpose.
The design process began by focusing on how the space would be lived in rather than how it would look. Multiple floor plan options were explored before arriving at a layout that balances sleeping, cooking, crafting, relaxing, and storage within a bright, welcoming studio environment. Soft blue accents, warm walnut-toned flooring, cream tile, white countertops, and crisp trim create an aesthetic that feels calm, timeless, and intentionally residential rather than utilitarian.
One of the most dramatic transformations came from replacing the original garage door with a wall of windows. Natural light now floods the interior, visually expanding the space and creating a stronger connection to the surrounding garden. Additional windows provide cross ventilation, keeping the cottage bright and comfortable throughout the year.
The material palette was intentionally selected to feel calm, timeless, and residential. Soft blue tones appear throughout the cottage, complemented by light walnut flooring, white countertops, cream tile, and crisp white trim. Together, these finishes create a warm and inviting environment that feels thoughtfully designed rather than utilitarian.
Thoughtful storage solutions help the cottage live larger than its footprint. A spacious bedroom closet, living room storage, full-height bathroom shelving, and carefully planned kitchen cabinetry keep daily essentials organized and out of sight. A built-in desk with integrated cabinetry provides a dedicated space for crafting, sewing, and spending time with grandchildren, reflecting how important hobbies and family connections are to everyday life.
A compact kitchenette, partial privacy wall, and quiet mini-split heating and cooling system complete the home, while a new concrete pathway connects the cottage to the main house for safe and convenient access year-round.
What makes this project special is not simply the garage conversion itself, but the life it makes possible. Through thoughtful space planning, universal design principles, and a collaborative design-build approach, a former garage became a warm, independent retreat that supports aging in place while keeping family close. The result is a cottage that feels less like a conversion and more like a home that was always meant to be there.
 THE Remodel Group
Creating space for a loved one doesn't always mean building a new home from the ground up. For this Southeast Portland garage conversion, the goal was simple but deeply personal: transform a detached garage into a comfortable guest cottage where a family member could live independently while remaining closely connected to the people she loves.
The existing home presented challenges for long-term living, including stairs and limited accessibility. At the same time, the family wanted to provide privacy, dignity, and the comforts of home rather than simply adding another bedroom to the main house. The answer was hiding in plain sight: a detached garage with untapped potential.
While the structure offered opportunity, it also came with significant constraints. A structural concrete block wall, neighboring retaining wall, and compact footprint left little room for expansion. With just 480 square feet to work with, every inch needed to serve a purpose.
The design process began by focusing on how the space would be lived in rather than how it would look. Multiple floor plan options were explored before arriving at a layout that balances sleeping, cooking, crafting, relaxing, and storage within a bright, welcoming studio environment. Soft blue accents, warm walnut-toned flooring, cream tile, white countertops, and crisp trim create an aesthetic that feels calm, timeless, and intentionally residential rather than utilitarian.
One of the most dramatic transformations came from replacing the original garage door with a wall of windows. Natural light now floods the interior, visually expanding the space and creating a stronger connection to the surrounding garden. Additional windows provide cross ventilation, keeping the cottage bright and comfortable throughout the year.
The material palette was intentionally selected to feel calm, timeless, and residential. Soft blue tones appear throughout the cottage, complemented by light walnut flooring, white countertops, cream tile, and crisp white trim. Together, these finishes create a warm and inviting environment that feels thoughtfully designed rather than utilitarian.
Thoughtful storage solutions help the cottage live larger than its footprint. A spacious bedroom closet, living room storage, full-height bathroom shelving, and carefully planned kitchen cabinetry keep daily essentials organized and out of sight. A built-in desk with integrated cabinetry provides a dedicated space for crafting, sewing, and spending time with grandchildren, reflecting how important hobbies and family connections are to everyday life.
A compact kitchenette, partial privacy wall, and quiet mini-split heating and cooling system complete the home, while a new concrete pathway connects the cottage to the main house for safe and convenient access year-round.
What makes this project special is not simply the garage conversion itself, but the life it makes possible. Through thoughtful space planning, universal design principles, and a collaborative design-build approach, a former garage became a warm, independent retreat that supports aging in place while keeping family close. The result is a cottage that feels less like a conversion and more like a home that was always meant to be there.
 Drury Design
THE SETUP
Sam’s client had lived in her downtown townhome home for less than a year when she decided to remodel the spacious second level. This open area consisted of three sections: a TV and fireplace zone, a sparsely furnished dining area, and a dominant central kitchen. The kitchen featured a long back wall with three segmented sections and a massive island housing the cooktop. She found the kitchen’s functionality lacking and its presence overwhelming – it dominated the entire floor, regardless of where you stood.
Design objectives:
- Reconfigure key kitchen elements (sink, cooktop, oven) while minimizing the kitchen’s visual impact
- Optimize the kitchen’s back wall, eliminating existing dead space
- Create a purposeful, well-defined dining area
- Establish a distinct, comfortable living area
- Reuse existing appliances and flooring
- Maintain an overall modern design aesthetic
THE REMODEL
Design challenges to be solved:
- Redesign the island to reduce its overwhelming presence
- Create a comfortable, dedicated living room within the available space
- Establish a distinct, inviting dining area within spatial constraints
- Enhance kitchen functionality and style without dominating the entire floor
THE RENEWED SPACE
Design solutions:
- Sam created raised end caps for the island. This separated the kitchen from adjacent living and dining areas while focusing the kitchen’s functionality. The new sink location offers ample workspace, allowing the cook to interact with guests seated at the island. The redesigned island also provides additional storage.
- For the living area, Sam opted for a functional-yet-minimalist approach. Large-format tile creates a natural stone look for the fireplace and TV wall. The recessed TV and extended fireplace shelf maintain a sleek profile. - Artistic wallpaper adds depth and texture, while the intentional lack of extensive shelving keeps the space open and distinct.
- Sam transformed the dining area’s blank wall into a feature, adding a unique dry bar with counter space, open shelves, cabinet storage and a beverage fridge. - - - Wallpaper behind and above the bar contributes to the area’s personality. A mirror adds depth while pendant lights add style and visual interest.
Relocating the cooktop to the back wall facilitates hidden ventilation, reducing visual clutter. Sam balanced transitional and modern elements for a contemporary yet comfortable feel. The digital control panel on the convection cooktop maintains a sleek look, while the wall oven is now at an easy-to-use height. ----- Mirrored base cabinet fronts and a paneled fridge prevent cabinetry monotony.
The redesign has delighted Sam’s client, achieving her main goal of creating a more inviting and visually appealing space. Each section now has its own visual personality and functionality while harmonizing within a monochromatic palette. The entire floor offers wow-factor pop upon first glance, with each area maintaining its distinct character while contributing to a cohesive, modern aesthetic.
 Drury Design
THE SETUP
Sam’s client had lived in her downtown townhome home for less than a year when she decided to remodel the spacious second level. This open area consisted of three sections: a TV and fireplace zone, a sparsely furnished dining area, and a dominant central kitchen. The kitchen featured a long back wall with three segmented sections and a massive island housing the cooktop. She found the kitchen’s functionality lacking and its presence overwhelming – it dominated the entire floor, regardless of where you stood.
Design objectives:
- Reconfigure key kitchen elements (sink, cooktop, oven) while minimizing the kitchen’s visual impact
- Optimize the kitchen’s back wall, eliminating existing dead space
- Create a purposeful, well-defined dining area
- Establish a distinct, comfortable living area
- Reuse existing appliances and flooring
- Maintain an overall modern design aesthetic
THE REMODEL
Design challenges to be solved:
- Redesign the island to reduce its overwhelming presence
- Create a comfortable, dedicated living room within the available space
- Establish a distinct, inviting dining area within spatial constraints
- Enhance kitchen functionality and style without dominating the entire floor
THE RENEWED SPACE
Design solutions:
- Sam created raised end caps for the island. This separated the kitchen from adjacent living and dining areas while focusing the kitchen’s functionality. The new sink location offers ample workspace, allowing the cook to interact with guests seated at the island. The redesigned island also provides additional storage.
- For the living area, Sam opted for a functional-yet-minimalist approach. Large-format tile creates a natural stone look for the fireplace and TV wall. The recessed TV and extended fireplace shelf maintain a sleek profile. - Artistic wallpaper adds depth and texture, while the intentional lack of extensive shelving keeps the space open and distinct.
- Sam transformed the dining area’s blank wall into a feature, adding a unique dry bar with counter space, open shelves, cabinet storage and a beverage fridge. - - - Wallpaper behind and above the bar contributes to the area’s personality. A mirror adds depth while pendant lights add style and visual interest.
Relocating the cooktop to the back wall facilitates hidden ventilation, reducing visual clutter. Sam balanced transitional and modern elements for a contemporary yet comfortable feel. The digital control panel on the convection cooktop maintains a sleek look, while the wall oven is now at an easy-to-use height. ----- Mirrored base cabinet fronts and a paneled fridge prevent cabinetry monotony.
The redesign has delighted Sam’s client, achieving her main goal of creating a more inviting and visually appealing space. Each section now has its own visual personality and functionality while harmonizing within a monochromatic palette. The entire floor offers wow-factor pop upon first glance, with each area maintaining its distinct character while contributing to a cohesive, modern aesthetic.
 THE Remodel Group
Creating space for a loved one doesn't always mean building a new home from the ground up. For this Southeast Portland garage conversion, the goal was simple but deeply personal: transform a detached garage into a comfortable guest cottage where a family member could live independently while remaining closely connected to the people she loves.
The existing home presented challenges for long-term living, including stairs and limited accessibility. At the same time, the family wanted to provide privacy, dignity, and the comforts of home rather than simply adding another bedroom to the main house. The answer was hiding in plain sight: a detached garage with untapped potential.
While the structure offered opportunity, it also came with significant constraints. A structural concrete block wall, neighboring retaining wall, and compact footprint left little room for expansion. With just 480 square feet to work with, every inch needed to serve a purpose.
The design process began by focusing on how the space would be lived in rather than how it would look. Multiple floor plan options were explored before arriving at a layout that balances sleeping, cooking, crafting, relaxing, and storage within a bright, welcoming studio environment. Soft blue accents, warm walnut-toned flooring, cream tile, white countertops, and crisp trim create an aesthetic that feels calm, timeless, and intentionally residential rather than utilitarian.
One of the most dramatic transformations came from replacing the original garage door with a wall of windows. Natural light now floods the interior, visually expanding the space and creating a stronger connection to the surrounding garden. Additional windows provide cross ventilation, keeping the cottage bright and comfortable throughout the year.
The material palette was intentionally selected to feel calm, timeless, and residential. Soft blue tones appear throughout the cottage, complemented by light walnut flooring, white countertops, cream tile, and crisp white trim. Together, these finishes create a warm and inviting environment that feels thoughtfully designed rather than utilitarian.
Thoughtful storage solutions help the cottage live larger than its footprint. A spacious bedroom closet, living room storage, full-height bathroom shelving, and carefully planned kitchen cabinetry keep daily essentials organized and out of sight. A built-in desk with integrated cabinetry provides a dedicated space for crafting, sewing, and spending time with grandchildren, reflecting how important hobbies and family connections are to everyday life.
A compact kitchenette, partial privacy wall, and quiet mini-split heating and cooling system complete the home, while a new concrete pathway connects the cottage to the main house for safe and convenient access year-round.
What makes this project special is not simply the garage conversion itself, but the life it makes possible. Through thoughtful space planning, universal design principles, and a collaborative design-build approach, a former garage became a warm, independent retreat that supports aging in place while keeping family close. The result is a cottage that feels less like a conversion and more like a home that was always meant to be there.
 Advance Design Studio, Ltd.
Our clients in Tower Lakes, IL, needed more storage and functionality from their kitchen. They were primarily focused on finding the right combination of cabinets, shelves, and drawers that fit all their cookware, flatware, and appliances. They wanted a brighter, bigger space with a natural cooking flow and plenty of storage. Soffits and crown molding needed to be removed to make the kitchen feel larger. Redesign elements included: relocating the fridge, adding a baking station and coffee bar, and placing the microwave in the kitchen island.
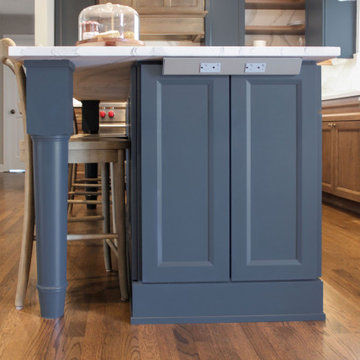
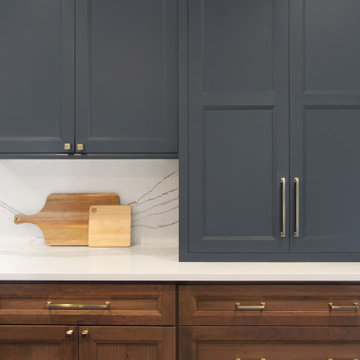
Advance Design Studio’s Claudia Pop offered functional, creative, and unique solutions to the homeowners’ problems. Our clients wanted a unique kitchen that was not completely white, a balance of design and function. Claudia offered functional, creative, and unique solutions to Chad and Karen’s kitchen design challenges. The first thing to go was soffits. Today, most kitchens can benefit from the added height and space; removing soffits is nearly always step one. Steely gray-blue was the color of choice for a freshly unique look bringing a sophisticated-looking space to wrap around the fresh new kitchen. Cherry cabinetry in a true brown stain compliments the stormy accents with sharp contrasting white Cambria quartz top balancing out the space with a dramatic flair.
“We wanted something unique and special in this space, something none of the neighbors would have,” said Claudia.
The dramatic veined Cambria countertops continue upward into a backsplash behind three complimentary open shelves. These countertops provide visual texture and movement in the kitchen. The kitchen includes two larder cabinets for both the coffee bar and baking station. The kitchen is now functional and unique in design.
“When we design a new kitchen space, as designers, we are always looking for ways to balance interesting design elements with practical functionality,” Claudia said. “This kitchen’s new design is not only way more functional but is stunning in a way a piece of art can catch one’s attention.”
Decorative mullions with mirrored inserts sit atop dual sentinel pantries flanking the new refrigerator, while a 48″ dual fuel Wolf range replaced the island cooktop and double oven. The new microwave is cleverly hidden within the island, eliminating the cluttered counter and attention-grabbing wall of stainless steel from the previous space.
The family room was completely renovated, including a beautifully functional entertainment bar with the same combination of woods and stone as the kitchen and coffee bar. Mesh inserts instead of plain glass add visual texture while revealing pristine glassware. Handcrafted built-ins surround the fireplace.
The beautiful and efficient design created by designer Claudia transitioned directly to the installation team seamlessly, much like the basement project experience Chad and Karen enjoyed previously.
“We definitely will and have recommended Advance Design Studio to friends who are looking to embark on a project small or large,” Karen said.
“Everything that was designed and built exactly how we envisioned it, and we are really enjoying it to its full potential,” Karen said.
Our award-winning design team would love to create a beautiful, functional, and spacious place for you and your family. With our “Common Sense Remodeling” approach, the process of renovating your home has never been easier. Contact us today at 847-665-1711 or schedule an appointment.
 Advance Design Studio, Ltd.
Our clients in Tower Lakes, IL, needed more storage and functionality from their kitchen. They were primarily focused on finding the right combination of cabinets, shelves, and drawers that fit all their cookware, flatware, and appliances. They wanted a brighter, bigger space with a natural cooking flow and plenty of storage. Soffits and crown molding needed to be removed to make the kitchen feel larger. Redesign elements included: relocating the fridge, adding a baking station and coffee bar, and placing the microwave in the kitchen island.
Advance Design Studio’s Claudia Pop offered functional, creative, and unique solutions to the homeowners’ problems. Our clients wanted a unique kitchen that was not completely white, a balance of design and function. Claudia offered functional, creative, and unique solutions to Chad and Karen’s kitchen design challenges. The first thing to go was soffits. Today, most kitchens can benefit from the added height and space; removing soffits is nearly always step one. Steely gray-blue was the color of choice for a freshly unique look bringing a sophisticated-looking space to wrap around the fresh new kitchen. Cherry cabinetry in a true brown stain compliments the stormy accents with sharp contrasting white Cambria quartz top balancing out the space with a dramatic flair.
“We wanted something unique and special in this space, something none of the neighbors would have,” said Claudia.
The dramatic veined Cambria countertops continue upward into a backsplash behind three complimentary open shelves. These countertops provide visual texture and movement in the kitchen. The kitchen includes two larder cabinets for both the coffee bar and baking station. The kitchen is now functional and unique in design.
“When we design a new kitchen space, as designers, we are always looking for ways to balance interesting design elements with practical functionality,” Claudia said. “This kitchen’s new design is not only way more functional but is stunning in a way a piece of art can catch one’s attention.”
Decorative mullions with mirrored inserts sit atop dual sentinel pantries flanking the new refrigerator, while a 48″ dual fuel Wolf range replaced the island cooktop and double oven. The new microwave is cleverly hidden within the island, eliminating the cluttered counter and attention-grabbing wall of stainless steel from the previous space.
The family room was completely renovated, including a beautifully functional entertainment bar with the same combination of woods and stone as the kitchen and coffee bar. Mesh inserts instead of plain glass add visual texture while revealing pristine glassware. Handcrafted built-ins surround the fireplace.
The beautiful and efficient design created by designer Claudia transitioned directly to the installation team seamlessly, much like the basement project experience Chad and Karen enjoyed previously.
“We definitely will and have recommended Advance Design Studio to friends who are looking to embark on a project small or large,” Karen said.
“Everything that was designed and built exactly how we envisioned it, and we are really enjoying it to its full potential,” Karen said.
Our award-winning design team would love to create a beautiful, functional, and spacious place for you and your family. With our “Common Sense Remodeling” approach, the process of renovating your home has never been easier. Contact us today at 847-665-1711 or schedule an appointment.

 Daniel Scerri Periti
We were approached with a request to design the furnishings for an existing ‘finished’ apartment. The intention was to move in relatively fast, and the property already had an existing marble floor, kitchen and bathrooms which had to be kept. The property also boasted a fantastic 270 degree view, seen from most of the apartment. The clients had a very important role in the completion of the project. They were very involved during the design process and through various decoration choices. The final design was kept as a rigid guideline when faced with picking out all the different elements.
Once clear of all previous furniture, the space felt cold and bare; so we immediately felt the need for warmth, and raw, natural elements and textures to complement the cold marble floor while visually tying in the design of the whole apartment together.
Since the existing kitchen had a touch of dark walnut stain, we felt this material was one we should add to the palette of materials to contest the stark materials. A raw cement finish was another material we felt would add an interesting contrast and could be used in a variety of ways, from cabinets to walls and ceilings, to tie up the design of various areas of the apartment.
To warm up the living/dining area, keeping the existing marble floor but visually creating zones within the large living/dining area without hindering the flow, a dark timber custom-made soffit, continuous with a floor-to-ceiling drinks cabinet zones the dining area, giving it a degree of much-needed warmth.
The various windows with a stupendous 270 degree view needed to be visually tied together. This was done by introducing a continuous sheer [drape] which also doubled up as a sound-absorbing material along 2 of the 4 walls of the space.
A very large sofa was required to fill up the space correctly, also required for the size of the young family.
Services were integrated within the units and soffits, while a customized design in the corner between the kitchen and the living room took into consideration the viewpoints from the main areas to create a pantry without hindering the flow or views. A strategically placed floor-to-ceiling mirror doubles up the space and extends the view to the inner parts of the apartment.
The daughter’s bedroom was a small challenge in itself, and a fun task, where we wanted to achieve the perception of a cozy niche with its own enclosed reading nook [for reading fairy tales], behind see-through curtains and a custom-ordered wall print sporting the girl’s favorite colors.
The sons’ bedroom had double the requirements in terms of space needed: more wardrobe, more homework desk space, a tv/play station area… “We combined a raised platform area between the boys’ beds to become an area with cushions where the kids can lay down and play, and face a hidden screen behind the homework desk’s sliding back panel for their play station”. The color of the homework desk was chosen in relation to the boys’ ages. A more masculine material palette was chosen for this room, in contrast to the light pastel palette of the girl’s bedroom. Again, this colour can easily be changed over time for a more mature look.
PROJECT DATA:
St. Paul’s Bay, Malta
DESIGN TEAM:
Perit Rebecca Zammit, Perit Daniel Scerri, Elyse Tonna
OTHER CREDITS:
Photography: Tonio Lombardi
Styling : TKS
 Advance Design Studio, Ltd.
Our clients in Tower Lakes, IL, needed more storage and functionality from their kitchen. They were primarily focused on finding the right combination of cabinets, shelves, and drawers that fit all their cookware, flatware, and appliances. They wanted a brighter, bigger space with a natural cooking flow and plenty of storage. Soffits and crown molding needed to be removed to make the kitchen feel larger. Redesign elements included: relocating the fridge, adding a baking station and coffee bar, and placing the microwave in the kitchen island.
Advance Design Studio’s Claudia Pop offered functional, creative, and unique solutions to the homeowners’ problems. Our clients wanted a unique kitchen that was not completely white, a balance of design and function. Claudia offered functional, creative, and unique solutions to Chad and Karen’s kitchen design challenges. The first thing to go was soffits. Today, most kitchens can benefit from the added height and space; removing soffits is nearly always step one. Steely gray-blue was the color of choice for a freshly unique look bringing a sophisticated-looking space to wrap around the fresh new kitchen. Cherry cabinetry in a true brown stain compliments the stormy accents with sharp contrasting white Cambria quartz top balancing out the space with a dramatic flair.
“We wanted something unique and special in this space, something none of the neighbors would have,” said Claudia.
The dramatic veined Cambria countertops continue upward into a backsplash behind three complimentary open shelves. These countertops provide visual texture and movement in the kitchen. The kitchen includes two larder cabinets for both the coffee bar and baking station. The kitchen is now functional and unique in design.
“When we design a new kitchen space, as designers, we are always looking for ways to balance interesting design elements with practical functionality,” Claudia said. “This kitchen’s new design is not only way more functional but is stunning in a way a piece of art can catch one’s attention.”
Decorative mullions with mirrored inserts sit atop dual sentinel pantries flanking the new refrigerator, while a 48″ dual fuel Wolf range replaced the island cooktop and double oven. The new microwave is cleverly hidden within the island, eliminating the cluttered counter and attention-grabbing wall of stainless steel from the previous space.
The family room was completely renovated, including a beautifully functional entertainment bar with the same combination of woods and stone as the kitchen and coffee bar. Mesh inserts instead of plain glass add visual texture while revealing pristine glassware. Handcrafted built-ins surround the fireplace.
The beautiful and efficient design created by designer Claudia transitioned directly to the installation team seamlessly, much like the basement project experience Chad and Karen enjoyed previously.
“We definitely will and have recommended Advance Design Studio to friends who are looking to embark on a project small or large,” Karen said.
“Everything that was designed and built exactly how we envisioned it, and we are really enjoying it to its full potential,” Karen said.
Our award-winning design team would love to create a beautiful, functional, and spacious place for you and your family. With our “Common Sense Remodeling” approach, the process of renovating your home has never been easier. Contact us today at 847-665-1711 or schedule an appointment.
 William Hoffman Architect
4 Steps to Achieving a Rewarding Cost Effective Home Renovation
1 Home Renovation an Introduction
A home renovation due to changes in family needs and space requirements can be a challenging, but also a rewarding experience. As a homeowner, gathering and coordinating resources and possibly help from professional consultants are required. Once the construction phase has started, patience, endurance and commitment to follow through are necessary. Despite the challenges, the rewards of a well-planned and successfully completed project are meaningful, adding aesthetic and economic value, also providing the opportunity to personalize a home, encompassing the function, comfort and aesthetics to accommodate individual taste and lifestyle.
A renovation of an existing home is a viable alternative to moving or building a new home, assuming that a home is structurally sound, the expenditure to enlarge or improve can be a cost effective alternative. A home possessing charm, style, historical significance, established landscaping or an exceptional location could be a significant motivation to consider purchasing another home with the intent to renovate.
The complexity of a project could be relatively simple, changing the use of a room, consolidating two rooms into one, or opening up a room to the outdoors. It could also be a more involved task requiring planning, design and construction documents to build a second floor addition, the addition of a new wing or completely gutting the interior. Some projects could be completed in a weekend’s work or more complex projects, using a “Master Plan”, a plan which provides overall guidance; a renovation can be accomplished all at once or divided into manageable projects over a period of time. With the home evolving gradually allowing the renovation to be planned, timed and tailored to meet individual needs and circumstances.
The due diligence phase should precede the decision to renovate whether it’s an existing home or a home that is purchased with the intent to renovate. The due diligence phase will reveal the factors affecting the nature and scope of the project or if a renovation makes sense.
Every renovation project is unique relative to personal requirements, architectural style & construction type. This guide will be helpful in developing an understanding of the preliminary groundwork required to realize a successful project. If properly planned, a home renovation project can be a positive and rewarding experience resulting in a comfortable, practical and an attractive living environment.
The first step of the planning process is documenting the goals and long-range plans referred to as the “Project Program”. This will dictate the nature, scope and feasibility of the project. Providing a guide to achieving defined goals, the timing or phasing of the project and budget required to achieve the desired end result.
2 Documenting Existing Conditions
Once the “Project Program”, has been established, the next step is to determine what there is to work with. This requires documenting the home’s floor plan and site elements which includes drawing an “as built” floor & site plan consisting of the existing exterior walls, interior rooms, doors, windows, etc. and surrounding site elements, landscape and other significant exterior features. Additionally understanding and noting on the “as built” plan, the structural, mechanical and electrical systems as necessary. Gathering the “existing condition” information defines what there is to work with, creating the framework from which to facilitate and organize the decision making process and develop effective “project program” solutions.
3 Evaluating Existing Conditions
The goals and long-range plans have been established, and the existing floor plan and site elements have been documented. Before developing design solutions, the next step is to evaluate existing conditions. The evaluation includes: a detailed analysis of the structural, mechanical and electrical systems, determining the condition of the house, noting functional and aesthetic deficiencies. At the same time recognizing the home’s strengths, assets and evaluating its relationship to its site. The remaining parameters will be defined by the local jurisdiction’s zoning regulations, these regulations will define the “envelope”, within which the proposed project will be required to fit:
•required front, side & rear yard setbacks
•maximum allowable lot coverage & height
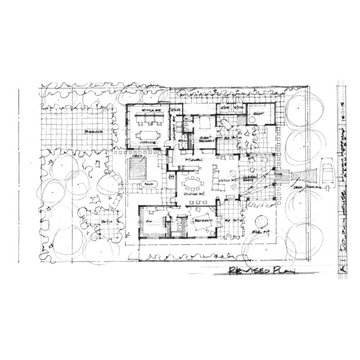
The previous three steps have provided the necessary foundation to start the design phase. The goals and long range plans have been established, existing conditions have been documented and the evaluation of what there is to work with are now in place. This will provide the framework from which to facilitate and organize design solutions. The consolidation of this information is manifested in the development of the “Master Plan” which will become the road map by which sound decision-making can be made as a home renovation evolves. Keeping the project, on a linear path, avoiding redundancies and back tracking, on time, within budget, concluding with a well crafted finished product. After all the “up front” research and documentation has been completed, the design phase of the project can now precede, with the creation of diagrammatic design drawings. Organizing interior spaces, taking into account the external elements, prevailing breezes, solar orientation, view, existing outdoor features, etc. Through the development of schematic sketches themes will emerge followed by design development drawings. Wise planning and renovation decisions can save money and time at the same time provide a well crafted finished project. The “Master Plan” provides a strategic path in the planning and decision making process leading to a successful and rewarding home renovation, which will add value and considerable enjoyment, for many years, living in a newly renovated home.
By virtue of having gone through these steps, frustrations sometimes encountered during a home renovation will be minimized, allowing the renovation to be a gratifying and rewarding experience. Being aware of the process allows one to become an “Educated Client,” which is worth quite a bit more than one might realize. The uneducated client may not realize the benefit of going through the planning, evaluation and documentation groundwork. He will only realize its benefits after having completed a prior renovation project. This rational approach keeps the design process on a direct path to achieving prescribed goals.
4 Exploring Design Solutions & Developing a Master Plan
The previous three steps have provided the necessary foundation to start the design phase. The goals and long range plans have been established, existing conditions have been documented and the evaluation of what there is to work with are now in place. This will provide the framework from which to facilitate and organize design solutions. The consolidation of this information is manifested in the development of the “Master Plan” which will become the road map by which sound decision-making can be made as a home renovation evolves. Keeping the project, on a linear path, avoiding redundancies and back tracking, on time, within budget, concluding with a well crafted finished product.
By virtue of having gone through these steps, frustrations sometimes encountered during a home renovation will be minimized, allowing the renovation to be a gratifying and rewarding experience. Being aware of the process allows one to become an “Educated Client,” which is worth quite a bit more than one might realize. The uneducated client may not realize the benefit of going through the planning, evaluation and documentation groundwork. He will only realize its benefits after having completed a prior renovation project. This rational approach keeps the design process on a direct path to achieving prescribed goals.
After all the “up front” research and documentation has been completed, the design phase of the project can now precede, with the creation of diagrammatic design drawings. Organizing interior spaces, taking into account the external elements, prevailing breezes, solar orientation, view, existing outdoor features, etc. Through the development of schematic sketches themes will emerge followed by design development drawings. Wise planning and renovation decisions can save money and time at the same time provide a well crafted finished project. The “Master Plan” provides a strategic path in the planning and decision making process leading to a successful and rewarding home renovation, which will add value and considerable enjoyment, for many years, living in a newly renovated home.

 Gallery KBNY
The owner of this historic and landmarked town-home renovation in Hudson Square, originally built in 1826, hired Gallery Kitchen and Bath to fully gut-renovate this 3-unit row-home. The scope of work included a full-scale renovation of the owners unit, including the renovation of the kitchen, one 4-piece master ensuite bathroom, one 3-piece bathroom with a walk-in steam shower, and a beautiful powder room. Additional work in the owners unit also included flooring, electrical upgrade, major plumbing work, new HVAC system, restoration of a fireplace, installation of a fully integrated smart home system and landmarked approved windows.
CELLAR RENOVATION IN NYC LANDMARKED TOWN-HOME
Rounding out the owners unit we renovated the cellar, which was converted into an entertainment space and featured a custom glass curtain wall, along with a custom staircase with an exposed brick wall. During the demolition phase of the cellar, our team discovered 56 wine jugs filled with wine from the prohibition era, leading us to name this project the prohibition house. For the two tenant units, Gallery Kitchen and Bath undertook the renovation of 2 kitchens, 4 bathrooms, new hardwood flooring throughout, along with detailed carpentry work in the entire home.
WHY GALLERY KITCHEN AND BATH
After interviewing multiple contractors, our client decided on Gallery Kitchen and Bath primarily because of our turnkey design, selection, and build process. In a renovation of this magnitude it is crucial to have a centralized full service contractor under one roof to handle all of the aspects and simultaneous moving parts of the project. Decentralizing the entire process by having multiple unaffiliated vendors handle various parts of the process can easily become chaotic, time consuming, and costly.
Because Gallery Kitchen and Bath undertook the entire process, from the design of the entire space to the selection and procurement of all finishes and fixtures, down to the procurement of all permits and LPC filings, it made a seemingly chaotic project a’lot more manageable.
PHASE 1: DESIGN, SELECTION, PROCUREMENT
Our client wanted the renovation to incorporate a fully modern design into his Hudson Square town-house. Being that this is a landmarked property, the exterior facade had to be restored and kept with the original aesthetic, the interior of the home however was a whole different story.
In keeping up with the modern aesthetic, our designers went to work to design a custom kitchen that included fully custom flat panel base cabinets in a white high gloss finish and an absolute matte black appliance/pantry wall. The kitchen design also included a white quartz countertop and backsplash with a waterfall edge island. To bring warmth to the modern kitchen, our designers incorporated a rifted and quartered select oak wood floor in a herringbone pattern, and custom blended stain with matte polyurethane finish. For continuity, the wood floor was also extended throughout the entire owners unit.
In the ensuite bathroom we created a “wet area” which houses a standalone soaking tub as well as a beautiful rainfall shower, completely leveled with the rest of the floor in the bathroom. Some highlights within this space include a tiled square drain, large niche cutouts with a carrera marble accents. Once again, to bring warmth to this modern bathroom, our designers incorporated a floating rustic oak vanity and carrera marble mosaic floor tile.
Last on the list on the owners unit floor was the cellar, which our client wanted to utilize as an entertainment space for his friends and family. During the design phase, we incorporated an open concept layout, wedding the indoor and outdoor space with a custom glass curtain wall. The design also included custom walnut built-ins that serve as a custom wet bar and storage piece.
With the design approved and selections made our office liaisons moved to procure all of the material selections and finishes.
PHASE 2: DEMO
Because this home is almost two centuries old, we had to take extra precaution during the interior demolition phase of the project. One specific area that we had to pay special attention to was the existing brick. Over time the mortar in old brick homes deteriorates and turns into dust – for this reason it was extremely important that a thorough and ongoing inspection of the exteriors and interior walls took place during the demolition of the space.
After 14 30-yard debris containers and 56 wine filled jugs from the prohibition era later , the demolition of this historic Hudson Square town-home came to an end. If you are wondering whether we tried the wine? After notifying the owner we agreed to open one of the jugs and try them together – nothing but vinegar.
PHASE 3: BUILD
One of the challenges in a renovation project of this scope is nailing down the logistics and delivery of fixtures and finish material. Adding to this challenge was a narrow entry door that required us to use a boom truck in order to deliver some of the larger materials on site. To ensure a succinct time schedule, we boomed all of the materials through the 3rd floor for the entire project and worked our renovation work from top floor to cellar. This technique also insured that any unexpected water issues during the renovation process would not damage a finished floor.
With all roughing and framing complete, the Gallery KBNY team proceeded to execute on the design plan.
THE REVEAL
From what was once a dilapidated town-home with nothing but potential, to a glamorous and luxurious modern interior space – the prohibition house was complete. Ready to speak with us about your renovation project? Contact us to schedule your free consultation and let Gallery KBNY show you why our all-inclusive approach to your renovation is the smartest way to renovating in NYC.
95