
Search results for "Attach effectively" in Home Design Ideas
 Moss Yaw Design studio
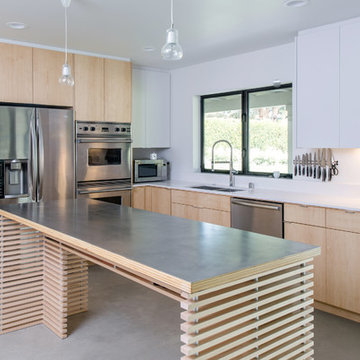
Full-height maple cabinets with painted white upper cabinets at either side frame the unique custom slatted wood and aluminum kitchen island.
Jimmy Cheng Photography
 Barron Designs
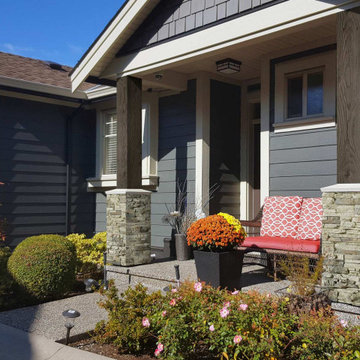
Transform your mundane post with cost effective faux wood column covers from Barron Designs. Crafted by hand in the US from real wood so they look extremely realistic. Barron Designs crafts our decorative wood column wraps by hand mitering and assembling 3 sides of the column. The 4th side is not attached, making it easy to slip the U-shaped piece around a structural beam then attach the 4th side using adhesive and/or finish nails. Optional base and crown moulding is available for a stunning finishing touch.
 Barron Designs
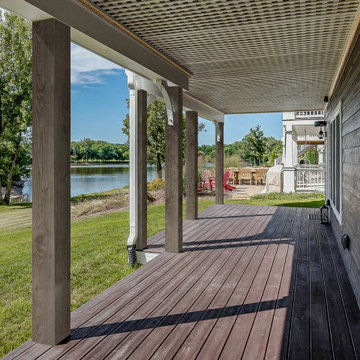
Transform your mundane post with cost effective faux wood column covers from Barron Designs. Crafted by hand in the US from real wood so they look extremely realistic. Barron Designs crafts our decorative wood column wraps by hand mitering and assembling 3 sides of the column. The 4th side is not attached, making it easy to slip the U-shaped piece around a structural beam then attach the 4th side using adhesive and/or finish nails. Optional base and crown moulding is available for a stunning finishing touch.
Find the right local pro for your project
 Barron Designs
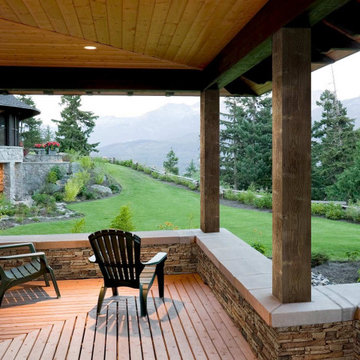
Transform your mundane post with cost effective faux wood column covers from Barron Designs. Crafted by hand in the US from real wood so they look extremely realistic. Barron Designs crafts our decorative wood column wraps by hand mitering and assembling 3 sides of the column. The 4th side is not attached, making it easy to slip the U-shaped piece around a structural beam then attach the 4th side using adhesive and/or finish nails. Optional base and crown moulding is available for a stunning finishing touch.
 SPACE LINE DESIGN ARCHITECTS
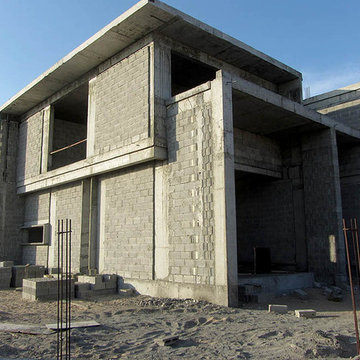
This 600sm/6500sf Mid-Century Modern villa features a unique central atrium running the length of the home, connecting the Main Entry and the Second Entry, creating a light filled, slot canyon effect.
The formal and family spaces are distinct yet still connected by this two-story central atrium, awash with a gentle filtered light from above.
There is an attached yet closed off service kitchen with attached maids quarters, linked with easy access to the 16 person formal dining room and adjacent majlis.
Upstairs are 4 bedrooms plus a separate large Master Suite, uniquely accessible by the open sided glass bridge-walk, leading to the very private Master Bedrm and the private reading nook.
We have done two color studies, one utilizing the beautifully orange rusted steel known as CorTen steel, while the other study shows a snow white EIFS exterior insulation and finish system offering super-high insulation values and zero maintenance as it never needing painting and it never cracks! (one of our favorite exterior finishes~ especially in hot climates!)
 Gailani Designs Inc.
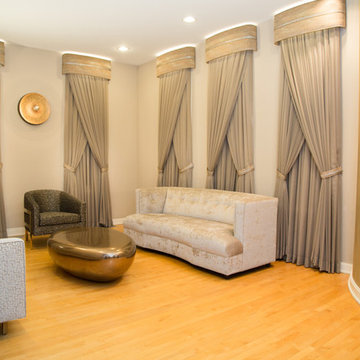
With sleek, contemporary styling, the living room boasts a curved wall with a textural copper-and-silver finish and five very tall, narrow windows. The room itself was all the inspiration I needed to envision big, bold and bright decorative hardware and trim, but the modern furniture and the eye-catching metallic-copper coffee table provided additional inspiration.
Because the clients don’t like floor lamps and because they entertain frequently, I suggested back-lit crowns to reflect light off the ceiling. They loved the idea, but then came the challenge.
Incorporating LED lighting in the design sounded easy enough, but a certified electrician had to be consulted to ensure safety and security. After spending considerable time learning about installing lights within the crowns, I set about designing how the lights needed to be placed to have the most dramatic effect.
Two rows of lights were installed. The upper row shines upward to create a curved light on the ceiling, which enhances the height of the windows, creates a rhythm suggestive of the curve of the accent wall, and mimics the pebble-like shape of the table. The second row of lights shine downward, creating beams of light on the drapery sheer for dramatic effect and helping illuminate the room. Dimmer switches were installed so the clients can adjust brightness.
A decorative trim of diamond crystals was attached to the center of the crowns to create visual interest and add a touch of luxury – a detail that was repeated on the tiebacks. The sheer draperies hanging under the crowns are very close in color to the walls, reducing the contrast between the wall and the draperies, which helps give the room a more open and expansive look and feel.
The clients are delighted with the end result and said that when visitors see the room for the first time, they never fail to comment on the amazing lights in the window treatments.
 Barron Designs
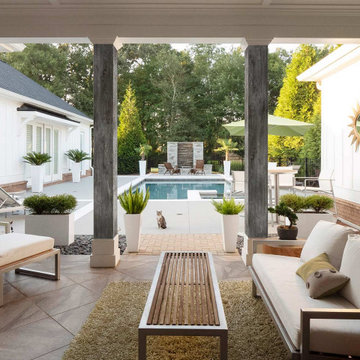
Transform your mundane post with cost effective faux wood column covers from Barron Designs. Crafted by hand in the US from real wood so they look extremely realistic. Barron Designs crafts our decorative wood column wraps by hand mitering and assembling 3 sides of the column. The 4th side is not attached, making it easy to slip the U-shaped piece around a structural beam then attach the 4th side using adhesive and/or finish nails. Optional base and crown moulding is available for a stunning finishing touch.

Sponsored
Sunbury, OH

J.Holderby - Renovations
Franklin County's Leading General Contractors - 2X Best of Houzz!
 Inviniti Cellar Design
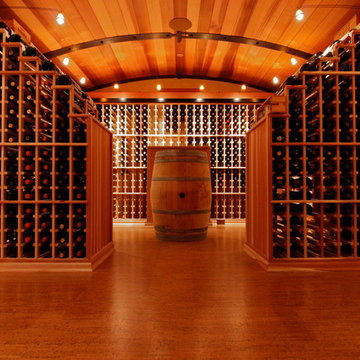
A wine cellar that literally takes your breath away when you walk through the door. The Barrel ceiling with custom forged staves takes you inside the barrel. The Waterfall racking on both sides gives dimension to the room with a wine barrel as the focal point. The lighting valance around the room supports the lighting which illuminates that warm glow. A cork floor provides a unique look as well as protection for those bottles that may accidentally fall. The back of the custom door was completely covered by corks. The pull out computer drawer supports the computer inventory system attached to the individual metal wine tags attached to the racking. Photo taken by Inviniti Cellar Design
taken by Inviniti Cellar Design
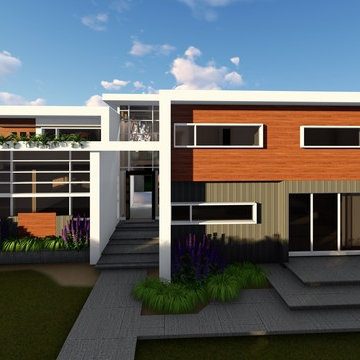 SPACE LINE DESIGN ARCHITECTS
This 600sm/6500sf Mid-Century Modern villa features a unique central atrium running the length of the home, connecting the Main Entry and the Second Entry, creating a light filled, slot canyon effect.
The formal and family spaces are distinct yet still connected by this two-story central atrium, awash with a gentle filtered light from above.
There is an attached yet closed off service kitchen with attached maids quarters, linked with easy access to the 16 person formal dining room and adjacent majlis.
Upstairs are 4 bedrooms plus a separate large Master Suite, uniquely accessible by the open sided glass bridge-walk, leading to the very private Master Bedrm and the private reading nook.
We have done two color studies, one utilizing the beautifully orange rusted steel known as CorTen steel, while the other study shows a snow white EIFS exterior insulation and finish system offering super-high insulation values and zero maintenance as it never needing painting and it never cracks! (one of our favorite exterior finishes~ especially in hot climates!)
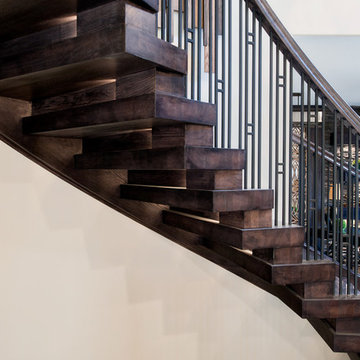
 Custom Newel Posts
The designers of this home brought us a real challenge; to build a unsupported curved stair that looks like stacked lumber. We believe this solid oak curved stair meets that challenge. LED lighting adds a modern touch to a rustic project. The widening effect at the bottom of the stair creates a welcoming impression. Our innovative design creates a look that floats on air.
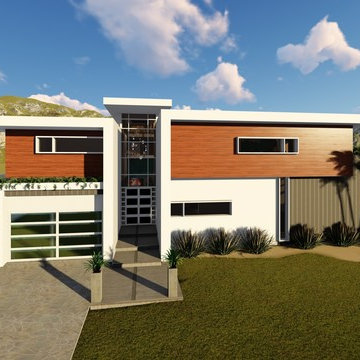 SPACE LINE DESIGN ARCHITECTS
This 600sm/6500sf Mid-Century Modern villa features a unique central atrium running the length of the home, connecting the Main Entry and the Second Entry, creating a light filled, slot canyon effect.
The formal and family spaces are distinct yet still connected by this two-story central atrium, awash with a gentle filtered light from above.
There is an attached yet closed off service kitchen with attached maids quarters, linked with easy access to the 16 person formal dining room and adjacent majlis.
Upstairs are 4 bedrooms plus a separate large Master Suite, uniquely accessible by the open sided glass bridge-walk, leading to the very private Master Bedrm and the private reading nook.
We have done two color studies, one utilizing the beautifully orange rusted steel known as CorTen steel, while the other study shows a snow white EIFS exterior insulation and finish system offering super-high insulation values and zero maintenance as it never needing painting and it never cracks! (one of our favorite exterior finishes~ especially in hot climates!)
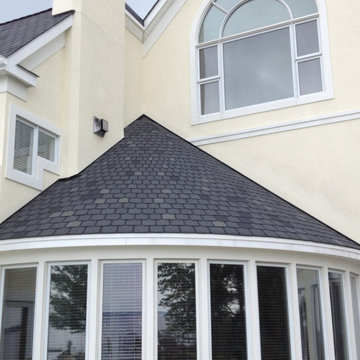
 Columbia Roofing Inc.
Mr. Mescher – Home Owner Shares Story
“I wanted to take this opportunity to tell you that I am extremely pleased with the work that Columbia Roofing did in replacing the roof on our Kent Island home. The house has a complicated roof structure with multiple gables and a quarter round conical roof which spans between two vertical walls in the back. We choose a 50 year Owens Corning shingle and to assure a good job, we only obtained quotes from roofing companies that received outstanding reviews.
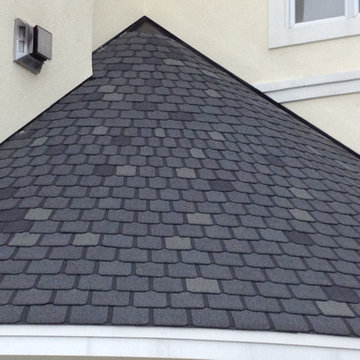
We were pleased when the Columbia production crew roofed the house without issue and brought the full visual effect of slate using the 4 tab asphalt shingle with its distinctive keyway.
When it came to the conical roof, we were faced with the possibility of having to install a metal roof in lieu of maintaining the slate like appearance that was so prominent on the other roof sections of the house. Our preference was to maintain the appearance of slate on the conical section similar to that seen on the old slate roof cathedrals. While this is easy to say, I can now appreciate how difficult it is to do.
To honor our wishes, Ben Alsop came to the house and worked through the complicated layout necessary to use the same 4 tab shingles on the conical section. To do the job properly, every single 4 tab shingle had to be cut into individual tabs.
Each tab was then taken up on the roof where the keyway was aligned to vertical through a system of straight lines drawn from the point of the conical roof to the starter shingle at the roof’s edge. Each tab had to be cut again (often multiple times) after the tab alignment was complete. To assure the accuracy necessary to maintain the visual effect, Ben took it upon himself to personally perform the roofing of the conical section.
Ben is a manager for Columbia Roofing who no longer performs the physical roofing work after coming up through the ranks of the roofing trade. His personal dedication to getting this job done for us in a way that is simply stellar could not go without acknowledgement. Ben is not only a craftsman, he is an artisan whose skill set can clearly be seen in the pictures that I have attached.
I want to thank Columbia Roofing for a job well done and particularly I want to thank Ben for taking the time and putting in the effort to truly make this a stellar installation.”
 Windy City Painters
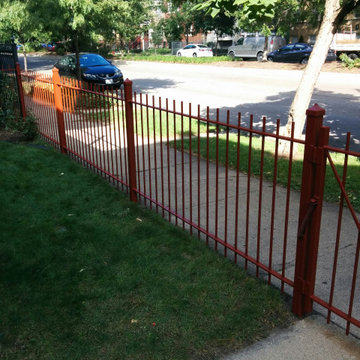
Ever notice how your iron fence looks worse every spring after another Chicago winter? That slow deterioration is not cosmetic - it is active metal failure that compounds every freeze-thaw cycle until replacement becomes the only option. Windy City Painters works with homeowners across the Chicago North Side and Near West Side to restore original iron fencing on greystones, two-flats, Victorian brownstones, and coach houses before that point is reached.
PROJECT OVERVIEW
This iron fence restoration involved a classic Chicago residential property with original wrought iron fencing showing surface rust across the majority of pickets, flaking previous paint coats, and localized deep pitting near the base rails. A structural check identified two loose pickets requiring welding before any surface preparation or coating began. Total linear footage fell in the mid-range for a standard Chicago residential lot.
MATERIALS AND PRODUCTS
Windy City Painters selected Ospho rust converter for chemically neutralizing active iron oxide before priming. Ospho reacts with rust to form a stable phosphate compound that stops corrosion progression rather than simply sealing over it. Sherwin-Williams DTM rust-inhibitive primer was applied to all bare and converted surfaces, followed by two finish coats of Rust-Oleum DTM in satin black. DTM - direct to metal - formulas provide corrosion inhibitors built into the coating matrix, which matters significantly in Chicago's climate.
THE PROCESS
Step 1 - Structural Assessment and Welding Coordination. Before any surface preparation begins, Windy City Painters inspects every picket and rail connection for structural integrity. Loose or cracked iron must be welded before coating. Paint applied over a compromised joint will fail within one season as movement continues to break the bond. On this project, two pickets were tack-welded by a coordinating welder before prep started.
Step 2 - Wire Wheel Grinding and Needle Gun Descaling. All rusted sections were ground to bare or near-bare metal using wire wheel attachments and needle gun descaling tools. This step removes loose scale, flaking previous coatings, and surface contamination that would prevent primer adhesion. Skipping mechanical prep is the single most common reason iron fence paint fails prematurely on Chicago properties.
Step 3 - Ospho Rust Converter Application. Ospho was brushed into all pitted and converted areas and allowed to cure fully. The phosphoric acid chemistry converts iron oxide into iron phosphate, arresting active rust and creating a surface that accepts primer more effectively than bare metal alone. Corroseal is an equivalent alternative used on projects with heavier pitting.
Step 4 - DTM Primer and Finish Coat Application. Sherwin-Williams DTM rust-inhibitive primer was applied across all prepared surfaces. Two topcoats of Rust-Oleum DTM in satin black followed after full primer cure. DTM finish coats add a second corrosion-inhibiting layer and provide the UV and weather resistance needed for Chicago exterior iron work.
CHICAGO-SPECIFIC CHALLENGES
Chicago iron fencing faces conditions that accelerate corrosion faster than most US markets. Lake humidity keeps metal surface moisture elevated through much of the year. Road salt splash from winter maintenance reaches fencing along parkways and sidewalk edges, introducing chlorides that aggressively attack iron. Freeze-thaw cycles expand any rust pocket that has formed under paint, lifting coatings from the inside and creating the classic bubbled-paint appearance homeowners notice every spring.
WHAT TO EXPECT LONG-TERM
With Ospho conversion, DTM primer, and two DTM finish coats properly applied over mechanically prepared surfaces, most Chicago residential iron fences hold 5-8 years before needing significant touch-up. Annual visual inspection for any chips or bare spots, with immediate touch-up using Rust-Oleum DTM, extends that window considerably.
PRO TIPS
Tip 1 - Address any bare metal spot the same season you notice it. A pinhole of exposed iron becomes a rust bubble within one Chicago winter and a flaking section by the following spring.
Tip 2 - Never paint over active rust without a converter step. Ospho or Corroseal is inexpensive insurance against a complete repaint two years early.
Tip 3 - Check picket bases at grade level every spring. Ground contact accelerates corrosion at the base faster than anywhere else on the fence. Catching it early keeps welding out of the equation.
Contact Windy City Painters at windypainters.com for a project estimate.
FAQ
Q: What does iron fence painting cost in Chicago? A: Residential iron fence painting with proper rust prep typically runs $300-$900 for standard lot footage. Windy City Painters provides itemized estimates based on linear footage, rust severity, and whether structural welding is required before surface preparation begins.
Q: Do you paint over rust or remove it first? A: Windy City Painters always addresses active rust before priming. Ospho or Corroseal rust converter chemically neutralizes iron oxide, and wire wheel grinding removes loose scale - coating over unaddressed rust guarantees early failure on Chicago iron fences.
Q: When does an iron fence need welding before painting? A: Loose pickets, cracked rails, or connections with visible movement require welding before any coating work begins. Paint cannot stabilize a structural joint - Windy City Painters coordinates with welders when this condition is identified during initial assessment.
Q: How long does iron fence paint last in Chicago? A: With mechanical prep, Ospho conversion, and Sherwin-Williams or Rust-Oleum DTM coatings, properly restored iron fencing holds 5-8 years in Chicago's freeze-thaw climate before needing significant maintenance.
Q: Is Ospho better than Corroseal for Chicago iron fences? A: Both are effective rust converters. Ospho is a liquid phosphoric acid treatment suited for moderate rust and pitting. Corroseal is a latex-based converter-primer hybrid better suited to heavier rust profiles. Windy City Painters selects based on site conditions.
Q: What finish sheen works best on iron fencing? A: Satin or semi-gloss black is the traditional and most durable choice for Chicago greystone and brownstone properties. Satin hides minor surface imperfections better than gloss while still providing adequate UV and moisture resistance.
Q: Can iron fence painting be done in spring or fall in Chicago? A: Yes. Windy City Painters schedules iron fence work in temperatures above 50 degrees Fahrenheit with low ambient humidity - spring and early fall are often ideal windows that avoid both winter cold and peak summer humidity.
Sponsored
Sunbury, OH
J.Holderby - Renovations
Franklin County's Leading General Contractors - 2X Best of Houzz!
 SPACE LINE DESIGN ARCHITECTS
This 600sm/6500sf Mid-Century Modern villa features a unique central atrium running the length of the home, connecting the Main Entry and the Second Entry, creating a light filled, slot canyon effect.
The formal and family spaces are distinct yet still connected by this two-story central atrium, awash with a gentle filtered light from above.
There is an attached yet closed off service kitchen with attached maids quarters, linked with easy access to the 16 person formal dining room and adjacent majlis.
Upstairs are 4 bedrooms plus a separate large Master Suite, uniquely accessible by the open sided glass bridge-walk, leading to the very private Master Bedrm and the private reading nook.
We have done two color studies, one utilizing the beautifully orange rusted steel known as CorTen steel, while the other study shows a snow white EIFS exterior insulation and finish system offering super-high insulation values and zero maintenance as it never needing painting and it never cracks! (one of our favorite exterior finishes~ especially in hot climates!)
 Columbia Roofing Inc.
Mr. Mescher – Home Owner Shares Story
“I wanted to take this opportunity to tell you that I am extremely pleased with the work that Columbia Roofing did in replacing the roof on our Kent Island home. The house has a complicated roof structure with multiple gables and a quarter round conical roof which spans between two vertical walls in the back. We choose a 50 year Owens Corning shingle and to assure a good job, we only obtained quotes from roofing companies that received outstanding reviews.
We were pleased when the Columbia production crew roofed the house without issue and brought the full visual effect of slate using the 4 tab asphalt shingle with its distinctive keyway.
When it came to the conical roof, we were faced with the possibility of having to install a metal roof in lieu of maintaining the slate like appearance that was so prominent on the other roof sections of the house. Our preference was to maintain the appearance of slate on the conical section similar to that seen on the old slate roof cathedrals. While this is easy to say, I can now appreciate how difficult it is to do.
To honor our wishes, Ben Alsop came to the house and worked through the complicated layout necessary to use the same 4 tab shingles on the conical section. To do the job properly, every single 4 tab shingle had to be cut into individual tabs.
Each tab was then taken up on the roof where the keyway was aligned to vertical through a system of straight lines drawn from the point of the conical roof to the starter shingle at the roof’s edge. Each tab had to be cut again (often multiple times) after the tab alignment was complete. To assure the accuracy necessary to maintain the visual effect, Ben took it upon himself to personally perform the roofing of the conical section.
Ben is a manager for Columbia Roofing who no longer performs the physical roofing work after coming up through the ranks of the roofing trade. His personal dedication to getting this job done for us in a way that is simply stellar could not go without acknowledgement. Ben is not only a craftsman, he is an artisan whose skill set can clearly be seen in the pictures that I have attached.
I want to thank Columbia Roofing for a job well done and particularly I want to thank Ben for taking the time and putting in the effort to truly make this a stellar installation.”
 Columbia Roofing Inc.
Mr. Mescher – Home Owner Shares Story
“I wanted to take this opportunity to tell you that I am extremely pleased with the work that Columbia Roofing did in replacing the roof on our Kent Island home. The house has a complicated roof structure with multiple gables and a quarter round conical roof which spans between two vertical walls in the back. We choose a 50 year Owens Corning shingle and to assure a good job, we only obtained quotes from roofing companies that received outstanding reviews.
We were pleased when the Columbia production crew roofed the house without issue and brought the full visual effect of slate using the 4 tab asphalt shingle with its distinctive keyway.
When it came to the conical roof, we were faced with the possibility of having to install a metal roof in lieu of maintaining the slate like appearance that was so prominent on the other roof sections of the house. Our preference was to maintain the appearance of slate on the conical section similar to that seen on the old slate roof cathedrals. While this is easy to say, I can now appreciate how difficult it is to do.
To honor our wishes, Ben Alsop came to the house and worked through the complicated layout necessary to use the same 4 tab shingles on the conical section. To do the job properly, every single 4 tab shingle had to be cut into individual tabs.
Each tab was then taken up on the roof where the keyway was aligned to vertical through a system of straight lines drawn from the point of the conical roof to the starter shingle at the roof’s edge. Each tab had to be cut again (often multiple times) after the tab alignment was complete. To assure the accuracy necessary to maintain the visual effect, Ben took it upon himself to personally perform the roofing of the conical section.
Ben is a manager for Columbia Roofing who no longer performs the physical roofing work after coming up through the ranks of the roofing trade. His personal dedication to getting this job done for us in a way that is simply stellar could not go without acknowledgement. Ben is not only a craftsman, he is an artisan whose skill set can clearly be seen in the pictures that I have attached.
I want to thank Columbia Roofing for a job well done and particularly I want to thank Ben for taking the time and putting in the effort to truly make this a stellar installation.”
 Tile Doctor Ltd
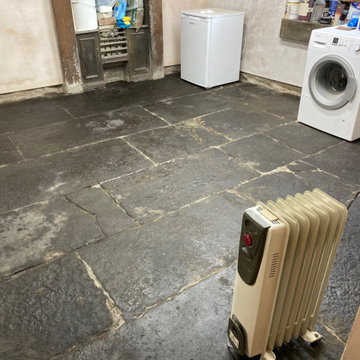
I was contacted by a client in Kendal to see if I could help with their Black Flagstone basement floor. As you can see from the photographs it was in a bit of a state and the stone looked mostly White rather than Black.
I carried out a site visit, to survey the floor and work out the best approach to restore its appearance. After testing a few different products and techniques I worked out an effective restoration plan and discussed this with the owner. Happy with my plan and costing’s we agreed a date to start the work. Being in the basement of the property had its challenges but it would mean we could work socially distanced from the owner.
To restore the floors appearance, I started with a set of coarse wire (60 and 120 grit) brushes lubricated with Tile Doctor Remove and Go which is a strong coatings remover. I had considered using milling pads on the tiles to reveal a new surface underneath but that does involve the use of an expensive set of coarse pads and given it was a basement the owners didn’t feel the extra expense would be justified.
The wire grits work well on rough stone floors when attached to a weighted buffing machine and we add some Tile Doctor Remove and Go to the mix. Once clean the floor was rinsed with water and the slurry extracted using an industrial wet vacuum. After cleaning the floor, it looked transformed, some pointing was required so we carried this out after the main clean.
The stone was left to dry out for a few days before returning to apply a sealer. For this floor I felt Tile Doctor X-Tra seal would be the best product and applied two coats. I chose X-Tra seal for this job as it ticks a lot of boxes, it’s a breathable oil-based resin sealer which being breathable will allow moisture to rise through the floor. Old floors like this don’t have a damp proof membrane so it is important to choose a sealer that can allow the floor to breath and not let damp build up under the floor where it can reach out to the walls and cause rising damp.
I also chose X-Tra Seal as it has a great ability to bring out the colour of the darker stone due to its high oil content, the oil will deter salts from forming if efflorescence is an issue. This is a unique property of this sealer as we never know if efflorescent salts are going to form or not so having this in place as a sealer is a great plus for a Tile Doctor, it is new to the market and is already proving popular on floors like this and for protecting external stone.
If the tiles are smooth Tile Doctor X-Tra Seal adds a bit of a sheen to the appearance of the stone however this stone was very rough, so we didn’t manage a shine, but the customer was happy with the matt finish and the slightly honed effect.
The floor looked great and much more appealing making the space more attractive and likely to be used. For aftercare I recommended Tile Doctor Neutral Tile Cleaner which will clean the floor without impacting the sealer which can be a problem with many of the stronger products you find in supermarkets.
Heidi Taylor
South Cumbria Tile Doctor


 Katie Hutchison Studio
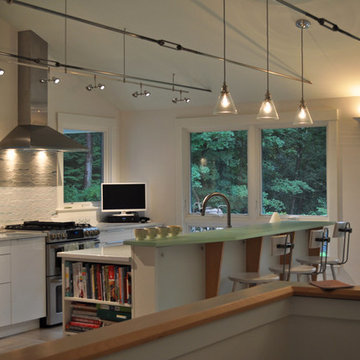
Constructed in two phases, this renovation, with a few small additions, touched nearly every room in this late ‘50’s ranch house. The owners raised their family within the original walls and love the house’s location, which is not far from town and also borders conservation land. But they didn’t love how chopped up the house was and the lack of exposure to natural daylight and views of the lush rear woods. Plus, they were ready to de-clutter for a more stream-lined look. As a result, KHS collaborated with them to create a quiet, clean design to support the lifestyle they aspire to in retirement.
To transform the original ranch house, KHS proposed several significant changes that would make way for a number of related improvements. Proposed changes included the removal of the attached enclosed breezeway (which had included a stair to the basement living space) and the two-car garage it partially wrapped, which had blocked vital eastern daylight from accessing the interior. Together the breezeway and garage had also contributed to a long, flush front façade. In its stead, KHS proposed a new two-car carport, attached storage shed, and exterior basement stair in a new location. The carport is bumped closer to the street to relieve the flush front facade and to allow access behind it to eastern daylight in a relocated rear kitchen. KHS also proposed a new, single, more prominent front entry, closer to the driveway to replace the former secondary entrance into the dark breezeway and a more formal main entrance that had been located much farther down the facade and curiously bordered the bedroom wing.
Inside, low ceilings and soffits in the primary family common areas were removed to create a cathedral ceiling (with rod ties) over a reconfigured semi-open living, dining, and kitchen space. A new gas fireplace serving the relocated dining area -- defined by a new built-in banquette in a new bay window -- was designed to back up on the existing wood-burning fireplace that continues to serve the living area. A shared full bath, serving two guest bedrooms on the main level, was reconfigured, and additional square footage was captured for a reconfigured master bathroom off the existing master bedroom. A new whole-house color palette, including new finishes and new cabinetry, complete the transformation. Today, the owners enjoy a fresh and airy re-imagining of their familiar ranch house.
Photos by Katie Hutchison
 Maison Maya
Nick Glimenakis Photography
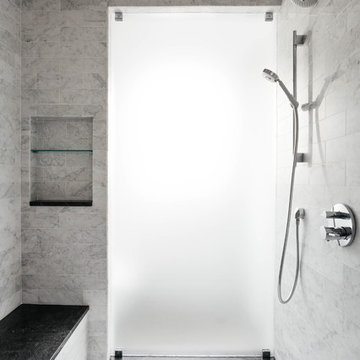
Example of a large transitional black and white tile and stone tile sauna design in New York
Example of a large transitional black and white tile and stone tile sauna design in New York
13