
Search results for "Become" in Home Design Ideas
 Just the Thing Decorating, Staging, and Windows
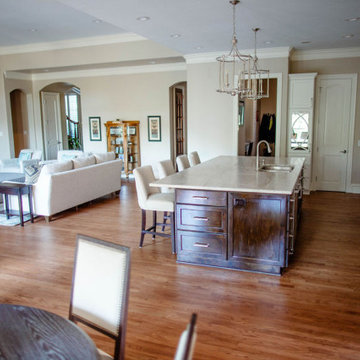
This recent renovation project began with a desire to open up the kitchen to the family room. Today everyone seems to want the big island to live and entertain around, right?
I always recommend taking your time during the planning phase—6 weeks at least! Kitchens and bathrooms are highly functional areas, so you want to give yourself time to think thoughts like, “where am I going to put all my plastic cups?” I ask my clients lots of questions during this phase to help them design a kitchen that truly has a place for everything. Appliances and plumbing are part of this phase as well.
Once the cabinet design was finalized, the demo began! Because that troublesome wall was load bearing, so the GC, Miland Home Construction, had to install a beam to support the second floor. But once that was done, boy we had a lot of space to work with!
Picking your countertops is a little like picking an ice cream flavor: you really want to see all your options! Not only is function important here, but your counter material is really a major element of the kitchen, so pick one you love! This client fell in love with Taj Mahal Quartzite.
The backsplash was the next layer of fun. Now the mood of the kitchen becomes clear. Will it be elegant? Homey? Rustic? Picking the lighting then becomes like the fine tuner on a microscope, adjusting the view to its perfect clarity.
With construction underway, and the mood of the new space established, soft furnishings become the focus. Layering in luxurious, yet durable fabrics are the name of the game for most families. We all want beautiful spaces that can stand up to spouses, kids, and pets! It’s always a lot fun to select a deep and comfy sofa and chairs!
The finishing touches are what really give the project that designer look—so be sure to save room in the budget for art, window treatments, and accessories. In this home I wallpapered the wall behind the tv with a subtle grasscloth, selected a large abstract to center the room, and echoed its colors throughout the accessories. The result is eye-pleasing indeed: soft, textured, interesting and peaceful. This busy family was thrilled with the results.
 Vision Design
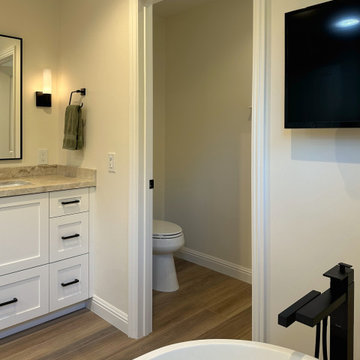
An unheated storage room became a spacious bathroom with every feature. The old tiny bathroom and closet became a very useful master closet.
Inspiration for a large modern master beige tile and ceramic tile wood-look tile floor, brown floor and double-sink bathroom remodel in San Francisco with shaker cabinets, white cabinets, a one-piece toilet, beige walls, an undermount sink, quartzite countertops, a hinged shower door, beige countertops, a niche and a built-in vanity
Inspiration for a large modern master beige tile and ceramic tile wood-look tile floor, brown floor and double-sink bathroom remodel in San Francisco with shaker cabinets, white cabinets, a one-piece toilet, beige walls, an undermount sink, quartzite countertops, a hinged shower door, beige countertops, a niche and a built-in vanity
 Village Home Stores
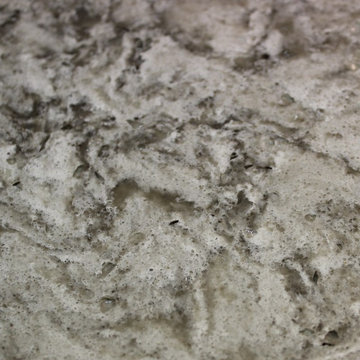
Cambria quartz tops in the "New Quay" design.
Inspiration for a mid-sized timeless home design remodel in Chicago
Inspiration for a mid-sized timeless home design remodel in Chicago
Find the right local pro for your project

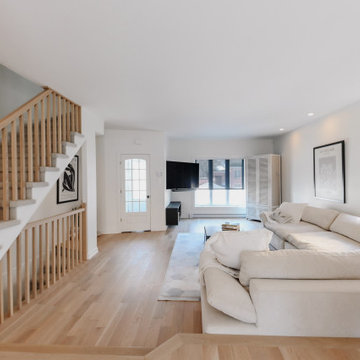
 ABtelier Design
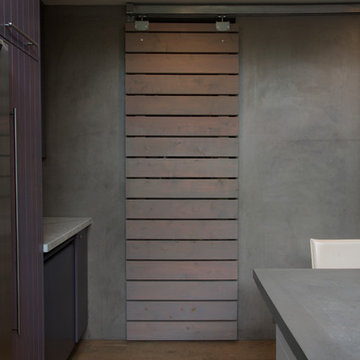
Example of a mid-sized danish formal and open concept light wood floor and beige floor living room design in Montreal with white walls and a wall-mounted tv
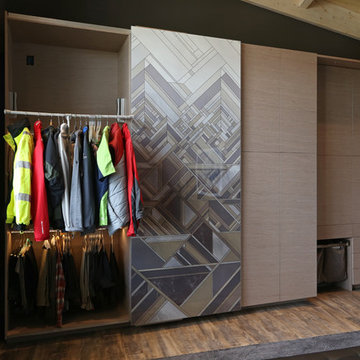
 DIRTT Environmental Solutions
Hygge – pronounced "hoo-ga" – is coziness. A way of living that emphasizes the importance of simplicity and unwinding. It's hospitality and warmth. But at DIRTT, it also means a living lab. The home is a giant test subject for the possibilities of prefabricated construction. The home demonstrates what's possible when traditional craftsmanship and modern technology combine. Complex angles and curves become a possibility. Exquisite finishes become reality when labor costs are flipped on their head. The home has become what it was meant to be all along; a place to gather with colleagues, Clients, family and friends to break bread and get to know one another.
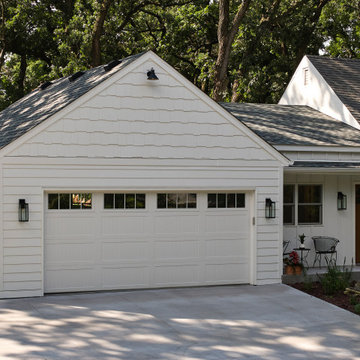

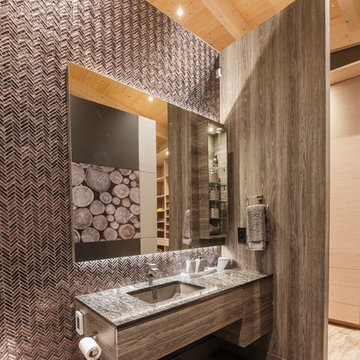 DIRTT Environmental Solutions
Hygge – pronounced "hoo-ga" – is coziness. A way of living that emphasizes the importance of simplicity and unwinding. It's hospitality and warmth. But at DIRTT, it also means a living lab. The home is a giant test subject for the possibilities of prefabricated construction. The home demonstrates what's possible when traditional craftsmanship and modern technology combine. Complex angles and curves become a possibility. Exquisite finishes become reality when labor costs are flipped on their head. The home has become what it was meant to be all along; a place to gather with colleagues, Clients, family and friends to break bread and get to know one another.
 Modern & Contemporary Interior Design
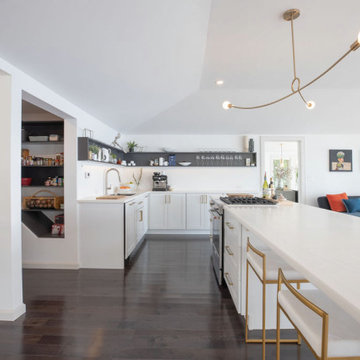
A sleek white, ultra modern island allows for guests to enjoy island seating and the view at the same time.
Slim, angular custom designed brass legs support the 13 foot long island, creating a cooking area with downdraft, preparation area, storage and seating.
 DIRTT Environmental Solutions
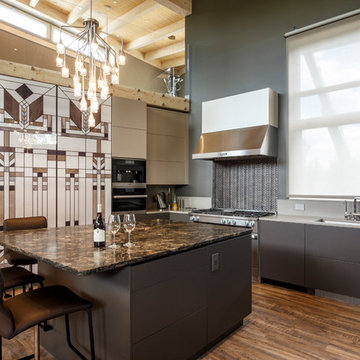
Hygge – pronounced "hoo-ga" – is coziness. A way of living that emphasizes the importance of simplicity and unwinding. It's hospitality and warmth. But at DIRTT, it also means a living lab. The home is a giant test subject for the possibilities of prefabricated construction. The home demonstrates what's possible when traditional craftsmanship and modern technology combine. Complex angles and curves become a possibility. Exquisite finishes become reality when labor costs are flipped on their head. The home has become what it was meant to be all along; a place to gather with colleagues, Clients, family and friends to break bread and get to know one another.

 Prime Realty
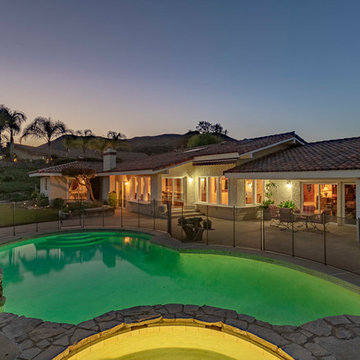
Inspiration for a large farmhouse backyard concrete and kidney-shaped natural hot tub remodel in Los Angeles

 Tile Doctor Ltd
This Tumbled Travertine tiled floor at a beautiful house in Horley had been poorly maintained through the years using the wrong type of sealer which quickly wore down allowing dirt to become ingrained in the stone. The owner had become concerned about the state of the tiles and decided it was time to call in an expert that could restore the tiles to a condition that complimented the environment in which it was situated.
Travertine is known for being very distinctive in character and very durable, making it a very popular choice for tiled flooring in properties worldwide. However, the stone does require regular professional maintenance and polishing to keep it looking it top shape and home owners rarely realise this when they decide to have it installed. Fortunately, in the UK at least you can rely on your local tile doctor to maintain it for you.
The first part of the job involved giving the floor a thorough clean to remove what was left of old sealers and any polishing compounds that remained on the floor. Before beginning that however I brought in all my equipment and products into the house and then prepped the area by taping up the woodwork to protect it during the renovation process.
To remove what was left of the old sealers and other coatings still present on the floor a strong solution of Tile Doctor Remove and Go was applied to the floor and left to soak in for about ten minutes before being actively worked in with a rotary machine fitted with a black scrubbing pad. The solution turned black with the soil as it was lifted out of the pores of the stone and it was then rinsed off with water and extracted with a wet vacuum.
Following this, we moved on to a process we know as burnishing that hones the stone and brings up the polished appearance. Working in sections due to the size of the floor It involves the application of a series of diamond encrusted burnishing pads from coarse through to very fine.
The coarse 400-grit pad fitted to the rotary floor buffer and run over the floor using only water for lubrication. The water turns into a slurry as the pad does its job removing dirt and this has to be rinsed off the floor and extracted with the wet vacuum before applying the next pad. The process was then repeated with medium 800 grit pad for an initial polish followed by the Fine 1500 grit pad for the second polish using water for lubrication and rinsing and extracting in between each pad.
The last pad is a very fine 3000 grit pad for the final polish and is applied with only a little water sprayed onto the floor using a technique we call a Spray Burnish. This last pad really brings up the polished appearance of the stone.
To bring up the appearance of the stone even further and add a really durable polish Tile Doctor Shine Powder was applied. This is a crystallising powder sealer that ensures a very high shine and a tough, durable finish. This powder is applied directly to the tiles in combination with approximately ½ a litre of water and a soft white buffing pad.
Last step was to add to the protection provided by the Shine Powder with two coats of Tile Doctor Ultra-Seal which is a natural look sealer that doesn’t change the look of the stone and is applied to the stone and grout. This sealer works by seeping into the stone, occupying the pores and preventing dirt from becoming ingrained.
The customer was ecstatic with the results, being particularly pleased that she got the floor looking the way she originally wanted without significant expense, not to mention stress.
Michael Conlon
East Surrey Tile Doctor
 Medford Design-Build
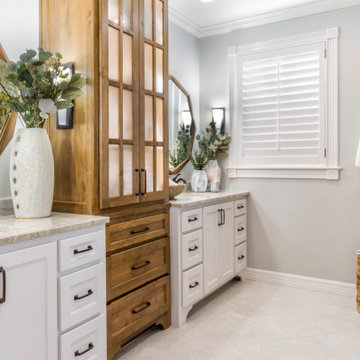
Bathroom - large farmhouse master double-sink bathroom idea in Dallas with shaker cabinets, white cabinets, a two-piece toilet, gray walls, an undermount sink, quartzite countertops, a hinged shower door, beige countertops and a built-in vanity
 Nip Tuck Remodeling
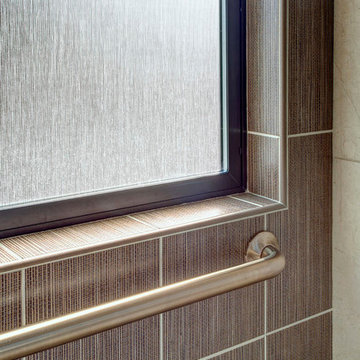
A sturdy, brushed metal grab bar is securely mounted to the tiled wall, providing added safety and stability within the shower. Its sleek, curved design blends seamlessly with the surrounding elements.
 Horticultural Concepts
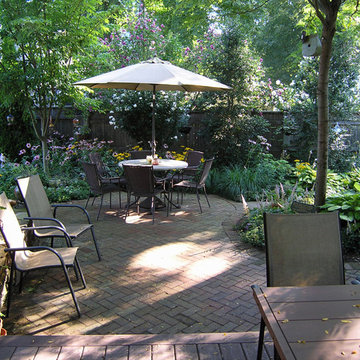
You must see this to believe it. Small becomes large, barren becomes lush and exposed becomes private. The most exquisite gardens can emerge from the emptiest of spaces with the right touch. This owner frequently receives compliments for the exterior of her garden. Only a select few get to see the interior spaces Click here.
 Just the Thing Decorating, Staging, and Windows
This recent renovation project began with a desire to open up the kitchen to the family room. Today everyone seems to want the big island to live and entertain around, right?
I always recommend taking your time during the planning phase—6 weeks at least! Kitchens and bathrooms are highly functional areas, so you want to give yourself time to think thoughts like, “where am I going to put all my plastic cups?” I ask my clients lots of questions during this phase to help them design a kitchen that truly has a place for everything. Appliances and plumbing are part of this phase as well.
Once the cabinet design was finalized, the demo began! Because that troublesome wall was load bearing, so the GC, Miland Home Construction, had to install a beam to support the second floor. But once that was done, boy we had a lot of space to work with!
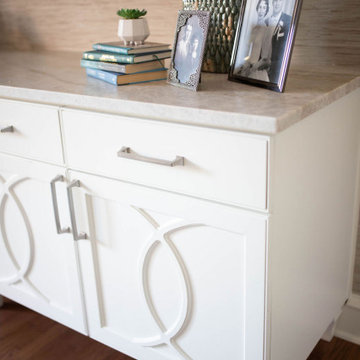
Picking your countertops is a little like picking an ice cream flavor: you really want to see all your options! Not only is function important here, but your counter material is really a major element of the kitchen, so pick one you love! This client fell in love with Taj Mahal Quartzite.
The backsplash was the next layer of fun. Now the mood of the kitchen becomes clear. Will it be elegant? Homey? Rustic? Picking the lighting then becomes like the fine tuner on a microscope, adjusting the view to its perfect clarity.
With construction underway, and the mood of the new space established, soft furnishings become the focus. Layering in luxurious, yet durable fabrics are the name of the game for most families. We all want beautiful spaces that can stand up to spouses, kids, and pets! It’s always a lot fun to select a deep and comfy sofa and chairs!
The finishing touches are what really give the project that designer look—so be sure to save room in the budget for art, window treatments, and accessories. In this home I wallpapered the wall behind the tv with a subtle grasscloth, selected a large abstract to center the room, and echoed its colors throughout the accessories. The result is eye-pleasing indeed: soft, textured, interesting and peaceful. This busy family was thrilled with the results.
 Audio Etc
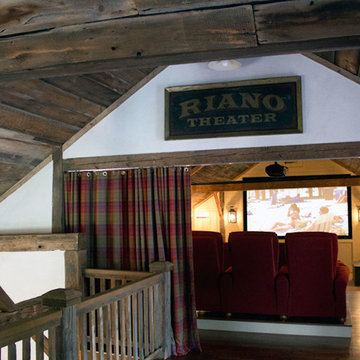
Inspiration for a mid-sized rustic open concept medium tone wood floor home theater remodel in New York with brown walls and a media wall
 Residential Construction Specialists LLC
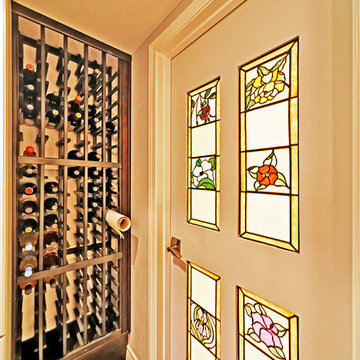
Custom door inset with artist's stained glass.
Wine cellar - traditional wine cellar idea in Seattle
Wine cellar - traditional wine cellar idea in Seattle
 The Galante Architecture Studio, Inc.
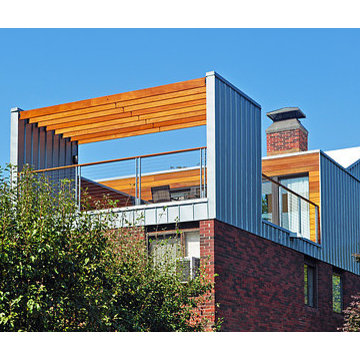
Originally built in 1972, these eight interlocked residential units and the accompanying House Master’s Residence won an AIA award for their unique spatial complexity, balancing standard units of construction with volumetric interplay, all while bringing natural light into living spaces. However, nearly 40 years later
These 1970’s era, interlocked faculty housing units won an AIA award when first completed. They were unique in spatial complexity, By early 2,000’s they were showing signs of age, and had become outdated on many levels. Working with project management for the Faculty of Arts & Sciences, we prepared one prototype design to bring the buildings into the 21st century. New insulated skylights, standing seam metal siding, cedar decks and trellises, exchanging black roofs for well insulated white roofs, were all part of a larger planning program to renovate all nine units. The prototype was implemented in 2012, to great approval and result. In 2013 a few more units were done. In 2014 the “House Masters” unit was done, with the remaining four units planned for future budgets.
Sustainable features include re-use of most materials on site, (former siding was able to become sheathing below metal panels), implementing the Stretch Energy Code for insulation, and putting new white roof membranes in place. Using FSC certified wood for decks and trellises, and using Rheinzink siding, a “200 year material” according to the manufacturer.
After nearly 40 years, Ronald Gourley’s AIA award winning Faculty Housing (1972) was beginning to show its age – plywood siding was delaminating, wooden decks splintering, and custom windows failing. Therefore, the opportunity to reinvent a piece of Mid-Century Modernism presented itself when two of the building’s eight alternating rooftop designs were to be rebuilt as prototypes for the remainder of the structure.
The strength of the original design was its rectilinear and symmetrical arrangement of internal and external spaces, but the difference between the two had become blurred over the decades. New zinc siding, mahogany decking, and stainless steel railings accentuate the defining elements and more clearly articulate the living spaces, breathing new life into the building and reinvigorating the surrounding campus.
Furthermore, the renovation also provided a chance to bring the structure up to modern energy standards and help meet Harvard’s lofty environmental goals. Insulation within the ceilings was more than tripled, white TPO roofing reduces the heat island effect, construction waste was minimized by recasting the siding as sheathing, and materials were selected not only for aesthetics, but for their longevity and ability to be recycled as well.
Harvard’s energy standards brought an uncharacteristic level of environmental care to this building. Roof structures are triple insulated, allowing separating interior from exterior in the most thermally efficient manner. North facing triple insulated skylights and white TPO roofing reduces the heat gain, but allows natural light to pour in. Materials were selected not only for aesthetics, but for their longevity. Zinc, for example, is made of 100% recycled material, and has duration of 200 years. Uncharacteristic levels of environmental care were common on this project.
48