
Search results for "Carefully deciding" in Home Design Ideas

 ZeroEnergy Design
This modern green home offers both a vacation destination on Cape Cod near local family members and an opportunity for rental income.
FAMILY ROOTS. A West Coast couple living in the San Francisco Bay Area sought a permanent East Coast vacation home near family members living on Cape Cod. As academic professionals focused on sustainability, they sought a green, energy efficient home that was well-aligned with their values. With no green homes available for sale on Cape Cod, they decided to purchase land near their family and build their own.
SLOPED SITE. Comprised of a 3/4 acre lot nestled in the pines, the steeply sloping terrain called for a plan that embraced and took advantage of the slope. Of equal priority was optimizing solar exposure, preserving privacy from abutters, and creating outdoor living space. The design accomplished these goals with a simple, rectilinear form, offering living space on the both entry and lower/basement levels. The stepped foundation allows for a walk-out basement level with light-filled living space on the down-hill side of the home. The traditional basement on the eastern, up-hill side houses mechanical equipment and a home gym. The house welcomes natural light throughout, captures views of the forest, and delivers entertainment space that connects indoor living space to outdoor deck and dining patio.
MODERN VISION. The clean building form and uncomplicated finishes pay homage to the modern architectural legacy on the outer Cape. Durable and economical fiber cement panels, fixed with aluminum channels, clad the primary form. Cedar clapboards provide a visual accent at the south-facing living room, which extends a single roof plane to cover the entry porch.
SMART USE OF SPACE. On the entry level, the “L”-shaped living, dining, and kitchen space connects to the exterior living, dining, and grilling spaces to effectively double the home’s summertime entertainment area. Placed at the western end of the entry level (where it can retain privacy but still claim expansive downhill views) is the master suite with a built-in study. The lower level has two guest bedrooms, a second full bathroom, and laundry. The flexibility of the space—crucial in a house with a modest footprint—emerges in one of the guest bedrooms, which doubles as home office by opening the barn-style double doors to connect it to the bright, airy open stair leading up to the entry level. Thoughtful design, generous ceiling heights and large windows transform the modest 1,100 sf* footprint into a well-lit, spacious home. *(total finished space is 1800 sf)
RENTAL INCOME. The property works for its owners by netting rental income when the owners are home in San Francisco. The house especially caters to vacationers bound for nearby Mayo Beach and includes an outdoor shower adjacent to the lower level entry door. In contrast to the bare bones cottages that are typically available on the Cape, this home offers prospective tenants a modern aesthetic, paired with luxurious and green features. Durable finishes inside and out will ensure longevity with the heavier use that comes with a rental property.
COMFORT YEAR-ROUND. The home is super-insulated and air-tight, with mechanical ventilation to provide continuous fresh air from the outside. High performance triple-paned windows complement the building enclosure and maximize passive solar gain while ensuring a warm, draft-free winter, even when sitting close to the glass. A properly sized air source heat pump offers efficient heating & cooling, and includes a carefully designed the duct distribution system to provide even comfort throughout the house. The super-insulated envelope allows us to significantly reduce the equipment capacity, duct size, and airflow quantities, while maintaining unparalleled thermal comfort.
ENERGY EFFICIENT. The building’s shell and mechanical systems play instrumental roles in the home’s exceptional performance. The building enclosure reduces the most significant energy glutton: heating. Continuous super-insulation, thorough air sealing, triple-pane windows, and passive solar gain work together to yield a miniscule heating load. All active energy consumers are extremely efficient: an air source heat pump for heating and cooling, a heat pump hot water heater, LED lighting, energy recovery ventilation (ERV), and high efficiency appliances. The result is a home that uses 70% less energy than a similar new home built to code requirements.
OVERALL. The home embodies the owners’ goals and values while comprehensively enabling thermal comfort, energy efficiency, a vacation respite, and supplementary income.
PROJECT TEAM
ZeroEnergy Design - Architect & Mechanical Designer
A.F. Hultin & Co. - Contractor
Pamet Valley Landscape Design - Landscape & Masonry
Lisa Finch - Original Artwork
European Architectural Supply - Windows
Eric Roth Photography - Photography
 ZeroEnergy Design
This modern green home offers both a vacation destination on Cape Cod near local family members and an opportunity for rental income.
FAMILY ROOTS. A West Coast couple living in the San Francisco Bay Area sought a permanent East Coast vacation home near family members living on Cape Cod. As academic professionals focused on sustainability, they sought a green, energy efficient home that was well-aligned with their values. With no green homes available for sale on Cape Cod, they decided to purchase land near their family and build their own.
SLOPED SITE. Comprised of a 3/4 acre lot nestled in the pines, the steeply sloping terrain called for a plan that embraced and took advantage of the slope. Of equal priority was optimizing solar exposure, preserving privacy from abutters, and creating outdoor living space. The design accomplished these goals with a simple, rectilinear form, offering living space on the both entry and lower/basement levels. The stepped foundation allows for a walk-out basement level with light-filled living space on the down-hill side of the home. The traditional basement on the eastern, up-hill side houses mechanical equipment and a home gym. The house welcomes natural light throughout, captures views of the forest, and delivers entertainment space that connects indoor living space to outdoor deck and dining patio.
MODERN VISION. The clean building form and uncomplicated finishes pay homage to the modern architectural legacy on the outer Cape. Durable and economical fiber cement panels, fixed with aluminum channels, clad the primary form. Cedar clapboards provide a visual accent at the south-facing living room, which extends a single roof plane to cover the entry porch.
SMART USE OF SPACE. On the entry level, the “L”-shaped living, dining, and kitchen space connects to the exterior living, dining, and grilling spaces to effectively double the home’s summertime entertainment area. Placed at the western end of the entry level (where it can retain privacy but still claim expansive downhill views) is the master suite with a built-in study. The lower level has two guest bedrooms, a second full bathroom, and laundry. The flexibility of the space—crucial in a house with a modest footprint—emerges in one of the guest bedrooms, which doubles as home office by opening the barn-style double doors to connect it to the bright, airy open stair leading up to the entry level. Thoughtful design, generous ceiling heights and large windows transform the modest 1,100 sf* footprint into a well-lit, spacious home. *(total finished space is 1800 sf)
RENTAL INCOME. The property works for its owners by netting rental income when the owners are home in San Francisco. The house especially caters to vacationers bound for nearby Mayo Beach and includes an outdoor shower adjacent to the lower level entry door. In contrast to the bare bones cottages that are typically available on the Cape, this home offers prospective tenants a modern aesthetic, paired with luxurious and green features. Durable finishes inside and out will ensure longevity with the heavier use that comes with a rental property.
COMFORT YEAR-ROUND. The home is super-insulated and air-tight, with mechanical ventilation to provide continuous fresh air from the outside. High performance triple-paned windows complement the building enclosure and maximize passive solar gain while ensuring a warm, draft-free winter, even when sitting close to the glass. A properly sized air source heat pump offers efficient heating & cooling, and includes a carefully designed the duct distribution system to provide even comfort throughout the house. The super-insulated envelope allows us to significantly reduce the equipment capacity, duct size, and airflow quantities, while maintaining unparalleled thermal comfort.
ENERGY EFFICIENT. The building’s shell and mechanical systems play instrumental roles in the home’s exceptional performance. The building enclosure reduces the most significant energy glutton: heating. Continuous super-insulation, thorough air sealing, triple-pane windows, and passive solar gain work together to yield a miniscule heating load. All active energy consumers are extremely efficient: an air source heat pump for heating and cooling, a heat pump hot water heater, LED lighting, energy recovery ventilation (ERV), and high efficiency appliances. The result is a home that uses 70% less energy than a similar new home built to code requirements.
OVERALL. The home embodies the owners’ goals and values while comprehensively enabling thermal comfort, energy efficiency, a vacation respite, and supplementary income.
PROJECT TEAM
ZeroEnergy Design - Architect & Mechanical Designer
A.F. Hultin & Co. - Contractor
Pamet Valley Landscape Design - Landscape & Masonry
Lisa Finch - Original Artwork
European Architectural Supply - Windows
Eric Roth Photography - Photography
 Dominique Michelle Vidal
Sorena's home is a beautiful reflection of her personality, adorned in her vibrant paintings and personal touches that breathed life into every room. When she decided to renovate her kitchen, I had the honor of designing it for her as well as form a connection that I still cherish to this day. Upon my most recent visit to her home to take photos, she greeted me with fresh coffee and pastries, a testament to the warmth of her character.
The renovation journey with Sorena was one filled with creativity and collaboration. As the designer, I took charge of curating the finish and lighting selections, while also assisting in the layout of all the cabinetry. One significant transformation was the decision to replace the existing tile with brand new hardwood floors. This change added a natural warmth to the room, complementing the elegance of other elements and providing a graceful continuity with the rest of her home. The kitchen transformed into a culinary masterpiece, blending elegance with functionality.
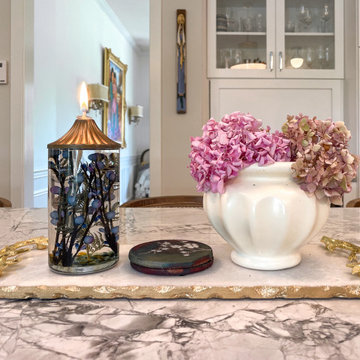
The focal points of the space are the La Cornue Stove imported from France and its coordinating custom range hood. Sorena insisted on these for her dream kitchen, and they indeed became the statement pieces that brought the design together. We complemented these with countertops of honed finish quartzite from Italy, which we both fell in love with as soon as we saw it. Its subtle sheen and luxurious feel added an exquisite touch to the space.
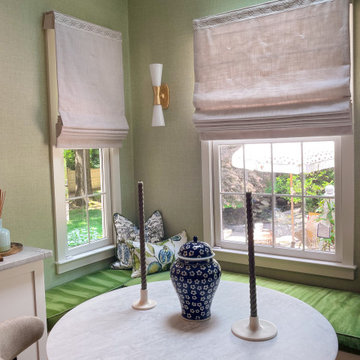
No detail was too small in Sorena's kitchen, and every corner had a story. The dreamy breakfast nook, overlooking her koi pond garden, was carefully crafted with a built-in bench adorned with green fabric cushions, providing a cozy spot for morning reflections or intimate conversations.
The project, located in West Chester, PA, was a success not only in the transformation of the space but also in creating her dream kitchen. It became an extension of her artistic flair, a place where she could not only host, but express herself. The inclusion of the hardwood floors and updated breakfast nook was a touch that truly finalized the space, giving it a warmth and continuity that resonated with her personality. It was a privilege to help her achieve her vision, and the gratitude in her eyes as she served coffee in her new kitchen is a memory I will always hold dear. Her kitchen wasn't merely a renovation; it was a manifestation of her dreams, executed with love, care, and a shared passion for beauty and design.
Find the right local pro for your project
 Dominique Michelle Vidal
Sorena's home is a beautiful reflection of her personality, adorned in her vibrant paintings and personal touches that breathed life into every room. When she decided to renovate her kitchen, I had the honor of designing it for her as well as form a connection that I still cherish to this day. Upon my most recent visit to her home to take photos, she greeted me with fresh coffee and pastries, a testament to the warmth of her character.
The renovation journey with Sorena was one filled with creativity and collaboration. As the designer, I took charge of curating the finish and lighting selections, while also assisting in the layout of all the cabinetry. One significant transformation was the decision to replace the existing tile with brand new hardwood floors. This change added a natural warmth to the room, complementing the elegance of other elements and providing a graceful continuity with the rest of her home. The kitchen transformed into a culinary masterpiece, blending elegance with functionality.
The focal points of the space are the La Cornue Stove imported from France and its coordinating custom range hood. Sorena insisted on these for her dream kitchen, and they indeed became the statement pieces that brought the design together. We complemented these with countertops of honed finish quartzite from Italy, which we both fell in love with as soon as we saw it. Its subtle sheen and luxurious feel added an exquisite touch to the space.
No detail was too small in Sorena's kitchen, and every corner had a story. The dreamy breakfast nook, overlooking her koi pond garden, was carefully crafted with a built-in bench adorned with green fabric cushions, providing a cozy spot for morning reflections or intimate conversations.
The project, located in West Chester, PA, was a success not only in the transformation of the space but also in creating her dream kitchen. It became an extension of her artistic flair, a place where she could not only host, but express herself. The inclusion of the hardwood floors and updated breakfast nook was a touch that truly finalized the space, giving it a warmth and continuity that resonated with her personality. It was a privilege to help her achieve her vision, and the gratitude in her eyes as she served coffee in her new kitchen is a memory I will always hold dear. Her kitchen wasn't merely a renovation; it was a manifestation of her dreams, executed with love, care, and a shared passion for beauty and design.
 Five Star Tree Care
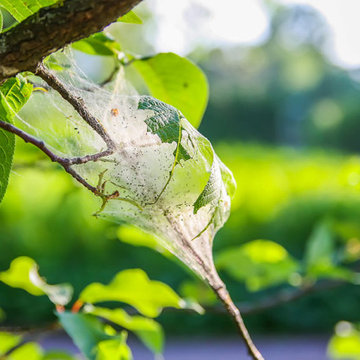
Have you ever looked out at your usually normal tree only to find it draped in hundreds or thousands of eerie looking webs? No, you are not going crazy. Chances are your tree has been visited by seasonal bugs. Typically, Eastern tent caterpillars or fall webworms are the cause of web covered trees. When they visit, they spin nets that resemble spider webs. Five Star Tree Services has put together a quick guide on everything you need to know about web-making caterpillars and how to deal with them.
Eastern Tent Caterpillars vs. Fall Webworms
Both of these pests look similar but there are some differences that set them apart. Eastern tent caterpillars are also called spring webworms. This is mainly because they are often found feeding during the spring seasons, while fall webworms as the name suggest, tend to appear in the autumn months.
The webs of the two pests look different from each other. The eastern tent caterpillar webs have a thick texture that looks like cotton, while the fall webworms have webs that more resemble tulle. Both also prefer to reside in different parts of the tree. Eastern tent caterpillars love to hang out where branches connect, called tree pockets. Fall webworms, on the other hand, like to hang out on the tips of branches.
Each has a different set of preferred tree species for their meals. Fall webworms like more than 100 different types of trees, but they are most often found on:
Black Walnut Trees
Hickory Trees
Wild Cherry Trees
Pecan Trees
Sweetgum Trees
Persimmon Trees
Mulberry Trees
Oak Trees
Pecan Trees
Eastern tent caterpillars also consume many different species of tree, but are most often found on:
Apple Trees
Crabapple Trees
Wild Cherry Trees
Ash Trees
Maple Trees
How to Remove Webworms & Tent Caterpillars
Before you start freaking out about your Halloween tree that suddenly decided to appear in the spring or early fall, it is important to note that these bugs won’t harm your tree. They look gross and will eat a large portion of your leaves, but there are no harmful side effects otherwise.
With that out of the way, getting rid of the webs is pretty simple. You can just remove them by hand and toss them into a bucket of detergent water to prevent sticking. You can also you the end of a stick or broom if you would prefer to avoid touching the sticky webs. For higher branches, we suggest calling a local arborist for assistance to prevent accidental falls.
How to Prevent Webworms & Tent Caterpillar Infestations
If you don’t want to deal with these webs at all, you can prevent an infestation in advance. In the winter, check your trees for tent caterpillar eggs. They are usually reddish in colour and a bit shiny. They can be found along the tree branches and scraped off. Fall webworm eggs look like green clumps and can be found on the bottom of leaves in the summertime. If you are unsure, or if you simply don’t want to deal with the problem on your own, Five Star Tree Services can help. Give us a call at (416) 990-3355 to find out more about our Toronto tree removal and tree care services today.
 Five Star Tree Care
Using a chainsaw is a quick way to make work of fallen branches, damaged trees, and more. However, unless you have been plenty of experience, you may not be able to use this tool safely. For those who have never used a chainsaw before, it is a good idea to start with a lighter saw to prevent injury. It is also a good idea to enroll in a training course. If you plan to use a chainsaw in a professional company, it is even mandatory. Five Star Tree Services has created a quick guide that will help you decide if using a chainsaw is the best option for you.
Chainsaw Maintenance
Before you start using a chainsaw, you need to know if the blades are properly sharpened. Dull blades can cause jagged cuts or even cause injury. A sharp blade allows the saw to cut smoothly and produce straight cuts. The next step is to review is the cutting chain. It should be adjusted to the right tension, so the chain doesn’t move when the engine is idle. Make sure there are no loose screws and that the chain brake is in proper working order.
Operating a Chainsaw
Once you ensure that the chainsaw is safe to operate, it is time to get it started. Do you know the right amount of throttle and pressure to use? What about which cut would be best for your current project? Each type of cut will affect the wood differently, so it is important to keep these factors in mind when using a chainsaw. Situational awareness is also an important part of chainsaw use. No one should be within 10 feet while you are cutting. Also, avoid getting distracted by people seeking your attention since it only takes a second for a grave mistake to occur.
Protection During Chainsaw Operation
Proper protection is essential when operating machinery. When using a chainsaw, you should have on personal protection equipment such as; chainsaw pants, steel toe boots, gloves, ear protection, high visibility clothing, a helmet, and eye protection. All of these items should be in good working order and made from high-quality materials. Protecting your face, neck, chest, and abdomen is critical when working with any type of cutting tool.
The best way to keep yourself protected while wearing your personal protective equipment (PPE) is to maintain control over the chainsaw. Gloves may reduce control for many people, but a firm stance and proper balance can work wonders for maintaining control. PPE usage is very important, but it is equally important not to get lulled into a false sense of security by wearing it.
Practice Makes Perfect
It is best to practice using your chainsaw before taking on big projects. This will help you learn to move your body and your head in a safe way and a way that supports a clean cut. Most often, work with chainsaws is completed on ground that is uneven or covered in obstacles. Practicing will ensure that you can adapt to your environment without risking damage to your property or bodily harm.
How We Can Help
Working with chainsaws can make tree care simpler, but without the proper training and protection, it can be hazardous. Instead of taking the risk, hire the professionals here at Five Star Tree Services for all of your Richmond Hill tree removal and tree care needs. Give us a call at (416) 990-3355 to find out more about our rates and services.

 ESI Builders & Remodelers
3,800sf, 4 bdrm, 3.5 bath with oversized 4 car garage and over 270sf Loggia; climate controlled wine room and bar, Tech Room, landscaping and pool. Solar, high efficiency HVAC and insulation was used which resulted in huge rebates from utility companies, enhancing the ROI. The challenge with this property was the downslope lot, sewer system was lower than main line at the street thus requiring a special pump system. Retaining walls to create a flat usable back yard.
ESI Builders is a subsidiary of EnergyWise Solutions, Inc. and was formed by Allan, Bob and Dave to fulfill an important need for quality home builders and remodeling services in the Sacramento region. With a strong and growing referral base, we decided to provide a convenient one-stop option for our clients and focus on combining our key services: quality custom homes and remodels, turnkey client partnering and communication, and energy efficient and environmentally sustainable measures in all we do. Through energy efficient appliances and fixtures, solar power, high efficiency heating and cooling systems, enhanced insulation and sealing, and other construction elements – we go beyond simple code compliance and give you immediate savings and greater sustainability for your new or remodeled home.
All of the design work and construction tasks for our clients are done by or supervised by our highly trained, professional staff. This not only saves you money, it provides a peace of mind that all of the details are taken care of and the job is being done right – to Perfection. Our service does not stop after we clean up and drive off. We continue to provide support for any warranty issues that arise and give you administrative support as needed in order to assure you obtain any energy-related tax incentives or rebates. This ‘One call does it all’ philosophy assures that your experience in remodeling or upgrading your home is an enjoyable one.
ESI Builders was formed by professionals with varying backgrounds and a common interest to provide you, our clients, with options to live more comfortably, save money, and enjoy quality homes for many years to come. As our company continues to grow and evolve, the expertise has been quickly growing to include several job foreman, tradesmen, and support staff. In response to our growth, we will continue to hire well-qualified staff and we will remain committed to maintaining a level of quality, attention to detail, and pursuit of perfection.
Sponsored
Columbus, OH

Hope Restoration & General Contracting
Columbus Design-Build, Kitchen & Bath Remodeling, Historic Renovations

 Progressive Design Build
Southwest Florida’s hot summers and mild winters, along with amenity-rich communities and beautiful homes, attract retirees from around the world every year. And, it is not uncommon to see these active adults choosing to spend their summers away from Florida, only to return for the fall/winter.
For our fabulous clients, that’s exactly what they did. After spending summers in Michigan, and winters in Bonita Springs, Florida, they decided to set down some roots. They purchased a home in Bonita Bay where they had enough space to build a guest suite for an aging parent who needed around the clock care.
After interviewing three different contractors, the chose to retain Progressive Design Build’s design services.
Progressive invested a lot of time during the design process to ensure the design concept was thorough and reflected the couple’s vision. Options were presented, giving these homeowners several alternatives and good ideas on how to realize their vision, while working within their budget. Progressive Design Build guided the couple all the way—through selections and finishes, saving valuable time and money.
When all was said and done, the design plan included a completely remodeled master suite, a separate master suite for the couple’s aging parents, a new kitchen, family room entertainment area, and laundry room. The cozy home was renovated with tiled flooring throughout, with the exception of carpeting in the bedrooms. Progressive Design Build modified some interior walls, created Wainscoted panels, a new home office, and completely painted the home inside and out.
This project resulted in the first of four additional projects this homeowner would complete with Progressive Design Build over the next five years.

 TKS Design Group
Download our free ebook, Creating the Ideal Kitchen. DOWNLOAD NOW
This client came to us in a bit of a panic when she realized that she really wanted her bathroom to be updated by March 1st due to having 2 daughters getting married in the spring and one graduating. We were only about 5 months out from that date, but decided we were up for the challenge.
The beautiful historical home was built in 1896 by an ornithologist (bird expert), so we took our cues from that as a starting point. The flooring is a vintage basket weave of marble and limestone, the shower walls of the tub shower conversion are clad in subway tile with a vintage feel. The lighting, mirror and plumbing fixtures all have a vintage vibe that feels both fitting and up to date. To give a little of an eclectic feel, we chose a custom green paint color for the linen cabinet, mushroom paint for the ship lap paneling that clads the walls and selected a vintage mirror that ties in the color from the existing door trim. We utilized some antique trim from the home for the wainscot cap for more vintage flavor.
The drama in the bathroom comes from the wallpaper and custom shower curtain, both in William Morris’s iconic “Strawberry Thief” print that tells the story of thrushes stealing fruit, so fitting for the home’s history. There is a lot of this pattern in a very small space, so we were careful to make sure the pattern on the wallpaper and shower curtain aligned.
A sweet little bird tie back for the shower curtain completes the story...
Designed by: Susan Klimala, CKD, CBD
Photography by: Michael Kaskel
For more information on kitchen and bath design ideas go to: www.kitchenstudio-ge.com
 Progressive Design Build
Southwest Florida’s hot summers and mild winters, along with amenity-rich communities and beautiful homes, attract retirees from around the world every year. And, it is not uncommon to see these active adults choosing to spend their summers away from Florida, only to return for the fall/winter.
For our fabulous clients, that’s exactly what they did. After spending summers in Michigan, and winters in Bonita Springs, Florida, they decided to set down some roots. They purchased a home in Bonita Bay where they had enough space to build a guest suite for an aging parent who needed around the clock care.
After interviewing three different contractors, the chose to retain Progressive Design Build’s design services.
Progressive invested a lot of time during the design process to ensure the design concept was thorough and reflected the couple’s vision. Options were presented, giving these homeowners several alternatives and good ideas on how to realize their vision, while working within their budget. Progressive Design Build guided the couple all the way—through selections and finishes, saving valuable time and money.
When all was said and done, the design plan included a completely remodeled master suite, a separate master suite for the couple’s aging parents, a new kitchen, family room entertainment area, and laundry room. The cozy home was renovated with tiled flooring throughout, with the exception of carpeting in the bedrooms. Progressive Design Build modified some interior walls, created Wainscoted panels, a new home office, and completely painted the home inside and out.
This project resulted in the first of four additional projects this homeowner would complete with Progressive Design Build over the next five years.
 United Home Experts
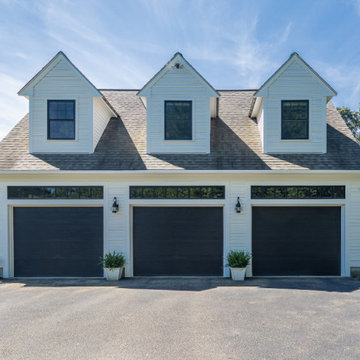
Over the last 3 years, this beautiful, center entrance colonial located in Norfolk, MA underwent a remarkable exterior remodel where we replaced the windows, and did exterior painting, carpentry, and an exterior door. An option many homeowners don’t consider is breaking up their project over time!
This project was staged in 5 portions where we addressed the following:
In 2019, we started by replacing 24 windows using Marvin Essential windows. They chose the popular, Ebony-colored exterior color frames and white exterior.
Later in 2019, they decided to replace additional windows.
In 2020, we replaced the remaining 13 windows with matching Marvin Essential windows and an entry door replacement and they chose a beautiful Provia Fiberglass French Door.
In 2020, the entire home is painted white with Sherwin Williams Resilience.
Built in 1988, this beautiful home in Norfolk, MA had older wooden clapboards and the homeowners were tired of the worn-out siding and wanted to give their home a facelift. With a modern farmhouse-like appeal, they chose a beautiful paint white colorway from Sherwin Williams and the black Ebony-colored windows from Marvin’s Essential line of black fiberglass windows.
For the homeowners, they were ready for a complete home makeover and they began carefully vetting who could make their house aspirations come to reality. Though humble in nature, these homeowners were going for the gold standard in remodeling their home and chose the best of the best products and the best company to do it.

 Reflections Water Gardens
After two years of fighting with a failing pond liner, the resident decided to replace the liner in the pond. This 150’ x 115’pond sat above and flowed into a larger pond which was lined with PVC liner. We were replacing this with a 45 mil epdm fishsafe rubber liner. This presented a problem: there is no way to adhere the new rubber liner to the existing PVC liner in the lower pond. The solution was to pour a cement 18” wide x 2’ deep footing next to the wier damn between the two ponds in order to connect the two liners together. The old liner was placed on the top of the footing and a water-block sealant was used. The new rubber liner was placed on top and another layer of sealant along with stainless steel bars were laid atop the two materials in order to press them together to maintain a water-tight junction. A drain tile system was installed beneath the liner to relieve ground water pressure and vent off any gasses. Water tight seals also had to be provided for multiple plumbing penetrations through the liner. Non-woven geotextile planting media bags were used to prevent erosion around the perimeter of the pond. As the pond was landscaped with lawn and perennials, these had to be removed and preserved and maintained throughout the project in order to return them upon completion of the lining. All trenching work and removal of plant material was done by hand in order to maintain the surrounding landscape; great care was taken throughout the project in order to protect existing hard and softscape, so that upon completion, the area appeared almost exactly as it had been before work began.
Photo by Larry Carnes
 Studio Saxe
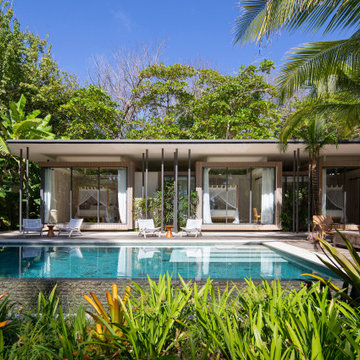
Studio Saxe was commissioned to design a beachfront house in the beautiful town of Santa Teresa in Costa Rica. We decided to integrate the jungle experience into the house and also frame the views of the ocean whilst blending with nature.
Concept
Studio Saxe decomposed the mass of the building into a series of pavilions with overlapping roofs that create interesting circulation spaces between the volumes. By dematerializing the volumes, we integrated the home into its lush surroundings.
Design
Studio Saxe used the decomposition of volumes to house the different programs of the project. Pavilions are divided into bedrooms, living spaces, service areas, and together they create a harmony that is weaved together through the circulation of indoor/outdoor spaces. This in turn allows the inhabitant to experience the intense natural surrounding every time they have to move from one place to the other.
Sustainability
The project was conceived as a decomposition of the volumes and this allowed for cross-ventilation due to the exposure of every space to at least 2 or 3 walls to the outside. The extended rooflines are carefully placed to protect from the sun and the rain through a process of bioclimatic design which analyzes the sun patterns, winds, and precipitation to create comfort without the use of energy. An array of sustainable systems such as rainwater catchment, water recycling systems, energy generation, and clever design makes this project a pioneer in sustainable tropical architecture that has passive design at its core.
Construction
Studio Saxe was interested in creating the sensation of floating rooflines, thus a series of thin columns support the roof planes in a way that they seem as they are floating A combination of steel and wood construction with concrete foundations allowed for the lightness of space, and this bleeding of boundaries between the structure and the outside.
Sponsored
Columbus, OH
Hope Restoration & General Contracting
Columbus Design-Build, Kitchen & Bath Remodeling, Historic Renovations
 Phoenix Home Remodeling
After years of dealing with the impractical layout and aging fixtures, Jennie decided it was time for a complete master bathroom remodel. She wanted a bathroom that not only functioned better but also reflected her style.
During the design phase, the team worked with Jennie to maximize the newly opened space. Removing the bathtub allowed for a significantly wider, more luxurious area.
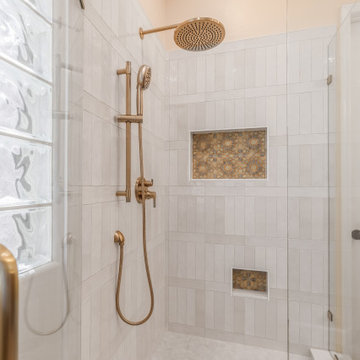
The new custom shower provides a stunning focal point for the room. The selection of MSI Surfaces' Eden Dolomite hexagon tiles for the shower floor and Arizona Tile’s Flash Ivory tiles for the walls ensured a sleek, modern look.
Every detail, from the new recessed bath niche featuring Amira Green Patterned Porcelain to the Champagne Bronze Delta Universal Showering fixtures, was carefully selected to bring Jennie’s dream bathroom to life.
On the vanity side, the layout was adjusted by converting two sinks into one, with a sleek new vessel sink from Kohler and a wall-mounted faucet from Delta Trinsic in Champagne Bronze.
The countertop gleamed with MSI Surfaces' Miraggio Gold Premium Natural Quartz, and the wall behind was tiled in the same green patterned porcelain as the shower niche, creating a cohesive and stylish design.
A frameless mirror and a four-light Lite Haus vanity in aged brass finished the vanity area. Sequoia Blonde 8x40 wood-look tiles were installed on the flooring in a random offset pattern for a natural flow throughout the bathroom.
With thoughtful design choices and high-quality materials, Jennie’s master bathroom evolved into a space that is not only practical but visually striking, combining timeless elegance with modern comforts.
 Craft Homes Northwest
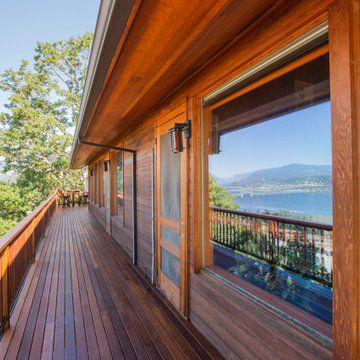
This home is remarkable in many ways. It features a simple but unique design that maximizes the site and breathtaking views. The home was originally built by a family who owned a local mill and who had choice selection of the wood used in its construction. We were brought in to restore the integrity of the 40-year-old deck, ensuring the new one preserved the precise aesthetic of the original.
The upper level features a cantilevered deck that wraps around the house without obscuring the view from the windows below. The structure of the deck was constructed of abnormally large rough-sawn fir joists milled to custom specifications. The joists run through the entire floor framing of the home and extend out as deck joists. Since the deck joists were so integral to the framing, preservation of the integrity of this structure was paramount.
The original cedar deck boards were failing, but the beautiful fir joists were well-preserved and could be fortified. After demoing the existing deck, we carefully removed all signs of dry rot, then tested the integrity of the fir joists. To ensure the longevity of the new deck, we added joists as needed to improve rigidity and weather-sealed the tops of each one with joist tape and metal flashing.
For the new decking, we decided on a very strong and durable solution, IPE wood, which we had milled to custom specifications to match the original boards. Working with this extremely hard wood has its challenges, but it was by far the best choice for this project.
We honored the design of the original railing by crafting a near replica. Admittedly, we tweaked a few dimensions, enhanced details of the assembly and added a few custom accents.
 Progressive Design Build
Southwest Florida’s hot summers and mild winters, along with amenity-rich communities and beautiful homes, attract retirees from around the world every year. And, it is not uncommon to see these active adults choosing to spend their summers away from Florida, only to return for the fall/winter.
For our fabulous clients, that’s exactly what they did. After spending summers in Michigan, and winters in Bonita Springs, Florida, they decided to set down some roots. They purchased a home in Bonita Bay where they had enough space to build a guest suite for an aging parent who needed around the clock care.
After interviewing three different contractors, the chose to retain Progressive Design Build’s design services.
Progressive invested a lot of time during the design process to ensure the design concept was thorough and reflected the couple’s vision. Options were presented, giving these homeowners several alternatives and good ideas on how to realize their vision, while working within their budget. Progressive Design Build guided the couple all the way—through selections and finishes, saving valuable time and money.
When all was said and done, the design plan included a completely remodeled master suite, a separate master suite for the couple’s aging parents, a new kitchen, family room entertainment area, and laundry room. The cozy home was renovated with tiled flooring throughout, with the exception of carpeting in the bedrooms. Progressive Design Build modified some interior walls, created Wainscoted panels, a new home office, and completely painted the home inside and out.
This project resulted in the first of four additional projects this homeowner would complete with Progressive Design Build over the next five years.
 Reflections Water Gardens
After two years of fighting with a failing pond liner, the resident decided to replace the liner in the pond. This 150’ x 115’pond sat above and flowed into a larger pond which was lined with PVC liner. We were replacing this with a 45 mil epdm fishsafe rubber liner. This presented a problem: there is no way to adhere the new rubber liner to the existing PVC liner in the lower pond. The solution was to pour a cement 18” wide x 2’ deep footing next to the wier damn between the two ponds in order to connect the two liners together. The old liner was placed on the top of the footing and a water-block sealant was used. The new rubber liner was placed on top and another layer of sealant along with stainless steel bars were laid atop the two materials in order to press them together to maintain a water-tight junction. A drain tile system was installed beneath the liner to relieve ground water pressure and vent off any gasses. Water tight seals also had to be provided for multiple plumbing penetrations through the liner. Non-woven geotextile planting media bags were used to prevent erosion around the perimeter of the pond. As the pond was landscaped with lawn and perennials, these had to be removed and preserved and maintained throughout the project in order to return them upon completion of the lining. All trenching work and removal of plant material was done by hand in order to maintain the surrounding landscape; great care was taken throughout the project in order to protect existing hard and softscape, so that upon completion, the area appeared almost exactly as it had been before work began.
Photo by Larry Carnes
 Reflections Water Gardens
After two years of fighting with a failing pond liner, the resident decided to replace the liner in the pond. This 150’ x 115’pond sat above and flowed into a larger pond which was lined with PVC liner. We were replacing this with a 45 mil epdm fishsafe rubber liner. This presented a problem: there is no way to adhere the new rubber liner to the existing PVC liner in the lower pond. The solution was to pour a cement 18” wide x 2’ deep footing next to the wier damn between the two ponds in order to connect the two liners together. The old liner was placed on the top of the footing and a water-block sealant was used. The new rubber liner was placed on top and another layer of sealant along with stainless steel bars were laid atop the two materials in order to press them together to maintain a water-tight junction. A drain tile system was installed beneath the liner to relieve ground water pressure and vent off any gasses. Water tight seals also had to be provided for multiple plumbing penetrations through the liner. Non-woven geotextile planting media bags were used to prevent erosion around the perimeter of the pond. As the pond was landscaped with lawn and perennials, these had to be removed and preserved and maintained throughout the project in order to return them upon completion of the lining. All trenching work and removal of plant material was done by hand in order to maintain the surrounding landscape; great care was taken throughout the project in order to protect existing hard and softscape, so that upon completion, the area appeared almost exactly as it had been before work began.
Photo by Larry Carnes
 Craft Homes Northwest
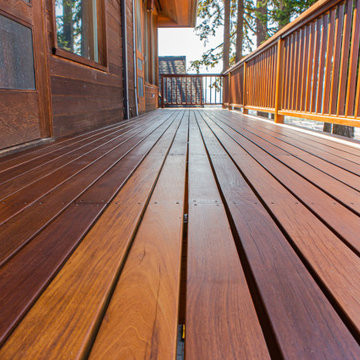
This home is remarkable in many ways. It features a simple but unique design that maximizes the site and breathtaking views. The home was originally built by a family who owned a local mill and who had choice selection of the wood used in its construction. We were brought in to restore the integrity of the 40-year-old deck, ensuring the new one preserved the precise aesthetic of the original.
The upper level features a cantilevered deck that wraps around the house without obscuring the view from the windows below. The structure of the deck was constructed of abnormally large rough-sawn fir joists milled to custom specifications. The joists run through the entire floor framing of the home and extend out as deck joists. Since the deck joists were so integral to the framing, preservation of the integrity of this structure was paramount.
The original cedar deck boards were failing, but the beautiful fir joists were well-preserved and could be fortified. After demoing the existing deck, we carefully removed all signs of dry rot, then tested the integrity of the fir joists. To ensure the longevity of the new deck, we added joists as needed to improve rigidity and weather-sealed the tops of each one with joist tape and metal flashing.
For the new decking, we decided on a very strong and durable solution, IPE wood, which we had milled to custom specifications to match the original boards. Working with this extremely hard wood has its challenges, but it was by far the best choice for this project.
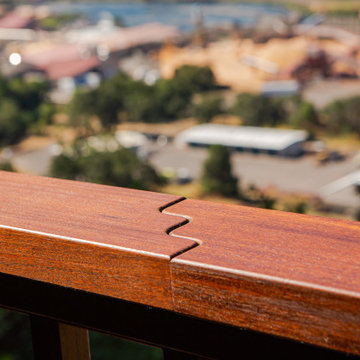
We honored the design of the original railing by crafting a near replica. Admittedly, we tweaked a few dimensions, enhanced details of the assembly and added a few custom accents.
 Craft Homes Northwest
This home is remarkable in many ways. It features a simple but unique design that maximizes the site and breathtaking views. The home was originally built by a family who owned a local mill and who had choice selection of the wood used in its construction. We were brought in to restore the integrity of the 40-year-old deck, ensuring the new one preserved the precise aesthetic of the original.
The upper level features a cantilevered deck that wraps around the house without obscuring the view from the windows below. The structure of the deck was constructed of abnormally large rough-sawn fir joists milled to custom specifications. The joists run through the entire floor framing of the home and extend out as deck joists. Since the deck joists were so integral to the framing, preservation of the integrity of this structure was paramount.
The original cedar deck boards were failing, but the beautiful fir joists were well-preserved and could be fortified. After demoing the existing deck, we carefully removed all signs of dry rot, then tested the integrity of the fir joists. To ensure the longevity of the new deck, we added joists as needed to improve rigidity and weather-sealed the tops of each one with joist tape and metal flashing.
For the new decking, we decided on a very strong and durable solution, IPE wood, which we had milled to custom specifications to match the original boards. Working with this extremely hard wood has its challenges, but it was by far the best choice for this project.
We honored the design of the original railing by crafting a near replica. Admittedly, we tweaked a few dimensions, enhanced details of the assembly and added a few custom accents.
29