
Search results for "Cleanup" in Home Design Ideas
 TATCOR DESIGN BUILD
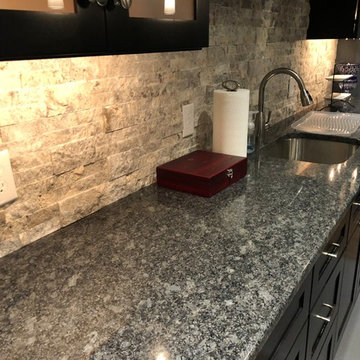
Close up of the full sink with additional granite counter top space and black cabinetry easily accessible from behind the bar for convenient initial mixing and clean-up later, as well as an effective view of the recessed lighting under and inside the wall-mounted black cabinets
 mackmiller design+build
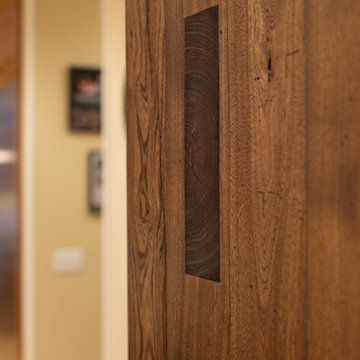
Our client loves to cook for her family and she requested a traditional kitchen that would blend with the rest of her home. She selected full overlay raised panel maple cabinets with a medium stain, bronze knobs and pulls and an oak floor. There are seedy glass inserts in the row above her upper cabinets. She chose all Thermador appliances including two 36" built-in refrigerator and freezer columns, gas cooktop and oven, a single oven and a microwave both housed in base cabinets. She selected Cambria quartz countertops and requested a recessed dog feeding station. We located it at the base of a tall kitchen cabinet and installed a quartz base for easy clean-up. A rustic sliding barn door with black iron hardware leads to her laundry room and adds character. Decorative lights with a bronze finish include a 3 three pendant fixture, a 5 light chandelier and 2 wall pendants. Recessed ceiling lights with dimmer switches provide plenty of general lighting. We clear coated her oak floors.
 Windward Pointe
Open House This Sunday 4/11/21 in Fishersville!
Your brand new, three-bedroom, 2.5-bathroom home awaits you in Windward Pointe! If you have been waiting for the perfect home for your family, this one is it! Your new kitchen features a large island with a built-in breakfast bar, stainless steel appliances, granite countertops, and hardwood floors. Warm yourself on cold days by the fireplace in the living room. There are many windows in this home, too, allowing the natural light to accent the home's beautiful construction.
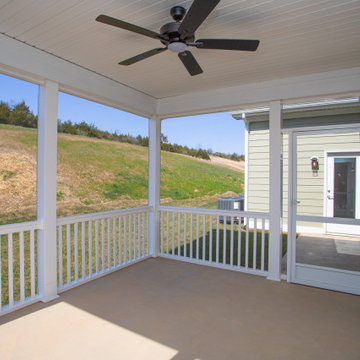
Enjoy the warmer weather on your screened-in back porch. The laundry room has plenty of cabinet space and a sink for easy clean-up. There is a bonus room just off the master suite, which would be perfect for a home office or nursery. Speaking of your new master suite, it features a walk-in closet and a master bath with a jetted tub, a stall shower, and his and her sinks!
Follow the gorgeous staircase to the second floor, where you'll find a loft/rec room area, two more bedrooms, a second full bath, and an unfinished bonus room! Plus, there's plenty of space for your vehicles in your new two-car garage!
This home is a must-see in person! Lucky for you, Ashley is hosting an open house this Sunday, April 11, 2021, at this stunning home! Visit her at 197 Windsor Drive, Fishersville, VA 22939, from 1 to 4 PM. This home is available with a builder's warranty for one year and qualifies for our easy owner financing program. Ashley has all the details! If you prefer to schedule a private tour or have any questions before the open house, contact her at 540-280-3385. We are an equal housing opportunity and warmly welcome realtors!
Find the right local pro for your project

 Picture Perfect Kitchen Designs
Photo Credit: Brandi Image Photography
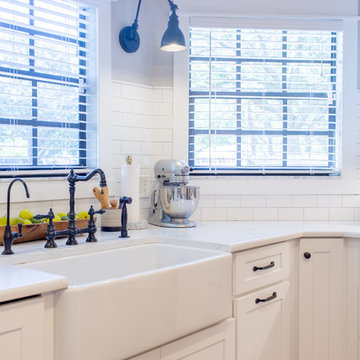
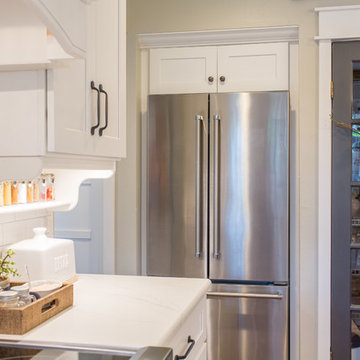
Our Modern Farmhouse Style reflects in our own personal kitchen and working showroom. The warmth of the Walnut Butcher Block sets the scene for gathering and also for long baking sessions. The Silestone Quartz countertop around the perimeter makes it for easy clean up - especially around the range area. That heavy cooking zone features a custom PPKD built wood hood with all the detailing in the crown molding. The glass hutch serves as a perfect every day dish cabinet, while glass on the range wall also helps to lighten up the heavy load. The Farmhouse sink provides a beautiful clean-up station with the bridge faucet to add beauty and tradition. The purifier is strategically set up near the coffee station for early morning risers. The refrigerator is built into an old walkway that was under-used and it provides the perfect spot to house a hard working appliance. The dishwasher is paneled and tucked away beside the sink while the double pull-out trash is also camoflauged adjacent to the sink.
We welcome you to make your Design Consult Appointment today so you can come and see the beauty, quality, and special touches we will put in your home, as we did with ours.
 Atlanta Porch & Patio
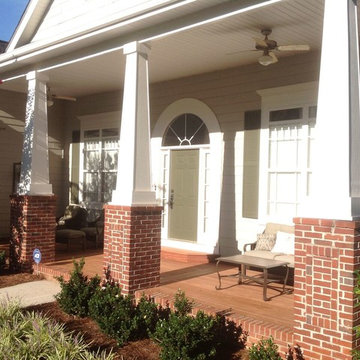
The brick around the edge of the porch really sets off the hardwood on this front porch.
At Atlanta Porch & Patio we are dedicated to building beautiful custom porches, decks, and outdoor living spaces throughout the metro Atlanta area. Our mission is to turn our clients’ ideas, dreams, and visions into personalized, tangible outcomes. Clients of Atlanta Porch & Patio rest easy knowing each step of their project is performed to the highest standards of honesty, integrity, and dependability. Our team of builders and craftsmen are licensed, insured, and always up to date on trends, products, designs, and building codes. We are constantly educating ourselves in order to provide our clients the best services at the best prices.
We deliver the ultimate professional experience with every step of our projects. After setting up a consultation through our website or by calling the office, we will meet with you in your home to discuss all of your ideas and concerns. After our initial meeting and site consultation, we will compile a detailed design plan and quote complete with renderings and a full listing of the materials to be used. Upon your approval, we will then draw up the necessary paperwork and decide on a project start date. From demo to cleanup, we strive to deliver your ultimate relaxation destination on time and on budget.
 Seattle Sustainable Landscapes
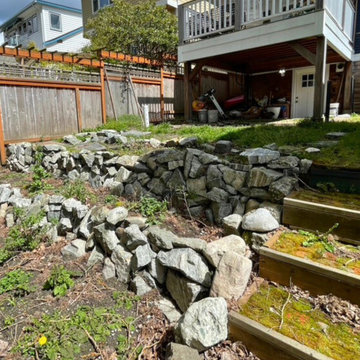
This is an example of a small victorian backyard stone and stone fence retaining wall landscape in Seattle.
 Atlanta Porch & Patio
At Atlanta Porch & Patio we are dedicated to building beautiful custom porches, decks, and outdoor living spaces throughout the metro Atlanta area. Our mission is to turn our clients’ ideas, dreams, and visions into personalized, tangible outcomes. Clients of Atlanta Porch & Patio rest easy knowing each step of their project is performed to the highest standards of honesty, integrity, and dependability. Our team of builders and craftsmen are licensed, insured, and always up to date on trends, products, designs, and building codes. We are constantly educating ourselves in order to provide our clients the best services at the best prices.
We deliver the ultimate professional experience with every step of our projects. After setting up a consultation through our website or by calling the office, we will meet with you in your home to discuss all of your ideas and concerns. After our initial meeting and site consultation, we will compile a detailed design plan and quote complete with renderings and a full listing of the materials to be used. Upon your approval, we will then draw up the necessary paperwork and decide on a project start date. From demo to cleanup, we strive to deliver your ultimate relaxation destination on time and on budget.
 Moss & Jane
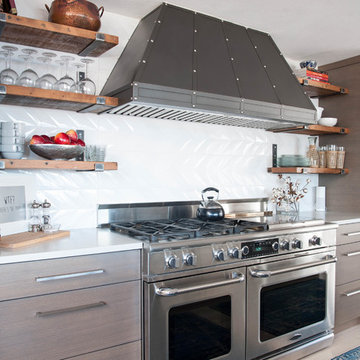
Midcentury modern home on Lake Sammamish. We used mixed materials and styles to add interest to this bright space. A Caesarstone quartz insert protects the reclaimed wood counter top and provides a work space for the chef. The crushed granite sink allows for easy clean-up and a scratch proof surface.
 TaylorPro Design and Remodeling, Inc.
"From the very beginning, it was obvious that Kerry Taylor is a creative, calm, solution oriented person who deals with challenges extremely well. His professionalism, knowledge, and work ethic are exemplary and his crew mirrors every one of those qualities. From structural problems that required immediate resolution to working around other contractors (flooring, windows), to everyday cleanup and protection of our surroundings, they did it all. Kerry designed and built special structures to support the cabinet crown moldings that we had purchased and which turned out not to be as we expected. We hadn't decided on everything ahead of time and the necessary resulting change orders were very decently priced and well documented in his invoices and receipts. He came in absolutely on budget and on time because he knows how to efficiently manage a project so that the workflow is smooth. We will absolutely call on him for future projects."
~ Avis D, Client
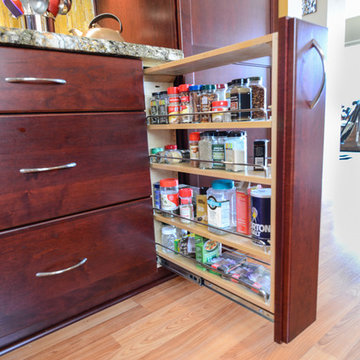
Single bowl sink, double faucets, under cabinet led lighting, TV center, key cabinet, spice rack pull out, toe kick drawer, rollouts, stainless steel hood, pendant, solar tube, appliance garage.
Photo by: Kerry W. Taylor


 Picture Perfect Kitchen Designs
Photo Credit: Brandi Image Photography
Our Modern Farmhouse Style reflects in our own personal kitchen and working showroom. The warmth of the Walnut Butcher Block sets the scene for gathering and also for long baking sessions. The Silestone Quartz countertop around the perimeter makes it for easy clean up - especially around the range area. That heavy cooking zone features a custom PPKD built wood hood with all the detailing in the crown molding. The glass hutch serves as a perfect every day dish cabinet, while glass on the range wall also helps to lighten up the heavy load. The Farmhouse sink provides a beautiful clean-up station with the bridge faucet to add beauty and tradition. The purifier is strategically set up near the coffee station for early morning risers. The refrigerator is built into an old walkway that was under-used and it provides the perfect spot to house a hard working appliance. The dishwasher is paneled and tucked away beside the sink while the double pull-out trash is also camoflauged adjacent to the sink.
We welcome you to make your Design Consult Appointment today so you can come and see the beauty, quality, and special touches we will put in your home, as we did with ours.

 Bilotta Kitchen & Home
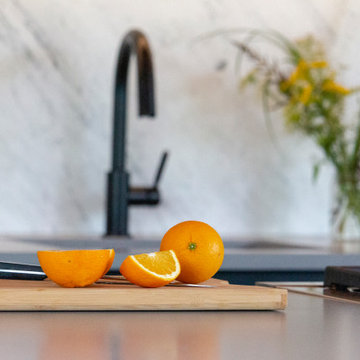
Nestled atop a wooded ridge in the Hudson Highlands, the architect-owner envisioned a reinterpretation of renowned mid-century experimental “Case Study Homes”. An authentic representation of the materials and a clear outdoor-indoor connection were priorities for the design. Heart pine on the ceiling references the forested surroundings. All cabinets are Bilotta’s private Bilotta Collection cabinetry. The island and wall cabinets are distinctive: natural walnut quarter-sawn veneer trimmed with thin strips of natural walnut solid stock. Matte black on the paneled refrigerator, tall pantry and rear base cabinets frame the area and merge into the black structural columns. Balancing the darker finishes is a single slab of Carrera marble on the backsplash, with Caesarstone in “Concrete” topping the cabinetry. Surrounded by walls of glass, the kitchen is flanked by oversized impressive roof overhangs with exposed joists. Inside, a header was placed to align with the outermost joist and delineate the prep area. Within that footprint, natural heart pine planks line the ceiling, parallel to the outdoor joists. This creates the illusion that the overhang enters the kitchen at one end and exits out the other, further obscuring the line between indoors and out. As a counterpoint to strong vertical cabinet lines and horizontal ceiling lines, a unique bronze scissor-armed light fixture creates a diamond pattern across the length of the kitchen. At the intersection of each arm is an individual half-gold exposed light bulb, resulting in pools of illumination that highlight the beautiful grain pattern and coloration of the wood ceiling – a stunning alternative to ubiquitous recessed lighting. Although it’s not large, this kitchen offers an abundance of storage and countertop space for meal prep and serving. The refrigerator and tall pantry bookend the space; making them equal in size imparts pleasing symmetry. With the sink centered along the back wall and the range centered in the island, there’s plenty of elbow room on each side of the appliances. Everything is within arms’ reach for easy use and fast cleanup. The gray hues of the “Concrete” colored quartz tops and the veining of the Carrera backsplash echo the stone outcroppings in the landscape and provide contrast to the variety of wood tones throughout the room.
 Jarrett Design
This remodel was a dated 1980s Cape Cod style home that desperately needed updating with the kitchen starting as the foundation for the rest of the home. The owners purchased the property in 2013 with the intent of replacing the existing kitchen installed in 2000, as well as updating most surfaces throughout the home. The space while moderately sized, felt cramped due to the L-shaped design and eat-in island that disrupted traffic flow from the mudroom, dining room and sliding doors to the patio. The owners knew they wanted to bring the light from the southern facing front of the home to the dark cave-like feeling of the kitchen. This was remedied by knocking down the wall between the existing dining room (now a lounge area), widening the entrance to the family room and creating a pathway to the existing formal living room (now the dining room). Also to create better traffic flow into the kitchen, the existing mudroom door was moved to the opposite side of the wall.
A large work island with cooktop, oven and convection/microwave was designed for efficiency and maintaining clean site lines. The work triangle allows for quick and easy meal prep and clean-up for the busy family. Space at the end of the kitchen was perfectly suited for a large kitchen table with views of the back yard, easy conversation with the cook at the island or those hanging in the newly appointed lounge area. The new doorway between the kitchen and dining room showcases the 10ft floor to ceiling bay window, allows more light to flood into the space and creates easy access between the two rooms for family gatherings. Given the home owners relocated to the area for job reasons and are not sure how long they will be in this home, we helped them achieve a balance of a design and finishes that they not only love, but would be appealing to many if another move was in their near future.
Matt Villano Photography
 D&G Construction
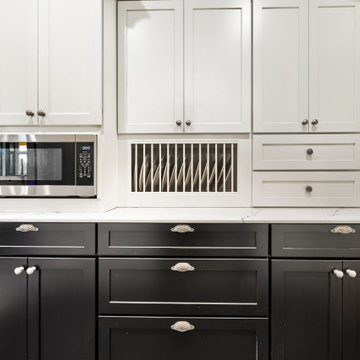
This kitchen remodel was designed to make a statement—balancing bold character with refined craftsmanship to create a space that’s both highly functional and visually unforgettable.
At the heart of the design is a striking contrast palette. Crisp white perimeter cabinetry keeps the space bright and open, while rich black lower cabinets and a substantial island ground the room with depth and sophistication. The oversized island serves as both a functional workspace and a central gathering point, topped with a dramatic stone surface that adds movement and texture.
The flooring plays a defining role in the overall aesthetic. A custom black-and-white patterned tile layout introduces energy and personality, transforming the kitchen into a true design centerpiece while maintaining a timeless appeal. This bold foundation is thoughtfully balanced by clean lines, classic shaker cabinetry, and elegant hardware selections.
Functionality was a key driver throughout the project. The layout maximizes workflow efficiency with dedicated zones for cooking, prep, and cleanup. A professional-grade range anchors the island, while the farmhouse sink positioned beneath large windows brings in natural light and enhances the everyday experience. Custom storage solutions—including extended cabinetry, integrated dish storage, and built-in appliance areas—ensure everything has its place without compromising the clean aesthetic.
Lighting was carefully layered to elevate both form and function. Statement pendant fixtures above the island add architectural interest, while recessed lighting provides consistent illumination throughout the space.
The result is a kitchen that feels both elevated and livable—where bold design choices meet practical everyday use. It’s a space designed not just to cook in, but to gather, entertain, and truly enjoy.


 Envision Web
Stuart Wade, Envision Virtual Tours, Inc.
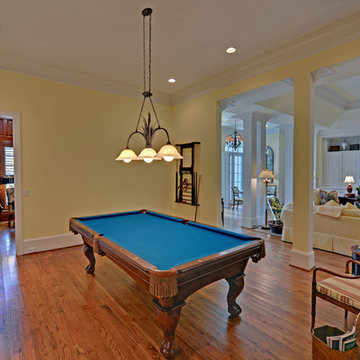
Envision Virtual Tours and High Resolution Photography is your best choice to find just what you are looking for in the Lake Burton Area . Knowing the areas and resources of Lake Burton is our specialty
Lake Burton is a 2,775 acre man-made lake with 62 miles of shoreline located in the northeastern corner of Georgia in Rabun County. It is the first lake in a five-lake series called the Tallulah River Watershed that follows the original course of the Tallulah River. The series of lakes starts with Lake Burton as the northernmost lake followed by Lake Seed, Lake Rabun, Lake Tallulah Falls and the eastern arm of Lake Tugalo (the western arm is formed by the Chattooga River. The lakes are owned and operated by the Georgia Power Company to generate hydroelectric energy for Georgia's largest city, Atlanta. At one time these lakes were the largest producers of electricity in the state of Georgia. Now, they only provide peak power supply.
The lake was built in a deep valley located along a 10 mile section of the Tallulah River. The Lake Burton Dam was closed on December 22, 1919 and the lake started to fill. The dam is a gravity concrete dam, with a height of 128 feet and a span of 1,100 feet. The spillway is equipped with eight gates 22 feet wide by 6.6 feet high. The total capacity at an elevation of 1,866.6 feet is 108,000 acre-ft, of which 106,000 acre-ft is usable storage. The generating capacity of the dam is 6,120 kilowatts (two units).Lake Burton is the highest Georgia Power lake in Georgia.
Lake Burton gets its named from the town of Burton, which was the second largest town in Rabun County with a population of approximately 200 but now lies below the lake's surface. The town (and the lake) was named after local prominent citizen Jeremiah Burton and was situated along the road from Clayton, Georgia to the Nacoochee Valley. Andrew Jackson Ritchie served as the postmaster for the area for several years. Gold was first discovered in Rabun County where Dicks Creek and the Tallulah River come together and was the reason for the town's founding in the early 1800s.
The Lake Burton Fish Hatchery and Moccasin Creek State Park are located on the western side of the lake. Lake Burton is home to several species of fish, including Spotted Bass, Largemouth Bass, White Bass, Black Crappie, Bluegill, Redear Sunfish, White Catfish, Walleye, Brown Trout, Rainbow Trout, and Yellow Perch.
The residents of Lake Burton are a mix of permanent residents and seasonal vacationers who together make-up the Lake Burton Civic Association, a local organization who goal is to maintain the lake through volunteer clean-ups and other such events. Let a Lake Burton resident and expert show you the way
The Lake Burton Civic Association is an active homeowners association for residents of the Lake Burton area and sponsors many events throughout the year such as:
burton, custom, envision, georgia, lake, mountain, nc, north, photography, web, western, Lake Burton, Lake Rabun, Seed Lake,Virtual Tours.
93