
Search results for "Cloud based solutions" in Home Design Ideas
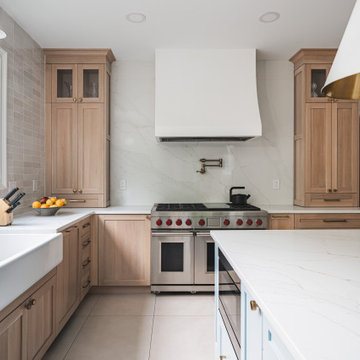
 Boss Design Center
This thoughtfully designed kitchen blends the clean simplicity of Scandinavian style with the warmth of natural materials. Light oak shaker cabinetry pairs seamlessly with a soft blue quartzite island, creating a balanced palette that feels fresh yet timeless. Brass hardware, a farmhouse sink, and oversized pendant lights add refined character without overpowering the space.
A custom range hood and full-height ceramic tile backsplash provide subtle texture and visual interest, while panel-ready appliances and smart storage solutions keep the look streamlined. The spacious island offers ample prep space and casual seating, making it both functional and welcoming for everyday life.
From the light porcelain tile flooring to the gold-toned fixtures and tailored detailing, every element works in harmony to create a bright, inviting kitchen that celebrates craftsmanship and modern living.
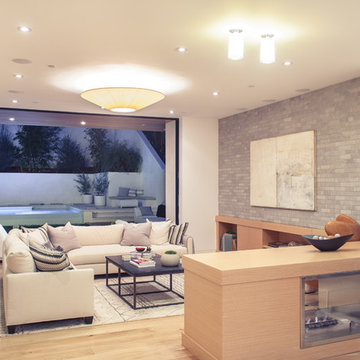
 Building Solutions and Design, Inc
Photo credit: Charles-Ryan Barber
Architect: Nadav Rokach
Interior Design: Eliana Rokach
Staging: Carolyn Greco at Meredith Baer
Contractor: Building Solutions and Design, Inc.
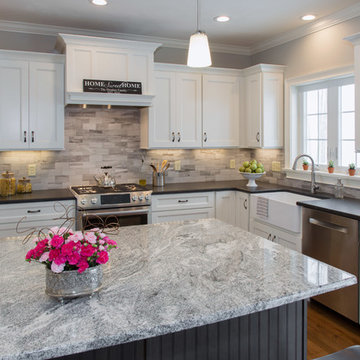
 Granite Plus
Outstanding kitchen installed in Dracut, MA. Black Pearl leather granite on top of white cabinets and Silver Cloud granite complementing the island. Great combination!
Find the right local pro for your project
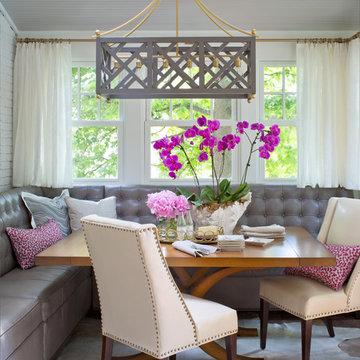
 Laura Lee Home
Emily Minton Redfield
Example of a mid-sized transitional enclosed dining room design in St Louis with white walls
Example of a mid-sized transitional enclosed dining room design in St Louis with white walls
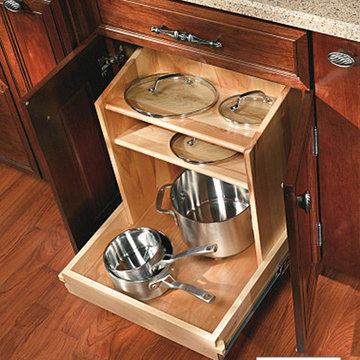
 Decora at The Home Depot
Keep your cookware neat and easy to find with integrated shelves that allow lid storage above their corresponding pots and pans.
Inspiration for a kitchen remodel in Other
Inspiration for a kitchen remodel in Other
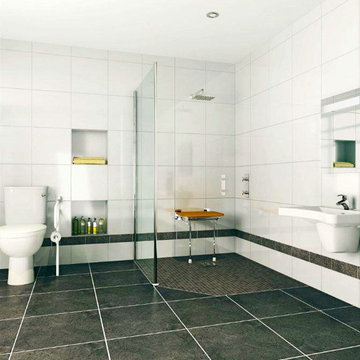
 Innovate Building Solutions
A barrier free glass reinforced plastic base former is set directly on the studs (or can be used with a concrete floor) to make this one level wet room shower really work well and look sleek. Notice how the niches are set lower for easy access for someone in a wheelchair. The wall mounted sink is easy to roll under. The large tile size in the bathrooms makes for less grout joints.
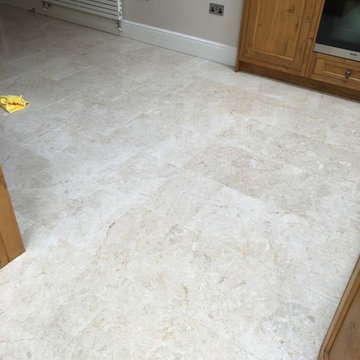
 Tile Doctor Ltd
Marble tiles can be tumbled in large drums to achieve an aged and softened effect, and this can look very nice providing that the stone is adequately maintained.
In the case of this floor at a property in Twickenham South West London, the Marble tiles that had been laid over five years ago, and in that time the sealer had worn down offering the floor little protection. Dirt had now become ingrained in the pores of the stone and grout, and a deep clean and fresh seal were required to restore the stone’s original colour and lustre. The property owner asked me to complete the job and I was more than happy to oblige.
To begin the restoration, I applied both Tile Doctor Pro-Clean, which is a high alkaline cleaner, and Tile Doctor Remove and Go, which a heavy-duty stripper and remover, to the floor and scrubbed the products in using a scrubbing pad fitted to a professional rotary machine.
The chemical solvents in the Remove and Go helped to break down any old sealer that remained inside the stone, allowing the Pro Clean to then work its magic on the stubborn ingrained dirt the customer had struggled to remove previously. Some of the deeper veins and grout lines I chose to scrub by hand to ensure the fullest and most meticulous clean possible.
The resulting soiled cleaning solution was then pressure rinsed with water and the soil extracted with a wet-vacuum, leaving a completely clean floor that was now ready to be sealed using a new sealant.
I returned to the property the following day after allowing the Marble tiles to dry fully. Drying the tiles is a crucial part of the restoration process, since even a small quantity of excess moisture can cloud the sealer and prevent it from working to its fullest capabilities.
I applied two coats of our solvent-based impregnating sealer known as Tile Doctor Colour Grow. As the name of the product suggests, Colour Grow not only protects the tiles against ingrained soil, it also thoroughly lifts and enhances the natural colours in the stone.
The new seal will make it easy for our customer to maintain the floor, making daily cleaning easier. It will also protect the stone against the nasty spillages that are common in kitchens and living rooms.
The customer was thrilled with the much-improved appearance of the Marble tiles and is very reassured that they will now stay in great condition for a long time. Another satisfied client!
Jonathan Oldham
South Middlesex Tile Doctor

 DesignbyRuchi
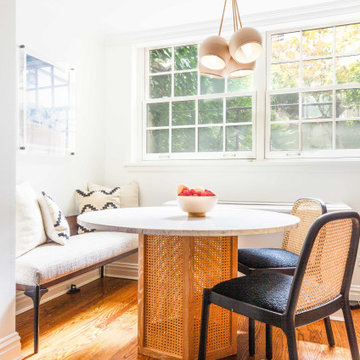
We love this dining room. The bench and 2 chairs add enough seating for friends to scooch in and lounge. The round table and its beauitful cane base and travetine stone top anchored by blush ceramic chandelier above look beutiful. The bowl of fruits with Lychee and peach adds a textural layer. The blue ocean art set in custom modern floating frames bring it all together.
 Tile Doctor Ltd
The pictures showed are of an Encaustic Cement tiled floor that had been installed in the bathroom of a property in Twickenham. At the time the tiles were installed, they did not seal them and had since accumulated dirt, especially in the grout lines.
Encaustic cement tiles have become extremely popular in the last few years with many beautiful artistic often geometric patterns available to choose from. The very nature of the cement-based tile however does make it slightly porous, and if left unsealed dirt will become ingrained in the tile making it difficult to remove and keep clean. Like grout they do therefore need to be sealed in order to keep them looking at their best for longer.
Now we normally recommend using diamond encrusted burnishing pads when renovating Encaustic Cement tiles however in this case the face of the tiles were not too bad and it was really the grout that needed the most attention. So, to cut the cost for customer, I advised a straightforward alkaline scrub clean and seal.
To clean the tile and grout I sprayed the floor with a strong dilution of Tile Doctor Pro-Clean and left it to soak into the dirt for ten minutes. Space in the bathroom was quite tight so instead of using a mechanical floor scrubber I scrubbed the tile and grout by hand working the alkaline cleaning solution into the pores to release the grout in dirt.
After scrubbing the floor was rinsed with a little water and the soil removed with a wet vacuum. Afterwards the floor was inspected, and any stubborn areas retreated with repeat of the process. After a final rinse, the floor was dried as much as possible with the wet vacuum.
Fortunately, the weather has been amazing of late and so it did not take long for the floor to dry, being a small space and a little encouragement from a heat gun always helps. Removing excess moisture before sealing is essential as even a small amount can cloud the sealer resulting in an uneven appearance.
Once satisfied that the floor was dry, I proceeded to seal it by applying a couple two coats of Tile Doctor Colour Grow across the Encaustic tile and grout. As an impregnating sealer Colour Grow penetrates the pores of the cement occupying the space and thus prevent any dirt from becoming ingrained there. Colour Grow’s colour intensifying properties also helped to deepen the black colour of the tile enhancing the contrast between the tiles and grout.
Now the floor has been properly sealed it will be far easier for the customer to keep them clean in future. For maximum longevity of the sealer I recommend maintenance cleaning with Tile Doctor Neutral Cleaner. Don’t be tempted to use supermarket cleaning products without reading the label first, many are simply too strong for cleaning sealed surfaces and will strip off the sealer prematurely leaving the tiles unprotected.
Jonathan Oldham
South Middlesex Tile Doctor
 Change Your Bathroom©
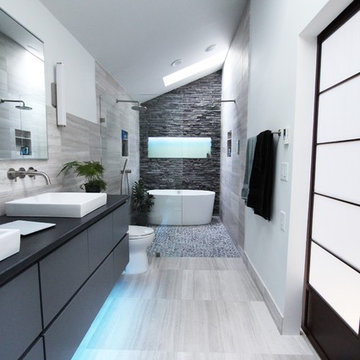
The goal of this project was to upgrade the builder grade finishes and create an ergonomic space that had a contemporary feel. This bathroom transformed from a standard, builder grade bathroom to a contemporary urban oasis. This was one of my favorite projects, I know I say that about most of my projects but this one really took an amazing transformation. By removing the walls surrounding the shower and relocating the toilet it visually opened up the space. Creating a deeper shower allowed for the tub to be incorporated into the wet area. Adding a LED panel in the back of the shower gave the illusion of a depth and created a unique storage ledge. A custom vanity keeps a clean front with different storage options and linear limestone draws the eye towards the stacked stone accent wall.
Houzz Write Up: https://www.houzz.com/magazine/inside-houzz-a-chopped-up-bathroom-goes-streamlined-and-swank-stsetivw-vs~27263720
The layout of this bathroom was opened up to get rid of the hallway effect, being only 7 foot wide, this bathroom needed all the width it could muster. Using light flooring in the form of natural lime stone 12x24 tiles with a linear pattern, it really draws the eye down the length of the room which is what we needed. Then, breaking up the space a little with the stone pebble flooring in the shower, this client enjoyed his time living in Japan and wanted to incorporate some of the elements that he appreciated while living there. The dark stacked stone feature wall behind the tub is the perfect backdrop for the LED panel, giving the illusion of a window and also creates a cool storage shelf for the tub. A narrow, but tasteful, oval freestanding tub fit effortlessly in the back of the shower. With a sloped floor, ensuring no standing water either in the shower floor or behind the tub, every thought went into engineering this Atlanta bathroom to last the test of time. With now adequate space in the shower, there was space for adjacent shower heads controlled by Kohler digital valves. A hand wand was added for use and convenience of cleaning as well. On the vanity are semi-vessel sinks which give the appearance of vessel sinks, but with the added benefit of a deeper, rounded basin to avoid splashing. Wall mounted faucets add sophistication as well as less cleaning maintenance over time. The custom vanity is streamlined with drawers, doors and a pull out for a can or hamper.
A wonderful project and equally wonderful client. I really enjoyed working with this client and the creative direction of this project.
Brushed nickel shower head with digital shower valve, freestanding bathtub, curbless shower with hidden shower drain, flat pebble shower floor, shelf over tub with LED lighting, gray vanity with drawer fronts, white square ceramic sinks, wall mount faucets and lighting under vanity. Hidden Drain shower system. Atlanta Bathroom.
 Camelot Homes
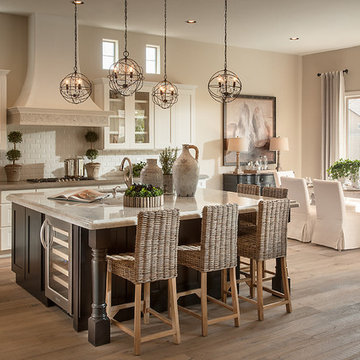
This light and airy kitchen invites entertaining and features multiple seating areas. The cluster of light fixtures over the island adds a special touch
 Amy Sklar Design Inc
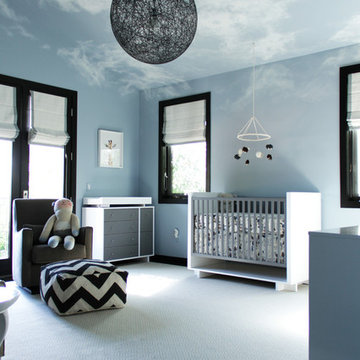
Nursery Remodel Los Angeles, CA
Photographer: Casey Hale
Mid-sized trendy gender-neutral nursery photo in Los Angeles with blue walls
Mid-sized trendy gender-neutral nursery photo in Los Angeles with blue walls
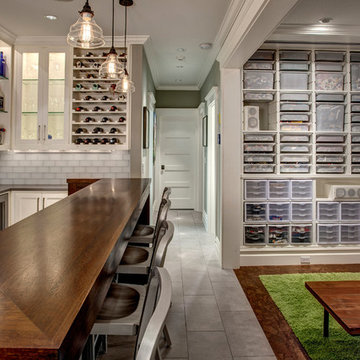
 Board & Vellum
A custom built room for LEGO storage also provides a backdrop for a Media Room and a nearby bar. John Wilbanks Photography
Basement - transitional underground basement idea in Seattle with gray walls and a bar
Basement - transitional underground basement idea in Seattle with gray walls and a bar
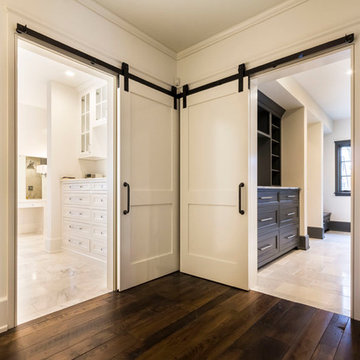

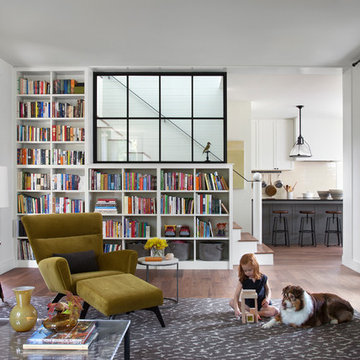
 Cuppett Kilpatrick Architecture + Interior Design
Ryann Ford
Mid-sized cottage living room library photo in Austin
Mid-sized cottage living room library photo in Austin
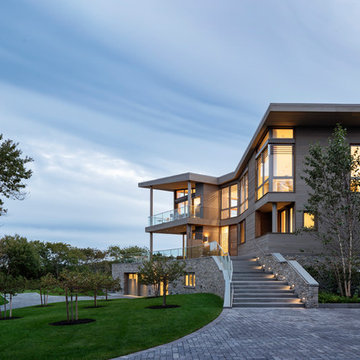
 Amanda Martocchio Architecture
When a world class sailing champion approached us to design a Newport home for his family, with lodging for his sailing crew, we set out to create a clean, light-filled modern home that would integrate with the natural surroundings of the waterfront property, and respect the character of the historic district.
Our approach was to make the marine landscape an integral feature throughout the home. One hundred eighty degree views of the ocean from the top floors are the result of the pinwheel massing. The home is designed as an extension of the curvilinear approach to the property through the woods and reflects the gentle undulating waterline of the adjacent saltwater marsh. Floodplain regulations dictated that the primary occupied spaces be located significantly above grade; accordingly, we designed the first and second floors on a stone “plinth” above a walk-out basement with ample storage for sailing equipment. The curved stone base slopes to grade and houses the shallow entry stair, while the same stone clads the interior’s vertical core to the roof, along which the wood, glass and stainless steel stair ascends to the upper level.
One critical programmatic requirement was enough sleeping space for the sailing crew, and informal party spaces for the end of race-day gatherings. The private master suite is situated on one side of the public central volume, giving the homeowners views of approaching visitors. A “bedroom bar,” designed to accommodate a full house of guests, emerges from the other side of the central volume, and serves as a backdrop for the infinity pool and the cove beyond.
Also essential to the design process was ecological sensitivity and stewardship. The wetlands of the adjacent saltwater marsh were designed to be restored; an extensive geo-thermal heating and cooling system was implemented; low carbon footprint materials and permeable surfaces were used where possible. Native and non-invasive plant species were utilized in the landscape. The abundance of windows and glass railings maximize views of the landscape, and, in deference to the adjacent bird sanctuary, bird-friendly glazing was used throughout.
Photo: Michael Moran/OTTO Photography
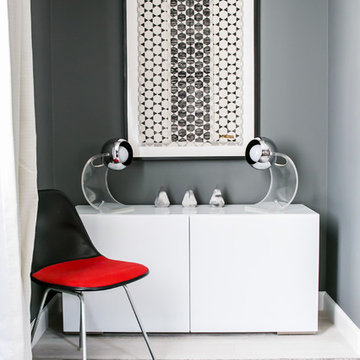
 SHIALICE
Rare "Dash99" Herman Miller chair from the 1970s.
Pair of chrome Sonneman Eyeball Lamps
Framed African textile from St. Frank
Concrete objects from Fankenlaur in Austria
Custom blackout drapery
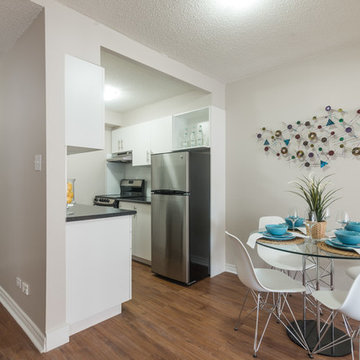
 Unique Home Solutions Inc.
Katia Provencher-Photographer
680 Sq. Ft. condo Model Suite. It is a small condo but feels like there is a lot of room. The colours were based on Rainy Day artwork and metal art Nick-Nacks by Olivia Salazar.
If you would like a home staging consultation or redesign of the interior of your house, give us a call. Unique Home Solutions Inc. has been in business since 2006.
Joanne Vroom 514-222-5553
 Star Furniture
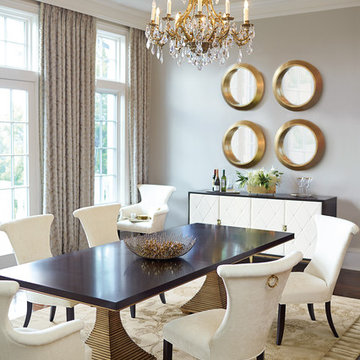
This "high energy" collection is part of a new category: glamorous transitional. Occasional tables are elegantly styled and feature brass plated metal frames. Added details such as embossed leather, antiqued mirror, and quilted bonded fabric/leather add unique elements to this high style, elegant furniture line.
BUFFET:
Ribbon stripe sapele veneers. Four wrapped doors quilted in white bonded leather with nailhead. Behind each pair of doors is one adjustable/removable shelf, one fully extendable drawer with hand cut-out and one fixed shelf. Left drawer has silverware insert. Right drawer has wrapped pad. Adjustable glides. Anti-tip kit. Caviar finish with gold finish base.
See if it’s ON SALE: https://www.starfurniture.com/current-promotion
 Design Filter
Photo by Matt Dahlman
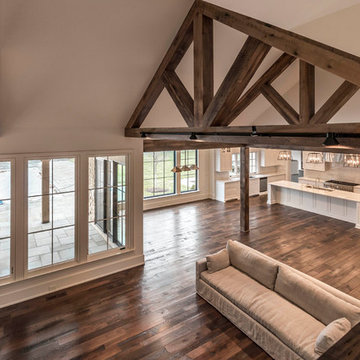
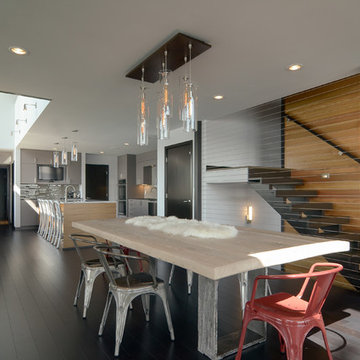
Kitchen/dining room combo - contemporary kitchen/dining room combo idea in Minneapolis with white walls
Kitchen/dining room combo - contemporary kitchen/dining room combo idea in Minneapolis with white walls
 Decora at The Home Depot
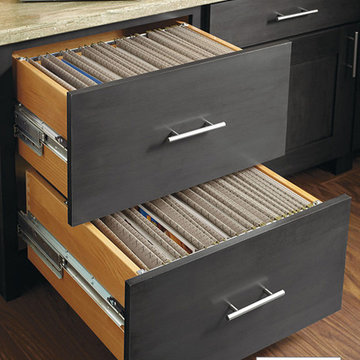
Store and organize all of your important papers and documents in this file drawer cabinet.
Home office photo in Other
Home office photo in Other
13