Search results for "Connection issues" in Home Design Ideas
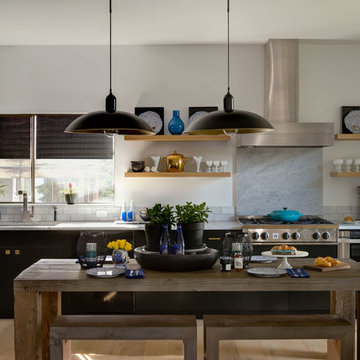
Condos are often a challenge – can’t move water, venting has to remain connected to existing ducting and recessed cans may not be an option. In this project, we had an added challenge – we could not lower the ceiling on the exterior wall due to a continual leak issue that the HOA has put off due to the multi-million-dollar expense.
DESIGN PHILOSOPHY:
Work Centers: prep, baking, clean up, message, beverage and entertaining.
Vignette Design: avoid wall to wall cabinets, enhance the work center philosophy
Geometry: create a more exciting and natural flow
ANGLES: the baking center features a Miele wall oven and Liebherr Freezer, the countertop is 36” deep (allowing for an extra deep appliance garage with stainless tambour).
CURVES: the island, desk and ceiling is curved to create a more natural flow. A raised drink counter in Sapele allows for “bellying up to the bar”
CIRCLES: the 60” table (seating for 6) is supported by a steel plate and a custom column (used also to support the end of the curved desk – not shown)
ISLAND CHALLENGE: To install recessed cans and connect to the existing ducting – we dropped the ceiling 6”. The dropped ceiling curves at the end of the island to the existing ceiling height at the pantry/desk area of the kitchen. The stainless steel column at the end of the island is an electrical chase (the ceiling is concrete, which we were not allowed to puncture) for the island
Cabinets: Sapele – Vertical Grain
Island Cabinets: Metro LM 98 – Horizontal Grain Laminate
Countertop
Granite: Purple Dunes
Wood – maple
Drink Counter: Sapele
Appliances:
Refrigerator and Freezer: Liebherr
Induction CT, DW, Wall and Steam Oven: Miele
Hood: Best Range Hoods – Cirrus
Wine Refrigerator: Perlick
Flooring: Cork
Tile Backsplash: Artistic Tile Steppes – Negro Marquina
Lighting: Tom Dixon
NW Architectural Photography

Upon first entering this early 1900s North Asheville home, Sean Perry felt as if he’d stepped back in time. And though it needed a full restoration — addressing multiple structural issues, as well as outdated electrical, plumbing, gas and insulation systems — maintaining the home’s historical integrity was at the forefront of this massive (and ultimately striking) undertaking.
With a goal of updating the home for modern living, The Hands of Sean Perry Co. rebuilt the original Porte Cochere to accommodate today’s vehicles. Then, the team installed a pool and stone deck in the backyard, giving the homeowners and their children a place to relax and enjoy sunny summer afternoons. Bringing even more light to the project, the crew relocated the home’s kitchen to its sunniest room, directly next to the veranda, drawing better connections between dining and entertaining.
In addition to these big changes, every room, including the basement, received updates and renovations — the dining room, kitchen, mudroom, living room, three full- and two half-bathrooms, four bedrooms, two office rooms and a finished attic space. Keeping as many details true to the home’s historic character as possible, the team even restored the original heart pine and oak floors, as well as its central staircase.

When homeowners Garry and Sherry bought their 1799 farmhouse in Lancaster, they prepared themselves for many years of renovation: 28 years, to be exact. They gradually tackled inside projects like the master bath, basement, a recent kitchen remodel and even an office-turned-Irish pub. During one painfully hot summer, they installed a pool that became their go-to for summer entertainment and parties. Now, Garry and Sherry’s four children have grown and the couple has found free time in not devoting their days to hockey, volleyball and softball games. So several years ago, they decided to take on the outdoor space.
The couple contacted Bobby Kenyon and Adrian Kapp of C.E. Pontz (www.cepontzsons.com) to create a design that would blend with the rustic look of their farmhouse. They hoped to increase the amount of entertaining space by enlarging the patio area and adding a pavilion and outdoor kitchen. Another must-have was a covered area that could ensure the party would not end even if the weather would not cooperate. After brainstorming with Bobby and Adrian, they decided to include a gas fireplace, an outdoor television in the pavilion, and a Kegerator in the kitchen.
For the outdoor overhaul, C.E. Pontz began by adding two separate patios of flagstone and natural stone that combine to a total area of 1,100 square feet. They laid large stone slabs to create a walkway connecting the kitchen and living area. For sunny days, C.E. Pontz installed an outdoor kitchen complete with granite countertops, sink, gas burner, grill and storage area. A pergola above the grill offers shade to whomever is tending the tongs that night. Sherry said that having an outdoor kitchen has made entertaining a time for sharing and enjoying food rather than preparing and serving it. When their indoor kitchen was being remodeled last summer, the family prepared nearly all of their meals outdoors, from eggs at breakfast to pasta at dinner. And they still love the summer staple of anything with grill marks. Because the perfect addition to charred meats and veggies is usually a cold draft, C.E. Pontz completed the kitchen with a Kegerator, placed conveniently in arm’s reach of the guest seating.
Across the walkway and above the adjoining stone patio, C.E. Pontz built a 16- by 20-foot pavilion, or, essentially, a living room under the trees. A fan hanging from the vaulted ceiling keeps guests cool while they lounge in plush wicker chairs, watching television. Sherry and Garry furnished the space with dark wicker seating from Wicker Imports in Lancaster (www.wickerimportsonline.com). They added pillows and cushions in earth-toned patterns for extra comfort and color. To keep the space alive after the sun sets, they decorated with lots of candles as well as copper lighting that Garry, having an electrical background, installed himself. Plus, C.E. Pontz constructed a gas-fed stone fireplace just outside the pavilion that illuminates the living area and provides a cozy warmth in colder months.
Garry, who has a green thumb according to his wife, sets out 18 to 20 large planters around the pool and patio in the summer. These complement the roses, nandina and various grasses that C.E. Pontz used to landscape around the patios. In spring, the couple works to beautify the beds so that in summer, they simply need to water the plants and enjoy the flora.
“It is truly an outdoor oasis that we utilize during the warm months and are sorry to see closed during the winter months,” Sherry says. After nearly thirty years of transformation, their 217-year-old home is the entertaining hot spot for friends, family and grandkids.
Fun Facts:
A Kegerator? Simpler than it sounds, a Kegerator is a dispensing device connected to a keg (typically of beer) that is kept in a refrigerated container. It maintains the quality of the beer for longer periods of time, even for several months.
Approximately 60 tons of stone base material were used for this project.
Two patios were added that combined a total area of 1,100 square feet of natural flagstone.
This landscape features about 18,000 pounds of flagstone.
This article appears in the April 2016 issue of Susquehanna Style
Did you like what you read here? Subscribe to Susquehanna Style »
http://www.susquehannastyle.com/April-2016/Historic-Hot-Spot/
Find the right local pro for your project
Storage was also an issue. The homeowners wanted to consolidate and enhance their ability to store common items with easier access. So, we combined 2 closets into 1 with easy access to the kitchen and created a large entry hallway closet.
Space was another concern that had to be addressed in the layout of the kitchen and adjoining dining room. By knocking out the wall between the two rooms we were able to dramatically increase, cabinet storage, available light, traffic flow and deliver a larger dining area. With the new connection between the kitchen and the dining/living room, we needed to hand-tooth new hardwood flooring seamlessly into existing oak.
Windows/Doors—Richlin fixed light, & patio door w/Lowe DS, Argon
Countertops / Backsplash—Vicostone Countertops: Venatino (BQ8660) 3cm
Kitchen—backsplash set 3x9" glass tile.
Cabinets—Custom Hardwood enameled (Benjamin Moore) White Wisp
Wall color—(Benjamin Moore) Chelsea Gray
Design/Build Consultant — Jeff Robinson
Photography — Alyssa Lee

At the outset, this project began with the transformation of a 2-car attached garage. The goal was to create a mudroom, an exercise room, and a breezeway to seamlessly connect the spacious detached garage with the main part of the house. Additionally, the project involved partial roof removal and the addition of a new front entry.
But then came an unexpected twist – scope creep.
We found ourselves veering away from the initial client-supplied architectural plans. After numerous consultations with the clients and several iterations of the design, we arrived at a significantly improved plan for the remodel and addition.
Our journey commenced with the demolition of almost the entire former 2-car garage, making space for a new, oversized 3-car garage measuring 40′ x 28′. This garage was strategically placed between the existing house and the large detached garage. We introduced a custom low-sloped flat roof, designed to address historical drainage issues.
To mitigate water pooling, we created a custom concrete step at the back corner of the garage, equipped with a sturdy metal grate that sits flush with the step. We also installed a PVC drainage system, commencing at the step and running beneath a newly designed patio, ultimately draining into the yard. These measures have significantly reduced water accumulation around the house.
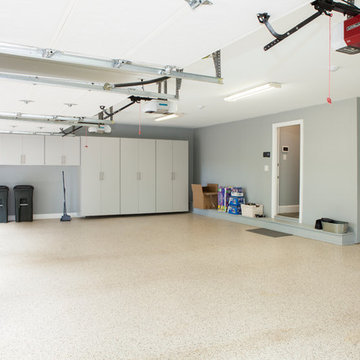
The new garage boasts several features, including Longboard aluminum siding, custom full glass garage doors, interior drywall finished to a level 4, an abundance of can lights, an epoxy floor coating, vinyl base trim, a new forced air garage heater, and more.
The clients also requested a designated space for their three kids and their friends to enjoy, thus giving birth to the “Kid Zone.” We partitioned a section of the existing oversized garage, resulting in a space measuring approximately 22′ x 32′, brimming with entertainment possibilities. To enhance control over the temperature in the Kid Zone, we collaborated with our licensed HVAC partner to install a cold weather mini-split system.
One of the most significant challenges was the modernization and consolidation of the home’s main electrical systems. We reconfigured and combined 6-7 different electrical panels into just two. One panel serves the main house, while the second is dedicated to backup power from a generator. These panels, along with the boiler for the in-floor heating system, are housed in a newly constructed mechanical room within the Kid Zone.
Inside the main house, we completed various tasks, such as removing the ceiling in the hallway from the new garage to address prior water damage, improve insulation, and rework electrical and HVAC systems. We also replaced the ceiling from the front door to the base of the stairs, adding new can lighting and enhancing insulation. Skilled drywall specialists then installed and finished new drywall to a level 5 standard.
The exterior of the house underwent a complete overhaul. Before installing new roofing on the entire house and garage, we modified an existing flat roof by adding custom lumber and plywood to enhance the pitch, preventing future ice dams. A new rubber roof was expertly installed on the oversized 3-car garage, and the flat roof section we re-framed.
Our meticulous exterior team removed old white aluminum soffit, fascia, and gutters, replacing them with new framing to accommodate Longboard soffit material. This task was particularly challenging due to the age of the house and the non-standard wall and roof framing. Our skilled exterior subcontractors ensured a perfect fit.
Near the pool area, we discovered severe rot and decay from years of water intrusion. After informing the homeowners, we ordered and installed five new commercial-style block framed windows and a custom 8′ high Anderson patio door. This involved careful removal and replacement of window headers from the outside to avoid disturbing the finished part of the house. We reframed the large openings to fit the new windows, and our skilled trim carpenters installed new walnut casing, base, and window sills.
In total, we replaced around 900 lineal feet of soffit and installed approximately 32 squares of aluminum siding. The entire house was meticulously prepped, repaired, and painted according to the client’s chosen color.
Throughout the project, we incorporated numerous custom touches and unique design elements, some of which you can see in the pictures. Our team also addressed various unforeseen challenges, from soil issues to rot and decay repair, roof leaks, drainage problems, electrical and HVAC complexities, and much more.
At Xpand Inc., we take pride in making it all happen, turning your remodeling and renovation dreams into reality.

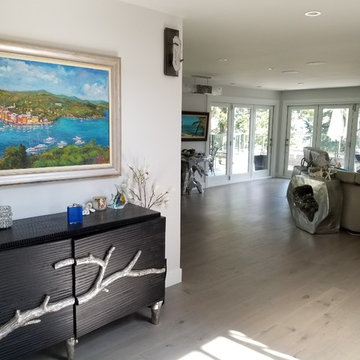
This south facing lakefront condo unit our clients purchased, with its terrace and solaria overlooking the water, was virtually in its original state, never having been renovated. Upon beginning construction, the space was completely opened to the stunning view. A contemporary aesthetic was created while implementing warmth with the choice of materials. With this openness came a new set of issues: mechanical travel and connection to existing runs, all inside a typical concrete condo structure. What we think is a true example of design complexity rendering simplicity.

Upon first entering this early 1900s North Asheville home, Sean Perry felt as if he’d stepped back in time. And though it needed a full restoration — addressing multiple structural issues, as well as outdated electrical, plumbing, gas and insulation systems — maintaining the home’s historical integrity was at the forefront of this massive (and ultimately striking) undertaking.
With a goal of updating the home for modern living, The Hands of Sean Perry Co. rebuilt the original Porte Cochere to accommodate today’s vehicles. Then, the team installed a pool and stone deck in the backyard, giving the homeowners and their children a place to relax and enjoy sunny summer afternoons. Bringing even more light to the project, the crew relocated the home’s kitchen to its sunniest room, directly next to the veranda, drawing better connections between dining and entertaining.
In addition to these big changes, every room, including the basement, received updates and renovations — the dining room, kitchen, mudroom, living room, three full- and two half-bathrooms, four bedrooms, two office rooms and a finished attic space. Keeping as many details true to the home’s historic character as possible, the team even restored the original heart pine and oak floors, as well as its central staircase.

When homeowners Garry and Sherry bought their 1799 farmhouse in Lancaster, they prepared themselves for many years of renovation: 28 years, to be exact. They gradually tackled inside projects like the master bath, basement, a recent kitchen remodel and even an office-turned-Irish pub. During one painfully hot summer, they installed a pool that became their go-to for summer entertainment and parties. Now, Garry and Sherry’s four children have grown and the couple has found free time in not devoting their days to hockey, volleyball and softball games. So several years ago, they decided to take on the outdoor space.
The couple contacted Bobby Kenyon and Adrian Kapp of C.E. Pontz (www.cepontzsons.com) to create a design that would blend with the rustic look of their farmhouse. They hoped to increase the amount of entertaining space by enlarging the patio area and adding a pavilion and outdoor kitchen. Another must-have was a covered area that could ensure the party would not end even if the weather would not cooperate. After brainstorming with Bobby and Adrian, they decided to include a gas fireplace, an outdoor television in the pavilion, and a Kegerator in the kitchen.
For the outdoor overhaul, C.E. Pontz began by adding two separate patios of flagstone and natural stone that combine to a total area of 1,100 square feet. They laid large stone slabs to create a walkway connecting the kitchen and living area. For sunny days, C.E. Pontz installed an outdoor kitchen complete with granite countertops, sink, gas burner, grill and storage area. A pergola above the grill offers shade to whomever is tending the tongs that night. Sherry said that having an outdoor kitchen has made entertaining a time for sharing and enjoying food rather than preparing and serving it. When their indoor kitchen was being remodeled last summer, the family prepared nearly all of their meals outdoors, from eggs at breakfast to pasta at dinner. And they still love the summer staple of anything with grill marks. Because the perfect addition to charred meats and veggies is usually a cold draft, C.E. Pontz completed the kitchen with a Kegerator, placed conveniently in arm’s reach of the guest seating.
Across the walkway and above the adjoining stone patio, C.E. Pontz built a 16- by 20-foot pavilion, or, essentially, a living room under the trees. A fan hanging from the vaulted ceiling keeps guests cool while they lounge in plush wicker chairs, watching television. Sherry and Garry furnished the space with dark wicker seating from Wicker Imports in Lancaster (www.wickerimportsonline.com). They added pillows and cushions in earth-toned patterns for extra comfort and color. To keep the space alive after the sun sets, they decorated with lots of candles as well as copper lighting that Garry, having an electrical background, installed himself. Plus, C.E. Pontz constructed a gas-fed stone fireplace just outside the pavilion that illuminates the living area and provides a cozy warmth in colder months.
Garry, who has a green thumb according to his wife, sets out 18 to 20 large planters around the pool and patio in the summer. These complement the roses, nandina and various grasses that C.E. Pontz used to landscape around the patios. In spring, the couple works to beautify the beds so that in summer, they simply need to water the plants and enjoy the flora.
“It is truly an outdoor oasis that we utilize during the warm months and are sorry to see closed during the winter months,” Sherry says. After nearly thirty years of transformation, their 217-year-old home is the entertaining hot spot for friends, family and grandkids.
Fun Facts:
A Kegerator? Simpler than it sounds, a Kegerator is a dispensing device connected to a keg (typically of beer) that is kept in a refrigerated container. It maintains the quality of the beer for longer periods of time, even for several months.
Approximately 60 tons of stone base material were used for this project.
Two patios were added that combined a total area of 1,100 square feet of natural flagstone.
This landscape features about 18,000 pounds of flagstone.
This article appears in the April 2016 issue of Susquehanna Style
Did you like what you read here? Subscribe to Susquehanna Style »
http://www.susquehannastyle.com/April-2016/Historic-Hot-Spot/

Kowalske Kitchen & Bath was hired as the remodeling contractor for this first floor remodel in the countryside of Oconomowoc, WI. By opening the kitchen up to the living room, the layout is better for hosting family gatherings. The entire family can be together in the kitchen and living room – cooking or spending time together. Highlights of this country kitchen include a window seat, walk-in pantry and space for their treasured piano.
Project Goals
+ Restore the beauty of their family home, that was built by the homeowner’s grandfather
+ Cooking functionality for their family farm
+ Add a workstation sink for easy food prep
+ Pantry storage space for canned items & wine collection
+ Design that honors the mid-century ranch bones of the house her grandfather built and their own traditional style
Challenges & Issues
+ Needed space to highlight their piano, since the homeowner is an avid pianist
+ Old layout didn’t have good views of their outdoor space – the lake, gardens and chicken coop
+ Kitchen was too small and cut off from the rest of the home
+ The heat and air conditioning did not function well due to several past additions
Country Kitchen Features:
Cooking Kitchen – We created a larger kitchen by expanding into the old dining room. The homeowners needed more space for canning vegetables, cooking and entertaining.
Mid-Century Country Design – The ranch home was built in the 1950s so we kept the mid-century and country kitchen design aesthetic by using hickory wood, tall verticals and long horizontals.
Kitchen Window Seat – A custom window seat with a curved backrest creates a gathering spot in the kitchen. This connects the home to the outdoor view of the lake where the family fishes and ice skates in winter. The bench is large enough to be used as a guest bed when they have visitors. The cozy nook has shelving, art lights, and a hidden radiator underneath to keep it warm and toasty.
Window Backsplash – Along the range wall, a new window backsplash features the beautiful view of the farm driveway, trees and gardens.
Minimalistic Hood – The hood with the wood shelf mimics the new fireplace mantel and ties the country kitchen and living room together.
New Pantry – The old kitchen area was converted into the new pantry and a laundry room. The pantry is their working kitchen where they can store food, their wine collection, and have countertop space for small appliances. Butcher block countertops, colorful wallpaper and a new window make the pantry inviting. Adjustable shelves allow for flexible storage options. The pocket door can be closed when they have guests.
Recycled Ash Flooring in Kitchen – The homeowners chose an eco-friendly flooring for their country kitchen. The beautiful varied width wood planks are from recycled ash trees from Milwaukee parks.
Workstation Sink – This sink has sliding platforms that hold bowls, colanders and cutting boards to multiply the countertop by going deep instead of wide. The sink can be used to chop, rinse, prep, dry dishes, hold hot dishes and clean up after a meal more efficiently.
Country House Living Room:
New Tile Floor – To better conduct the heat, we replaced the old wood floors with porcelain tile. New radiators, insulation, ductwork, and enclosing the basement staircase improved the function of their HVAC.
Fireplace Makeover – To create a new focal point for the living room, we installed a new fire box, new mantle, and floor to ceiling stone. The goal was to draw the eye up to the vaulted beamed ceiling.
Open Concept Layout – The wall between the kitchen and living room was removed to connect the two spaces. We added new cabinetry along the wall with a tall bookcase. Since they didn’t use their formal dining room, a small dining table was added to the living room.
New Railing & Stairs – The staircase to the kitchen area was tricky because we needed to find a style that would make it feel airy. We did a glass enclosure with a simple metal railing and moved the staircase to the center of the room to allow room for the piano.

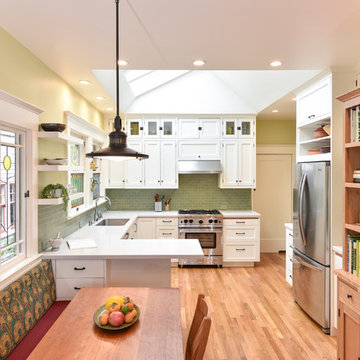
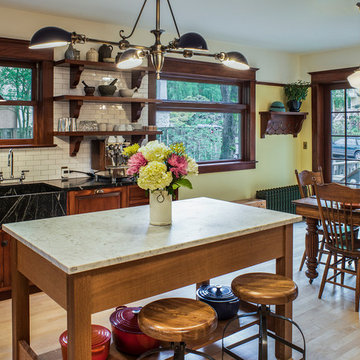
The home was built in 1926 and had been remodeled a couple times. The kitchen was small and sandwiched between the closed off dining room and office not offering and view of outside or option for natural light (2 story house).
The owners wanted to have a bigger kitchen with lots of light and a view of the backyard. 2-story houses have a harder time moving walls due to structural issues, but we were able to eliminate the wall between the office and kitchen to open up the space. After working through several design options, we relocated the laundry room door, created a new side door to the driveway, and moved the sink to the back wall to have a view of the yard.
The owners love the craftsmen style and wanted to keep the look and feel but modernize everything. The accent tile behind the cooktop is handmade by FireClay tile. Custom cabinets from a local cabinet shop The Wood Connection.

At the outset, this project began with the transformation of a 2-car attached garage. The goal was to create a mudroom, an exercise room, and a breezeway to seamlessly connect the spacious detached garage with the main part of the house. Additionally, the project involved partial roof removal and the addition of a new front entry.
But then came an unexpected twist – scope creep.
We found ourselves veering away from the initial client-supplied architectural plans. After numerous consultations with the clients and several iterations of the design, we arrived at a significantly improved plan for the remodel and addition.
Our journey commenced with the demolition of almost the entire former 2-car garage, making space for a new, oversized 3-car garage measuring 40′ x 28′. This garage was strategically placed between the existing house and the large detached garage. We introduced a custom low-sloped flat roof, designed to address historical drainage issues.
To mitigate water pooling, we created a custom concrete step at the back corner of the garage, equipped with a sturdy metal grate that sits flush with the step. We also installed a PVC drainage system, commencing at the step and running beneath a newly designed patio, ultimately draining into the yard. These measures have significantly reduced water accumulation around the house.
The new garage boasts several features, including Longboard aluminum siding, custom full glass garage doors, interior drywall finished to a level 4, an abundance of can lights, an epoxy floor coating, vinyl base trim, a new forced air garage heater, and more.
The clients also requested a designated space for their three kids and their friends to enjoy, thus giving birth to the “Kid Zone.” We partitioned a section of the existing oversized garage, resulting in a space measuring approximately 22′ x 32′, brimming with entertainment possibilities. To enhance control over the temperature in the Kid Zone, we collaborated with our licensed HVAC partner to install a cold weather mini-split system.
One of the most significant challenges was the modernization and consolidation of the home’s main electrical systems. We reconfigured and combined 6-7 different electrical panels into just two. One panel serves the main house, while the second is dedicated to backup power from a generator. These panels, along with the boiler for the in-floor heating system, are housed in a newly constructed mechanical room within the Kid Zone.
Inside the main house, we completed various tasks, such as removing the ceiling in the hallway from the new garage to address prior water damage, improve insulation, and rework electrical and HVAC systems. We also replaced the ceiling from the front door to the base of the stairs, adding new can lighting and enhancing insulation. Skilled drywall specialists then installed and finished new drywall to a level 5 standard.
The exterior of the house underwent a complete overhaul. Before installing new roofing on the entire house and garage, we modified an existing flat roof by adding custom lumber and plywood to enhance the pitch, preventing future ice dams. A new rubber roof was expertly installed on the oversized 3-car garage, and the flat roof section we re-framed.
Our meticulous exterior team removed old white aluminum soffit, fascia, and gutters, replacing them with new framing to accommodate Longboard soffit material. This task was particularly challenging due to the age of the house and the non-standard wall and roof framing. Our skilled exterior subcontractors ensured a perfect fit.
Near the pool area, we discovered severe rot and decay from years of water intrusion. After informing the homeowners, we ordered and installed five new commercial-style block framed windows and a custom 8′ high Anderson patio door. This involved careful removal and replacement of window headers from the outside to avoid disturbing the finished part of the house. We reframed the large openings to fit the new windows, and our skilled trim carpenters installed new walnut casing, base, and window sills.
In total, we replaced around 900 lineal feet of soffit and installed approximately 32 squares of aluminum siding. The entire house was meticulously prepped, repaired, and painted according to the client’s chosen color.
Throughout the project, we incorporated numerous custom touches and unique design elements, some of which you can see in the pictures. Our team also addressed various unforeseen challenges, from soil issues to rot and decay repair, roof leaks, drainage problems, electrical and HVAC complexities, and much more.
At Xpand Inc., we take pride in making it all happen, turning your remodeling and renovation dreams into reality.

The Brooke Residence ‘Addi- tion by Subtraction’ remodeling project was recognized with numerous regional and national awards and was selected for Fine Homebuilding’s Annual Issue on Houses.
This 1920’s Craftsman Bungalow had been poorly modified in the 70’s in an attempt to address poor energy performance with a scabbed on solarium. The design solution removed the solarium and completely reimagined the floor plan: The kitchen was relocated to the rear; the stairway was relocated to enhance function, and a better connection to the family room was created.

This south facing lakefront condo unit our clients purchased, with its terrace and solaria overlooking the water, was virtually in its original state, never having been renovated. Upon beginning construction, the space was completely opened to the stunning view. A contemporary aesthetic was created while implementing warmth with the choice of materials. With this openness came a new set of issues: mechanical travel and connection to existing runs, all inside a typical concrete condo structure. What we think is a true example of design complexity rendering simplicity.

The home was built in 1926 and had been remodeled a couple times. The kitchen was small and sandwiched between the closed off dining room and office not offering and view of outside or option for natural light (2 story house).
The owners wanted to have a bigger kitchen with lots of light and a view of the backyard. 2-story houses have a harder time moving walls due to structural issues, but we were able to eliminate the wall between the office and kitchen to open up the space. After working through several design options, we relocated the laundry room door, created a new side door to the driveway, and moved the sink to the back wall to have a view of the yard.
The owners love the craftsmen style and wanted to keep the look and feel but modernize everything. The accent tile behind the cooktop is handmade by FireClay tile. Custom cabinets from a local cabinet shop The Wood Connection.

Our design for the expansion and gut renovation of a small 1200 square foot house in a residential neighborhood triples is size, and reworks the living arrangement. The rear addition takes advantage of southern exposure with a "greenhouse" room that provides solar heat gain in winter, shading in summer, and a vast connection to the rear yard.
Architecturally, we used an approach we call "willful practicality." The new soaring ceiling ties together first and second floors in a dramatic volumetric expansion of space, while providing increased ventilation and daylighting from greenhouse to operable windows and skylights at the peak. Exterior pockets of space are created from curved forces pushing in from outside to form cedar clad porch and stoop.
Sustainable design is employed throughout all materials, energy systems and insulation. Masonry exterior walls and concrete floors provide thermal mass for the interior by insulating the exterior. An ERV system facilitates increased air changes and minimizes changes to the interior air temperature. Energy and water saving features and renewable, non-toxic materal selections are important aspects of the house design. Environmental community issues are addressed with a drywell in the side yard to mitigate rain runoff into the town sewer system. The long sloping south facing roof is in anticipation of future solar panels, with the standing seam metal roof providing anchoring opportunities for the panels.
The exterior walls are clad in stucco, cedar, and cement-fiber panels defining different areas of the house. Closed cell spray insulation is applied to exterior walls and roof, giving the house an "air-tight" seal against air infiltration and a high R-value. The ERV system provides the ventilation needed with this tight envelope. The interior comfort level and economizing are the beneficial results of the building methods and systems employed in the house.
Photographer: Peter Kubilus

Water heaters can often be repaired if there are minor issues. The team at City Plumbing & Rooter can make a quick diagnosis and expert repair for minor drips or leaks from water line connections or at the temperature and pressure relief valve on a traditional tank water heaters.

Professional Toilet Repair Service You Can Trust ?️
At Handyman Expert, we recently completed a toilet repair in Dunwoody, GA, restoring comfort and functionality to our client’s bathroom. The toilet was loose and leaking from the base, causing both inconvenience and water damage. Our skilled technicians carefully removed the toilet, cleaned the tile area and the drain opening, and replaced the old wax seal with a new, durable sealing system to ensure a perfect fit and watertight connection.
Once the area was fully prepared, we reinstalled the toilet, securely anchoring it to the floor with reinforced metal brackets for long-term stability. The result? A completely fixed, sturdy toilet that no longer leaks or wobbles — leaving the bathroom clean, safe, and fresh once again.
Reliable Bathroom Plumbing Solutions in Dunwoody ?
This toilet repair project in Dunwoody, GA is another example of our dedication to high-quality craftsmanship and attention to detail. Whether it’s a simple repair or a full bathroom renovation, our team delivers precise, reliable, and lasting results every time.
If you’re experiencing leaks, unstable fixtures, or any other plumbing issues — don’t wait! Contact Handyman Expert today for fast, professional, and affordable repair services that keep your home running smoothly.
Project Highlights: ?
✅ Location: Dunwoody, GA
✅ Service: Toilet repair & leak fix
✅ Duration: 1 day
✅ Result: Stable and leak-free toilet installation

This exciting renovation improved both the look and functionality of our client’s Master Ensuite and Shared Bathroom. Both rooms had both dated aesthetics and dysfunctional layouts, but more importantly, they required updated plumbing due to an old renovation where the plumbing had been done incorrectly and had caused leaking and ceiling damage below.
To solve the leaks, and provide better function in both Bathrooms, fixtures in the Shared Bathroom were relocated, and the previously installed plumbing connections were corrected. This solved the leak issues and provided improved function in both Bathrooms.
A rarely used large corner tub in the Master Ensuite was eliminated to accommodate a spacious walk-in shower with a bench, and a custom wall-to-wall double vanity provided a nice aesthetic and lots of useful storage.
The tub and toilet in the Shared Bathroom were switched and new custom vanity and linen cabinets were installed.
Each Bathroom was given its own distinct look. Porcelain tiles made to look like marble, and mosaics accentuated with patterned floor tiles, luxurious marble knobs and handles, and beautiful jewel faucets gave the Master Ensuite a Transitional charm.
The Shared Bathroom was completed with large format black porcelain tiles with a marble look, glass accent mosaics, and modern plumbing fixtures gave the room an eclectic flair.
The project was finished on time, and our clients couldn’t be happier! They can now enjoy their personalized Shared Bathroom and Master Ensuite, with the comfort of knowing the plumbing is installed correctly.

The home was built in 1926 and had been remodeled a couple times. The kitchen was small and sandwiched between the closed off dining room and office not offering and view of outside or option for natural light (2 story house).
The owners wanted to have a bigger kitchen with lots of light and a view of the backyard. 2-story houses have a harder time moving walls due to structural issues, but we were able to eliminate the wall between the office and kitchen to open up the space. After working through several design options, we relocated the laundry room door, created a new side door to the driveway, and moved the sink to the back wall to have a view of the yard.
The owners love the craftsmen style and wanted to keep the look and feel but modernize everything. The accent tile behind the cooktop is handmade by FireClay tile. Custom cabinets from a local cabinet shop The Wood Connection.

Kowalske Kitchen & Bath was hired as the remodeling contractor for this first floor remodel in the countryside of Oconomowoc, WI. By opening the kitchen up to the living room, the layout is better for hosting family gatherings. The entire family can be together in the kitchen and living room – cooking or spending time together. Highlights of this country kitchen include a window seat, walk-in pantry and space for their treasured piano.
Project Goals
+ Restore the beauty of their family home, that was built by the homeowner’s grandfather
+ Cooking functionality for their family farm
+ Add a workstation sink for easy food prep
+ Pantry storage space for canned items & wine collection
+ Design that honors the mid-century ranch bones of the house her grandfather built and their own traditional style
Challenges & Issues
+ Needed space to highlight their piano, since the homeowner is an avid pianist
+ Old layout didn’t have good views of their outdoor space – the lake, gardens and chicken coop
+ Kitchen was too small and cut off from the rest of the home
+ The heat and air conditioning did not function well due to several past additions
Country Kitchen Features:
Cooking Kitchen – We created a larger kitchen by expanding into the old dining room. The homeowners needed more space for canning vegetables, cooking and entertaining.
Mid-Century Country Design – The ranch home was built in the 1950s so we kept the mid-century and country kitchen design aesthetic by using hickory wood, tall verticals and long horizontals.
Kitchen Window Seat – A custom window seat with a curved backrest creates a gathering spot in the kitchen. This connects the home to the outdoor view of the lake where the family fishes and ice skates in winter. The bench is large enough to be used as a guest bed when they have visitors. The cozy nook has shelving, art lights, and a hidden radiator underneath to keep it warm and toasty.
Window Backsplash – Along the range wall, a new window backsplash features the beautiful view of the farm driveway, trees and gardens.
Minimalistic Hood – The hood with the wood shelf mimics the new fireplace mantel and ties the country kitchen and living room together.
New Pantry – The old kitchen area was converted into the new pantry and a laundry room. The pantry is their working kitchen where they can store food, their wine collection, and have countertop space for small appliances. Butcher block countertops, colorful wallpaper and a new window make the pantry inviting. Adjustable shelves allow for flexible storage options. The pocket door can be closed when they have guests.
Recycled Ash Flooring in Kitchen – The homeowners chose an eco-friendly flooring for their country kitchen. The beautiful varied width wood planks are from recycled ash trees from Milwaukee parks.
Workstation Sink – This sink has sliding platforms that hold bowls, colanders and cutting boards to multiply the countertop by going deep instead of wide. The sink can be used to chop, rinse, prep, dry dishes, hold hot dishes and clean up after a meal more efficiently.
Country House Living Room:
New Tile Floor – To better conduct the heat, we replaced the old wood floors with porcelain tile. New radiators, insulation, ductwork, and enclosing the basement staircase improved the function of their HVAC.
Fireplace Makeover – To create a new focal point for the living room, we installed a new fire box, new mantle, and floor to ceiling stone. The goal was to draw the eye up to the vaulted beamed ceiling.
Open Concept Layout – The wall between the kitchen and living room was removed to connect the two spaces. We added new cabinetry along the wall with a tall bookcase. Since they didn’t use their formal dining room, a small dining table was added to the living room.
New Railing & Stairs – The staircase to the kitchen area was tricky because we needed to find a style that would make it feel airy. We did a glass enclosure with a simple metal railing and moved the staircase to the center of the room to allow room for the piano.
15